


Build a Slack Activity Dashboard Using Airbyte and Apache Superset


This post was originally posted over at Airbyte here
In this blog, we've covered how to use Meltano in concert with Superset to build a Slack dashboard (parts 1, 2, and 3). In this post, we'll walkthrough how to use Airbyte, an alternative data integration tool to build a similar dashboard.
Replicating Data from Slack to Postgres with Airbyte
Deploying Airbyte
There are several easy ways to deploy Airbyte, as listed here. For this tutorial, I will just use the Docker Compose method from my workstation:
# In your workstation terminal
git clone https://github.com/airbytehq/airbyte.git
cd airbyte
docker-compose up
The above command will make the Airbyte app available on localhost:8000. Visit the URL on your favorite browser, and you should see Airbyte’s dashboard (if this is your first time, you will be prompted to enter your email to get started).
If you haven’t set Docker up, follow the instructions here to set it up on your machine.
Setting Up Airbyte’s Slack Source Connector
Airbyte’s Slack connector will give us access to the data. So, we are going to kick things off by setting this connector to be our data source in Airbyte’s web app. I am assuming you already have Airbyte and Docker set up on your local machine. We will be using Docker to create our PostgreSQL database container later on.
Now, let’s proceed. If you already went through the onboarding, click on the “new source” button at the top right of the Sources section. If you're going through the onboarding, then follow the instructions.
You will be requested to enter a name for the source you are about to create. You can call it “slack-source”. Then, in the Source Type combo box, look for “Slack,” and then select it. Airbyte will then present the configuration fields needed for the Slack connector. So you should be seeing something like this on the Airbyte App:
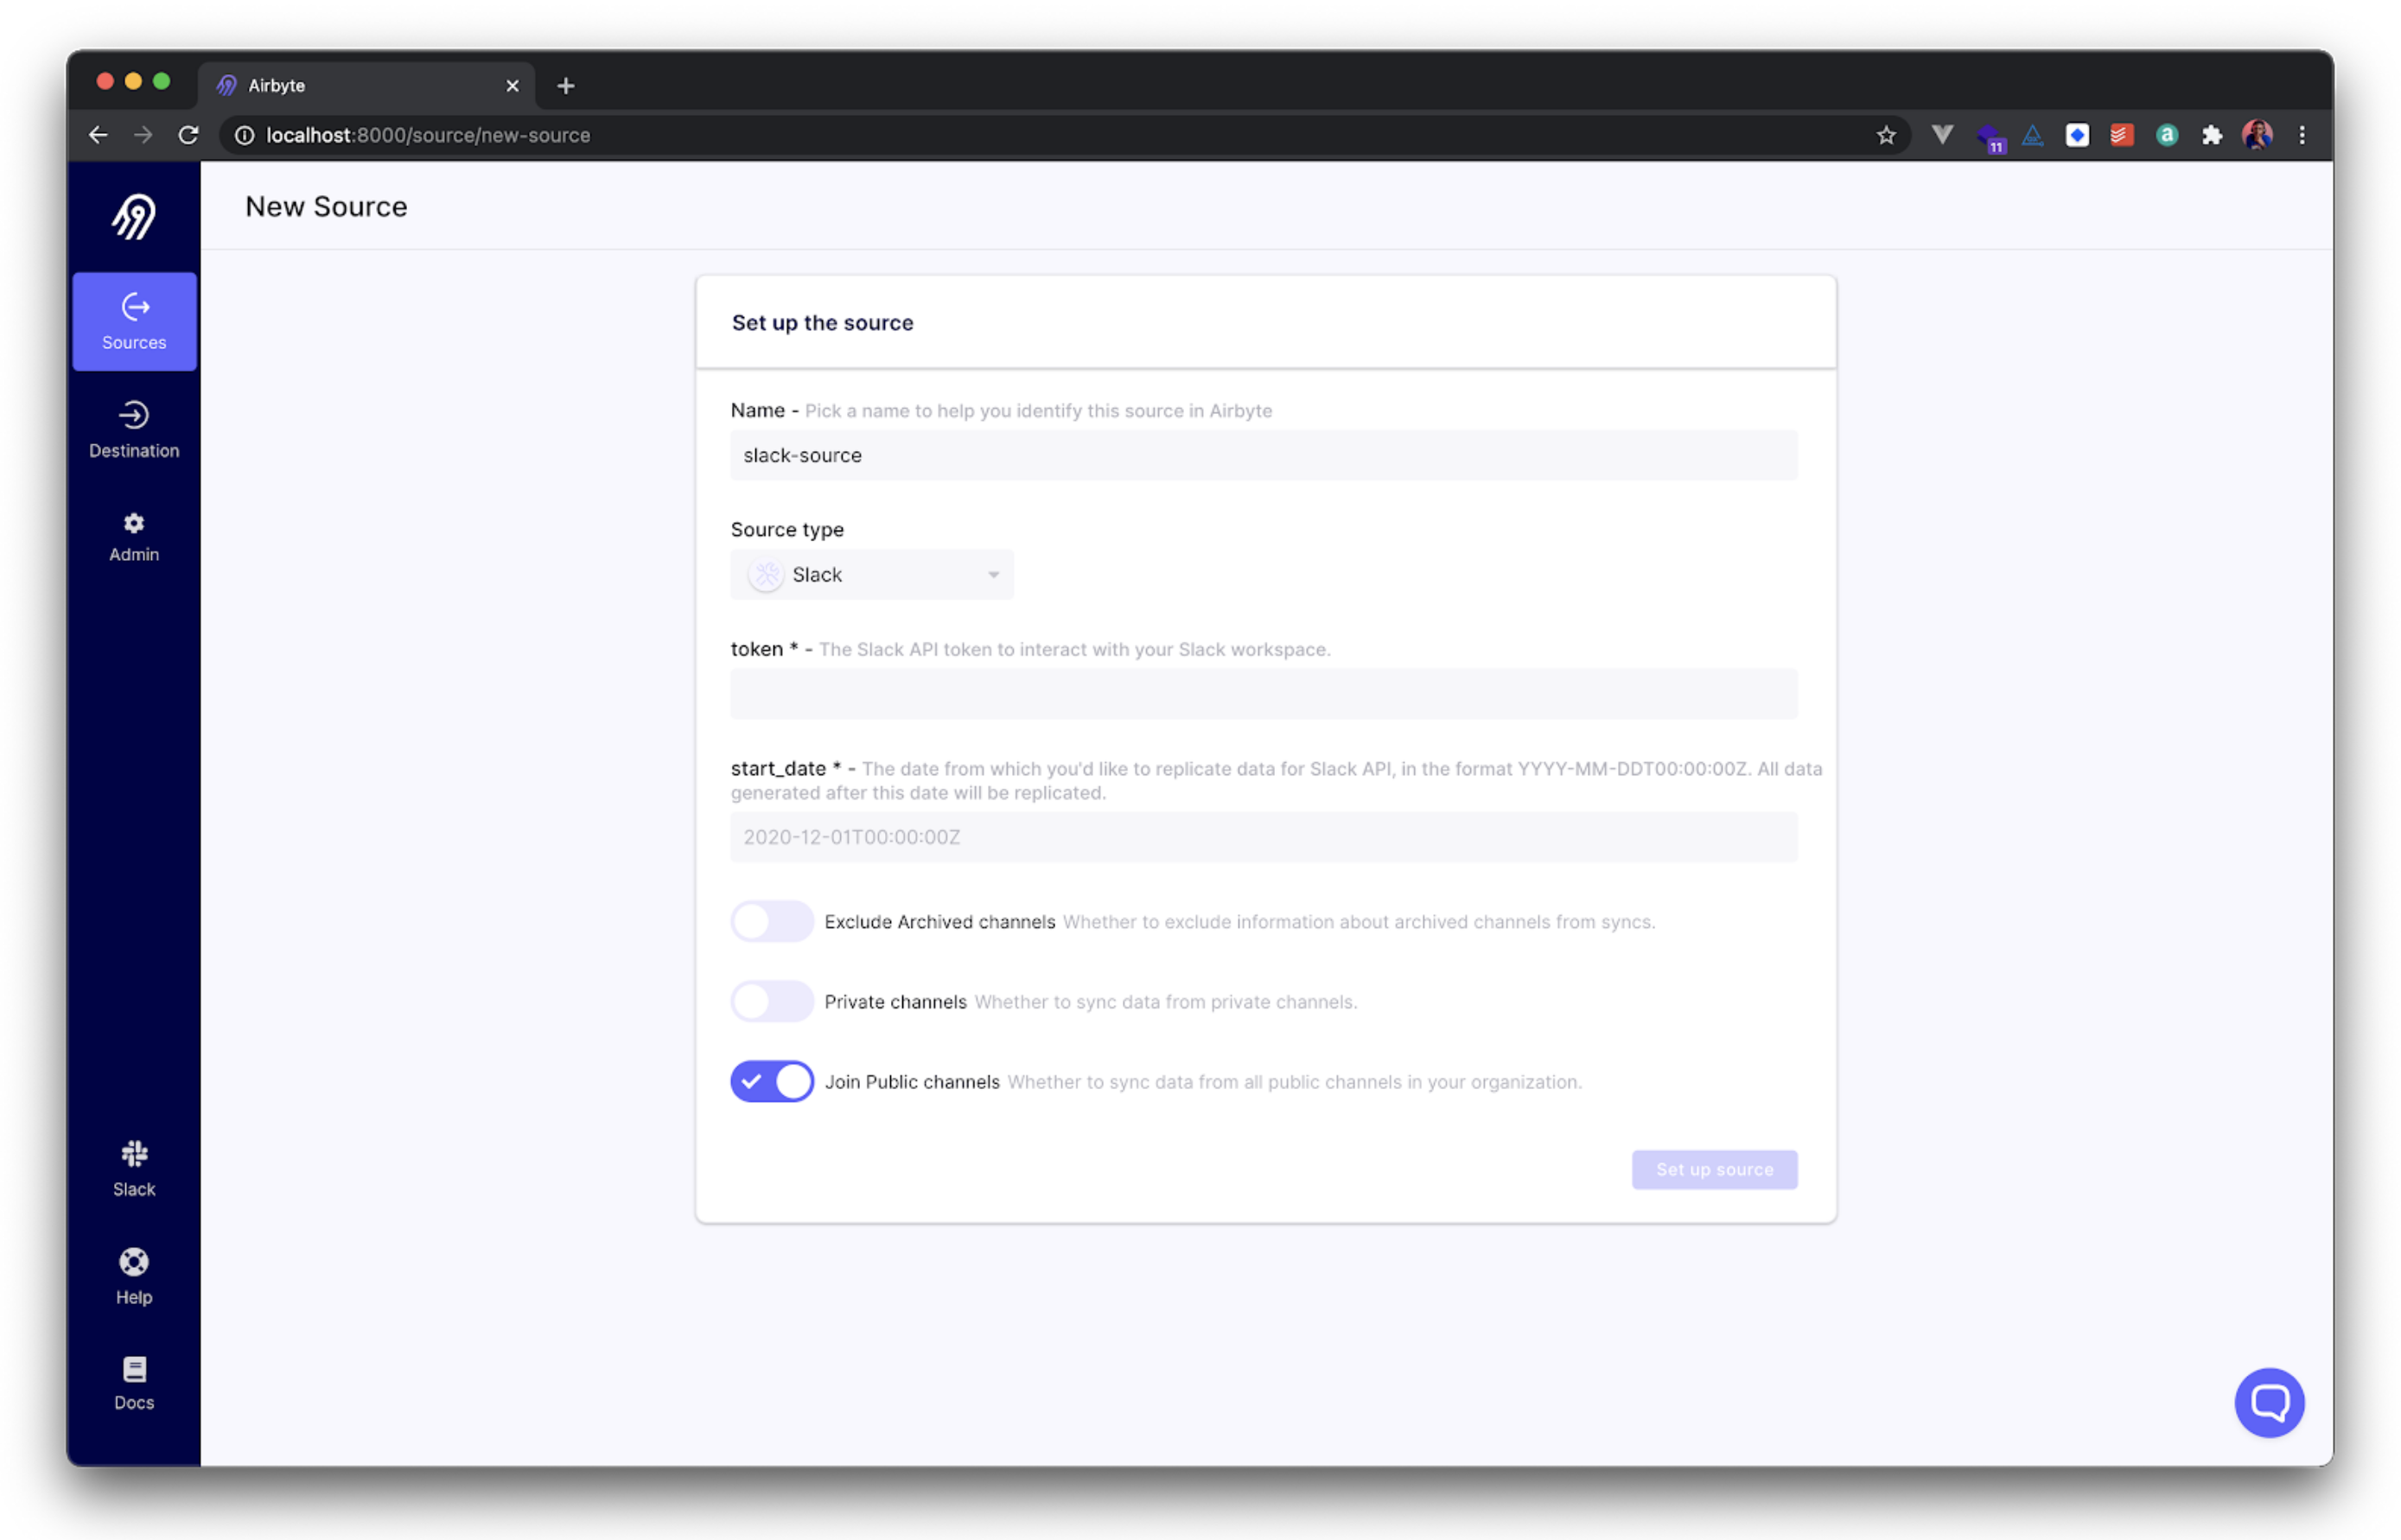
The first thing you will notice is that this connector requires a Slack token. So, we have to obtain one. If you are not a workspace admin, you will need to ask for permission.
Let’s walk through how we would get the Slack token we need.
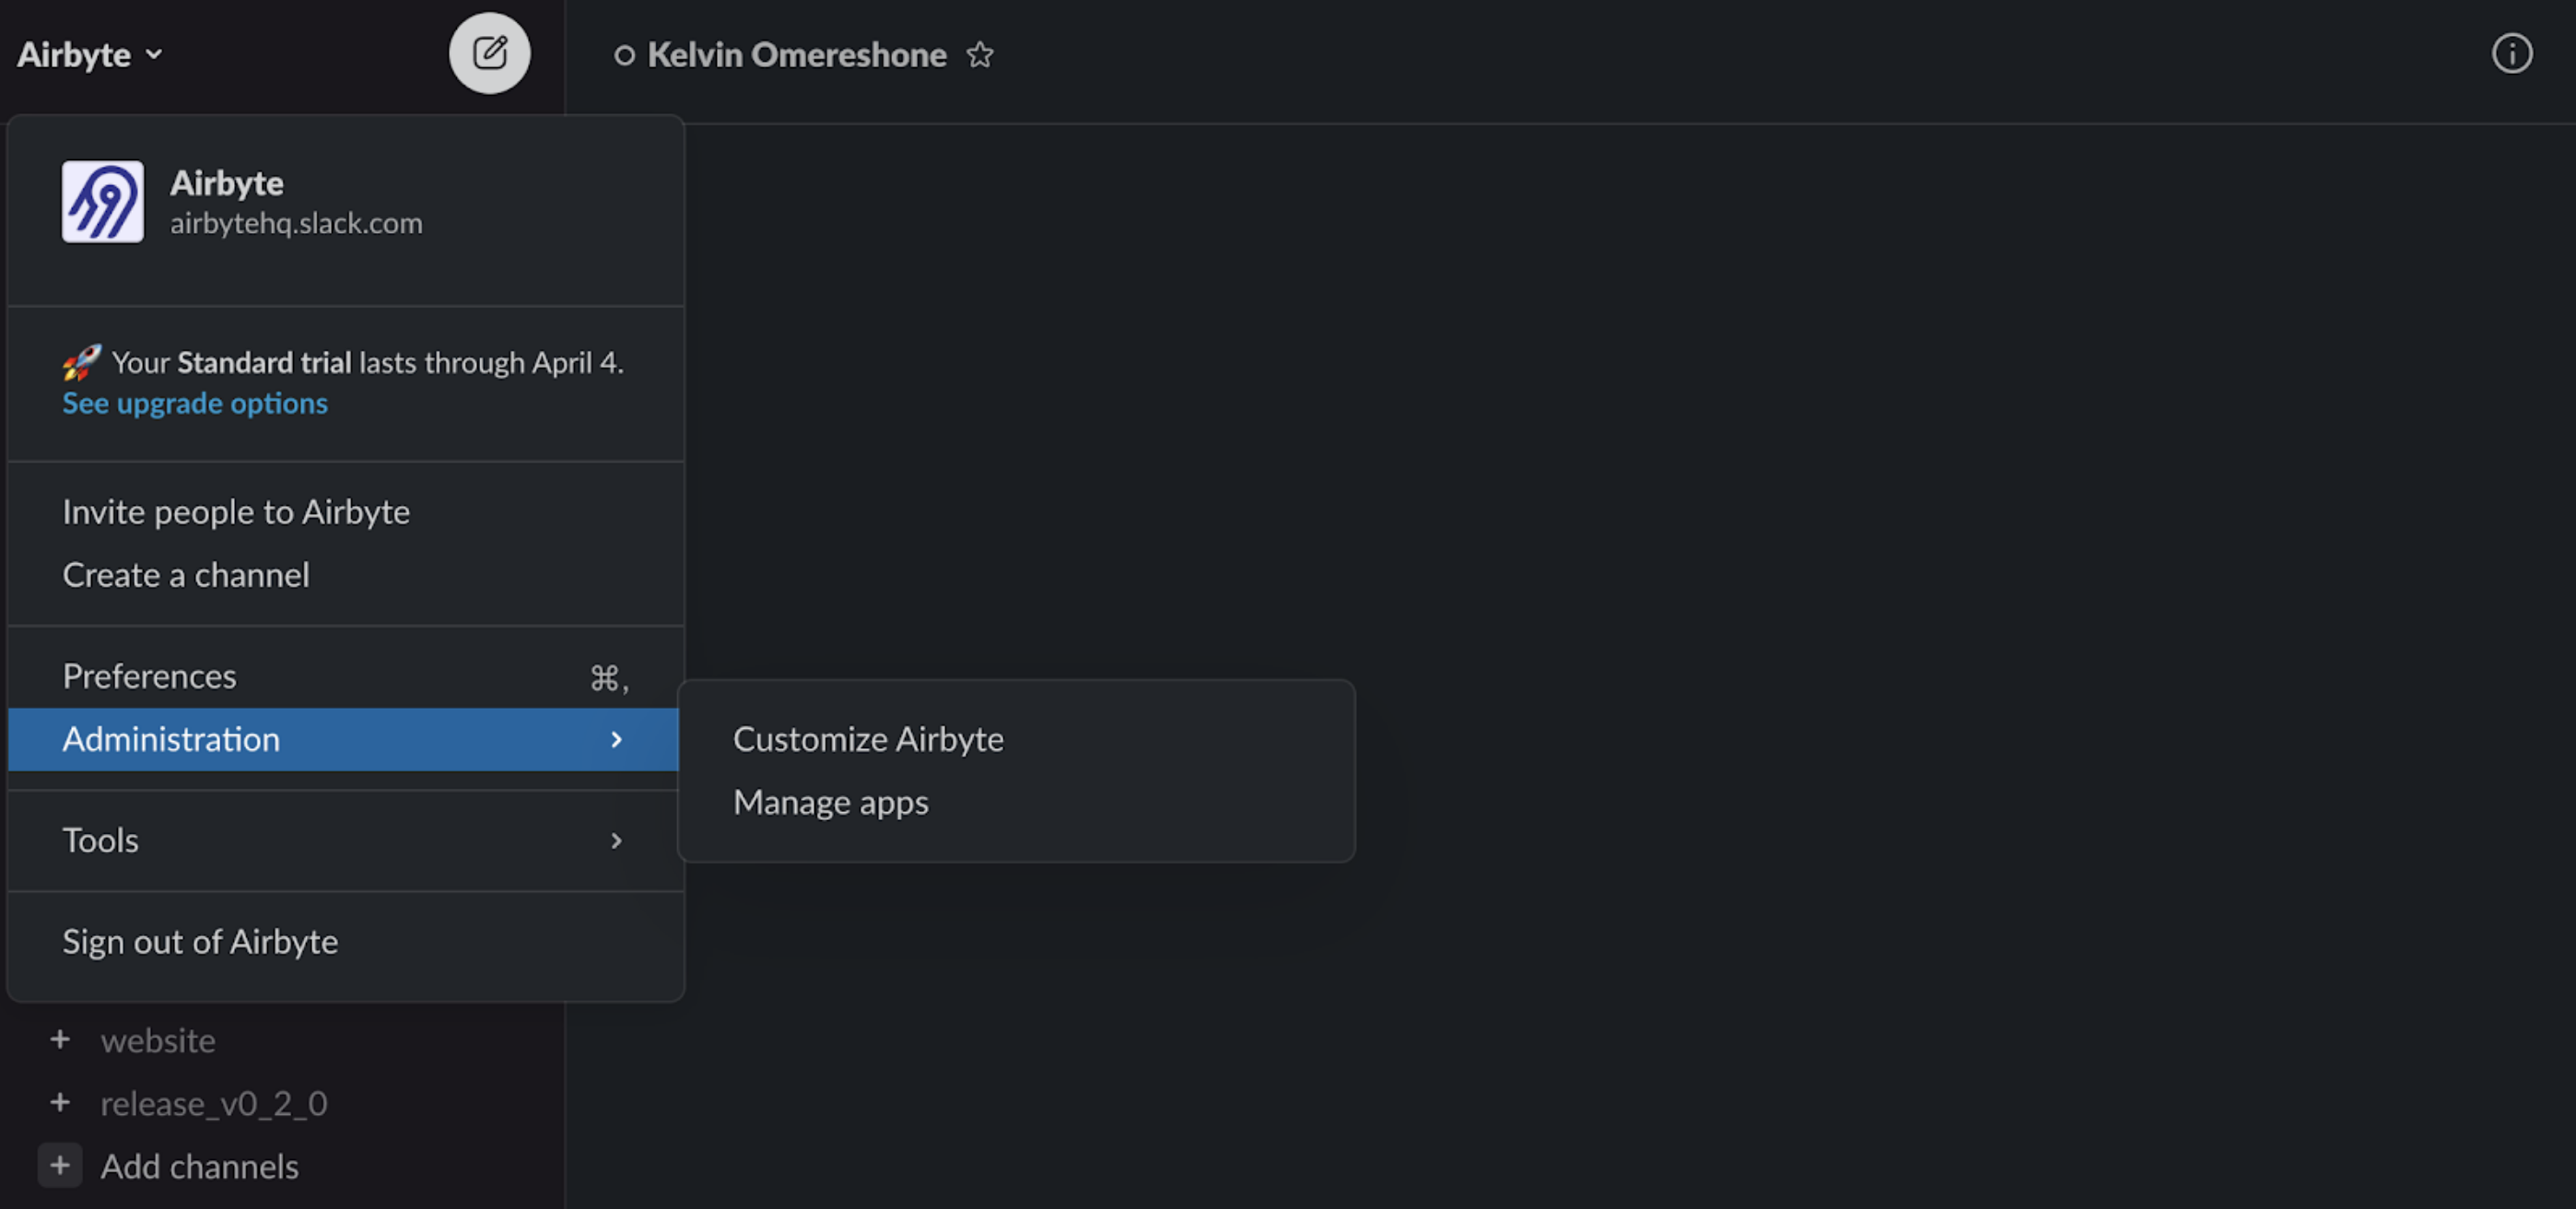
Assuming you are a workspace admin, open the Slack workspace and navigate to [Workspace Name] > Administration > Customize [Workspace Name]. In our case, it will be Airbyte > Administration > Customize Airbyte (as shown below):
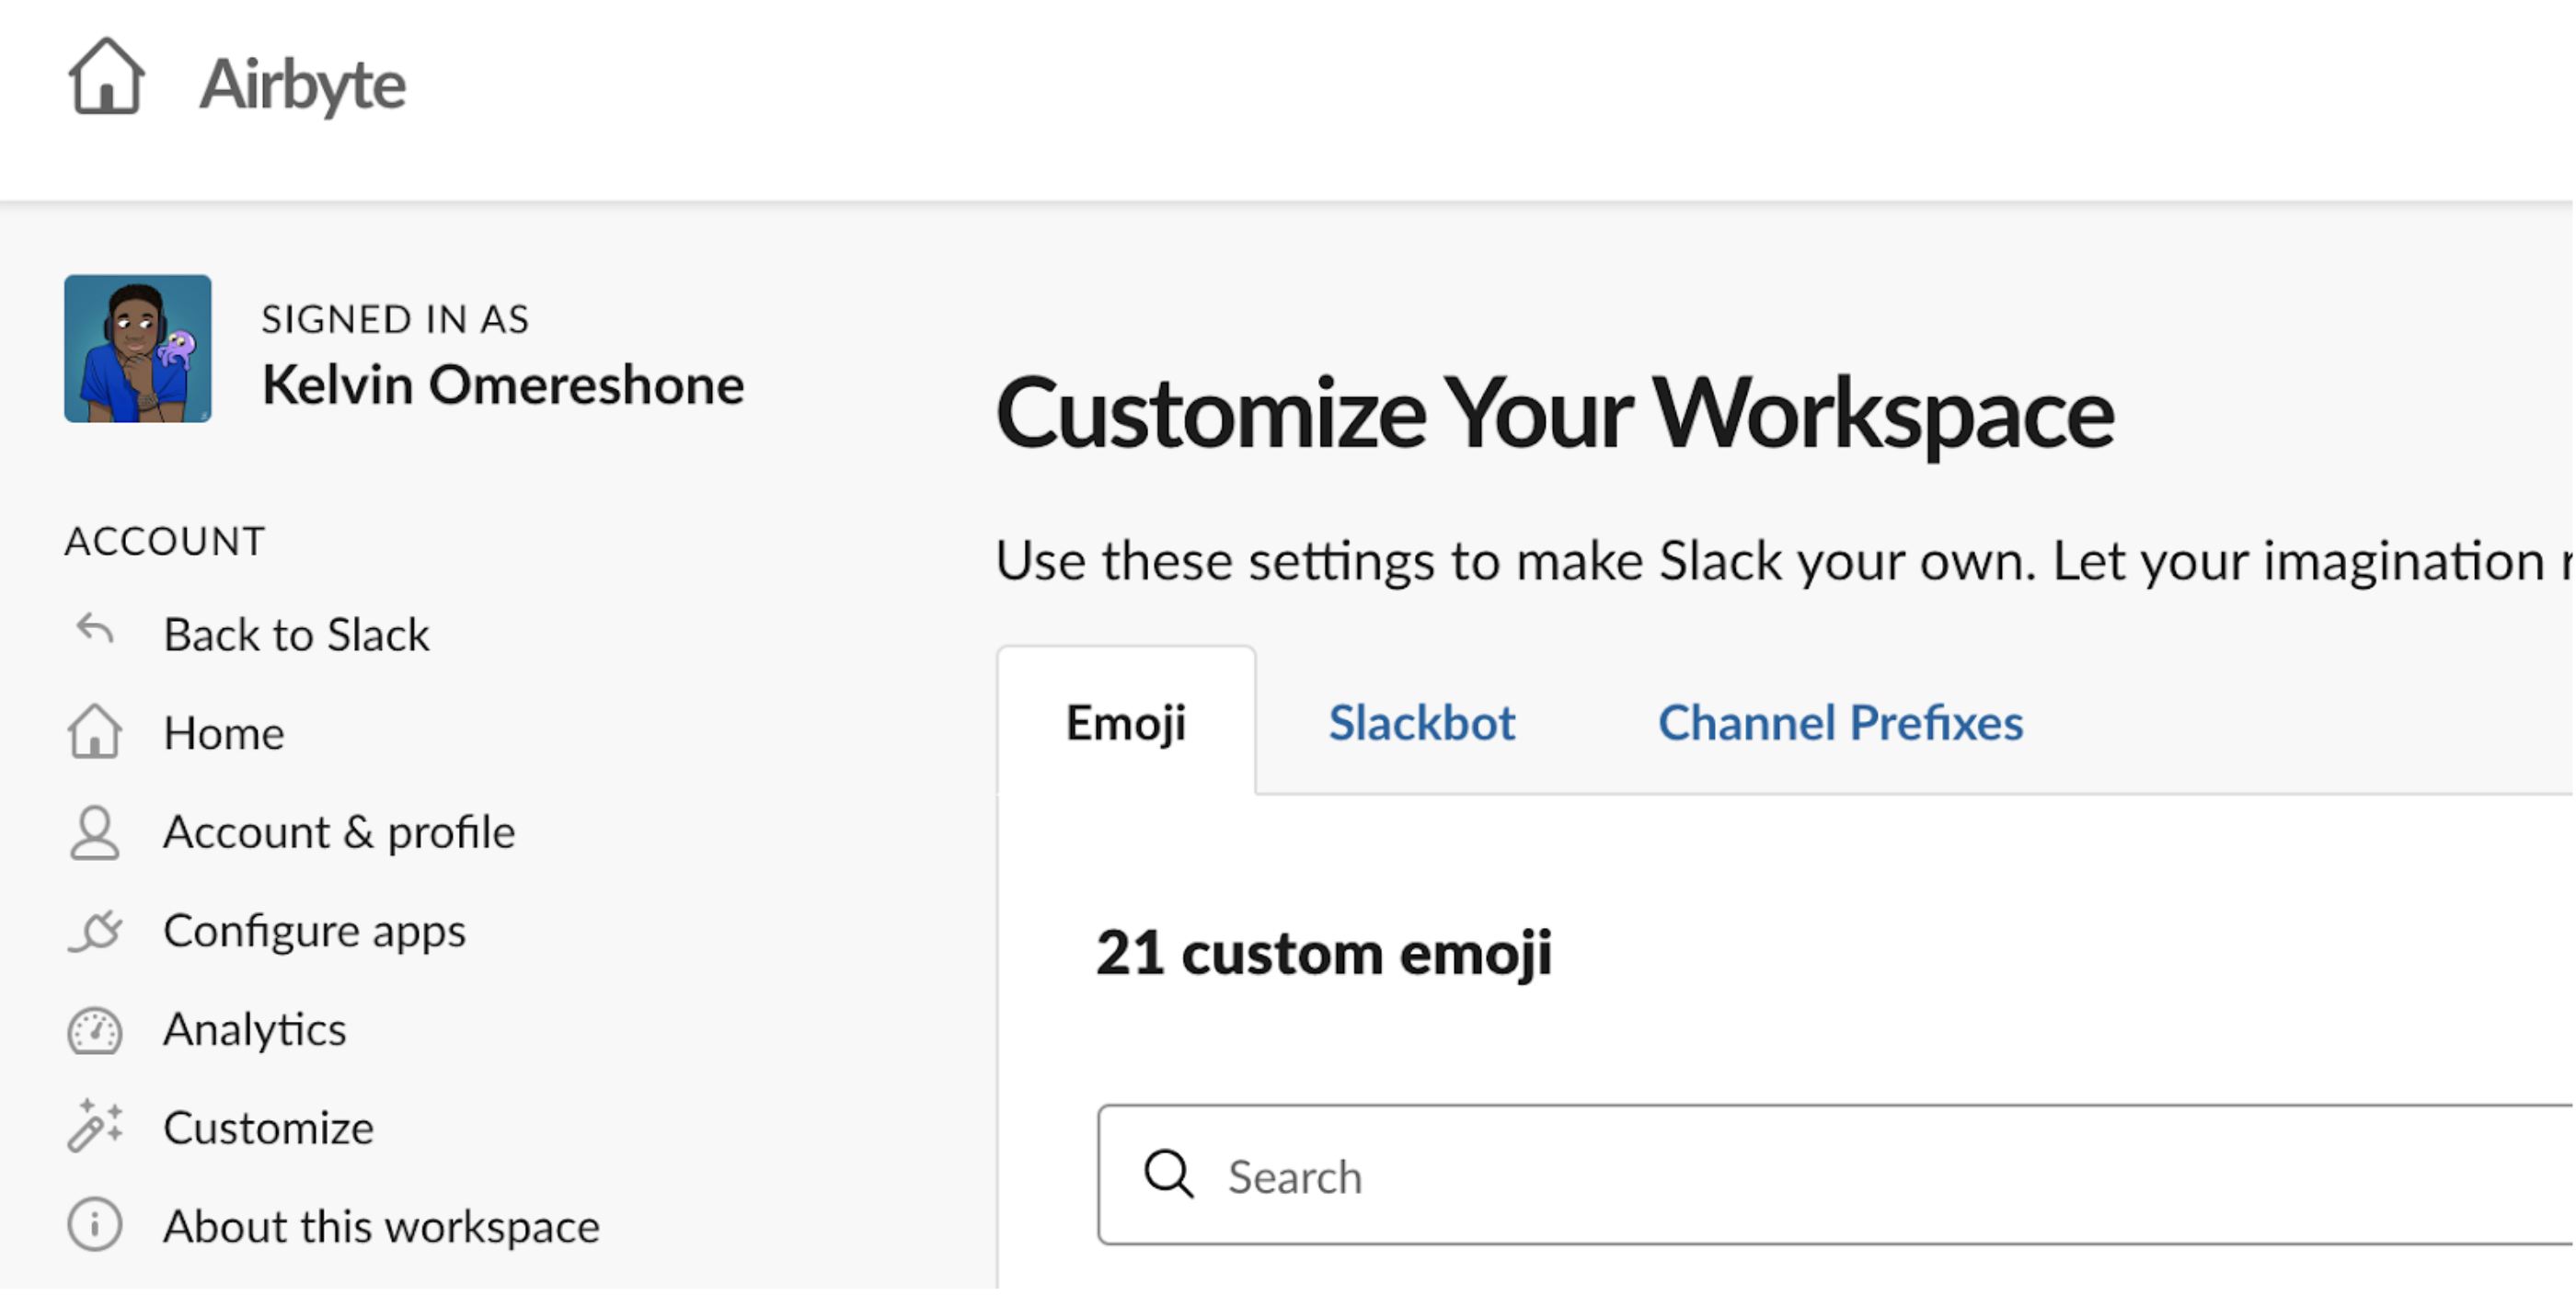
In the new page that opens up in your browser, you will then need to navigate to Configure apps.
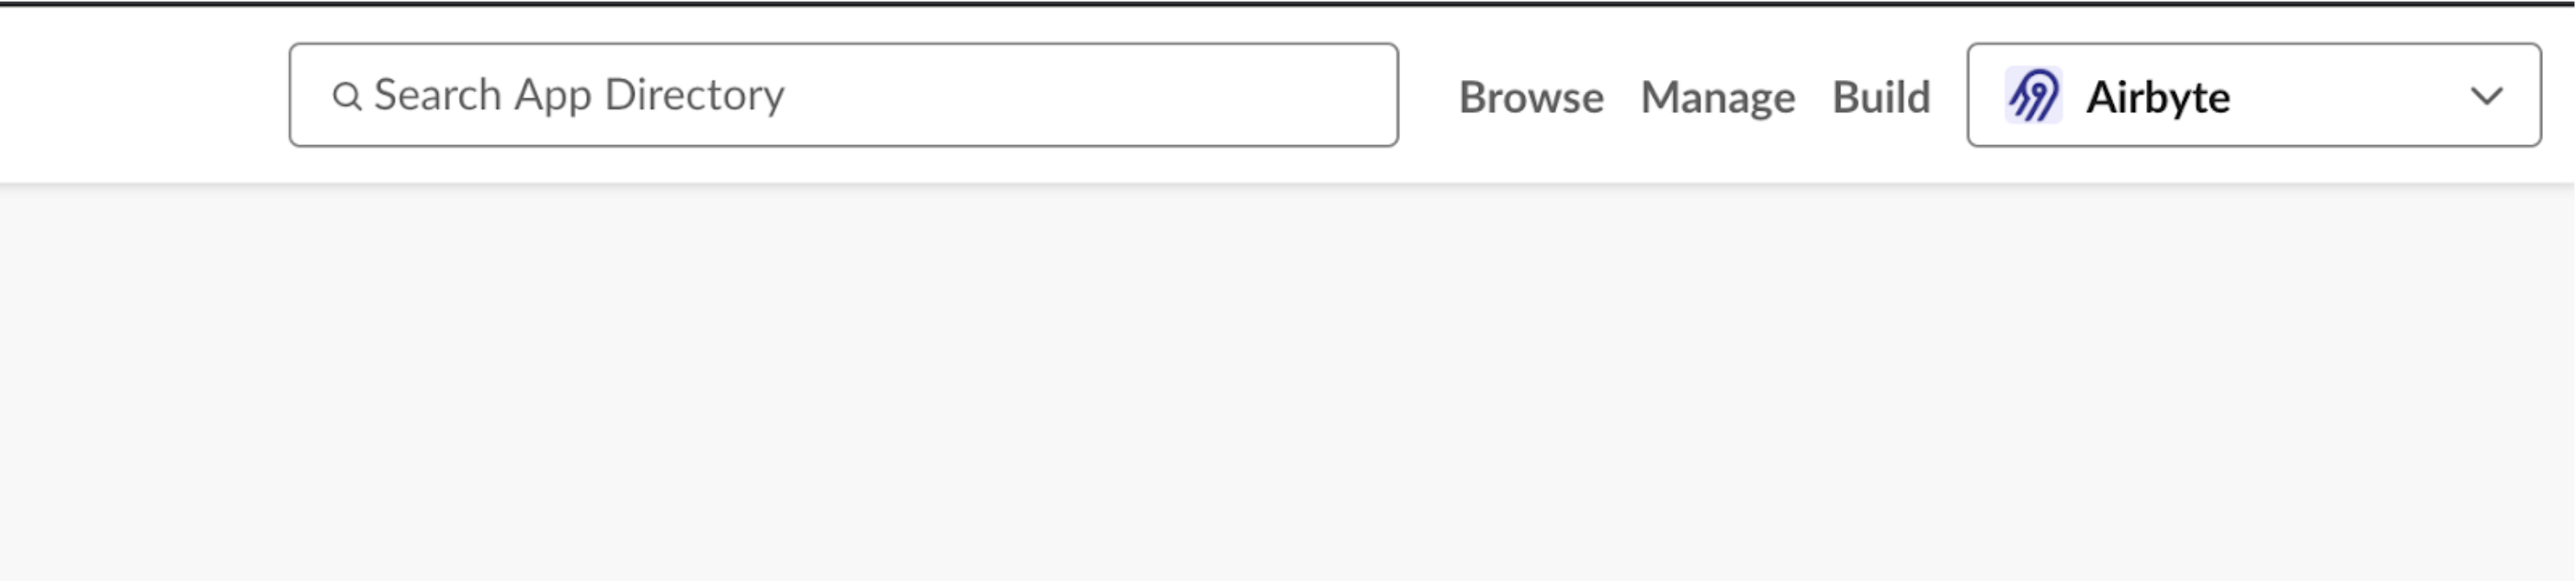
In the new window that opens up, click on Build in the top right corner.
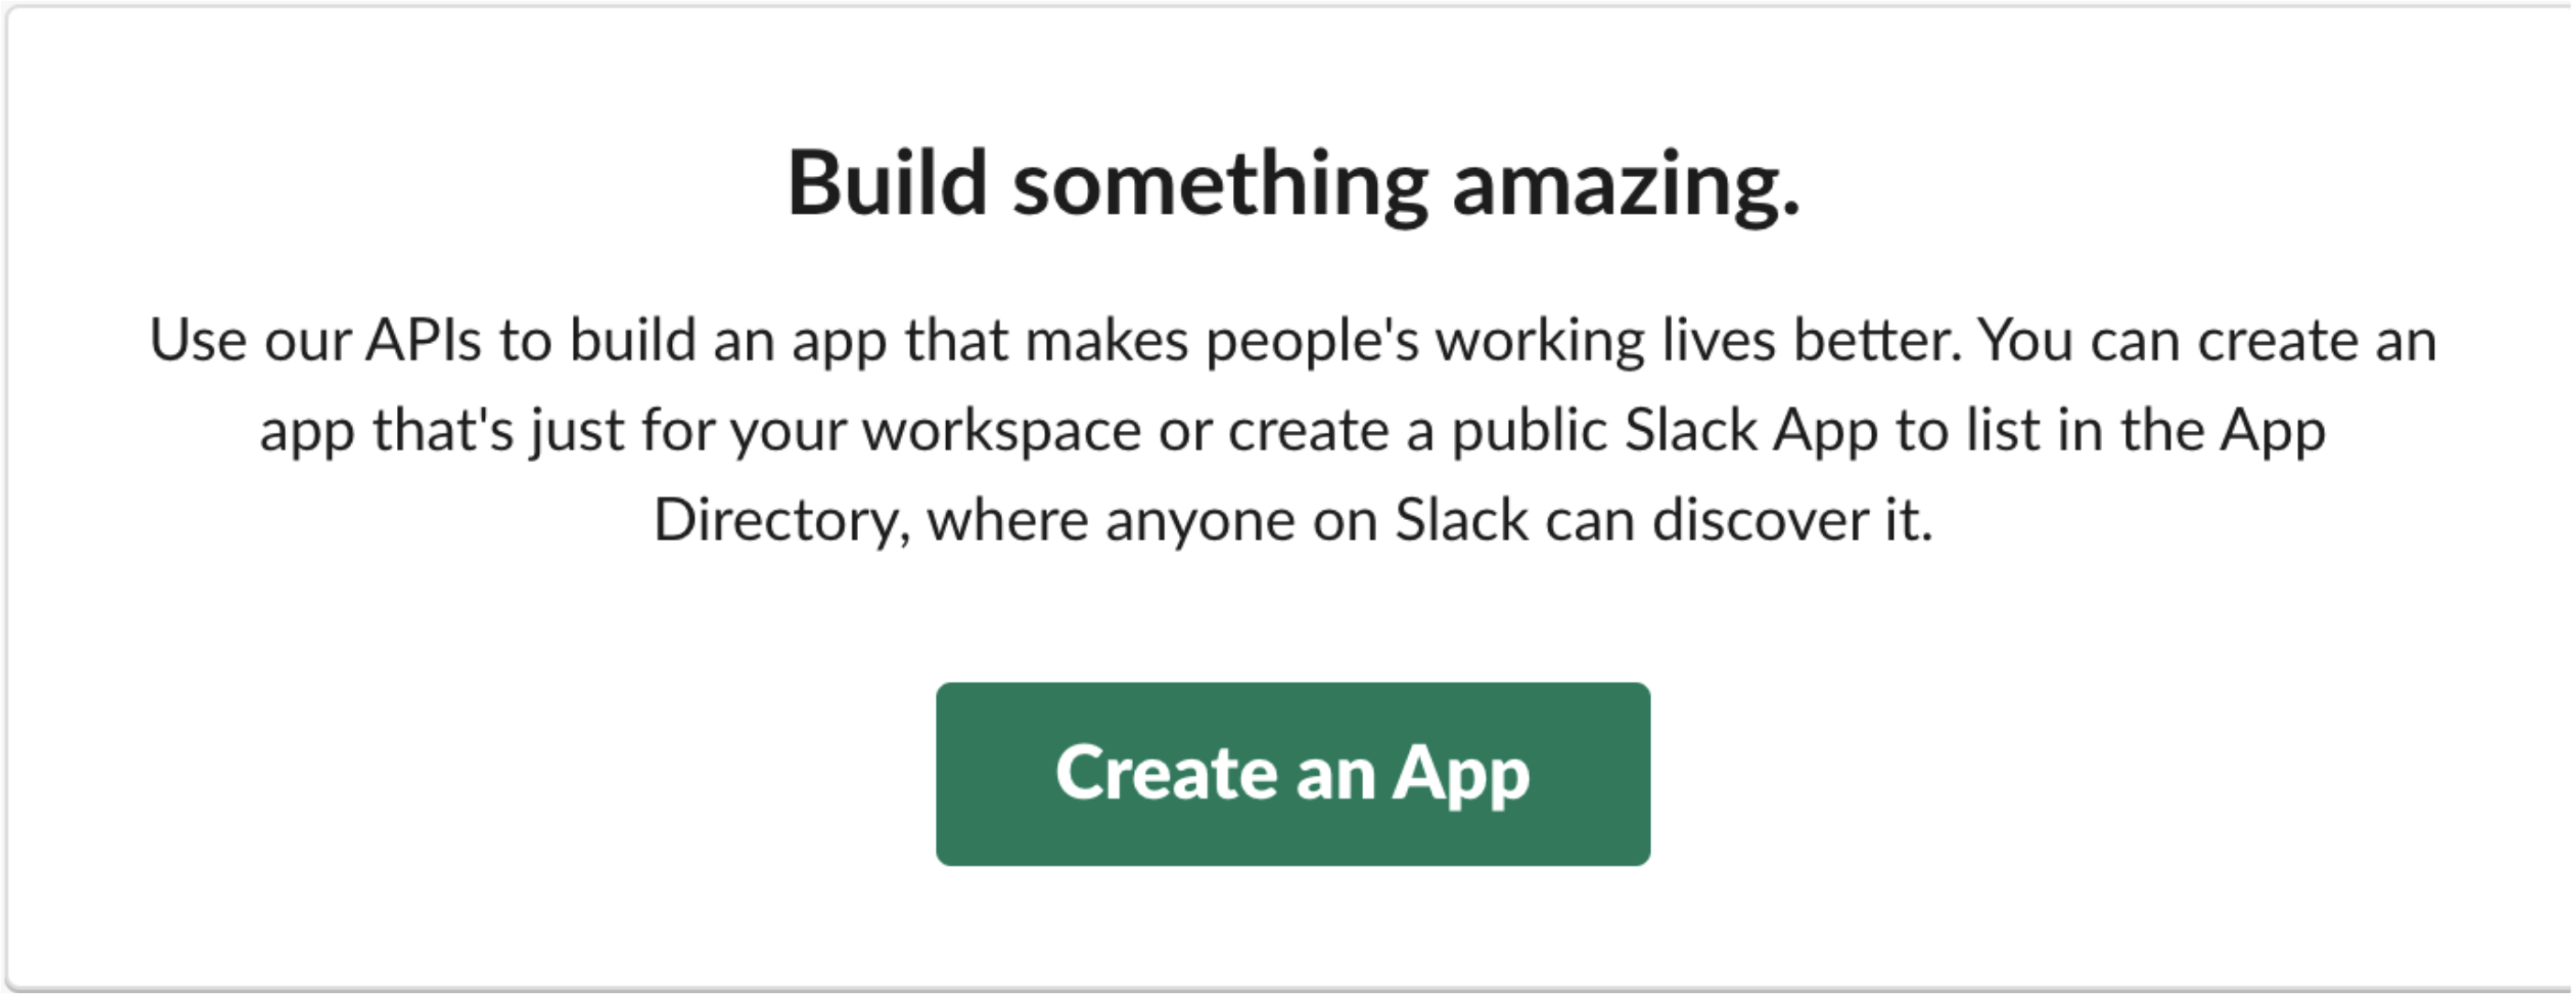
Click on the Create an App button.
In the modal form that follows, give your app a name - you can name it airbyte_superset, then select your workspace from the Development Slack Workspace.
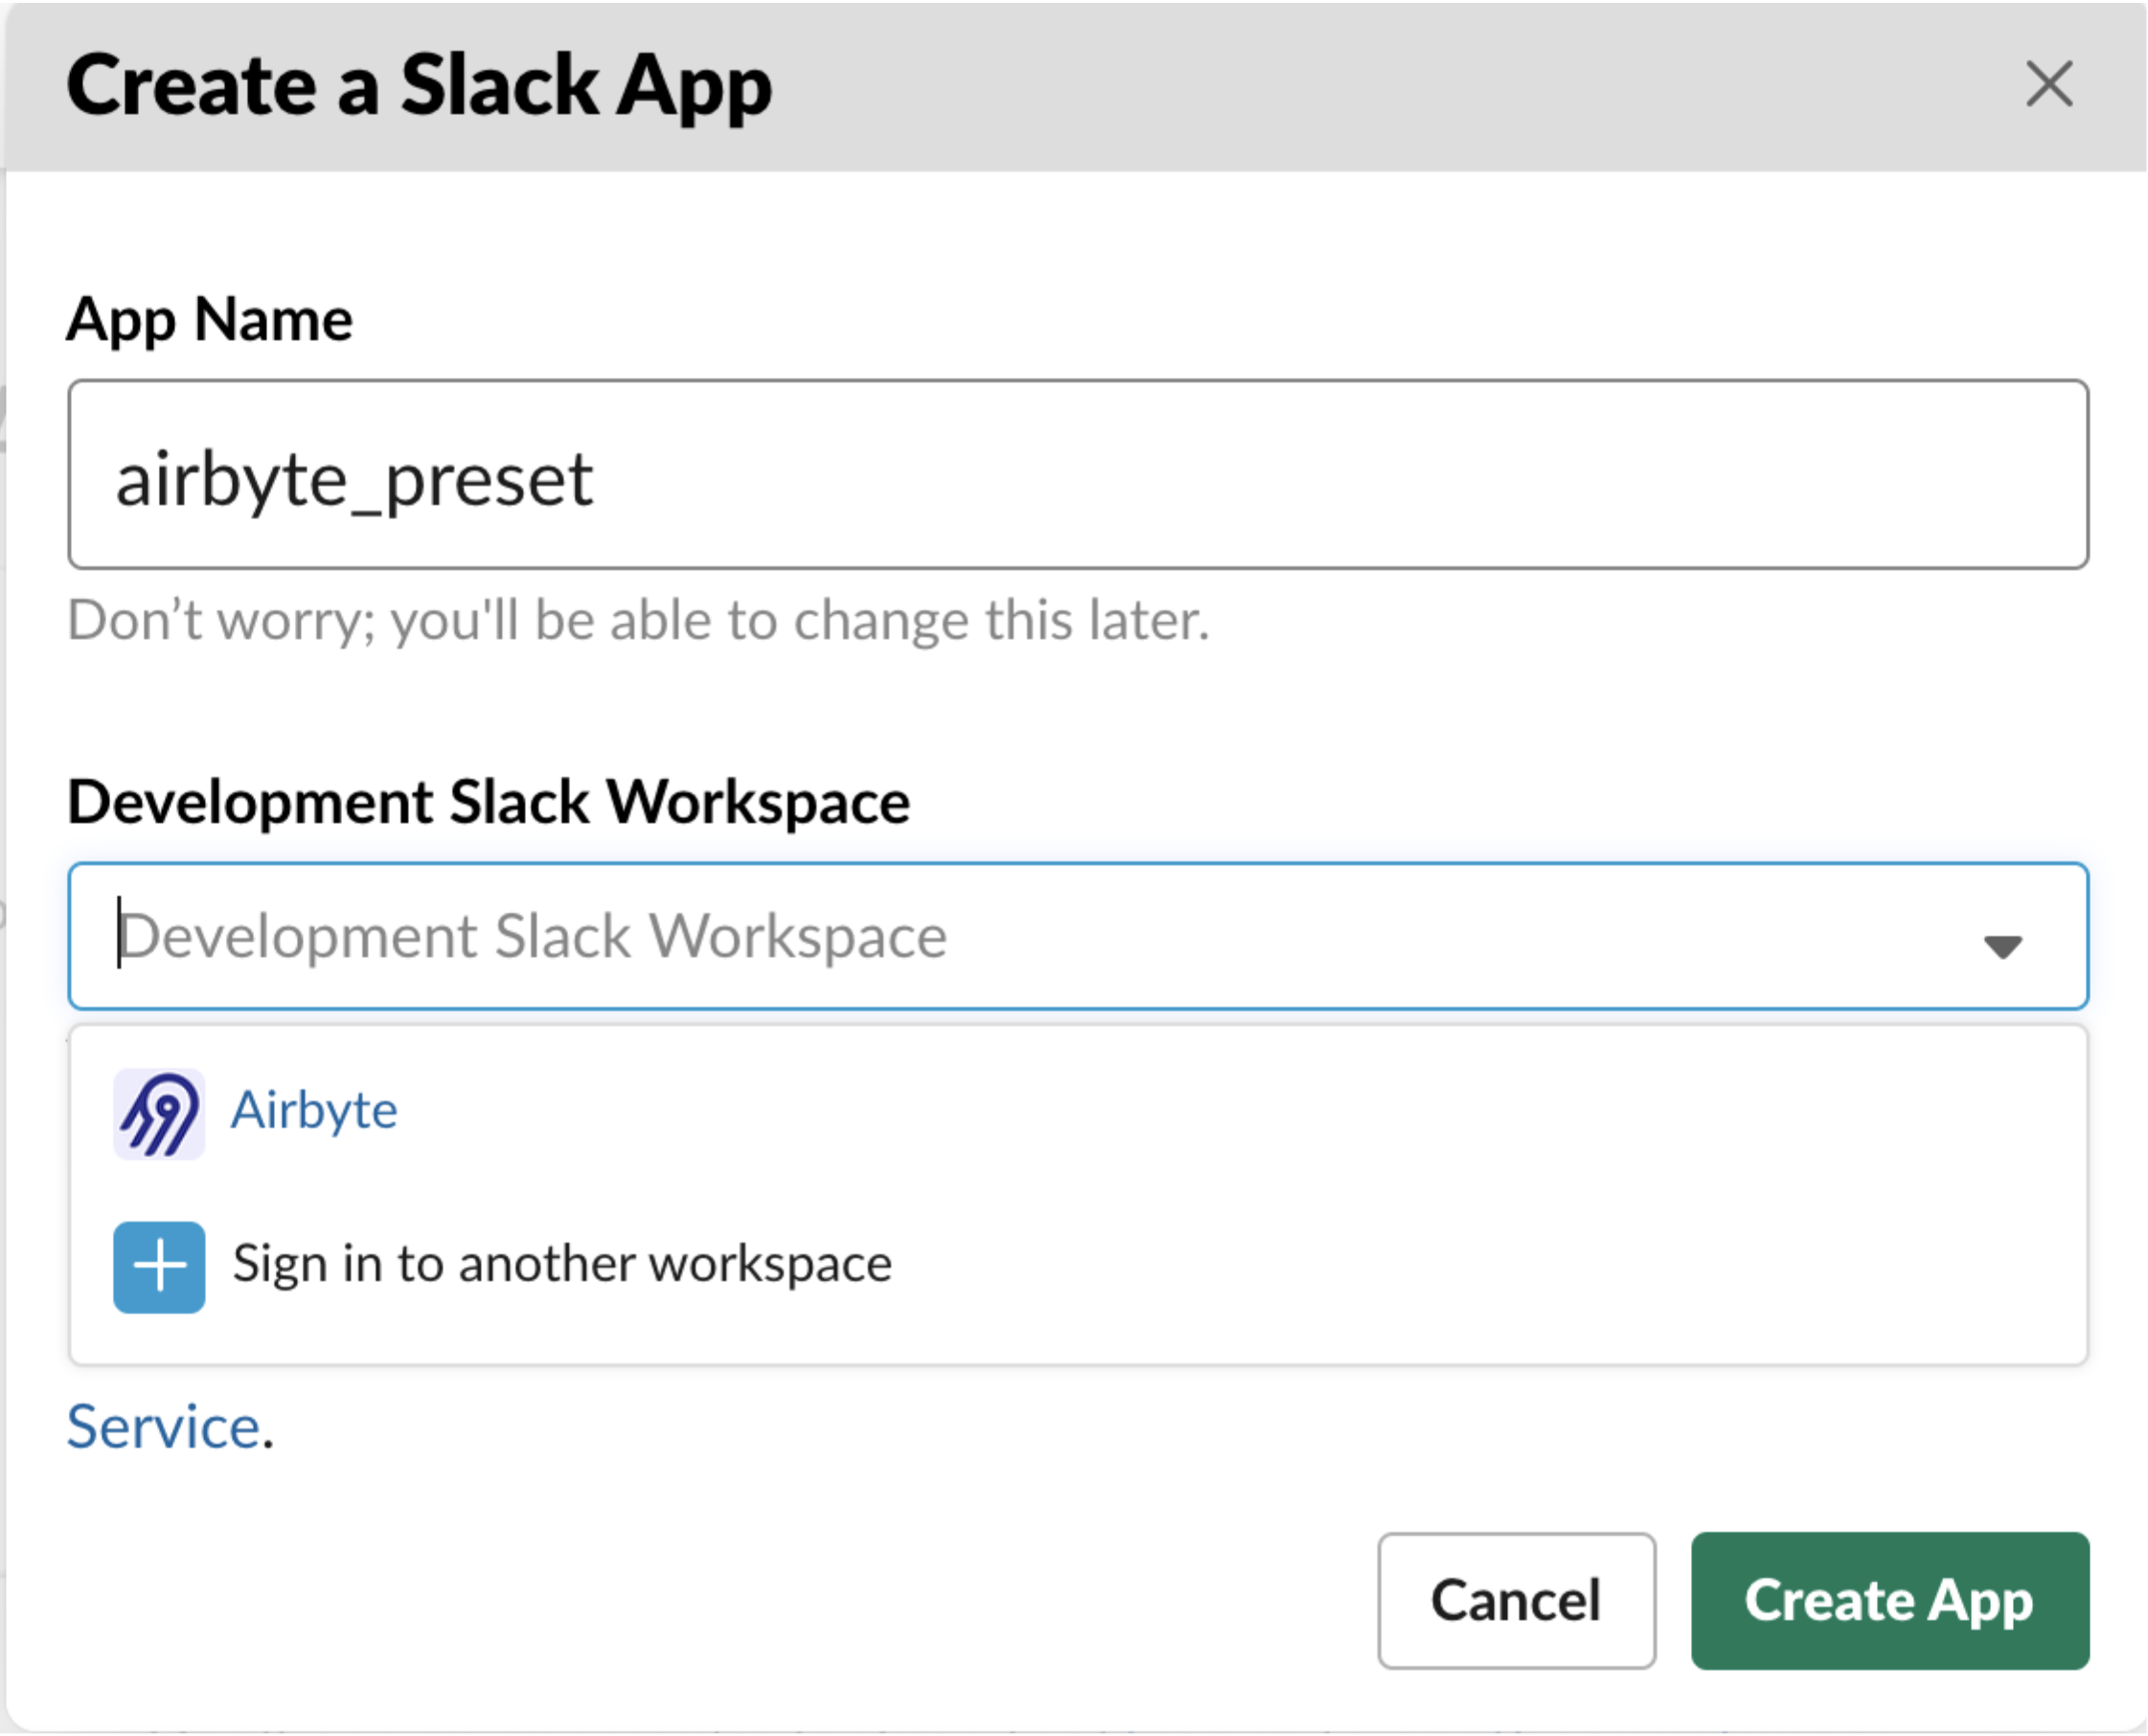
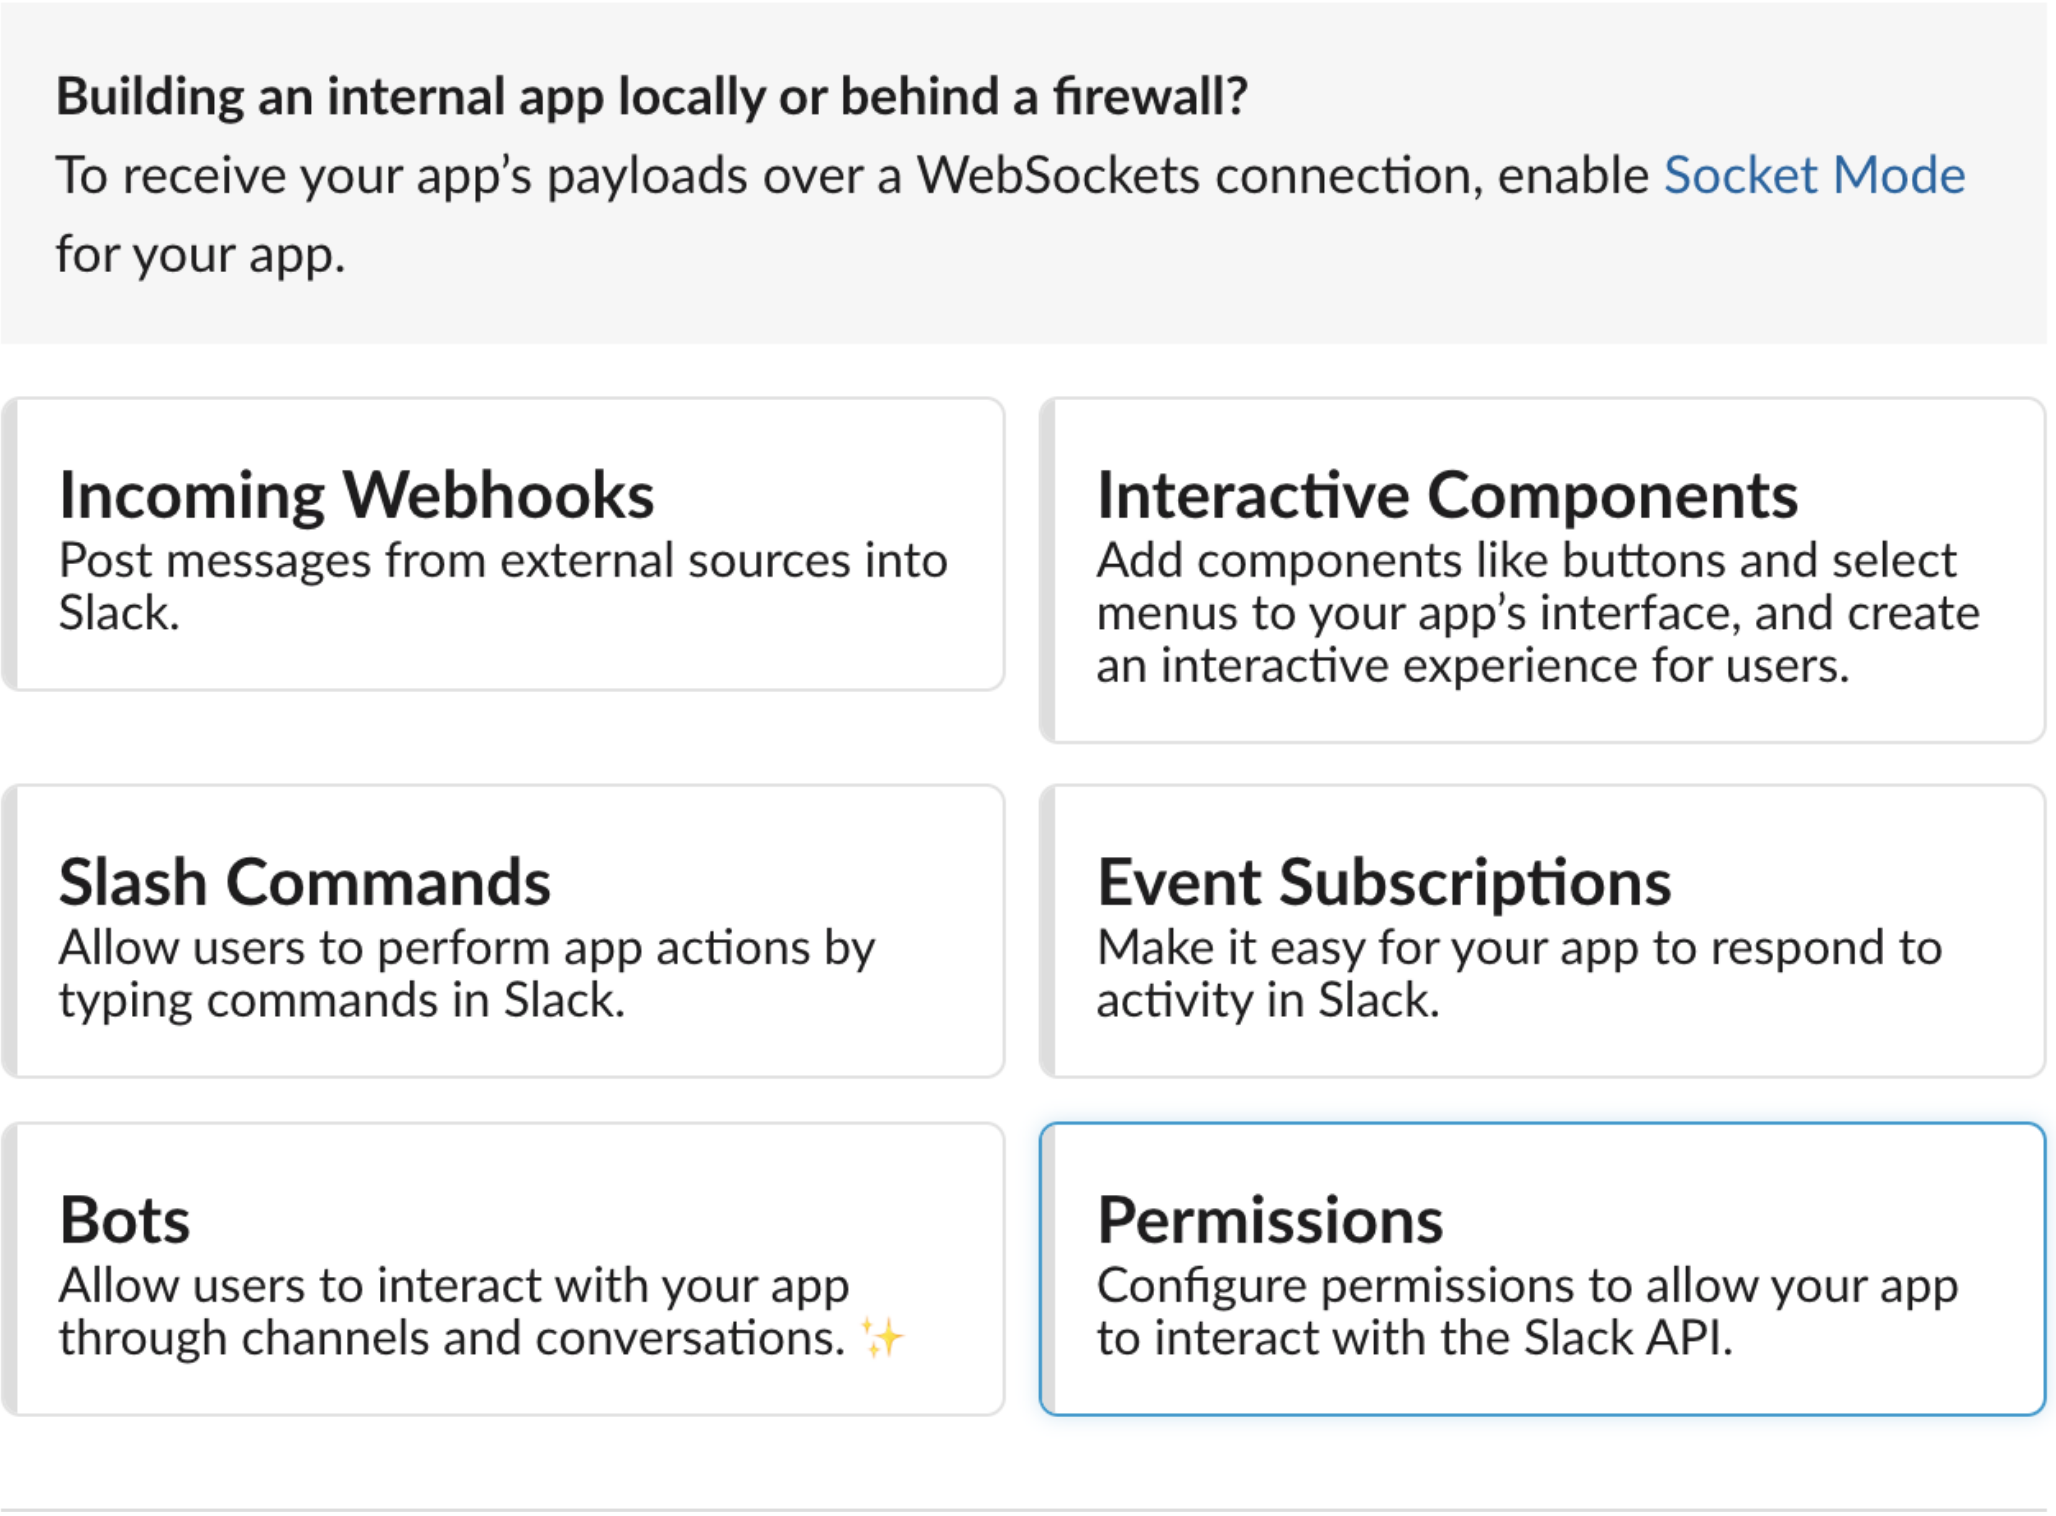
Next, click on the Create App button. You will then be presented with a screen where we are going to set permissions for our airbyte_superset app, by clicking on the Permissions button on this page.
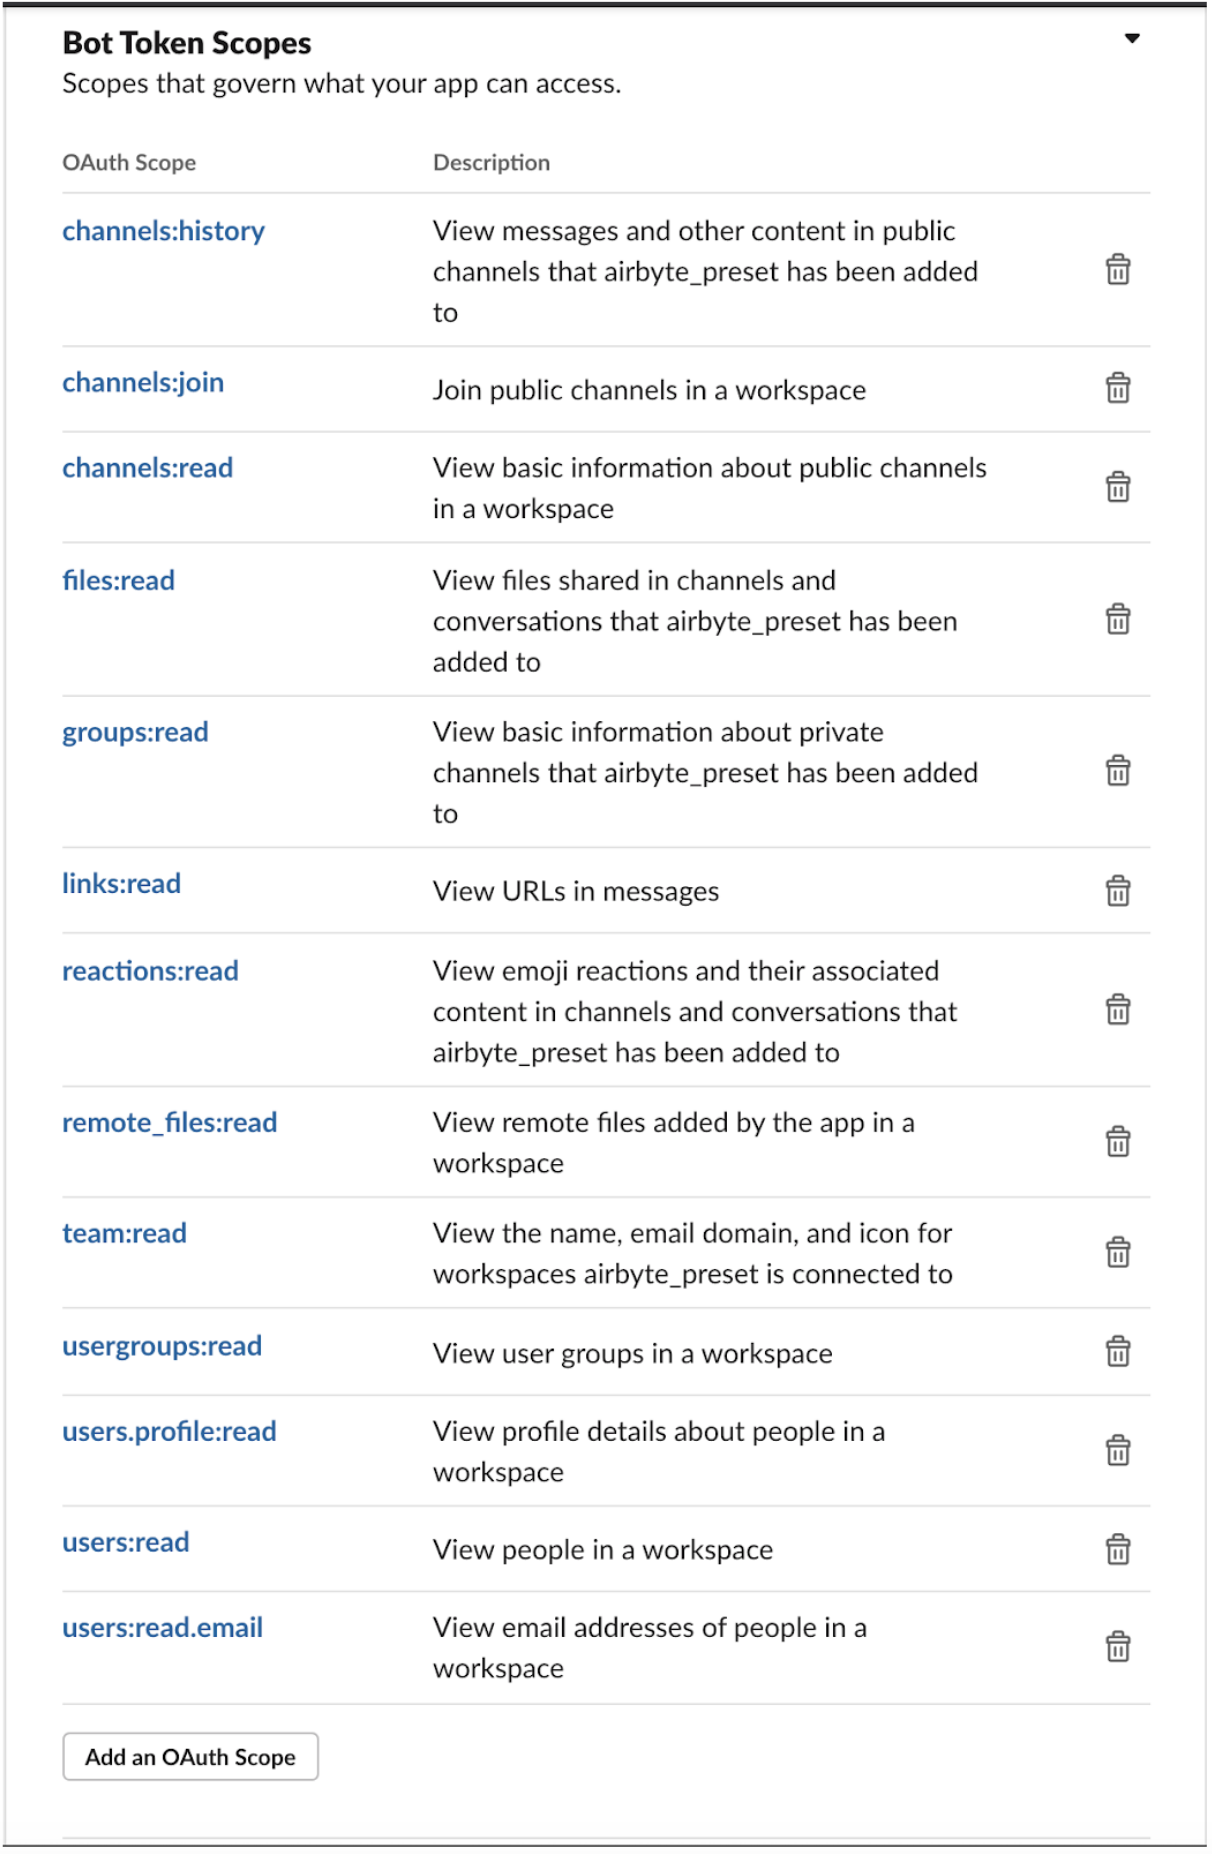
In the next screen, navigate to the scope section. Then, click on the Add an OAuth Scope button. This will allow you to add permission scopes for your app. At a minimum, your app should have the following permission scopes:
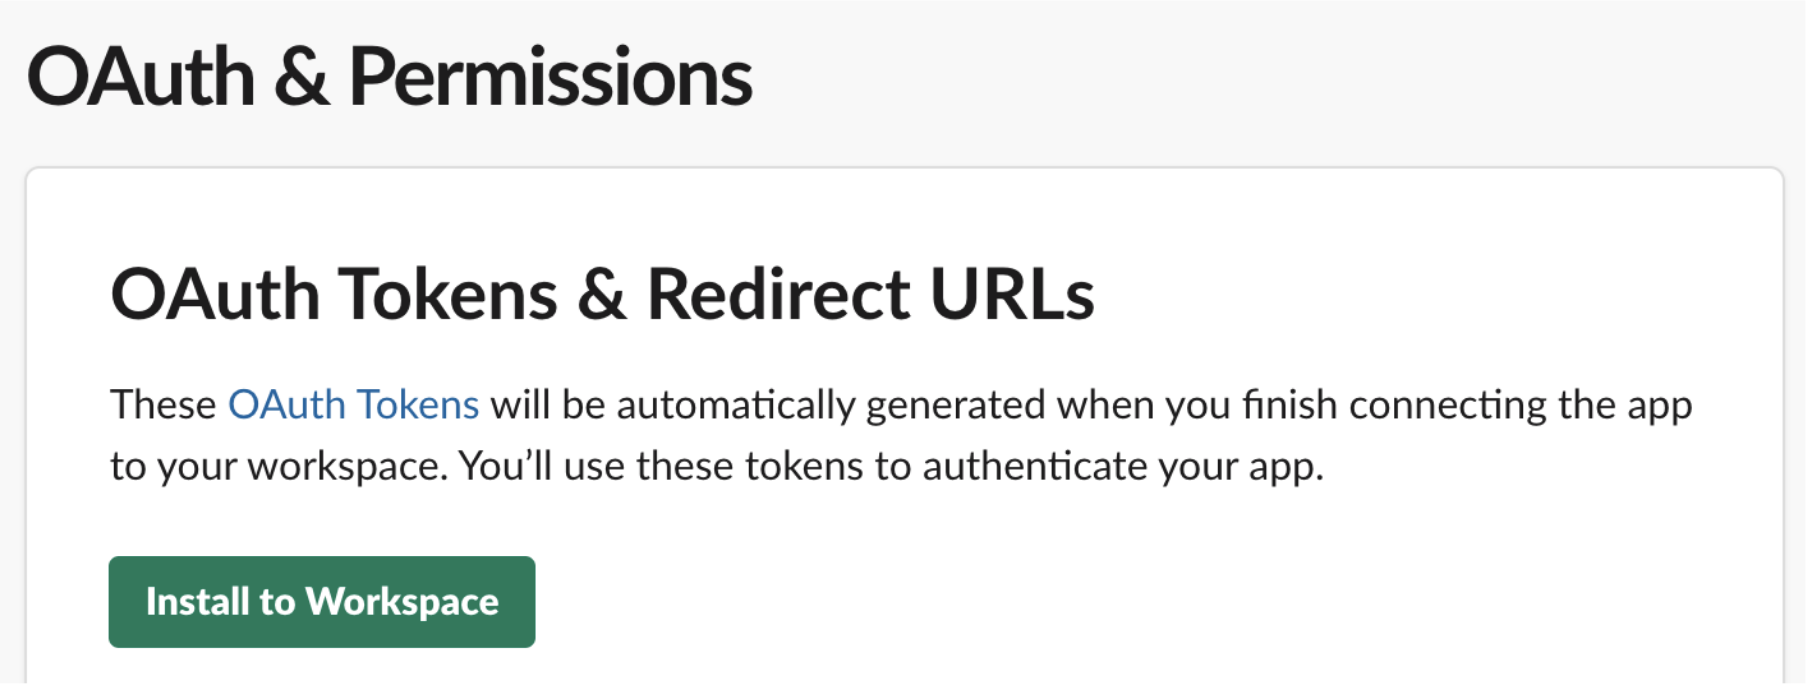
Then, we are going to add our created app to the workspace by clicking the Install to Workspace button.
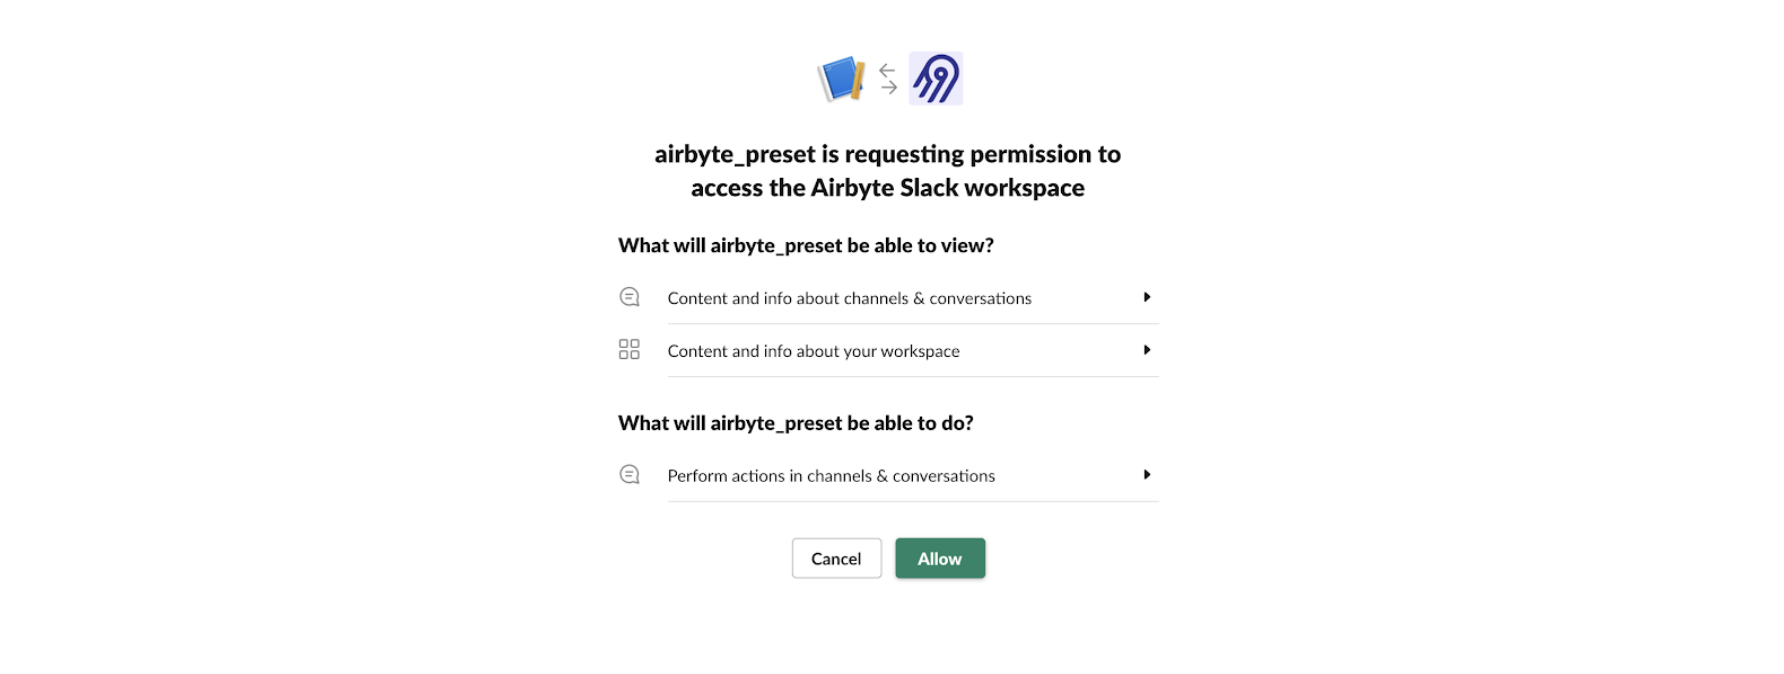
Slack will prompt you that your app is requesting permission to access your workspace of choice. Click Allow.
After the app has been successfully installed, you will be navigated to Slack’s dashboard, where you will see the Bot User OAuth Access Token.
This is the token you will provide back on the Airbyte page, where we dropped off to obtain this token. So make sure to copy it and keep it in a safe place.
Now that we are done with obtaining a Slack token, let’s go back to the Airbyte page we dropped off and add the token in there.
We will also need to provide Airbyte with start_date. This is the date from which we want Airbyte to start replicating data from the Slack API, and we define that in the format: YYYY-MM-DDT00:00:00Z.
We will specify ours as 2020-09-01T00:00:00Z. We will also tell Airbyte to exclude archived channels and not include private channels, and also to join public channels, so the latter part of the form should look like this:
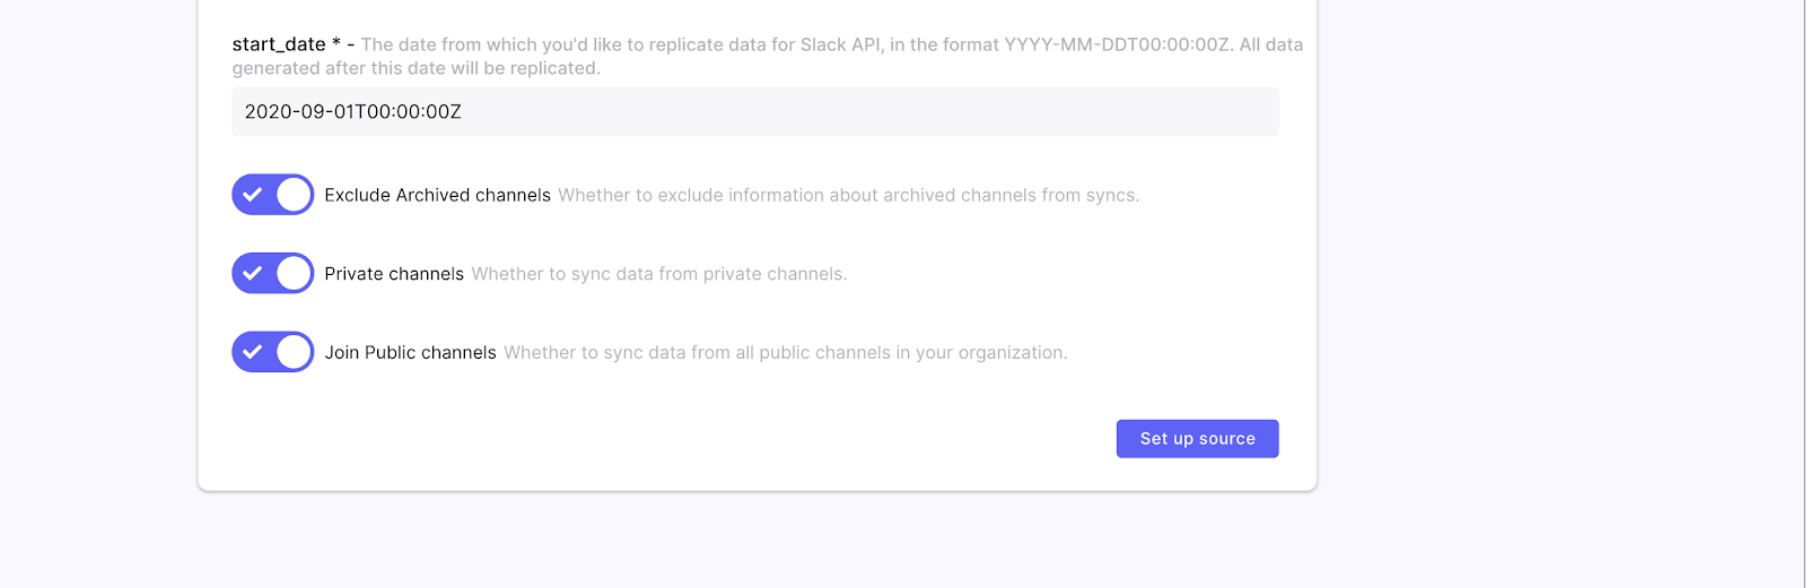
Finally, click on the Set up source button for Airbyte to set the Slack source up.
If the source was set up correctly, you will be taken to the destination section of Airbyte’s dashboard, where you will tell Airbyte where to store the replicated data.
Setting Up Airbyte’s Postgres Destination Connector
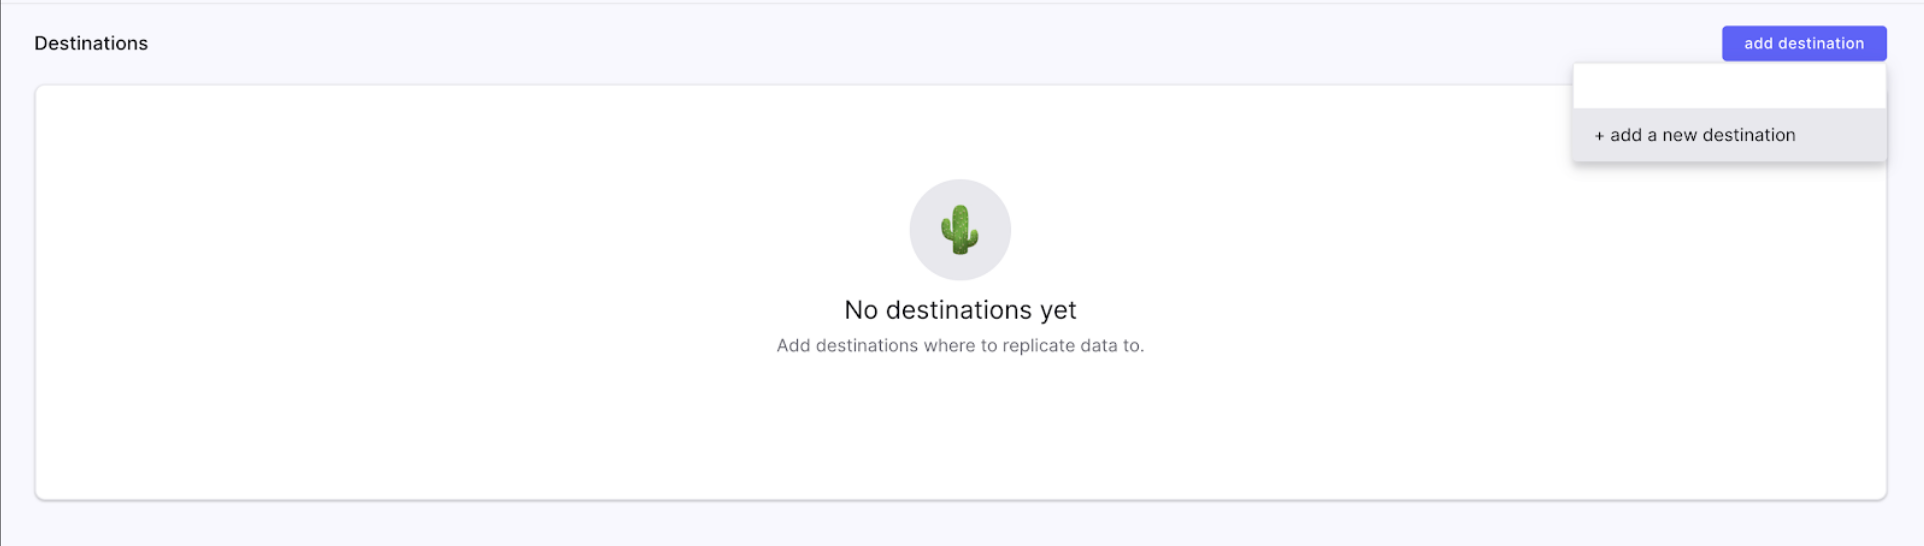
For our use case, we will be using PostgreSQL as the destination.
Click the add destination button in the top right corner, then click on add a new destination.
In the next screen, Airbyte will validate the source, and then present you with a form to give your destination a name. We’ll call this destination slack-destination. Then, we will select the Postgres destination type. Your screen should look like this now:
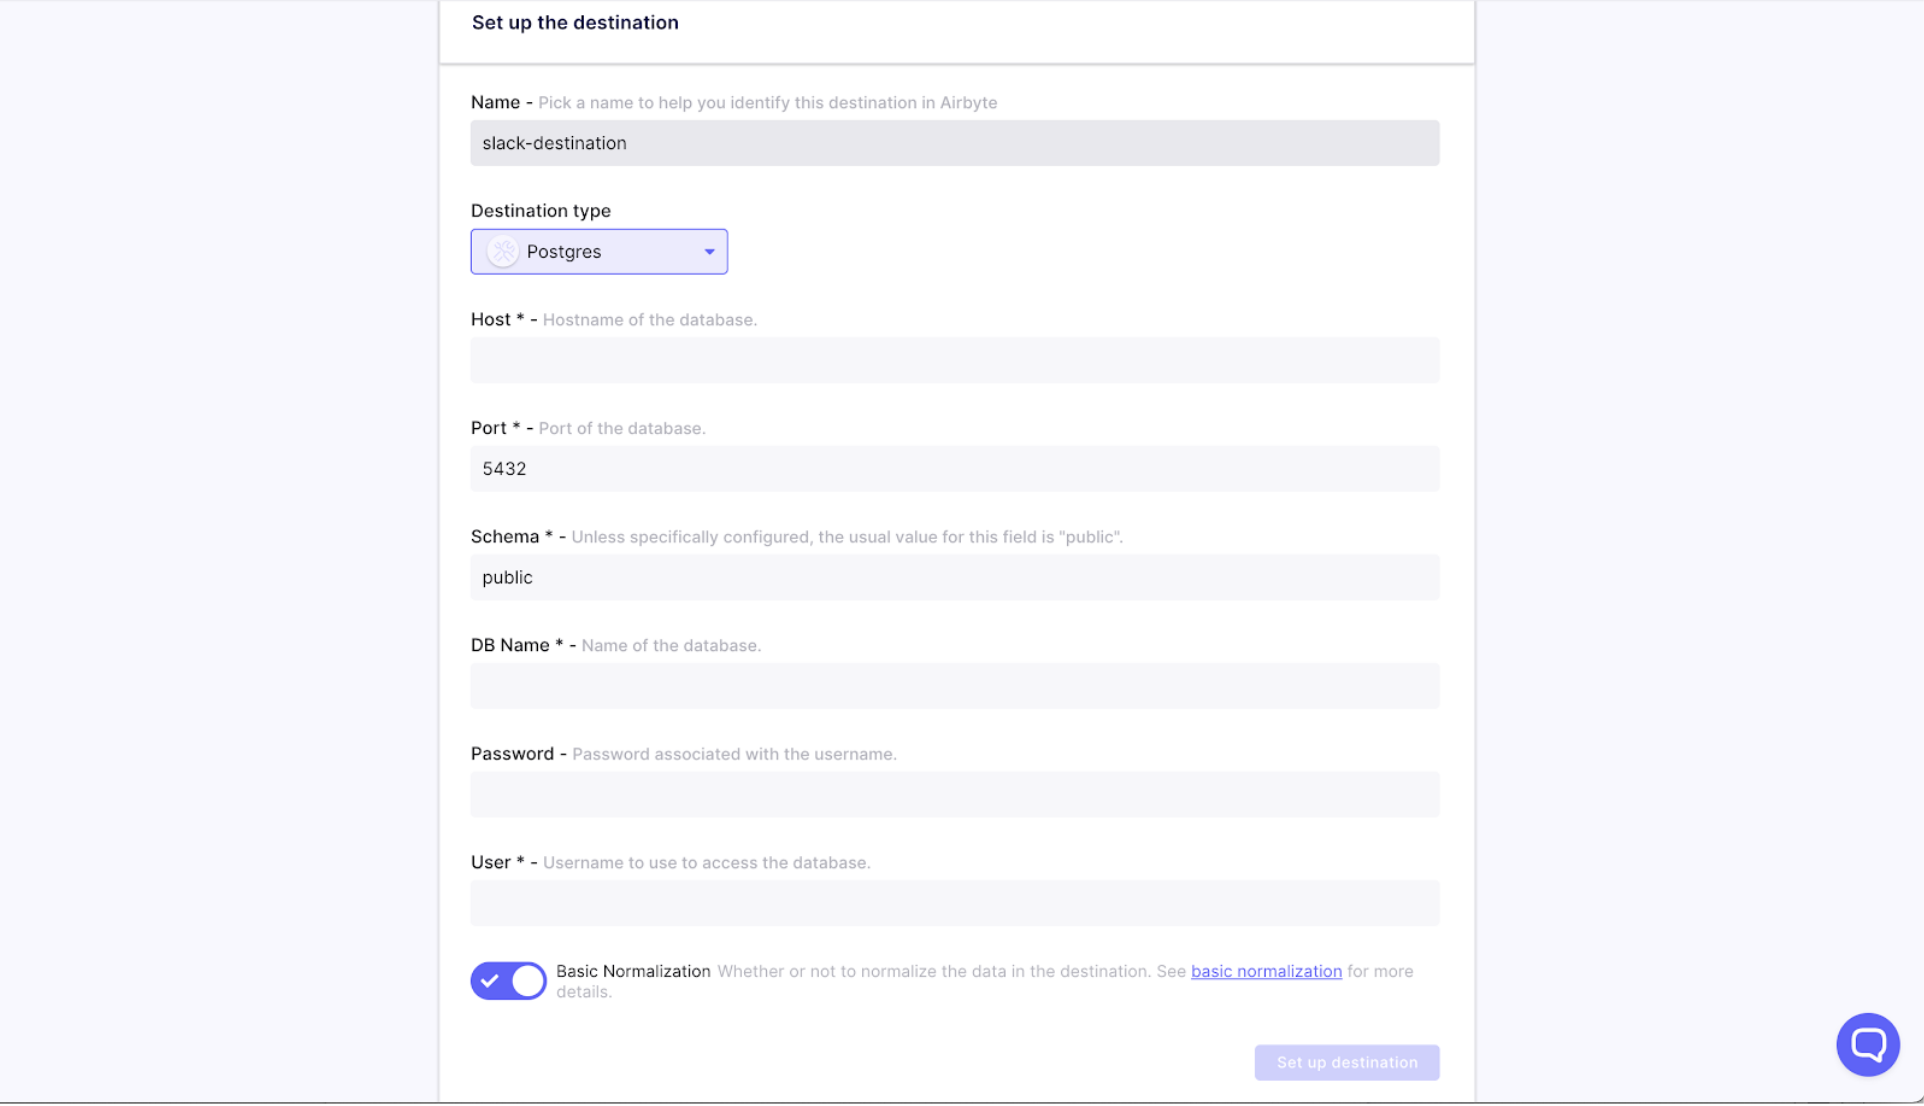
Great! We have a form to enter Postgres connection credentials, but we haven’t set up a Postgres database. Let’s do that!
Since we already have Docker installed, we can spin off a Postgres container with the following command in our terminal:
docker run --rm --name slack-db -e POSTGRES_PASSWORD=password -p 2000:5432 -d postgres(Note that the Docker compose file for Superset ships with a Postgres database, as you can see here).
The above command will do the following:
- create a Postgres container with the name slack-db,
- set the password to password,
- expose the container’s port 5432, as our machine’s port 2000.
- create a database and a user, both called postgres.
With this, we can go back to the Airbyte screen and supply the information needed. Your form should look like this:
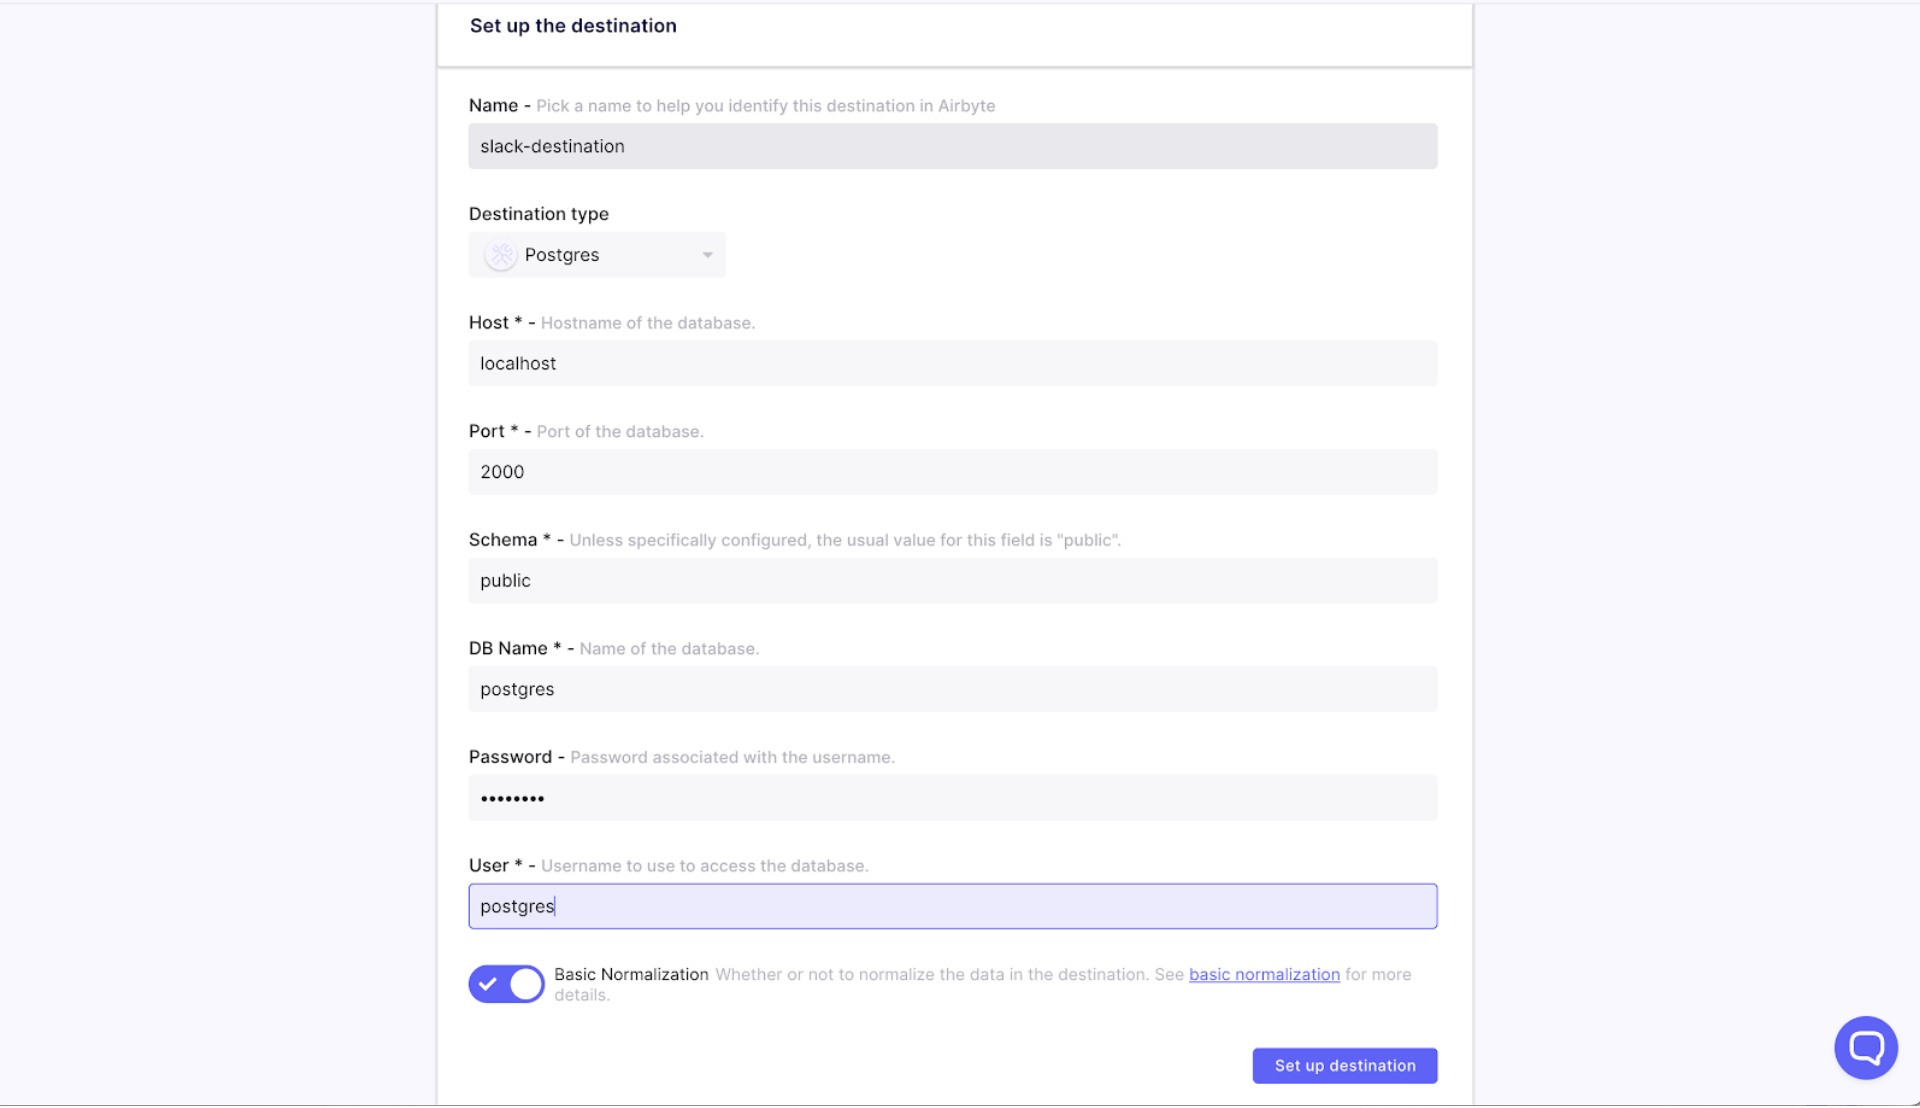
Then click on the Set up destination button.
Setting Up the Replication
You should now see the following screen:
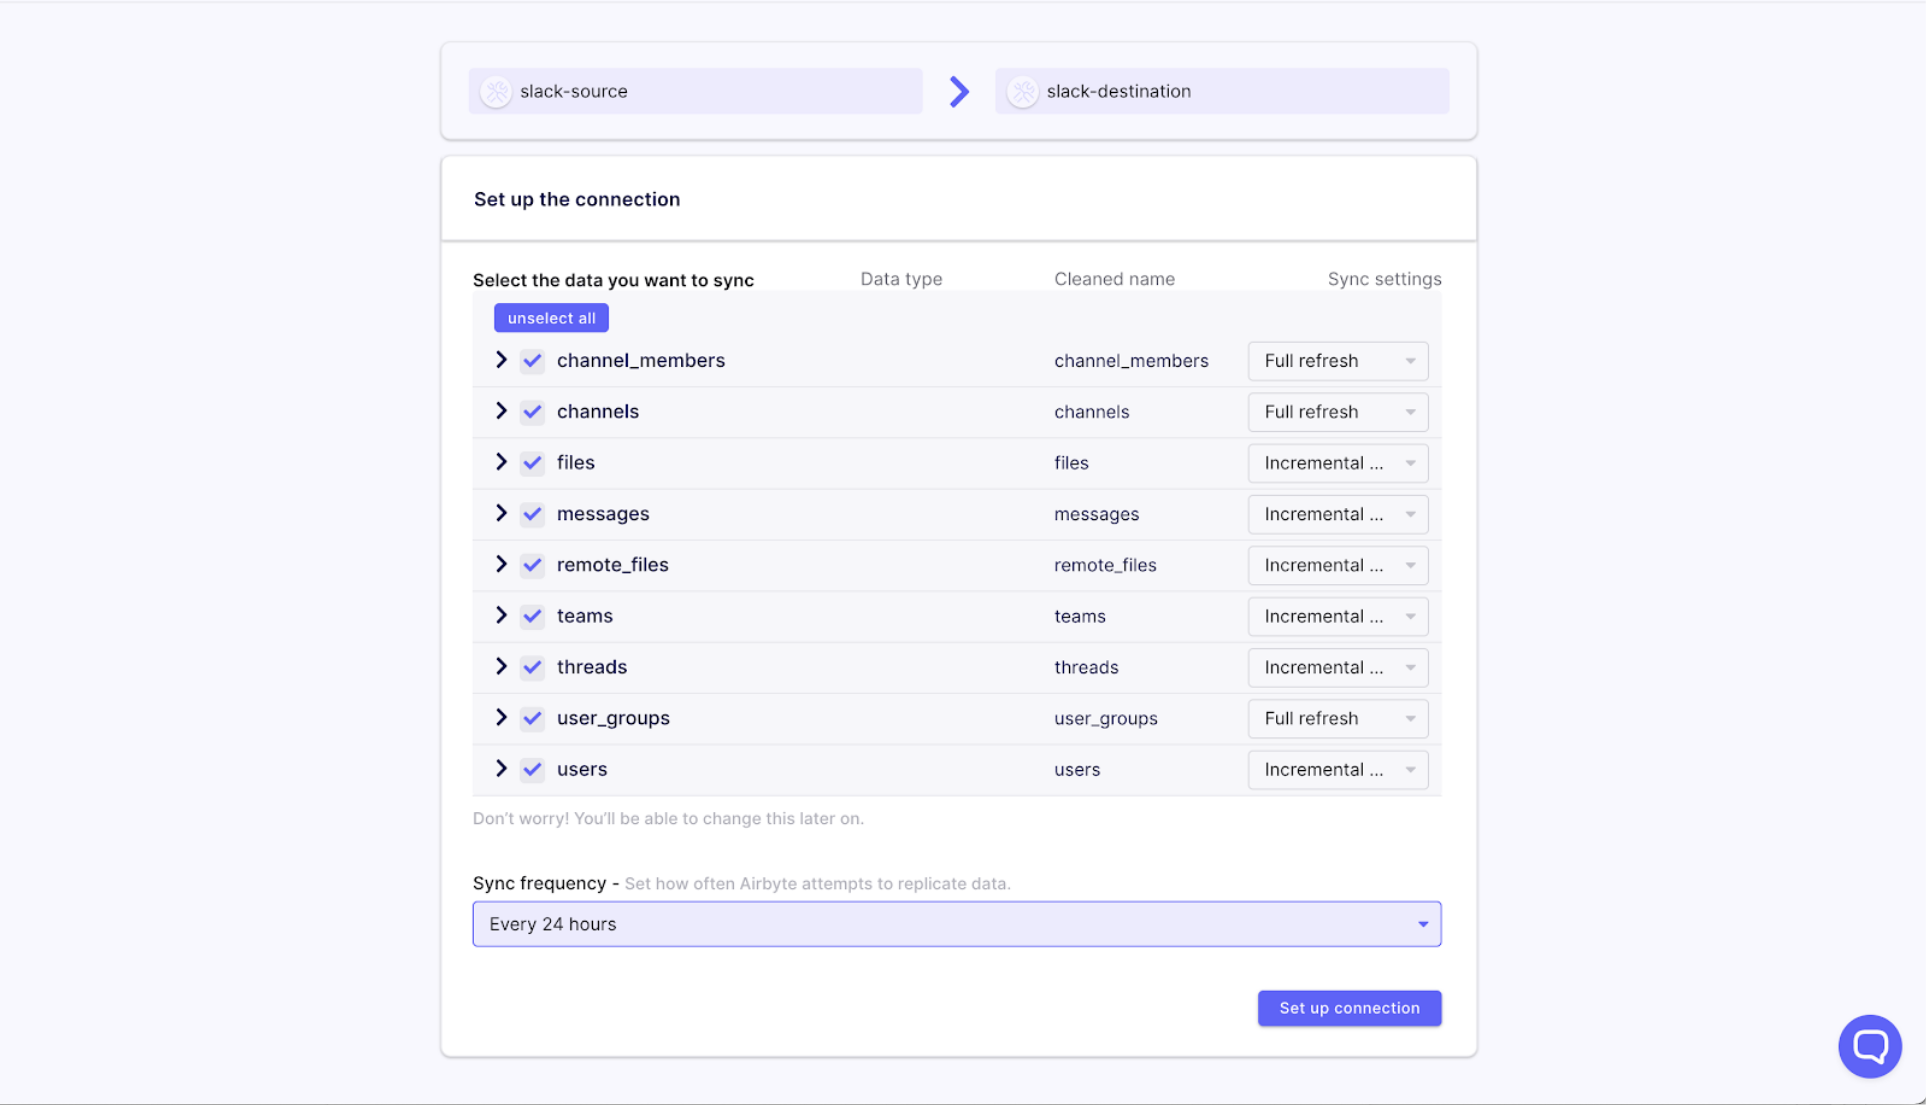
Airbyte will then fetch the schema for the data coming from the Slack API for your workspace. You should leave all boxes checked and then choose the sync frequency - this is the interval in which Airbyte will sync the data coming from your workspace. Let’s set the sync interval to every 24 hours.
Then click on the Set up connection button.
Airbyte will now take you to the destination dashboard, where you will see the destination you just set up. Click on it to see more details about this destination.
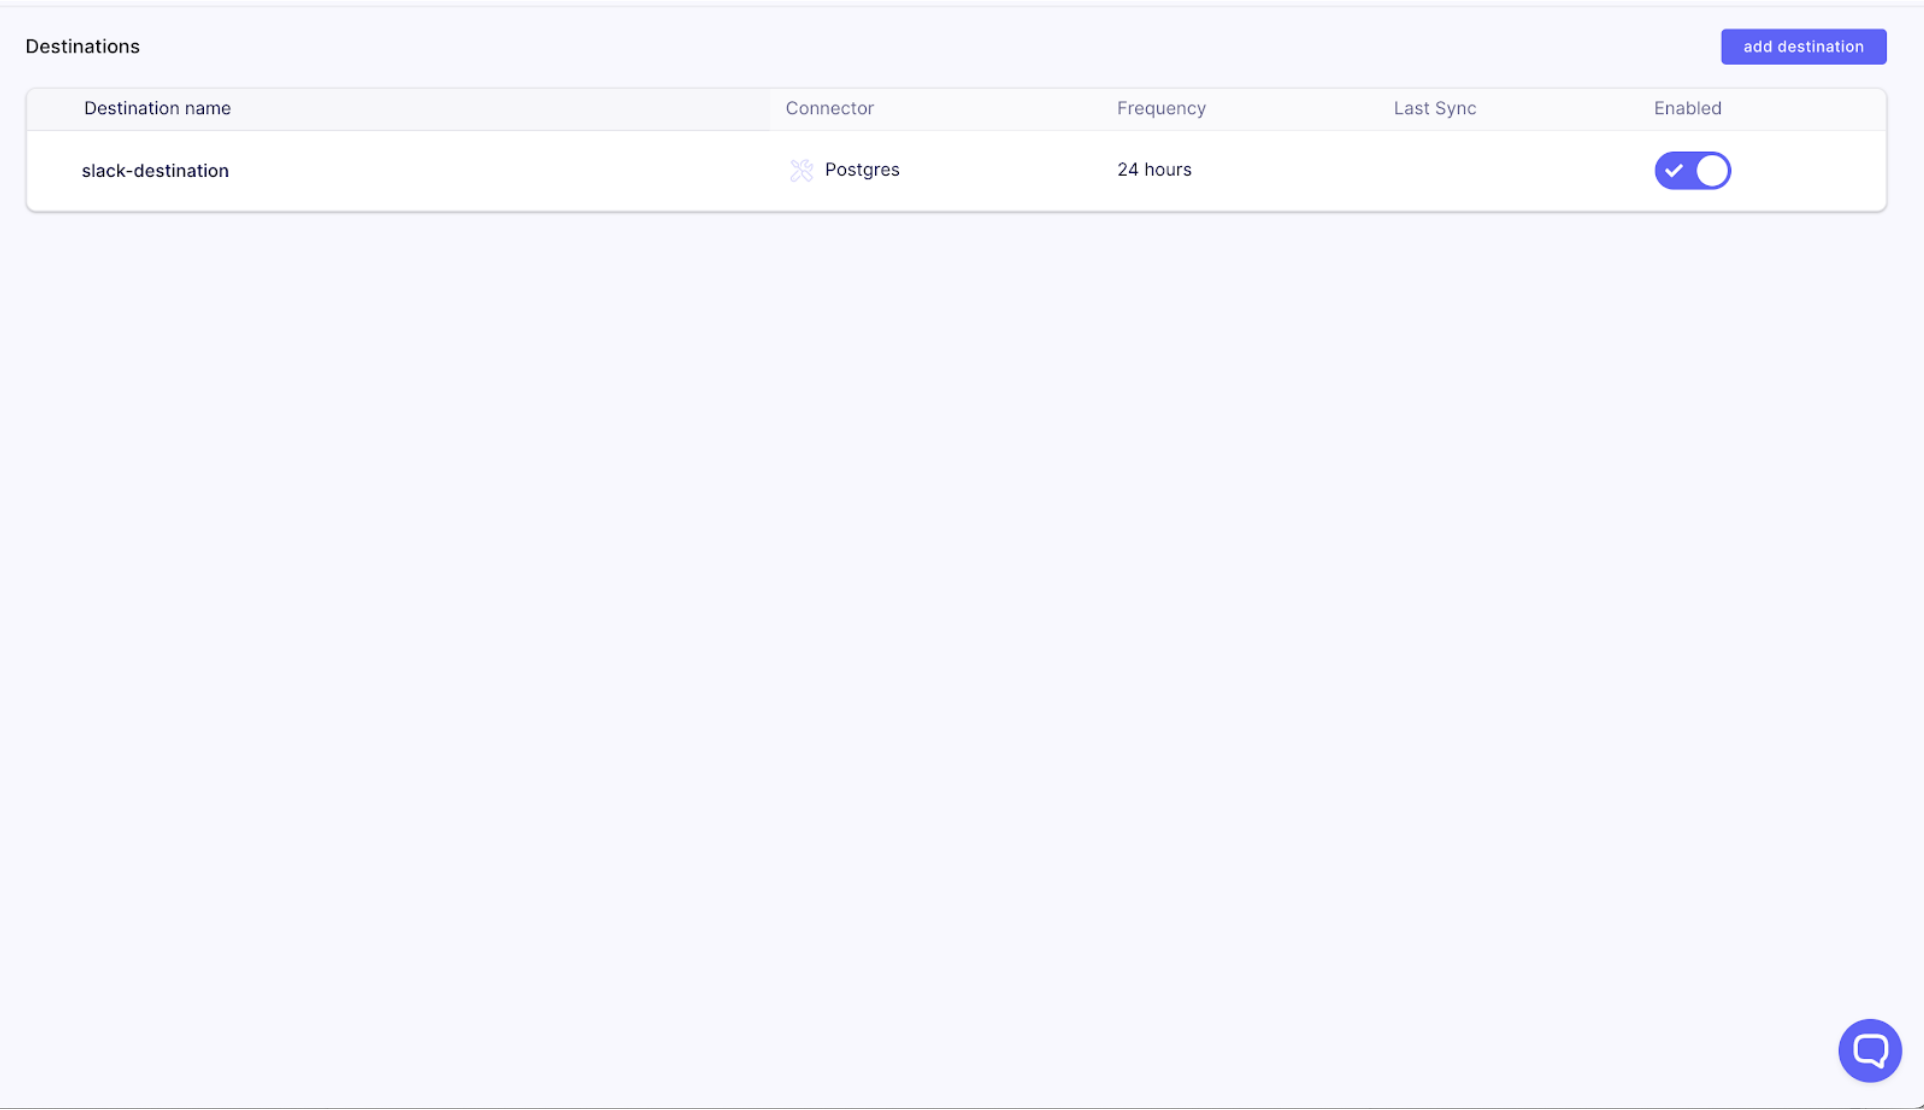
You will see Airbyte running the very first sync. Depending on the size of the data Airbyte is replicating, it might take a while before syncing is complete.
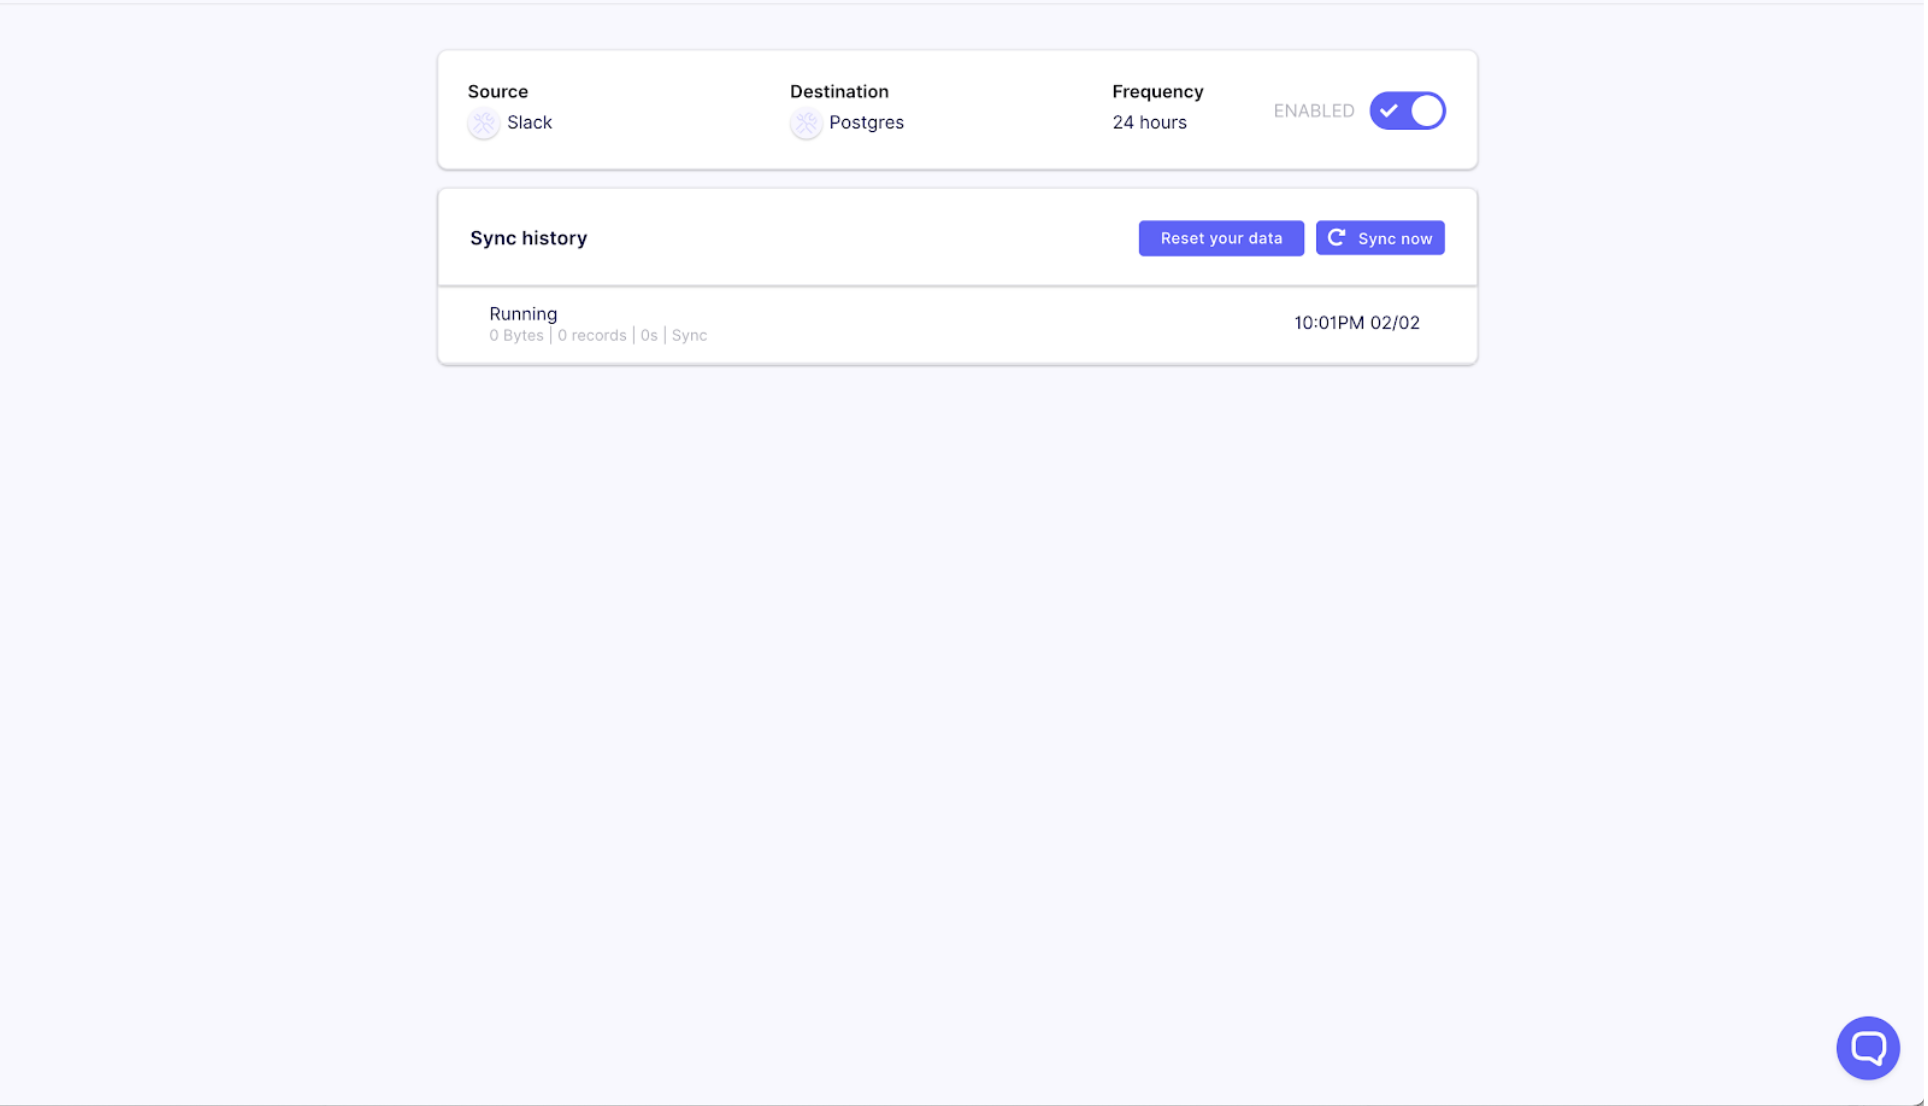
When it’s done, you will see the Running status change to Succeeded, and the size of the data Airbyte replicated as well as the number of records being stored on the Postgres database.

To test if the sync worked, run the following in your terminal:
docker exec slack-source psql -U postgres -c "SELECT * FROM public.users;"This should output the rows in the users’ table.
To get the count of the users’ table as well, you can also run:
docker exec slack-db psql -U postgres -c "SELECT count(*) FROM public.users;"Now that we have the data from the Slack workspace in our Postgres destination, we will head on to creating the Slack dashboard with Apache Superset.
Setting Up Apache Superset for the Dashboards
Installing Apache Superset
Apache Superset, or simply Superset, is a modern data exploration and visualization platform. To get started using it, we will be cloning the Superset repo. Navigate to a destination in your terminal where you want to clone the Superset repo to and run:
git clone https://github.com/apache/superset.gitIt’s recommended to check out the latest branch of Superset, so run:
cd supersetAnd then run:
git checkout latestSuperset needs you to install and build its frontend dependencies and assets. So, we will start by installing the frontend dependencies:
npm installNote: The above command assumes you have both Node and NPM installed on your machine.
Finally, for the frontend, we will build the assets by running:
npm run buildAfter that, go back up one directory into the Superset directory by running:
cd..Then run:
docker-compose upThis will download the Docker images Superset needs and build containers and start services Superset needs to run locally on your machine.
Once that’s done, you should be able to access Superset on your browser by visiting http://localhost:8088, and you should be presented with the Superset login screen.
Enter username: admin and Password: admin to be taken to your Superset dashboard.
Great! You’ve got Superset set up. Now let’s tell Superset about our Postgres Database holding the Slack data from Airbyte.
Setting Up a Postgres Database in Superset
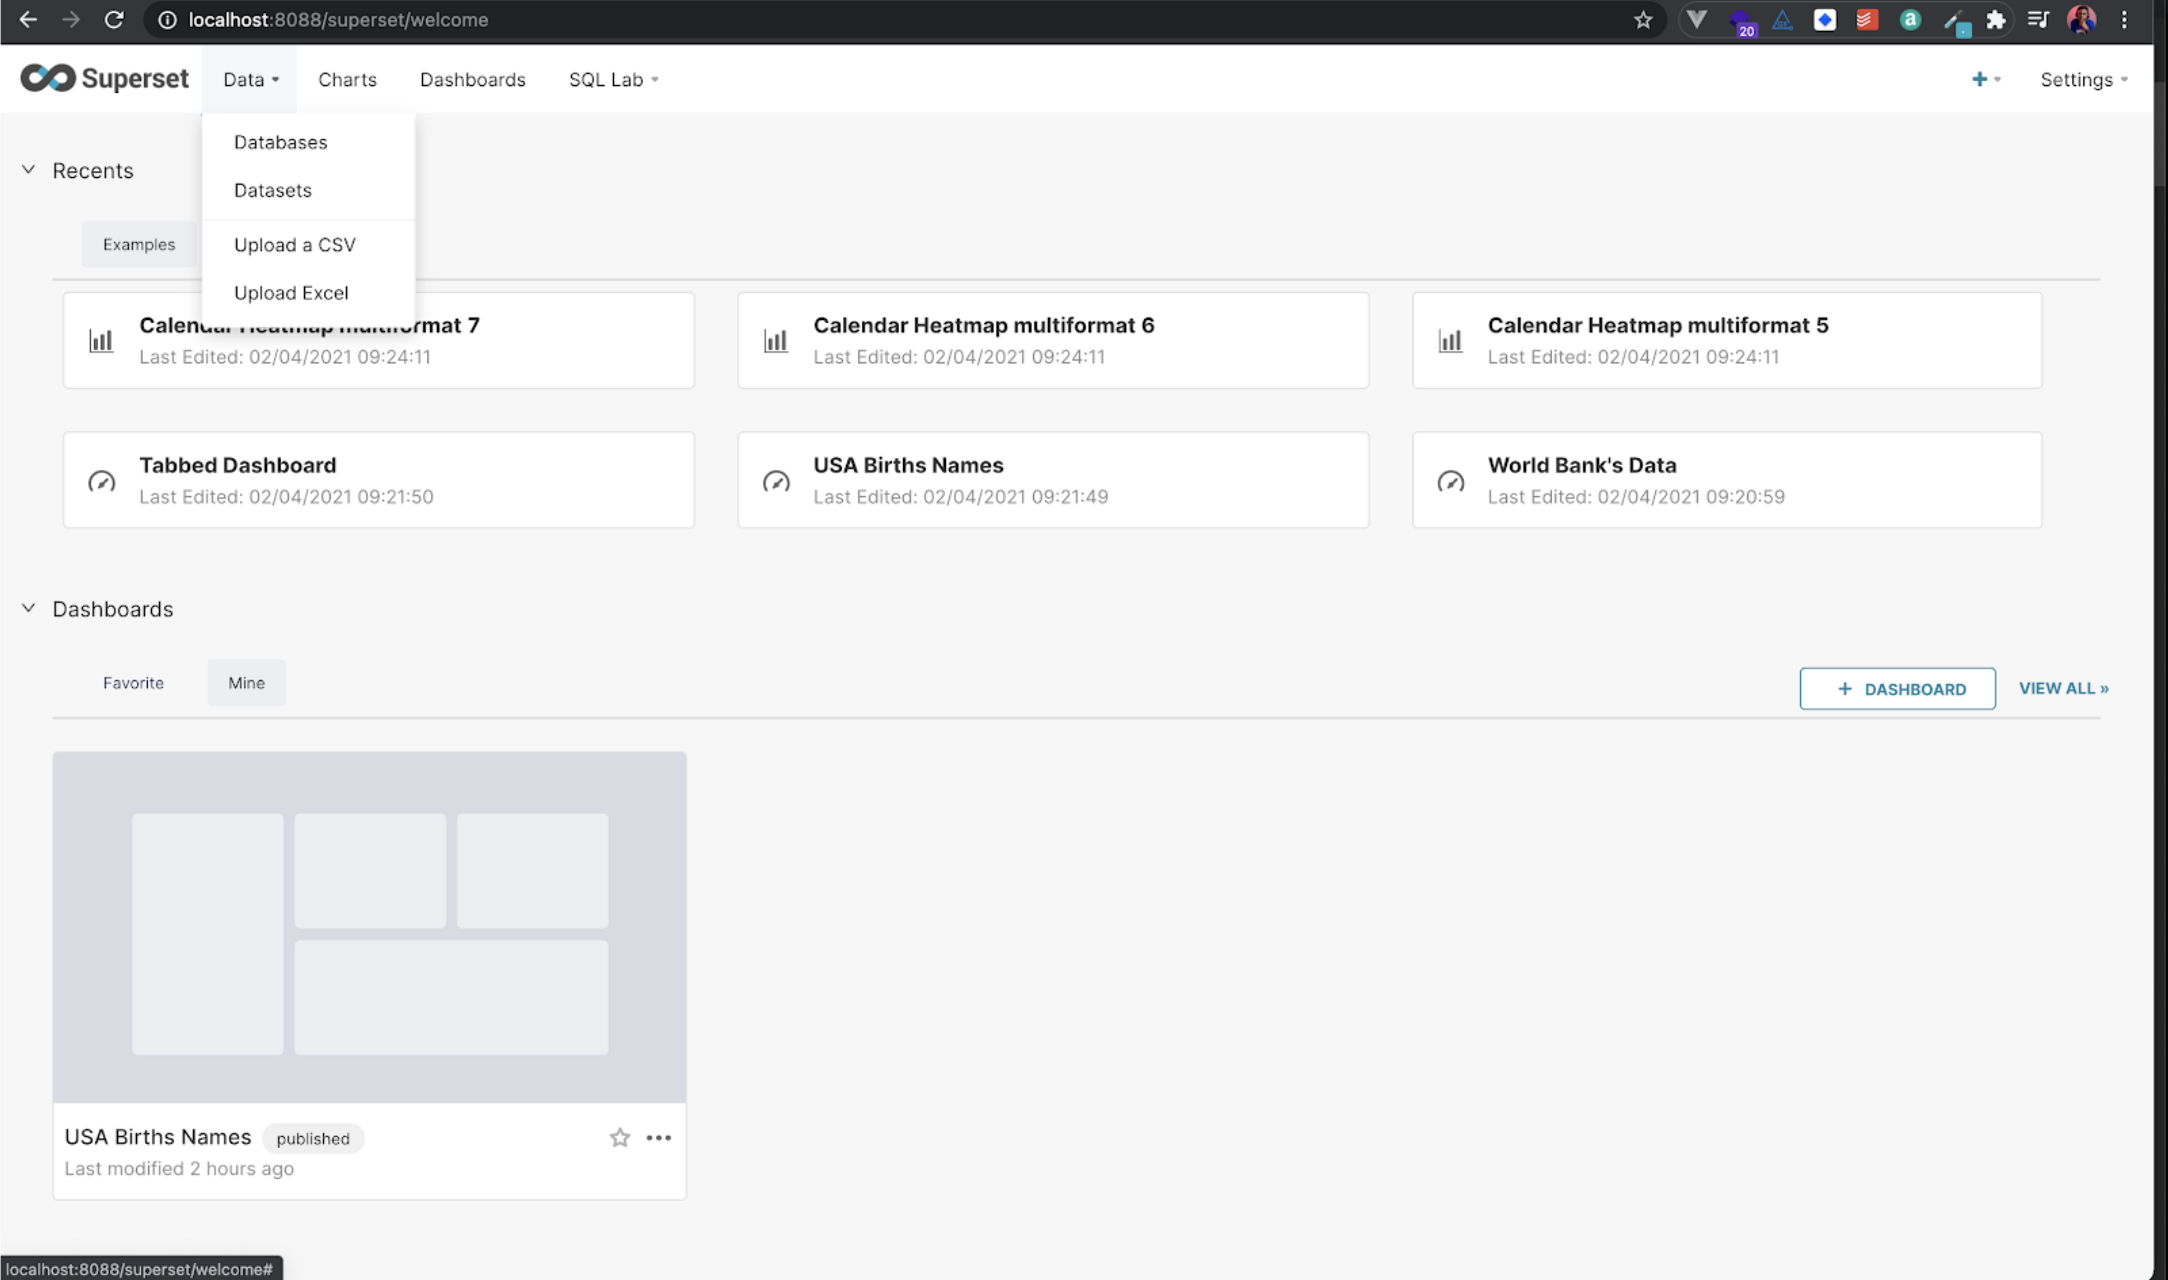
To do this, on the top menu in your Superset dashboard, hover on the Data dropdown and click on Databases.
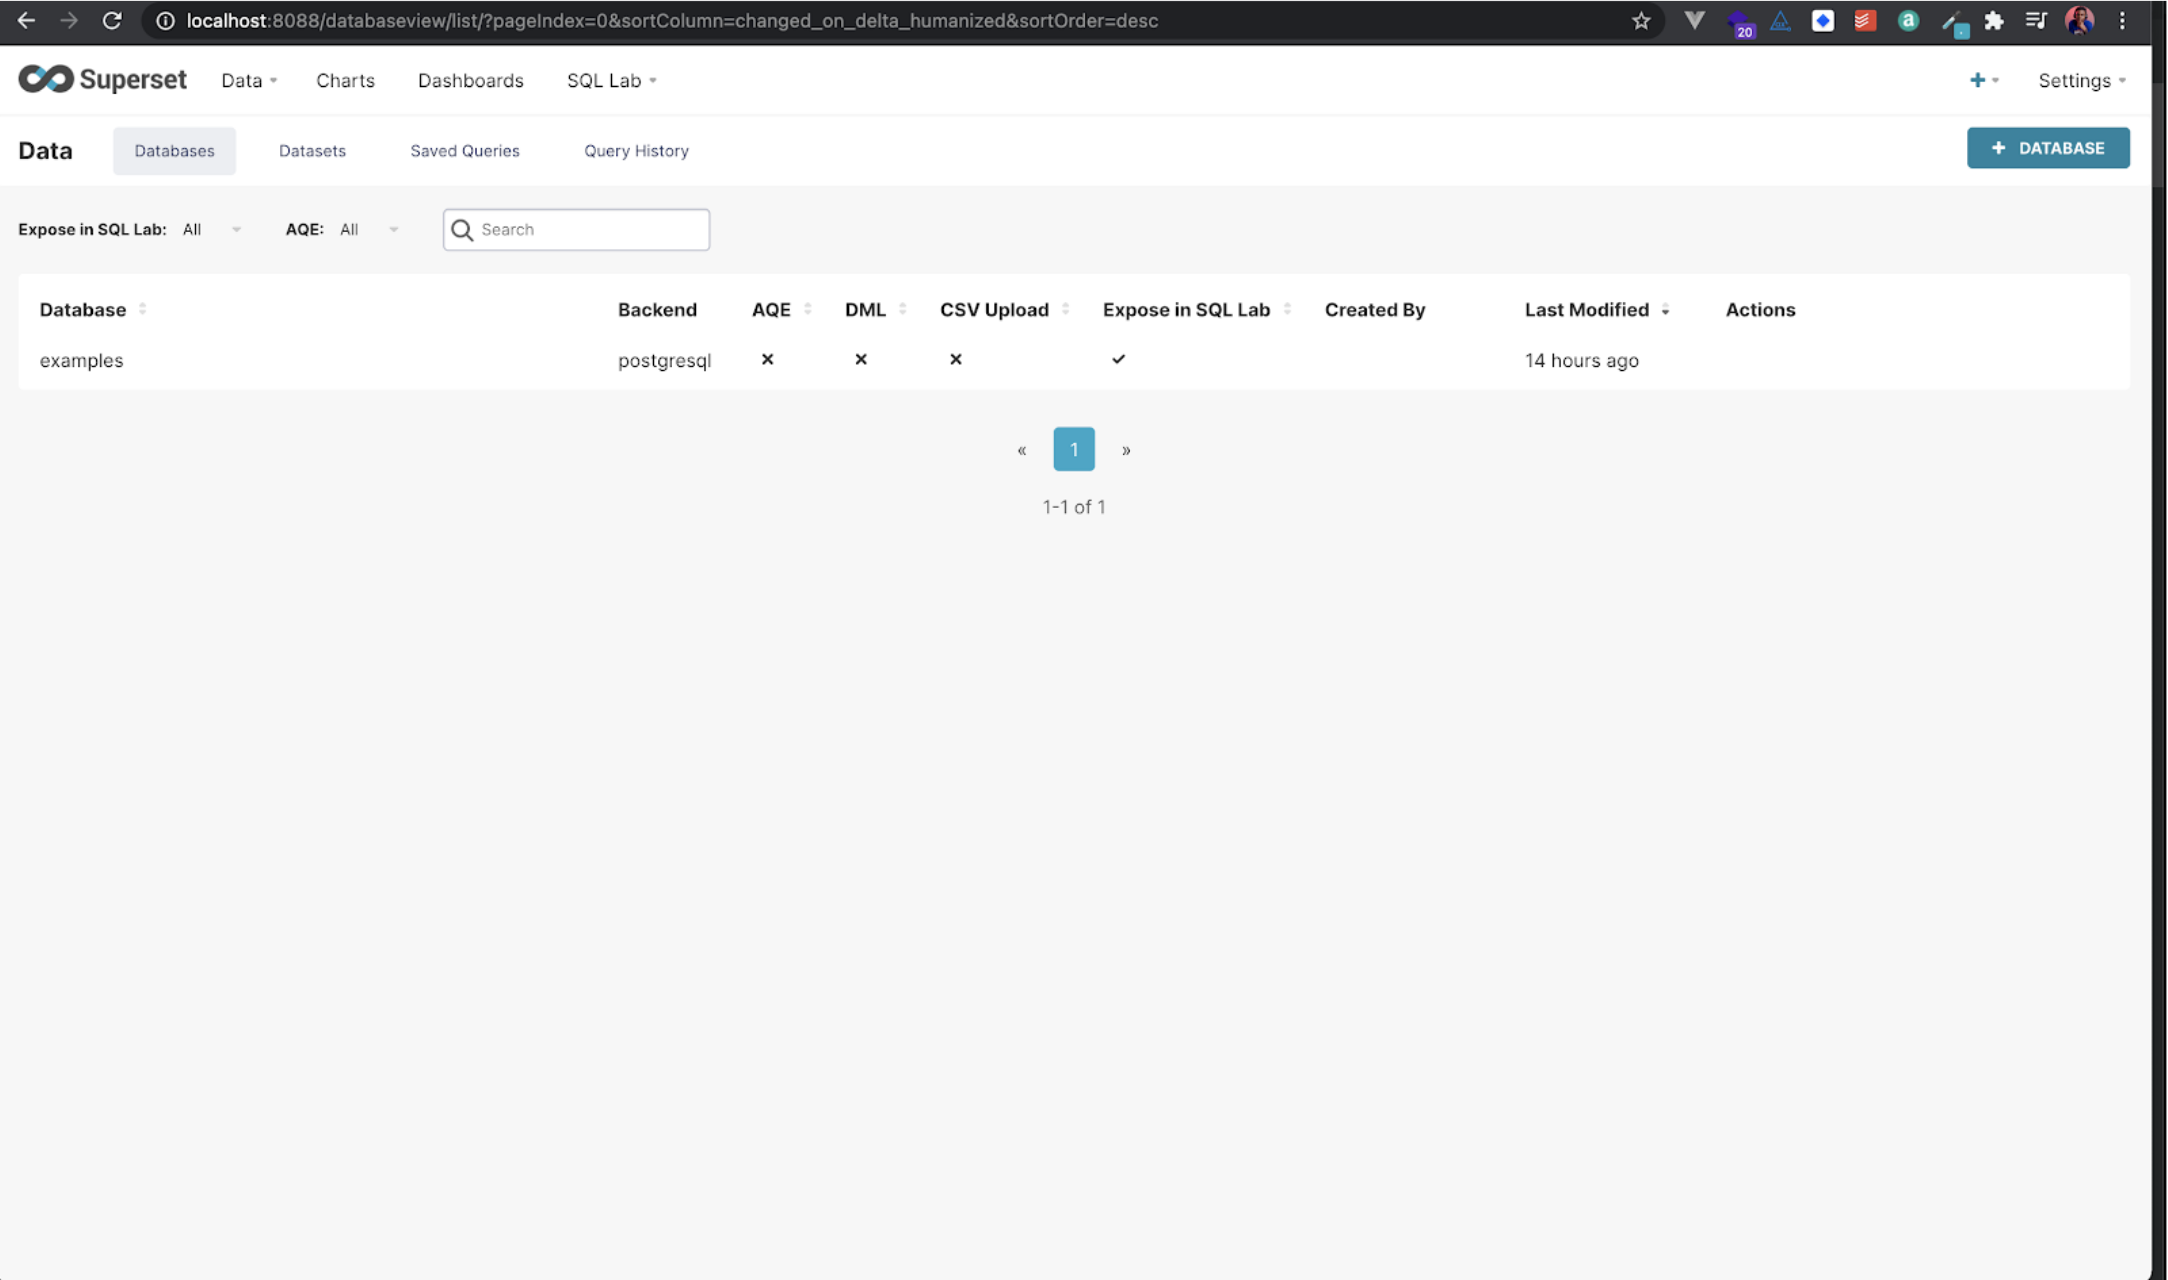
In the page that opens up, click on the + Database button in the top right corner.
Then, you will be presented with a modal to add your Database Name and the connection URI.
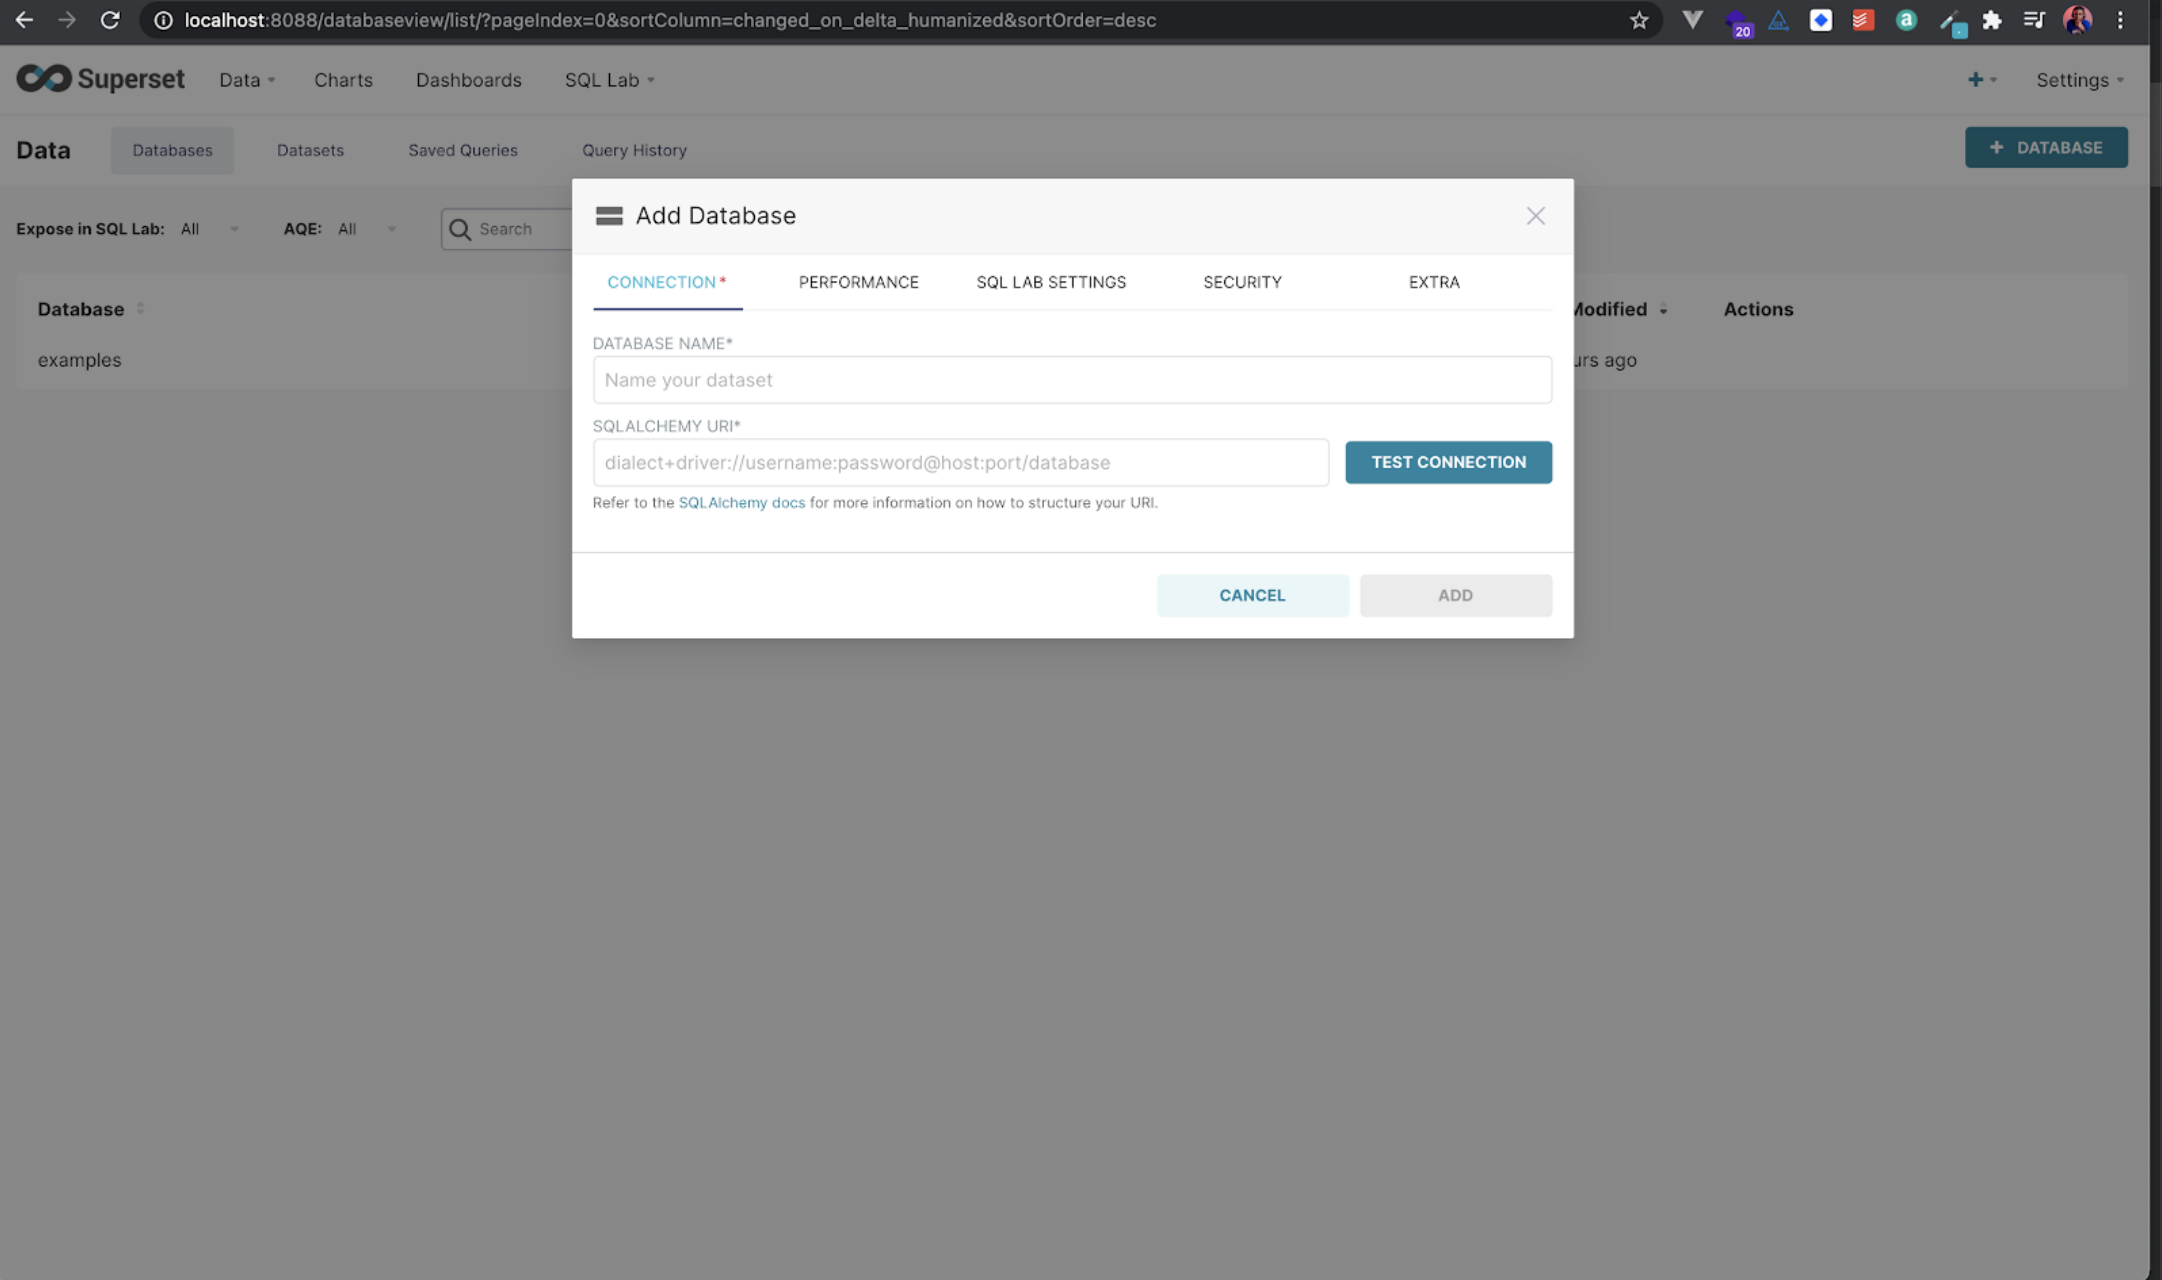
Let’s call our Database slack_db, and then add the following URI as the connection URI:
postgresql://postgres:password@docker.for.mac.localhost:2000/postgresIf you are on a Windows Machine, yours will be:
postgresql://postgres:password@docker.for.win.localhost:2000/postgresNote: We are using docker.for.[mac|win].localhost in order to access the localhost of your machine, because using just localhost will point to the Docker container network and not your machine’s network.
Your Superset UI should look like this:

We will need to enable some settings on this connection. Click on the SQL LAB SETTINGS and check the following boxes:
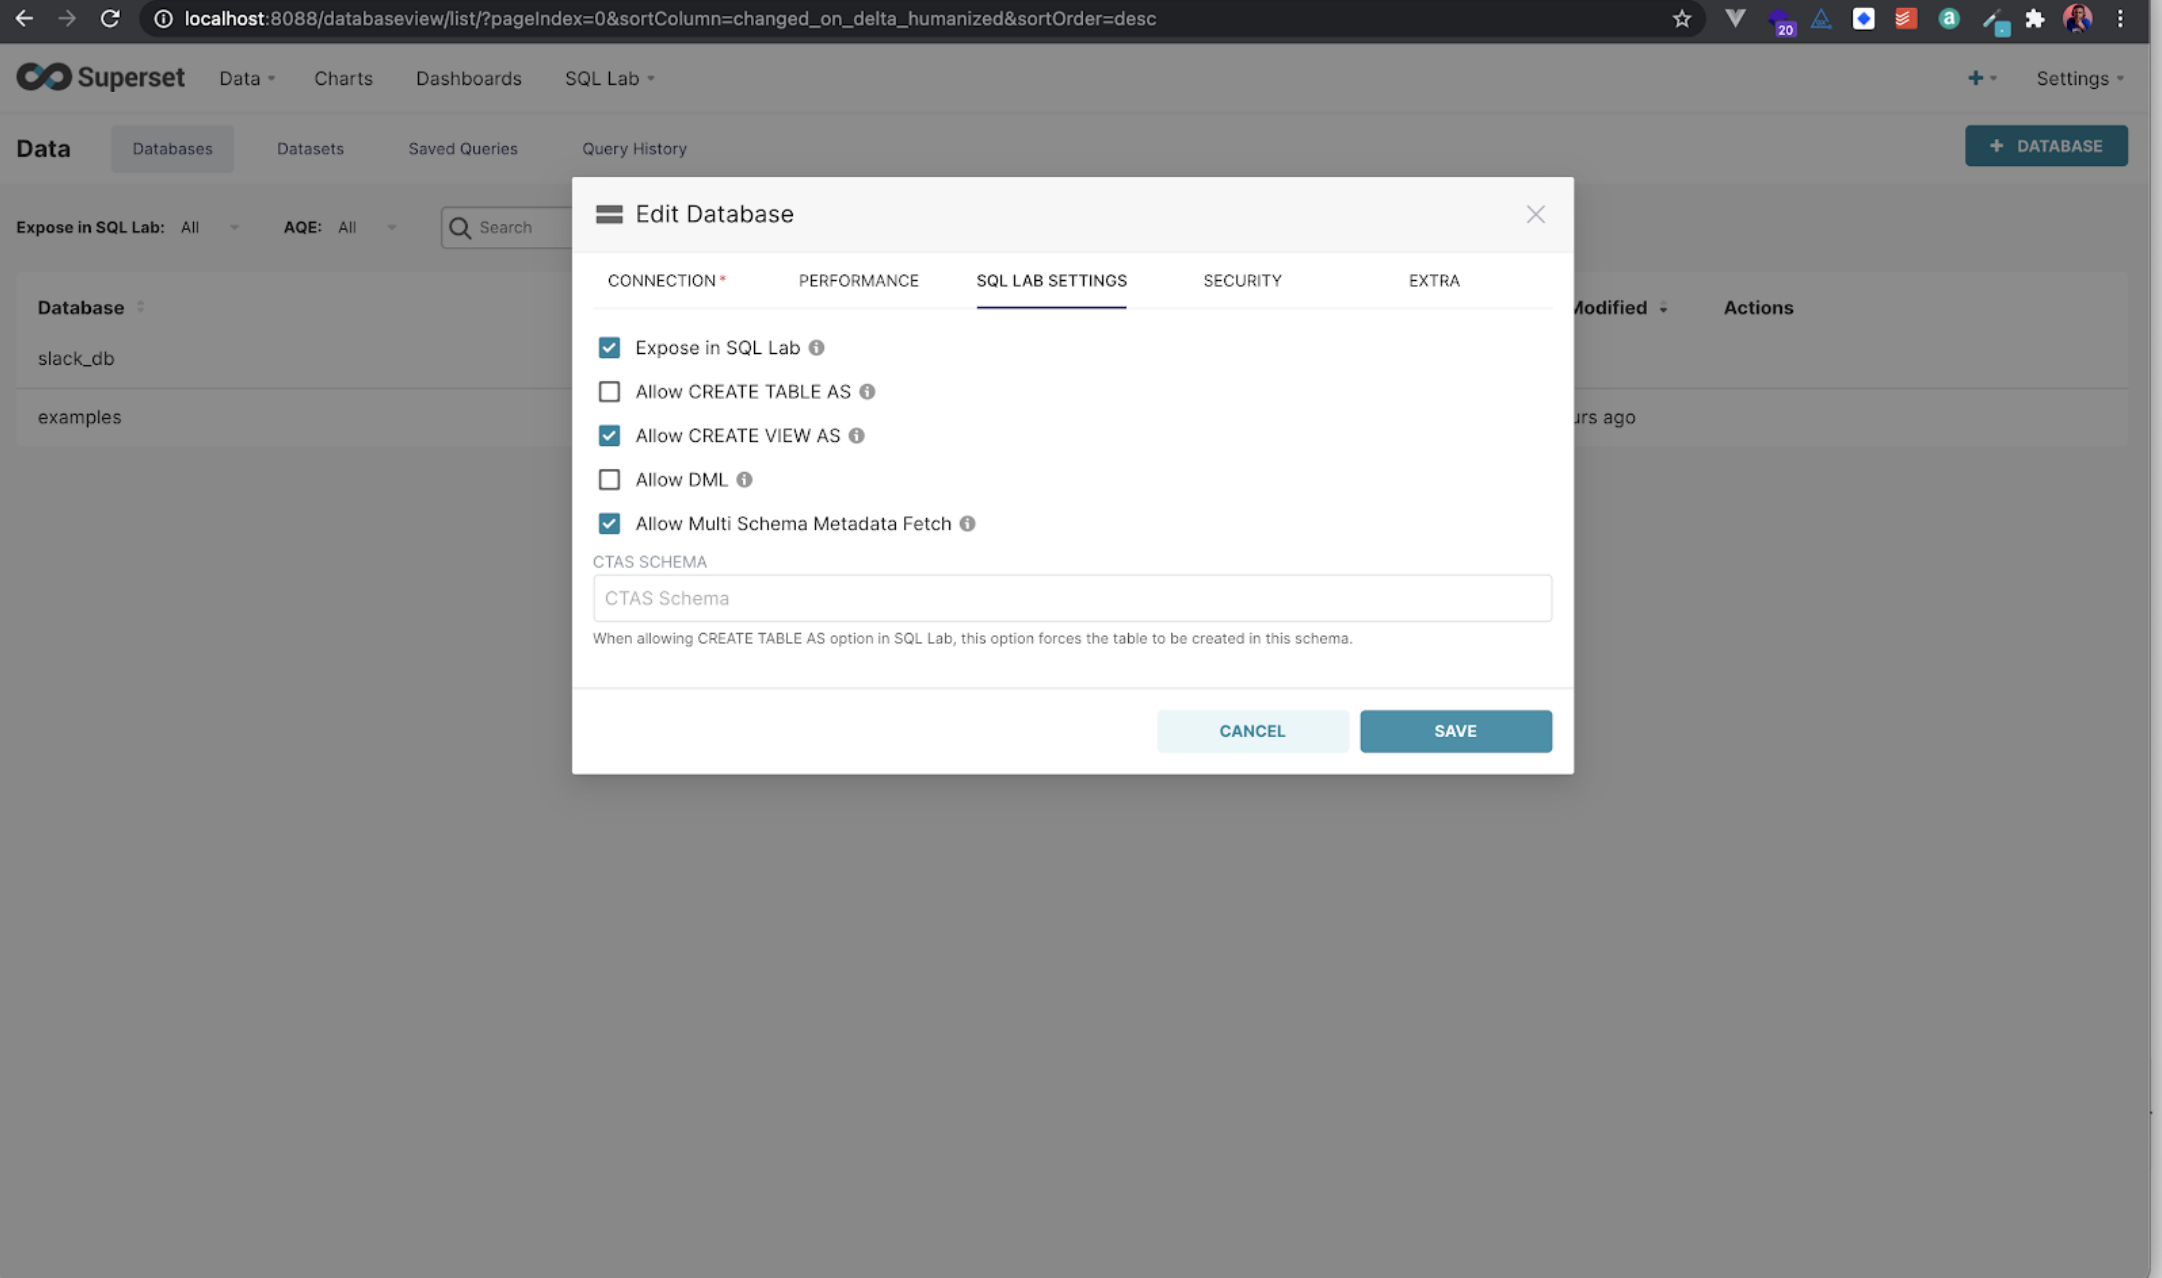
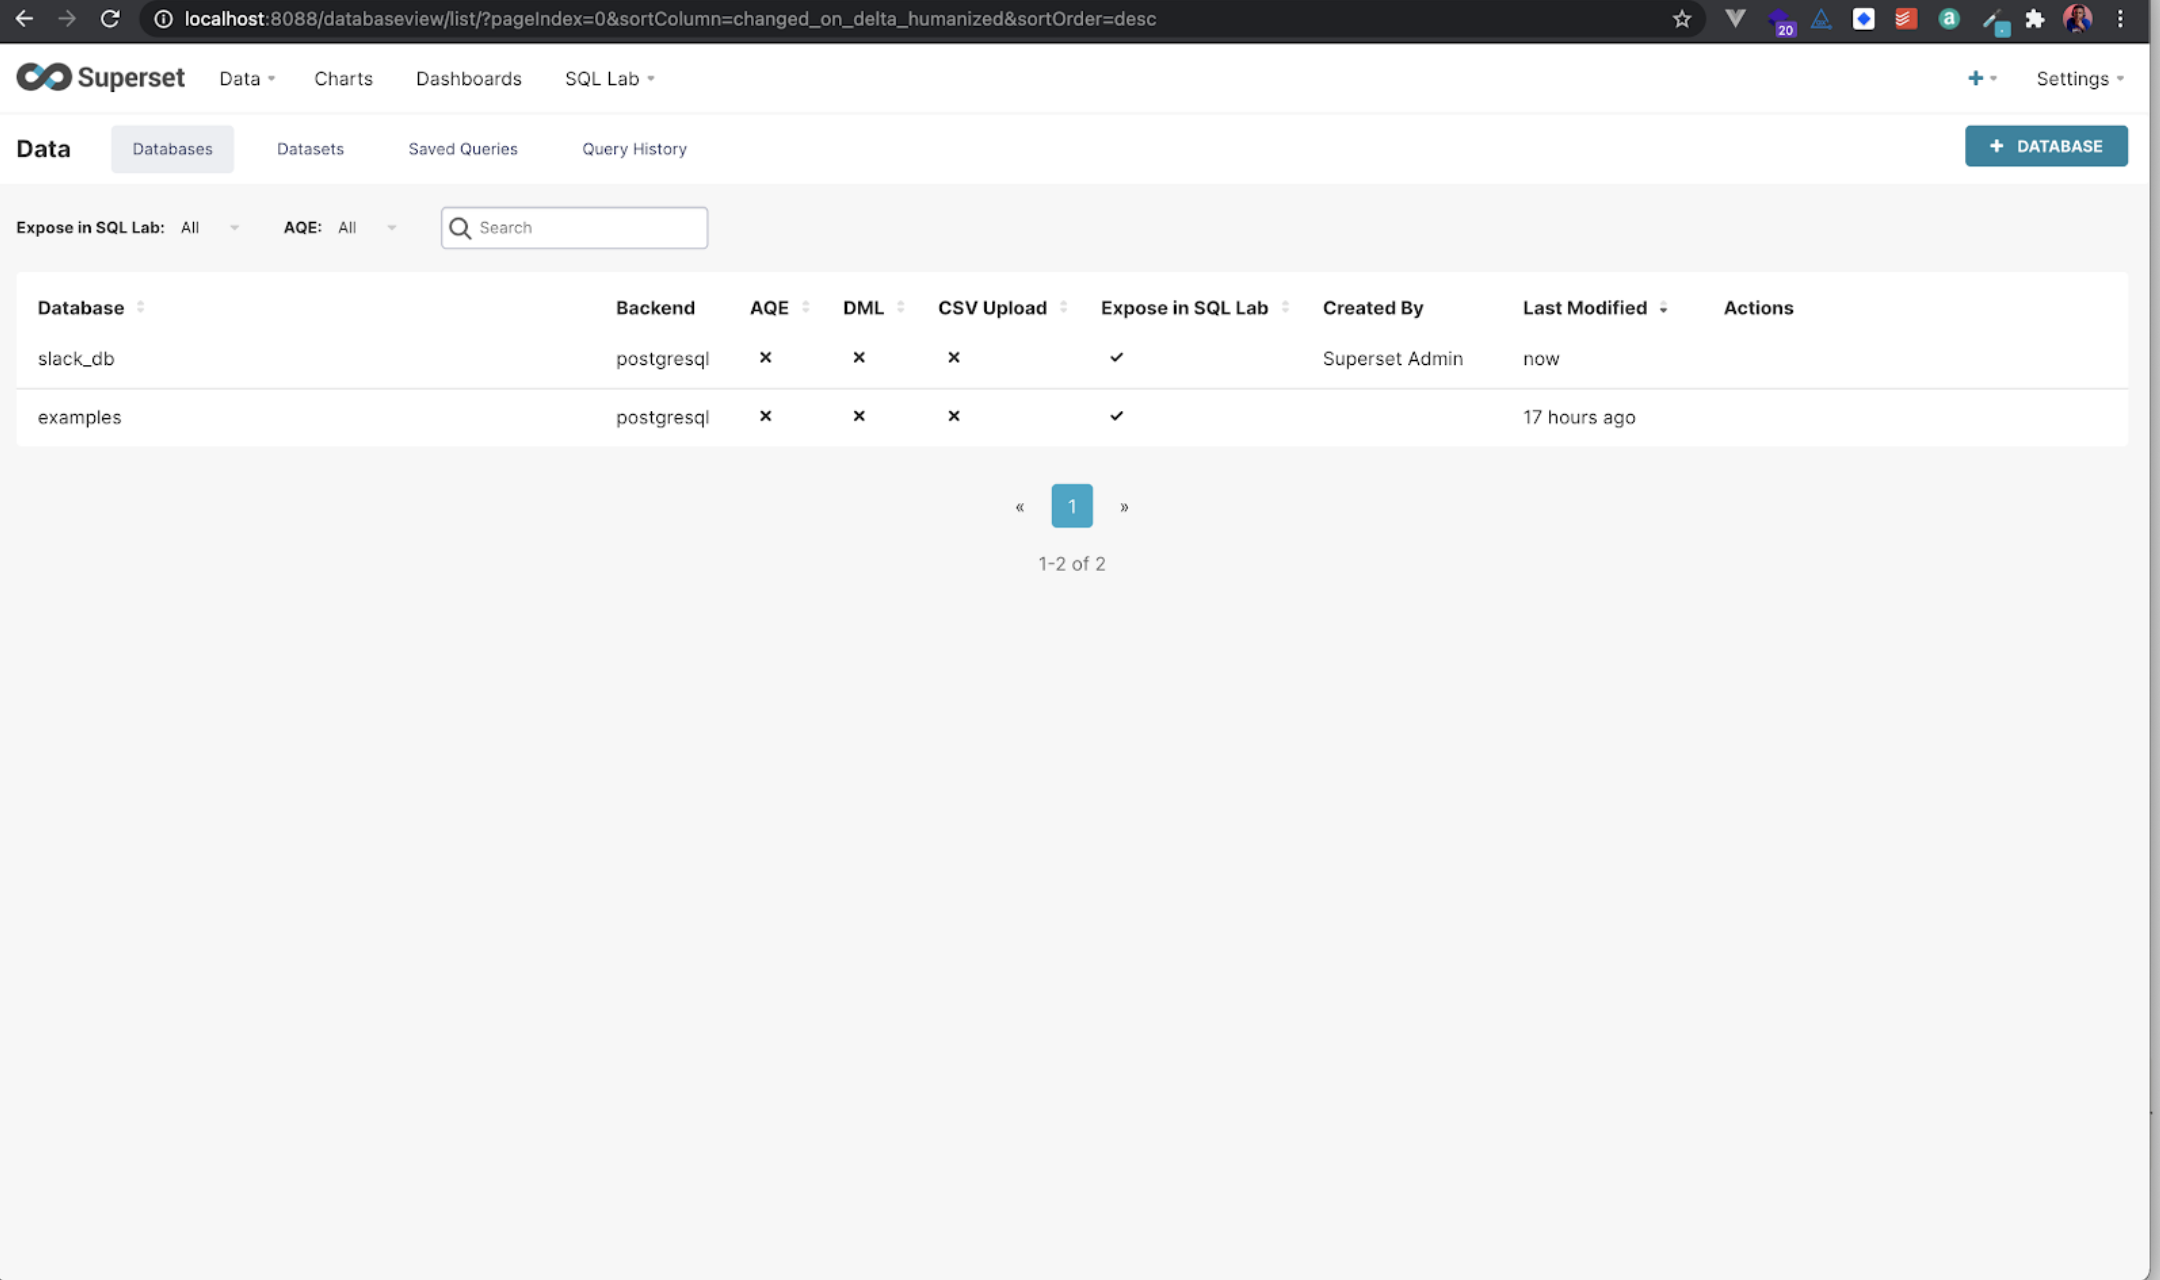
Afterwards, click on the ADD button, and you will see your database on the data page of Superset.
Importing our dataset
Now that you’ve added the database, you will need to hover over the data menu again; now click on Datasets.
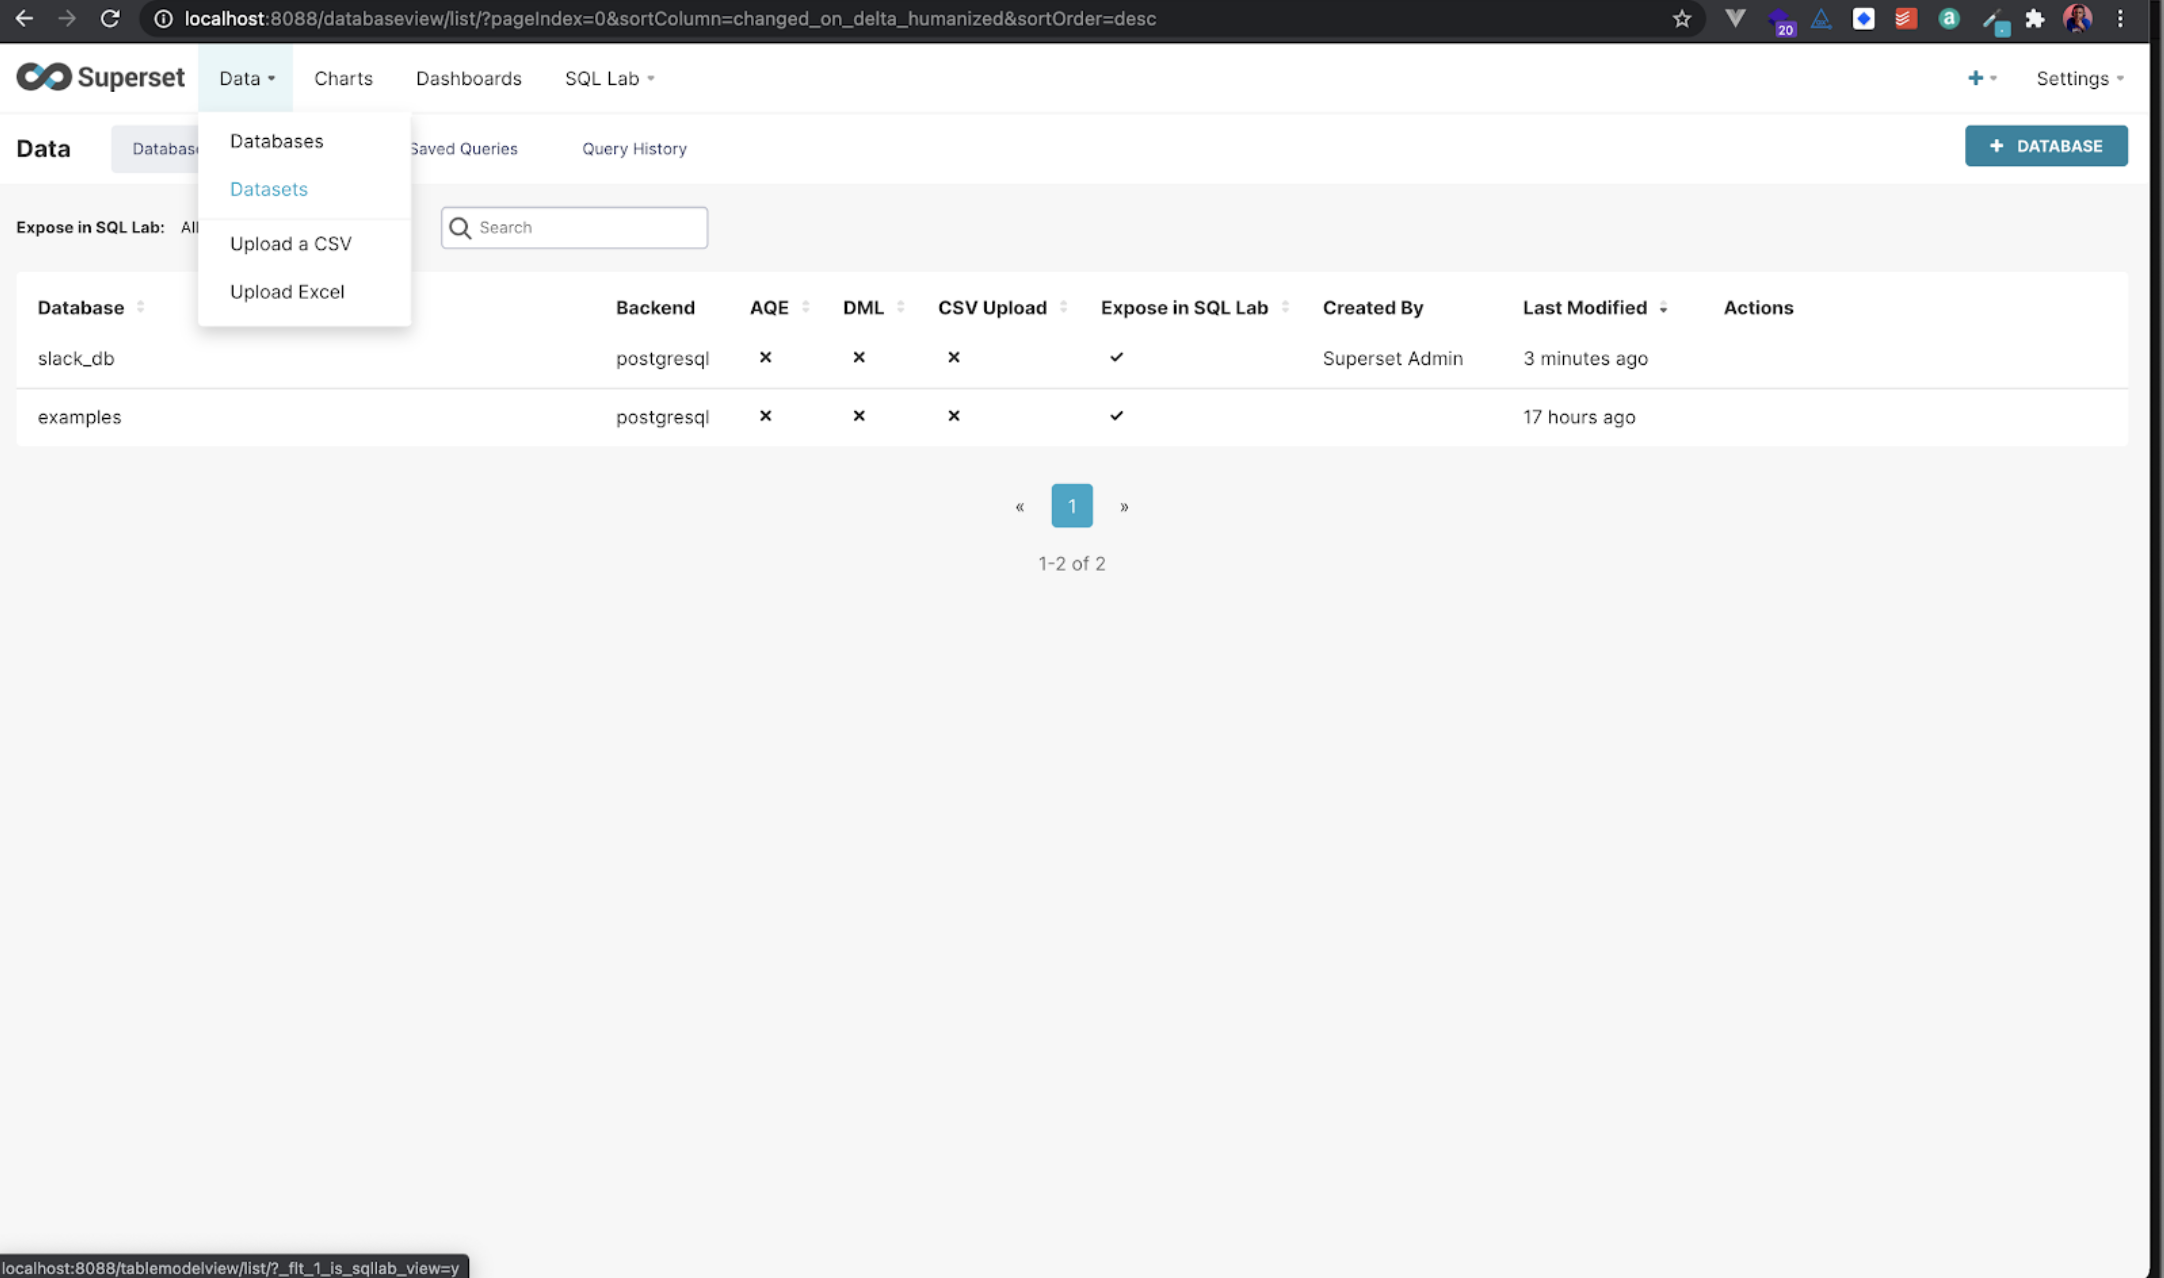
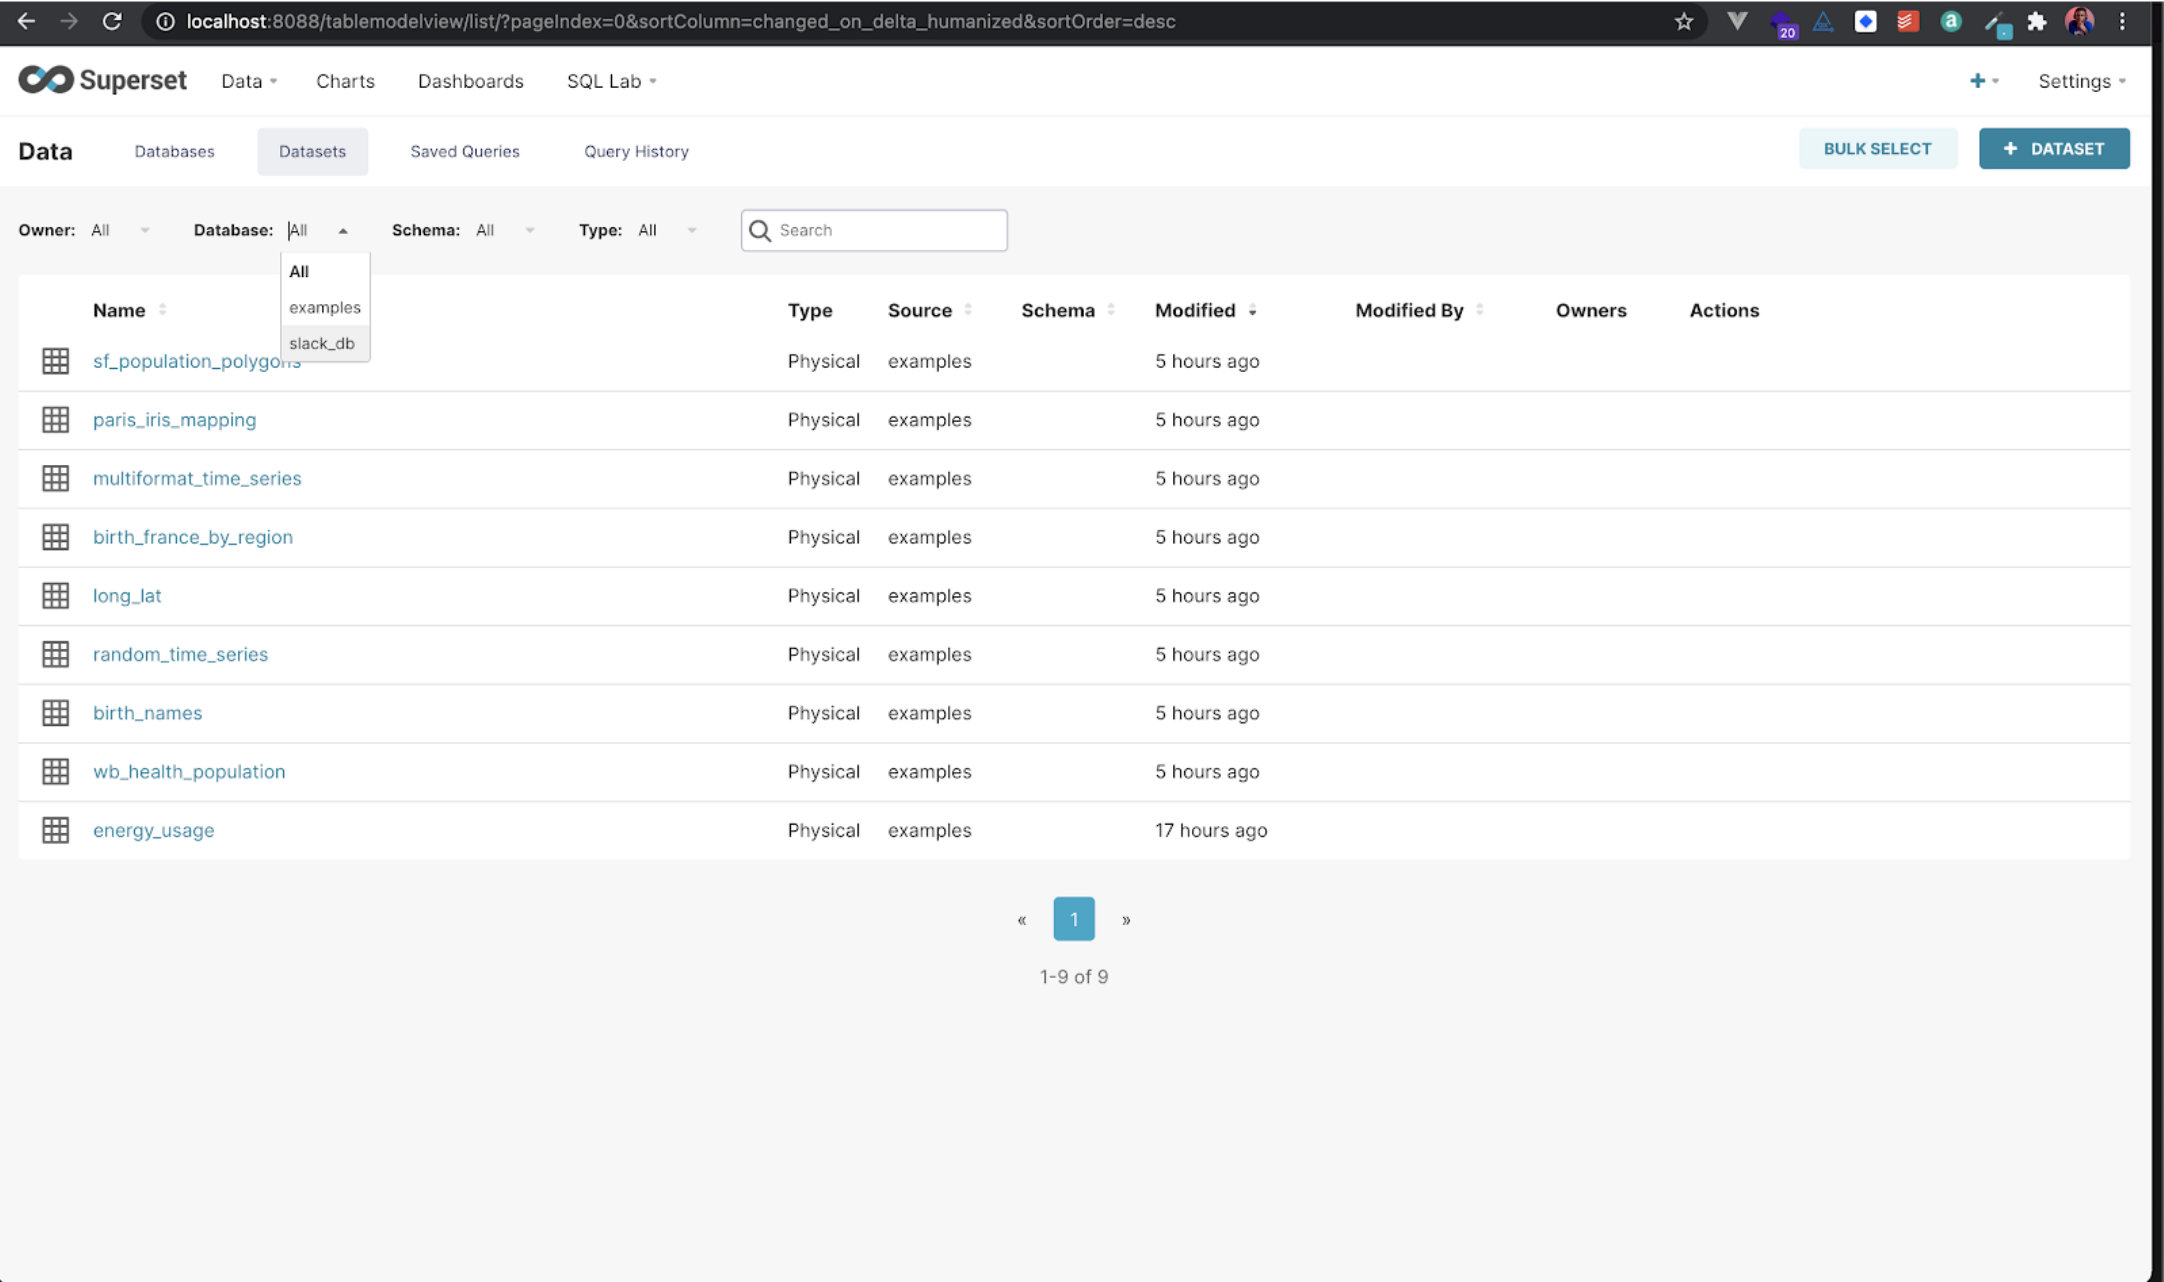
Then, you will be taken to the datasets page:

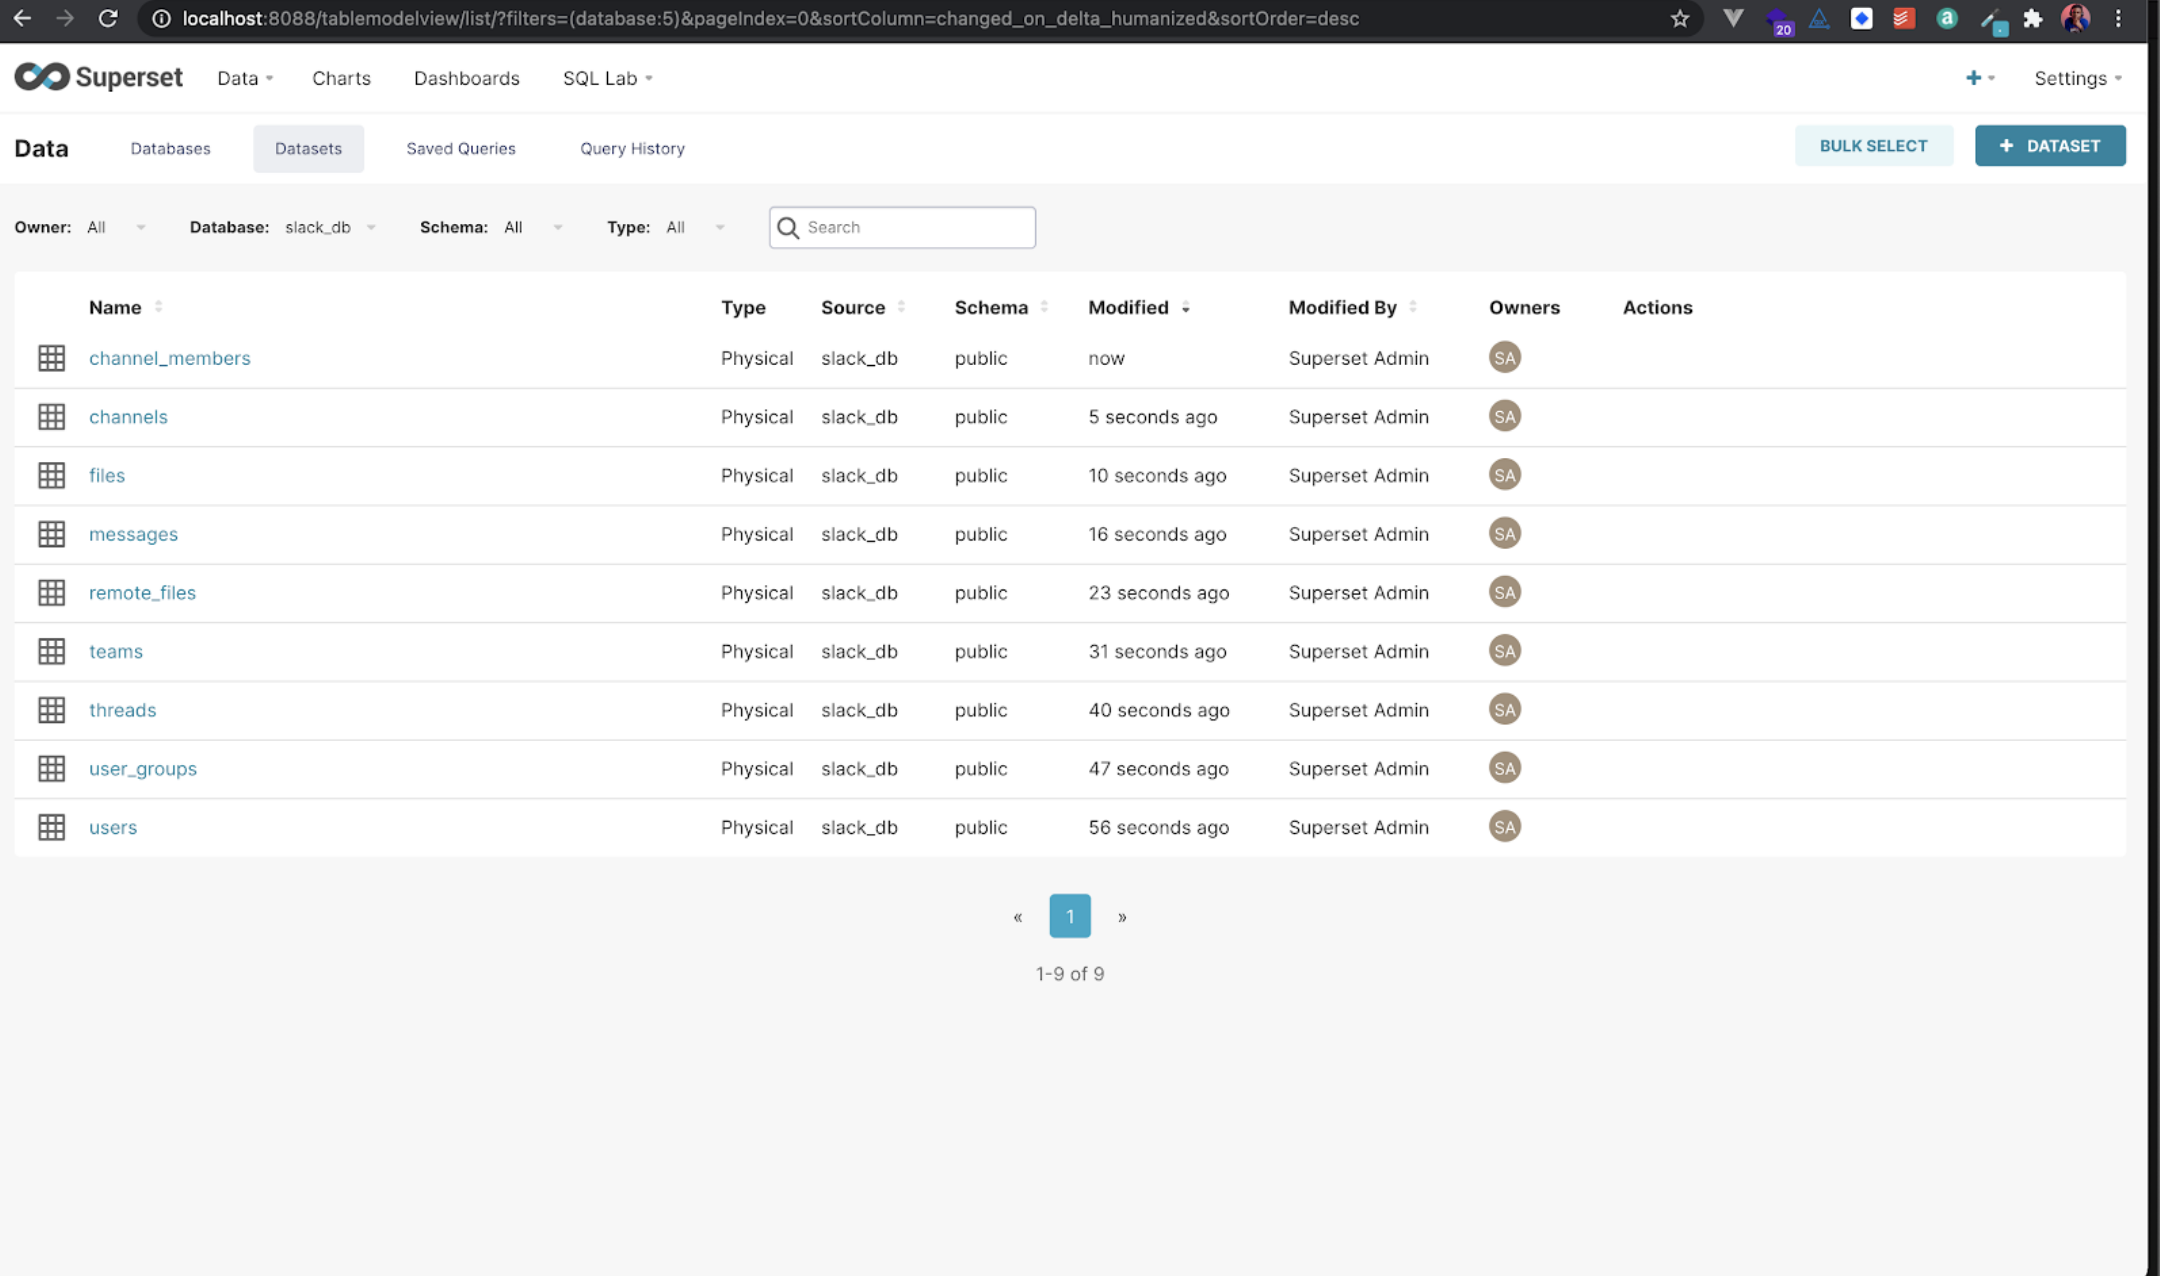
We want to only see the datasets that are in our slack_db database, so in the Database that is currently showing All, select slack_db and you will see that we don’t have any datasets at the moment.
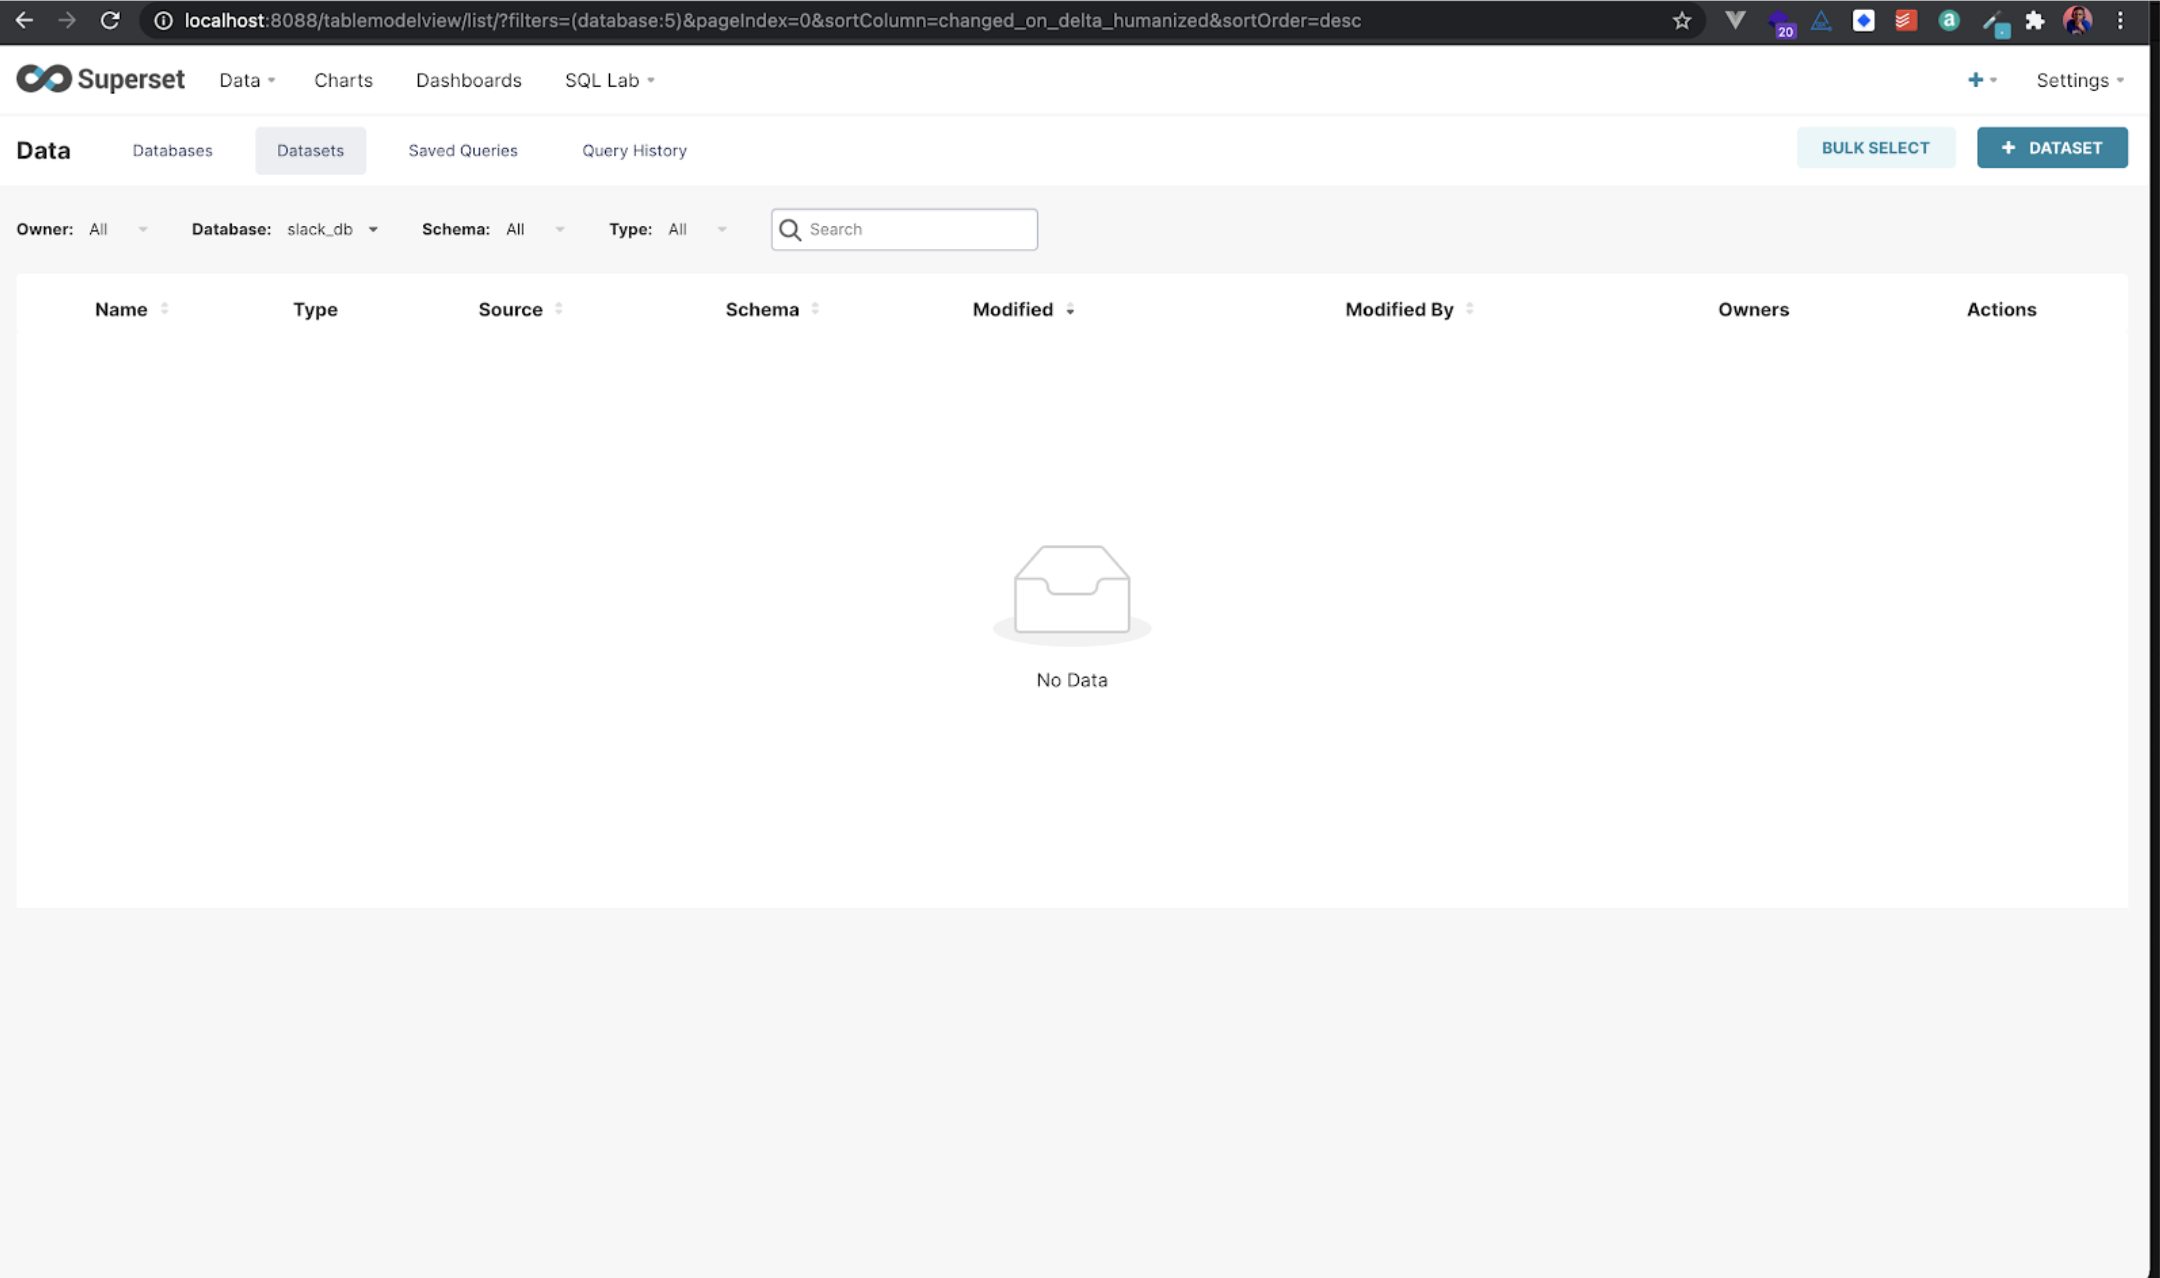
You can fix this by clicking on the + DATASET button and adding the following datasets.
Note: Make sure you select the public schema under the Schema dropdown.
Now that we have set up Superset and given it our Slack data, let’s proceed to creating the visualizations we need.
Still remember them? Here they are again:
- Total number of members of a Slack workspace
- The evolution of the number of Slack workspace members
- Evolution of weekly messages
- Evolution of weekly threads created
- Evolution of messages per channel
- Members per time zone
Creating Our Dashboards with Superset
Total number of members of a Slack workspace
To get this, we will first click on the users’ dataset of our slack_db on the Superset dashboard.

Next, change untitled at the top to Number of Members.
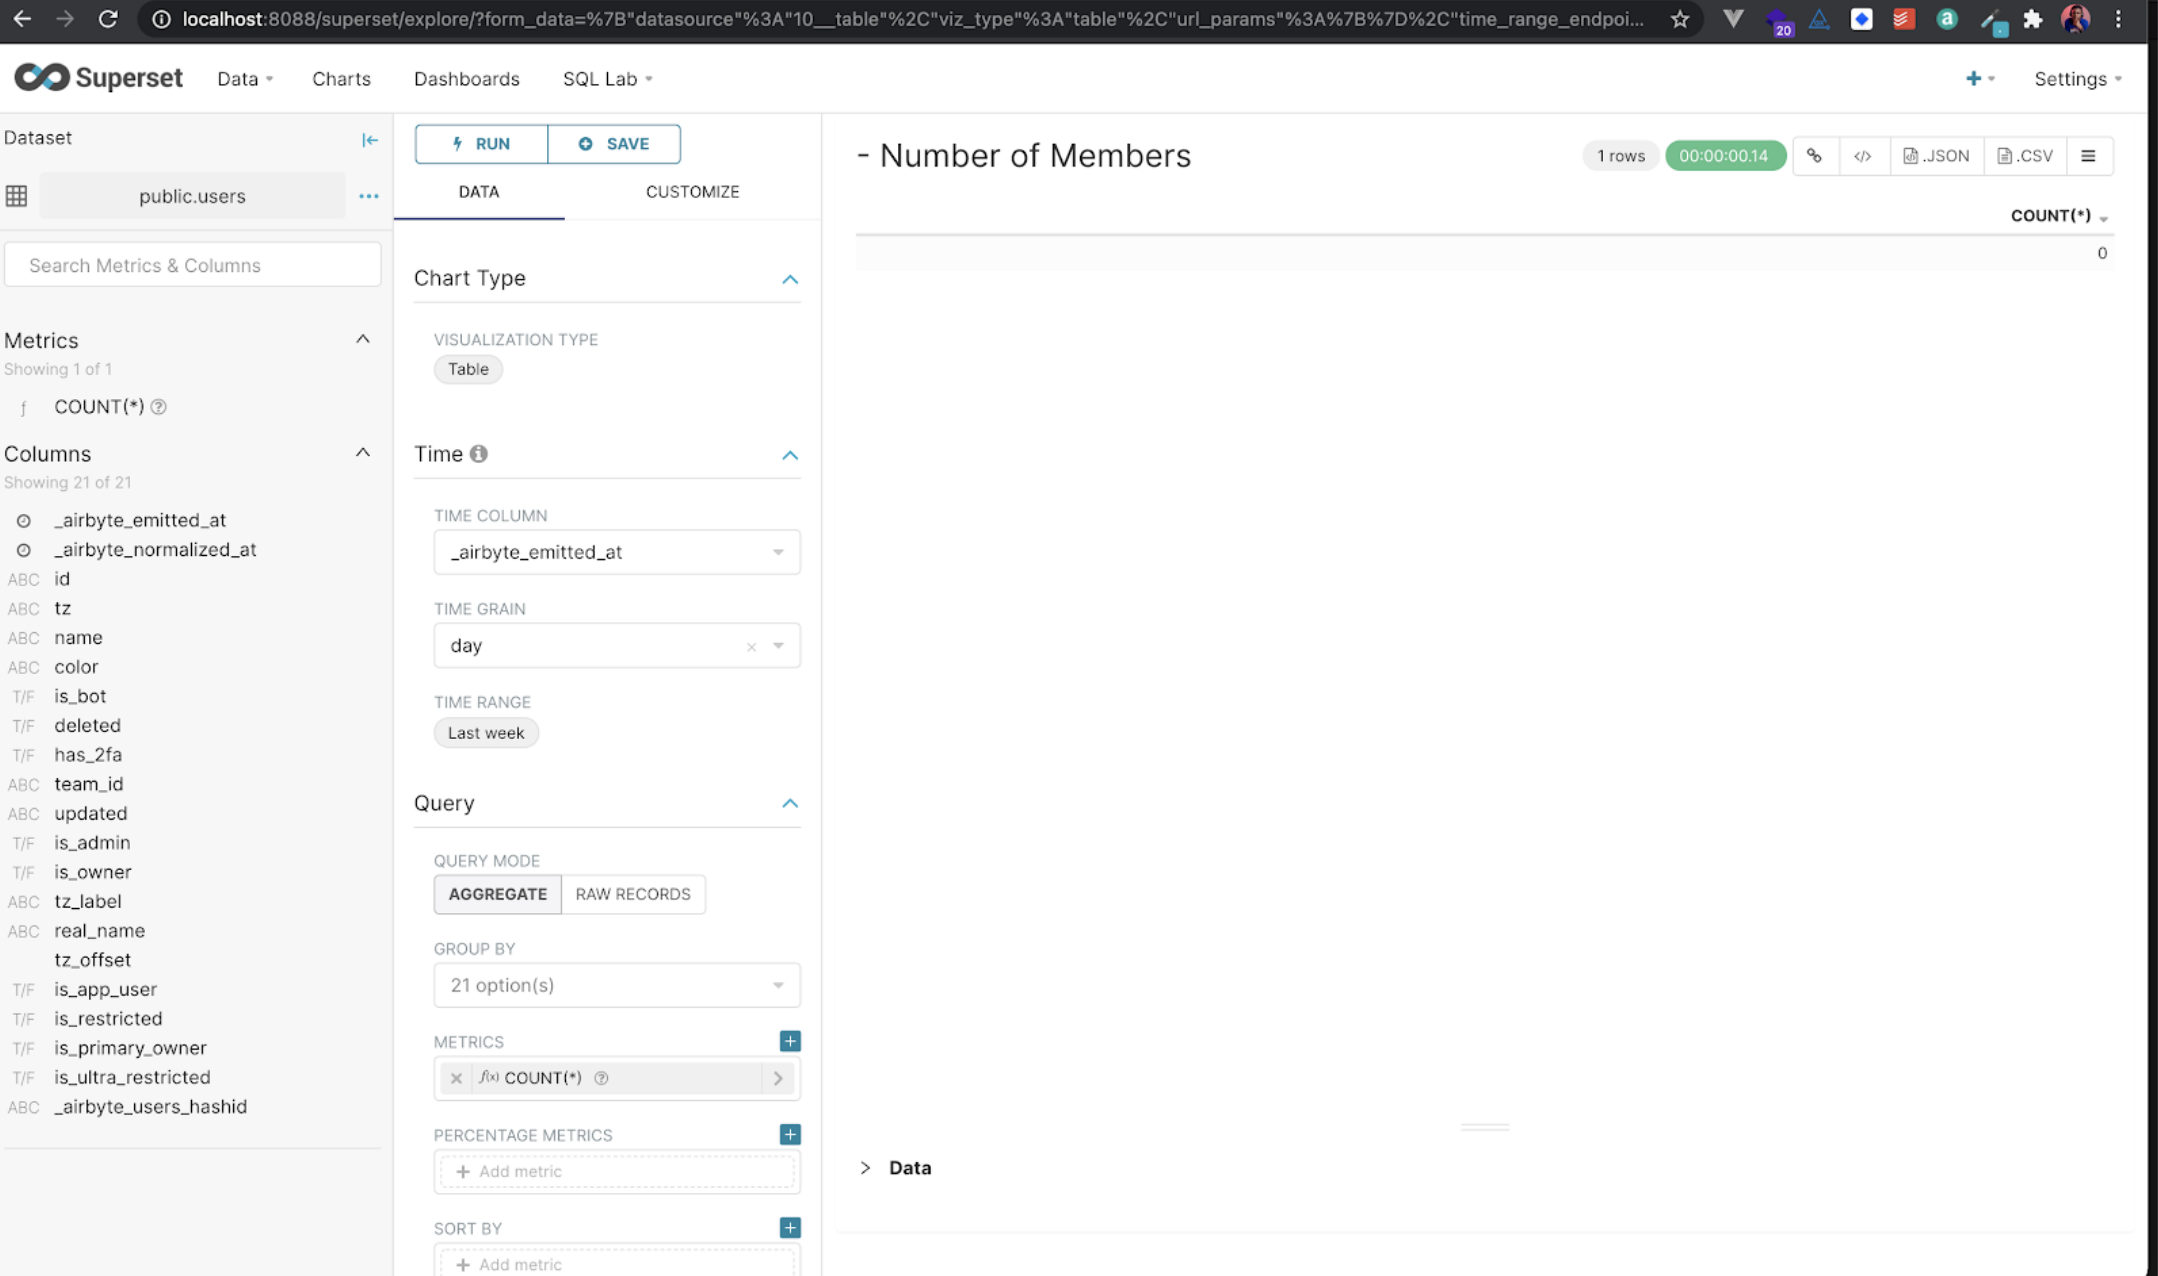
Now change the Visualization Type to Big Number, remove the Time Range filter, and add a Subheader named “Slack Members.” So your UI should look like this:
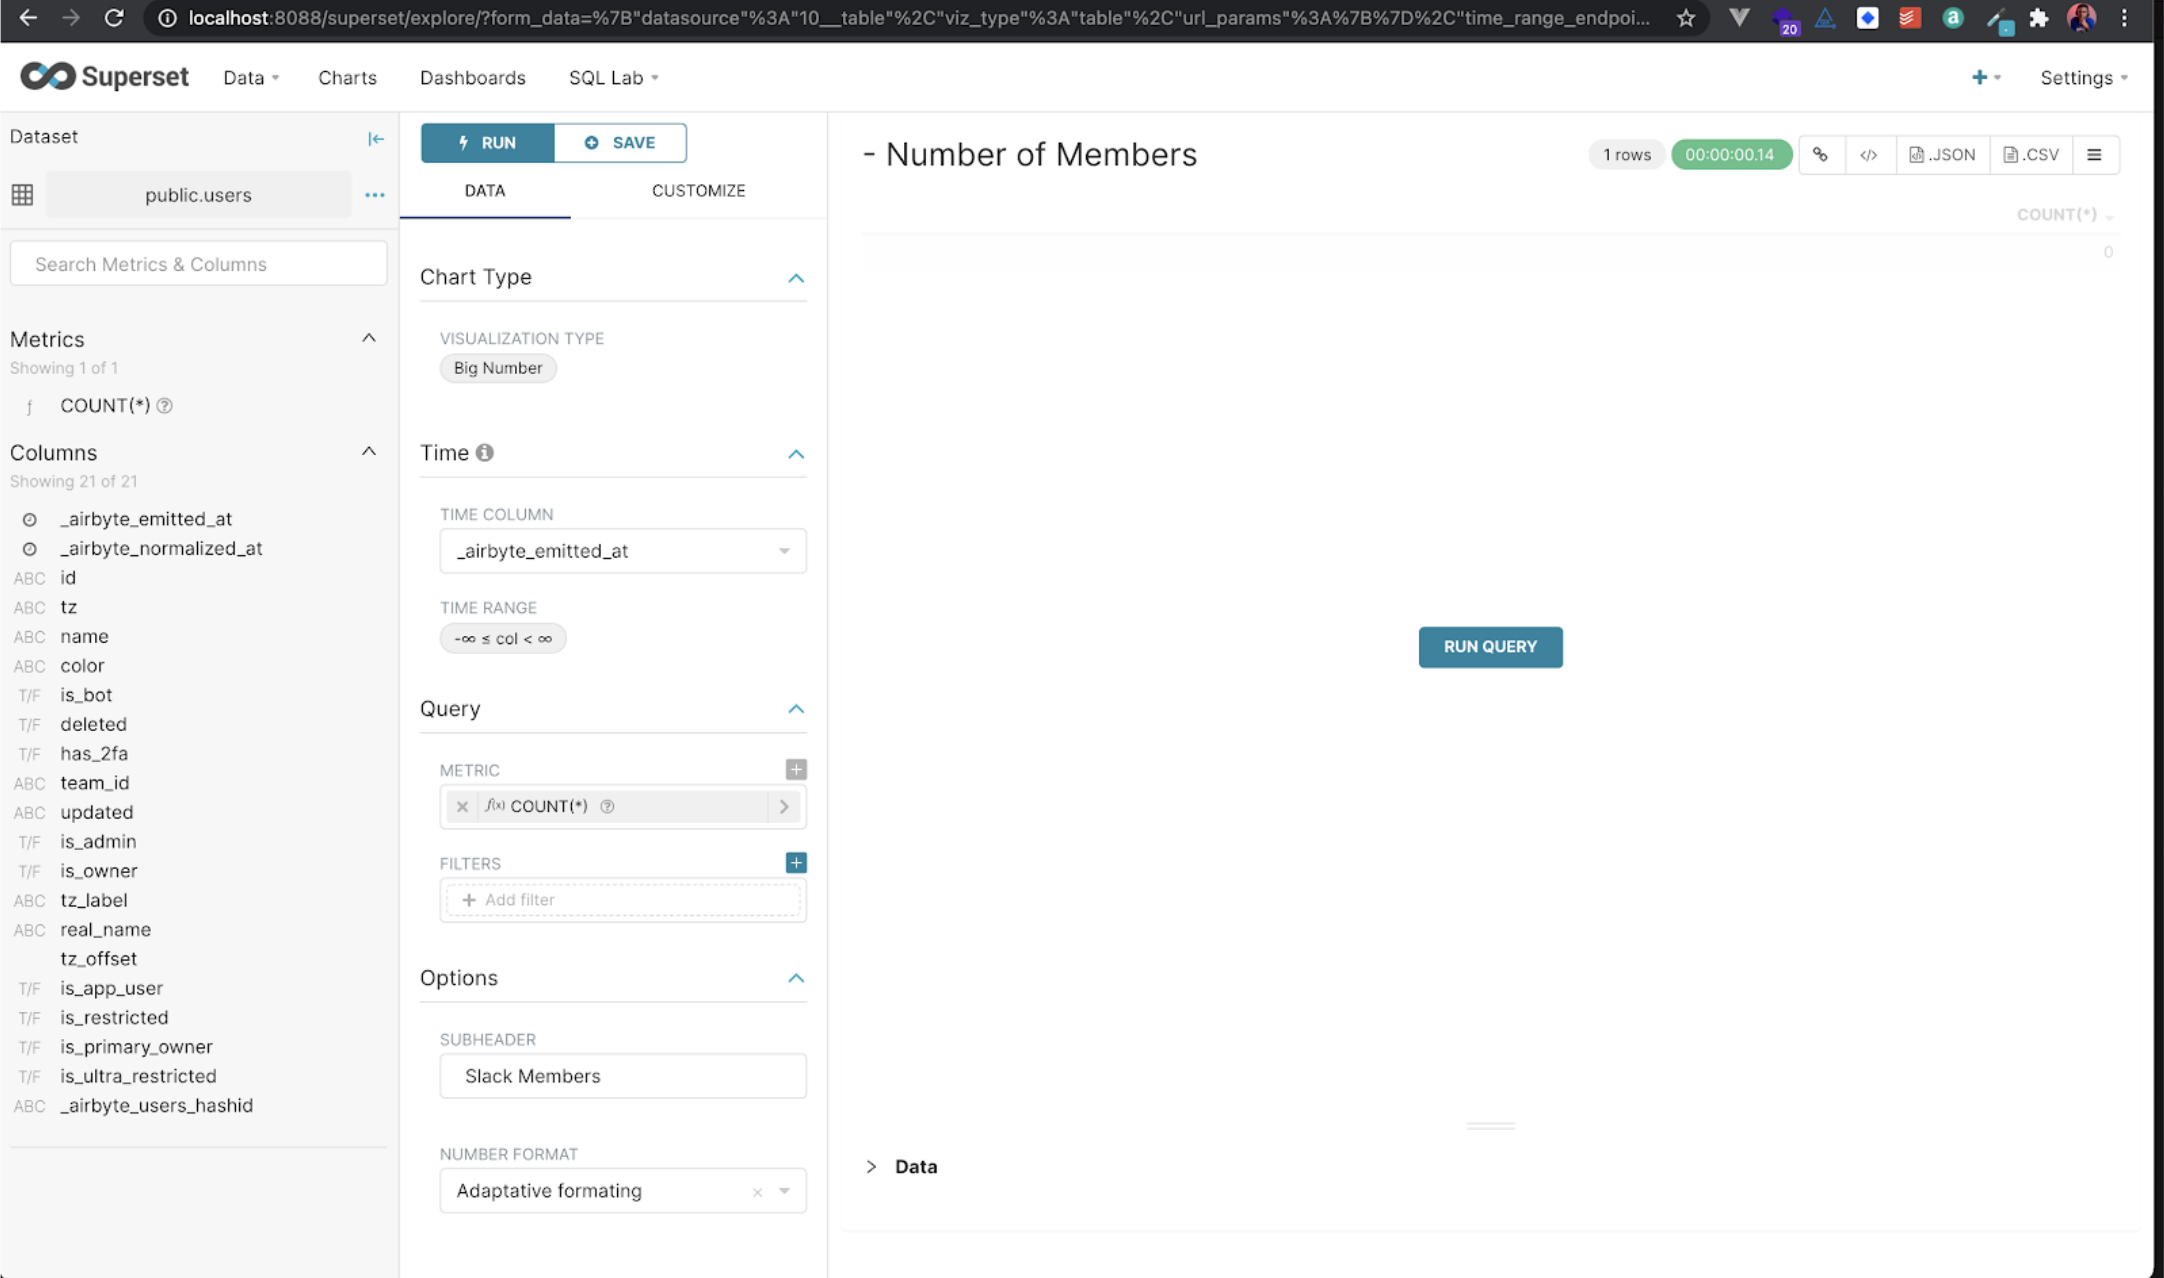
Then, click on the RUN QUERY button, and you should now see the total number of members.
Pretty cool, right? Now let’s save this chart by clicking on the SAVE button.

Then, in the ADD TO DASHBOARD section, type in “Slack Dashboard”, click on the “Create Slack Dashboard” button, and then click the Save button.
Great! We have successfully created our first Chart, and we also created the Dashboard. Subsequently, we will be following this flow to add the other charts to the created Slack Dashboard.
Casting the ts column
Before we proceed with the rest of the charts for our dashboard, if you inspect the ts column on either the messages table or the threads table, you will see it’s of the type VARCHAR. We can’t really use this for our charts, so we have to cast both the messages and threads’ ts column as TIMESTAMP. Then, we can create our charts from the results of those queries. Let’s do this.
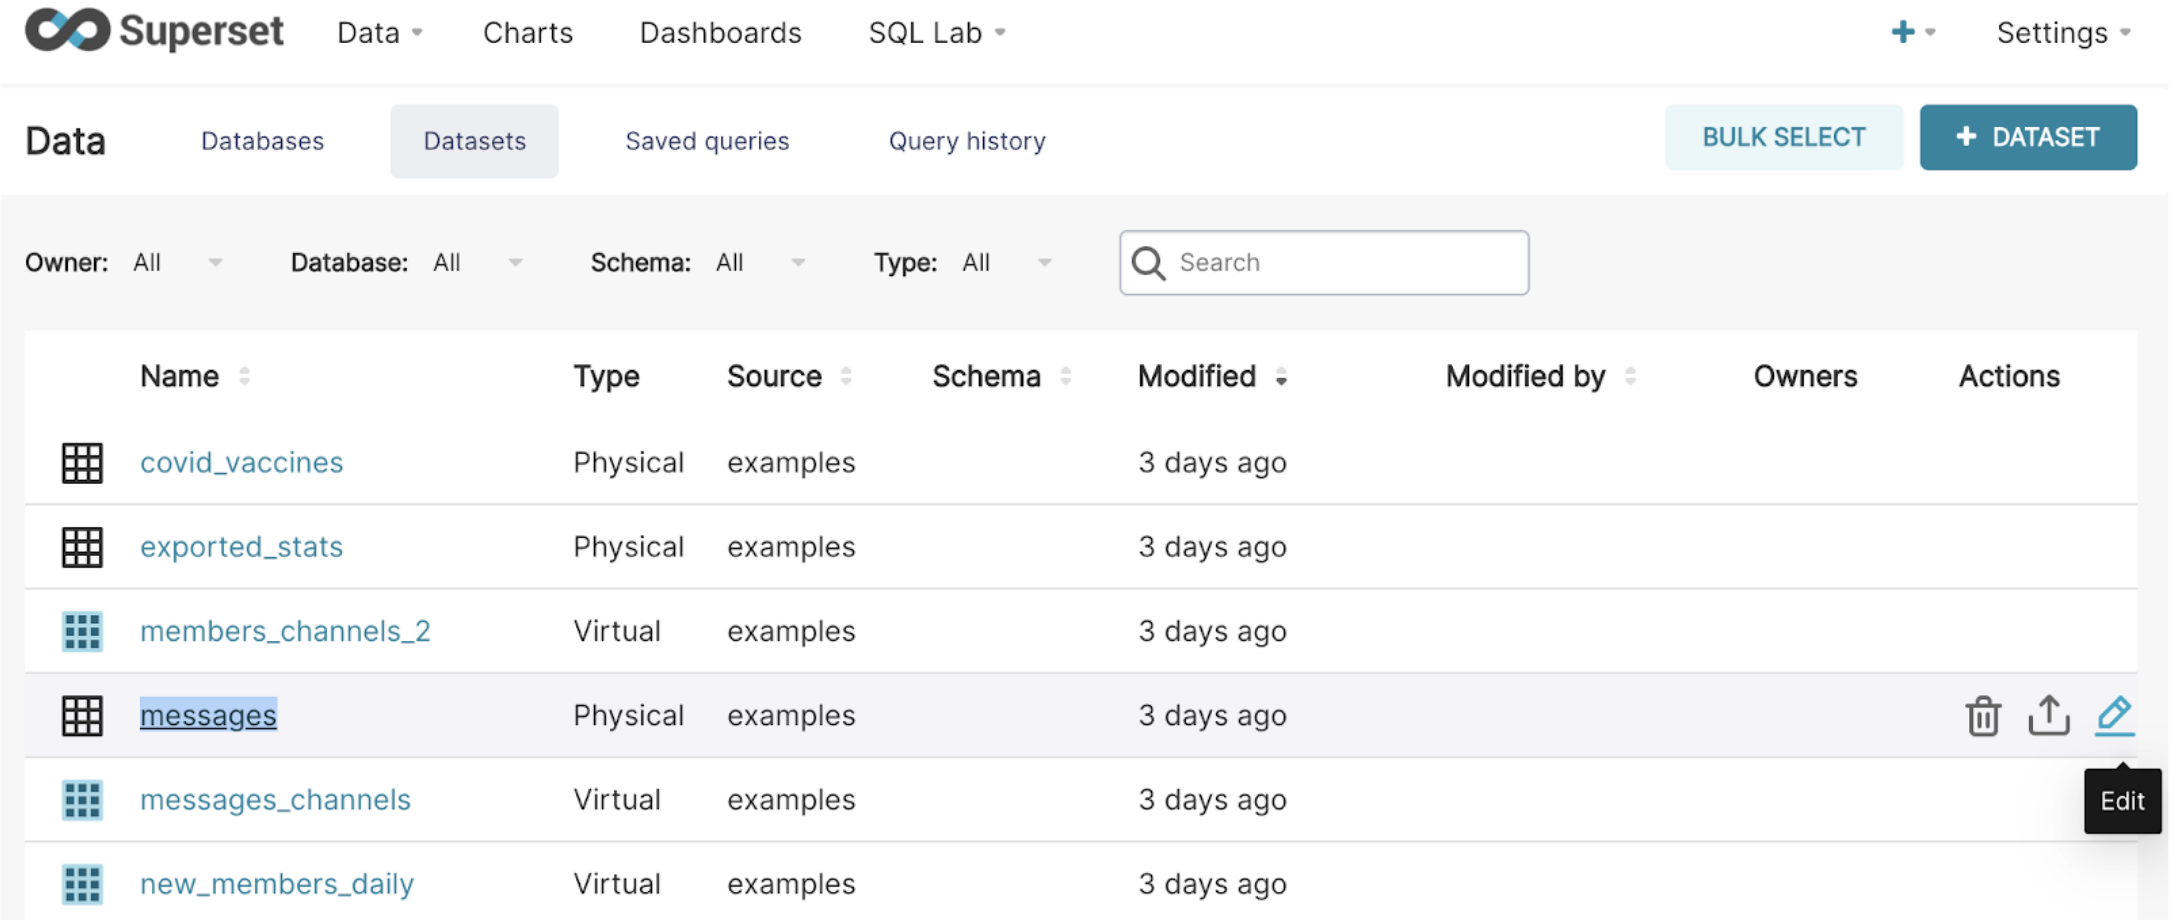
First, navigate to the Data menu, and click on the Datasets link. In the list of datasets, click the Edit button for the messages table.
You’re now in the Edit Dataset view. Click the Lock button to enable editing of the dataset. Then, navigate to the Columns tab, expand the ts dropdown, and then tick the Is Temporal box.
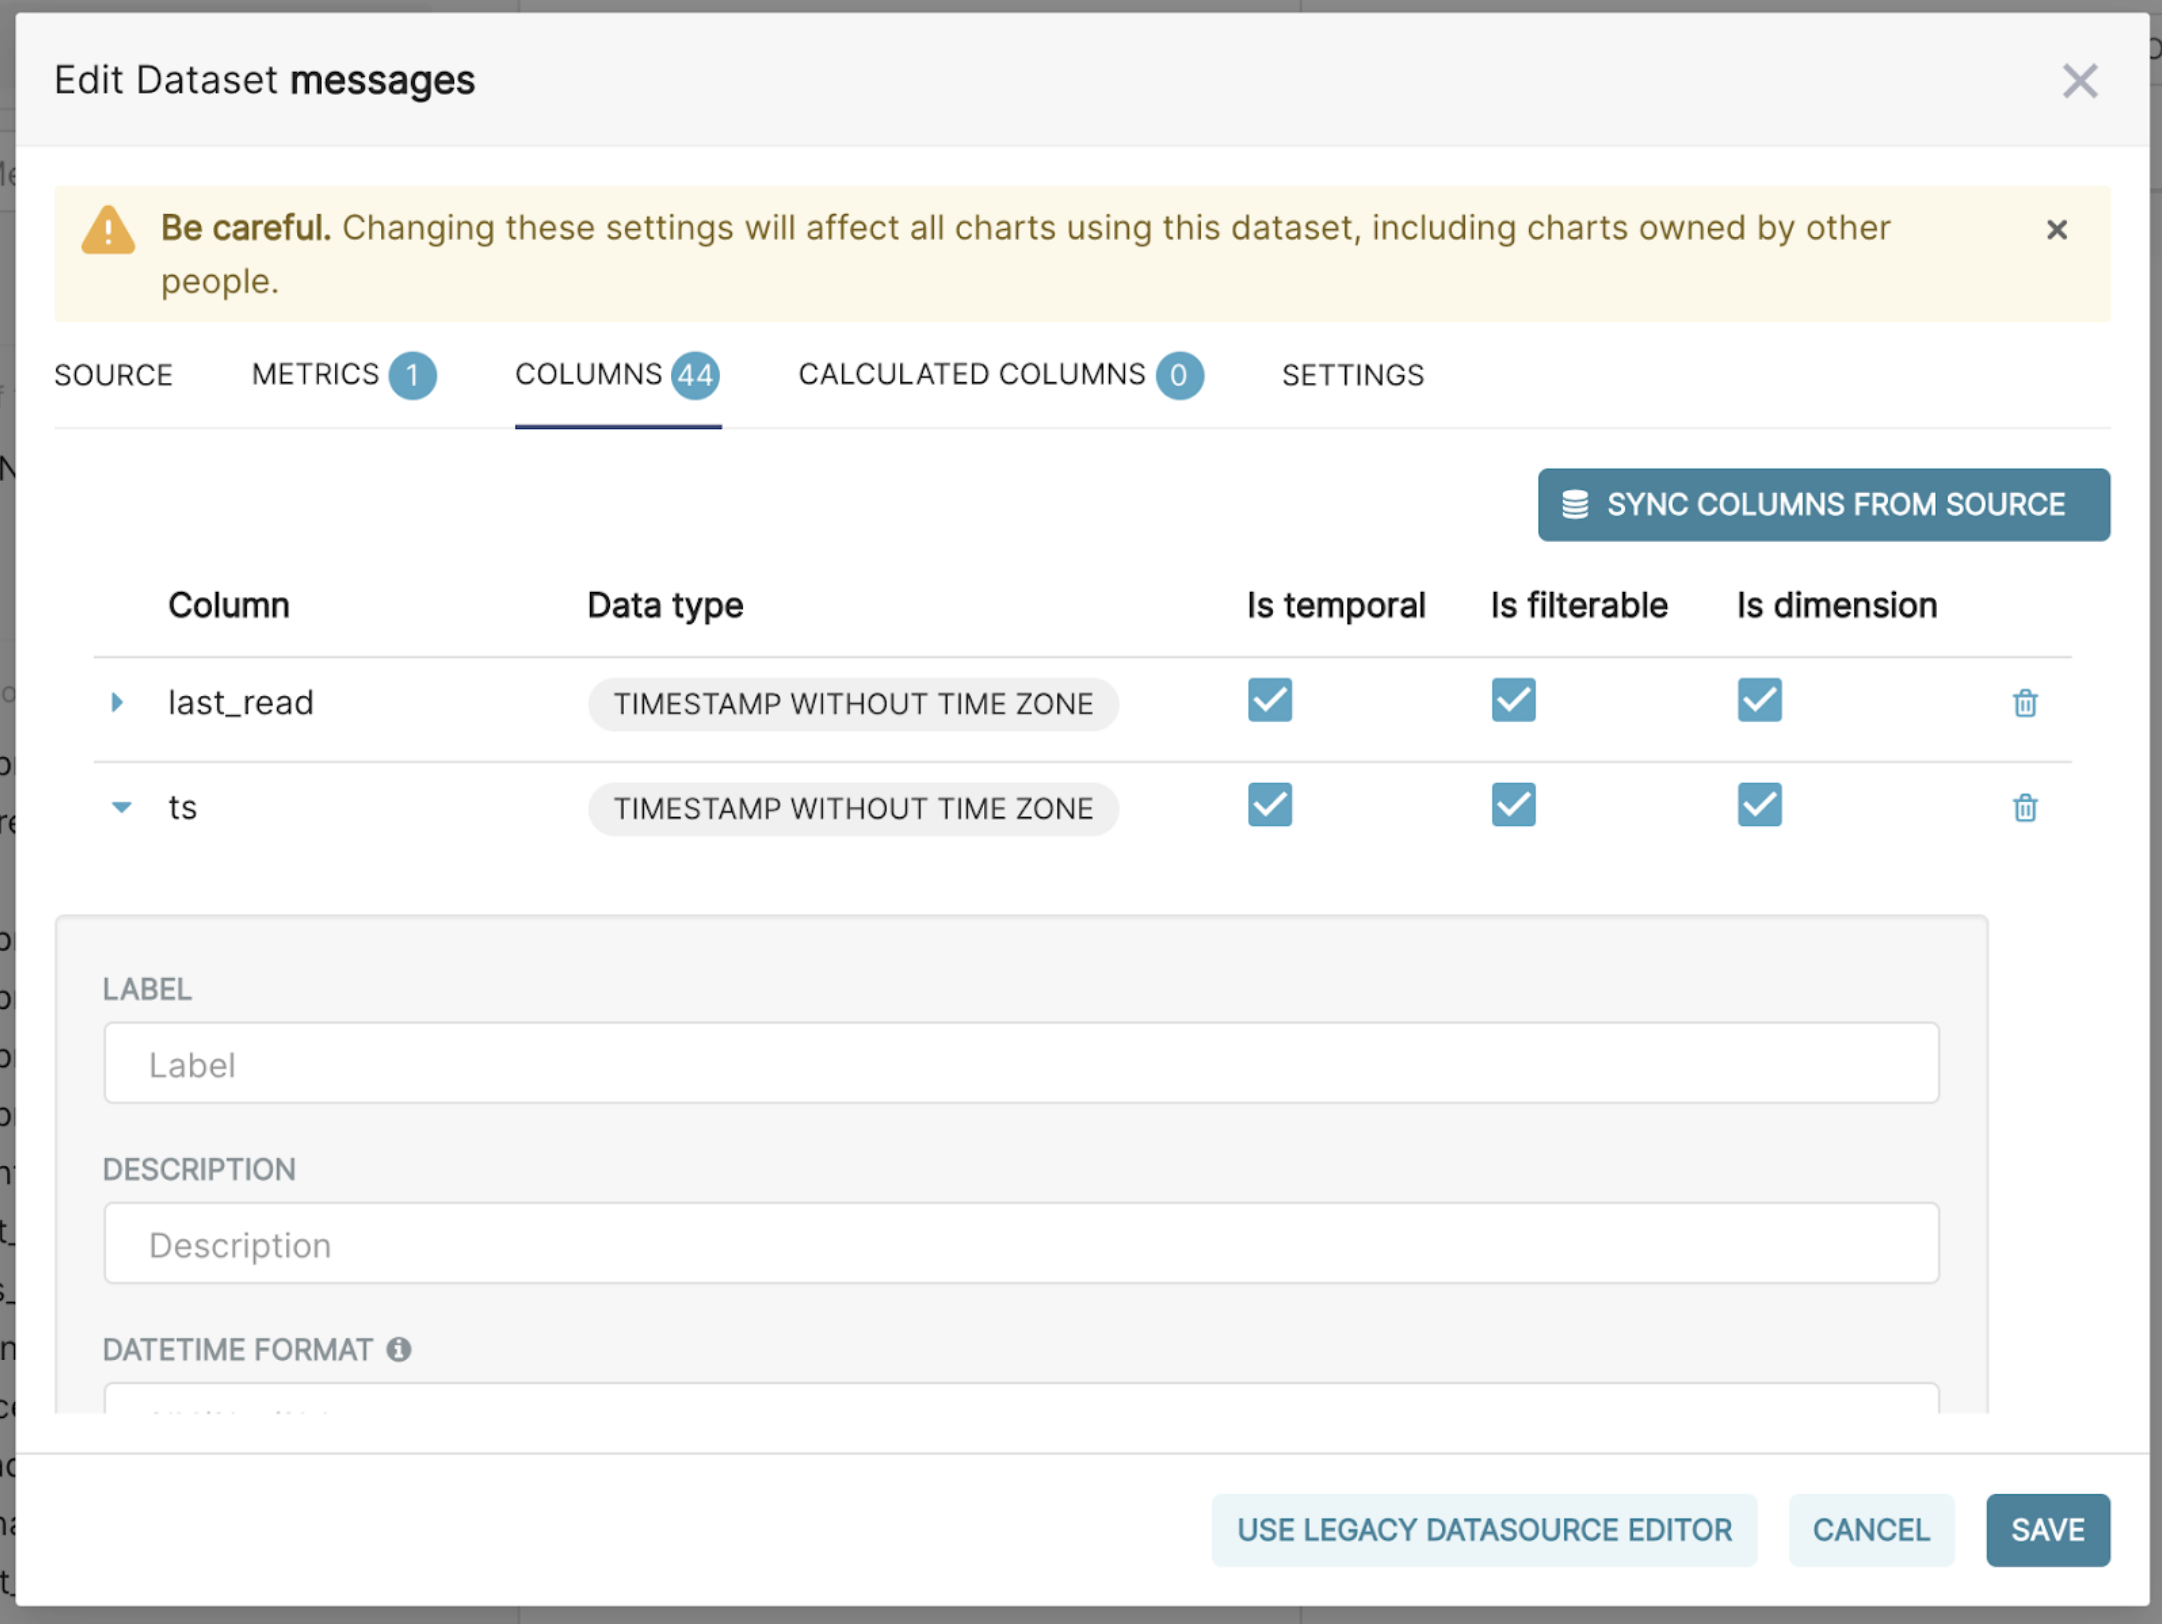
Persist the changes by clicking the Save button.
The evolution of the number of Slack workspace members
In the exploration page, let’s first get the chart showing the evolution of the number of Slack members. To do this, make your settings on this page match the screenshot below:

Save this chart onto the Slack Dashboard.
Evolution of weekly messages posted
Now, we will look at the evolution of weekly messages posted. Let’s configure the chart settings on the same page as the previous one.
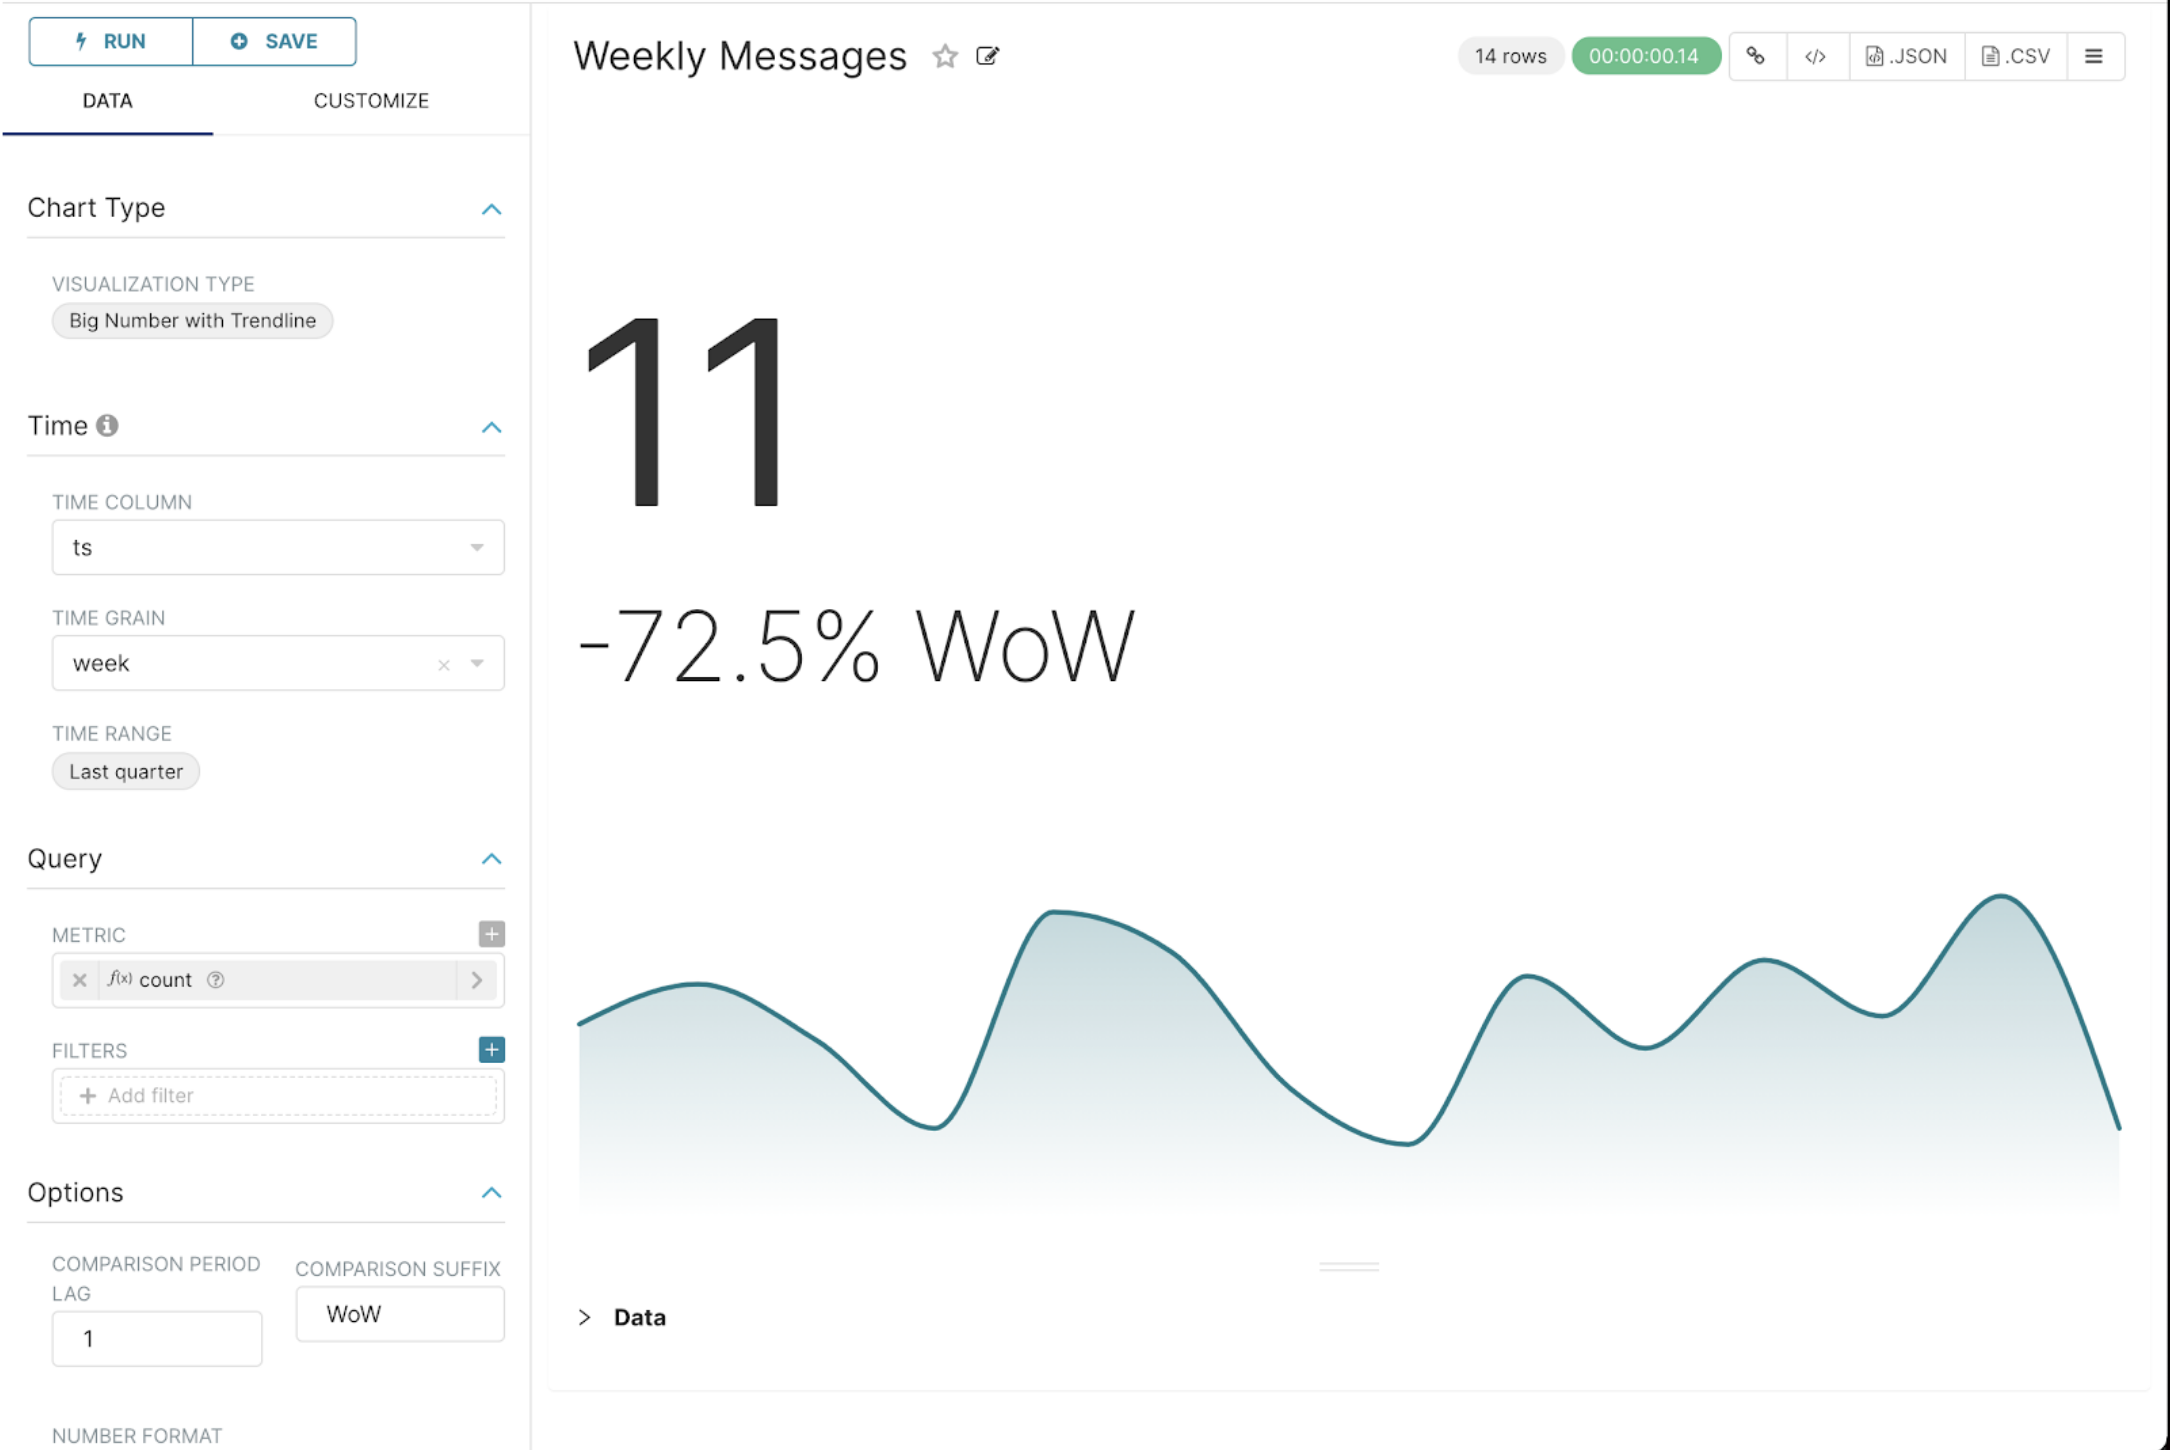
Remember, your visualization will differ based on the data you have.
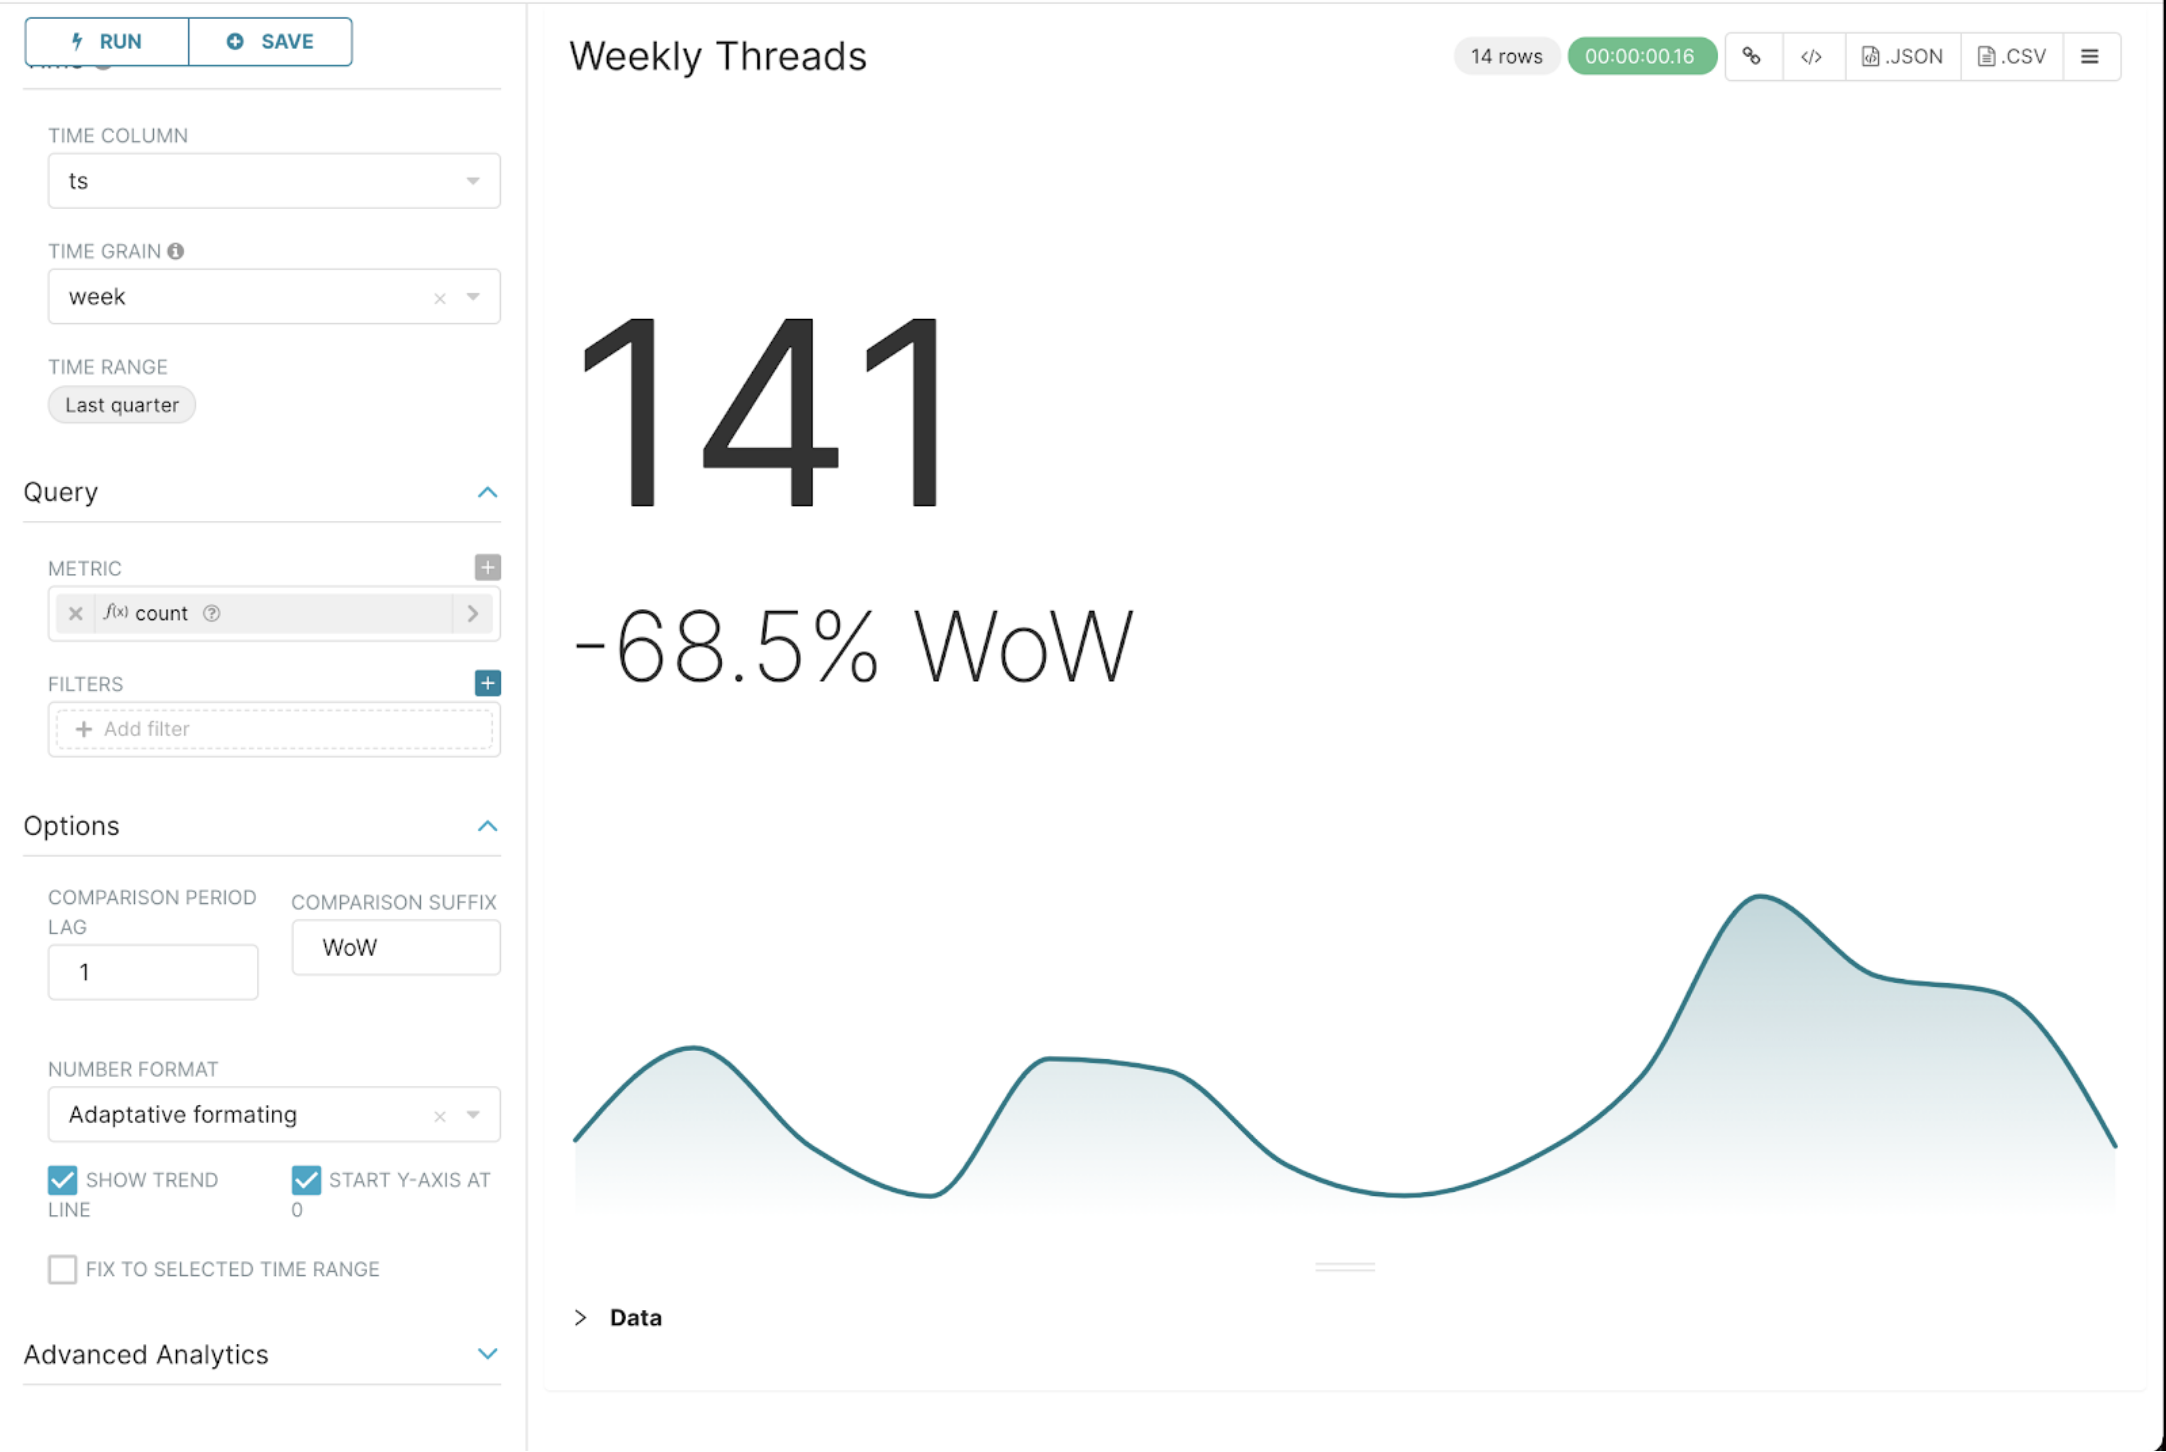
Evolution of weekly threads created
Now, we are finished with creating the message chart. Let's go over to the thread chart. You will recall that we will need to cast the ts column as stated earlier. So, do that and get to the exploration page, and make it match the screenshot below to achieve the required visualization:
Evolution of messages per channel
For this visualization, we will need a more complex SQL query. Here’s the query we used (as you can see in the screenshot below):
SELECT CAST(m.ts as TIMESTAMP), c.name, m.text
FROM public.messages m
INNER JOIN public.channels c
ON m.channel_id = c_id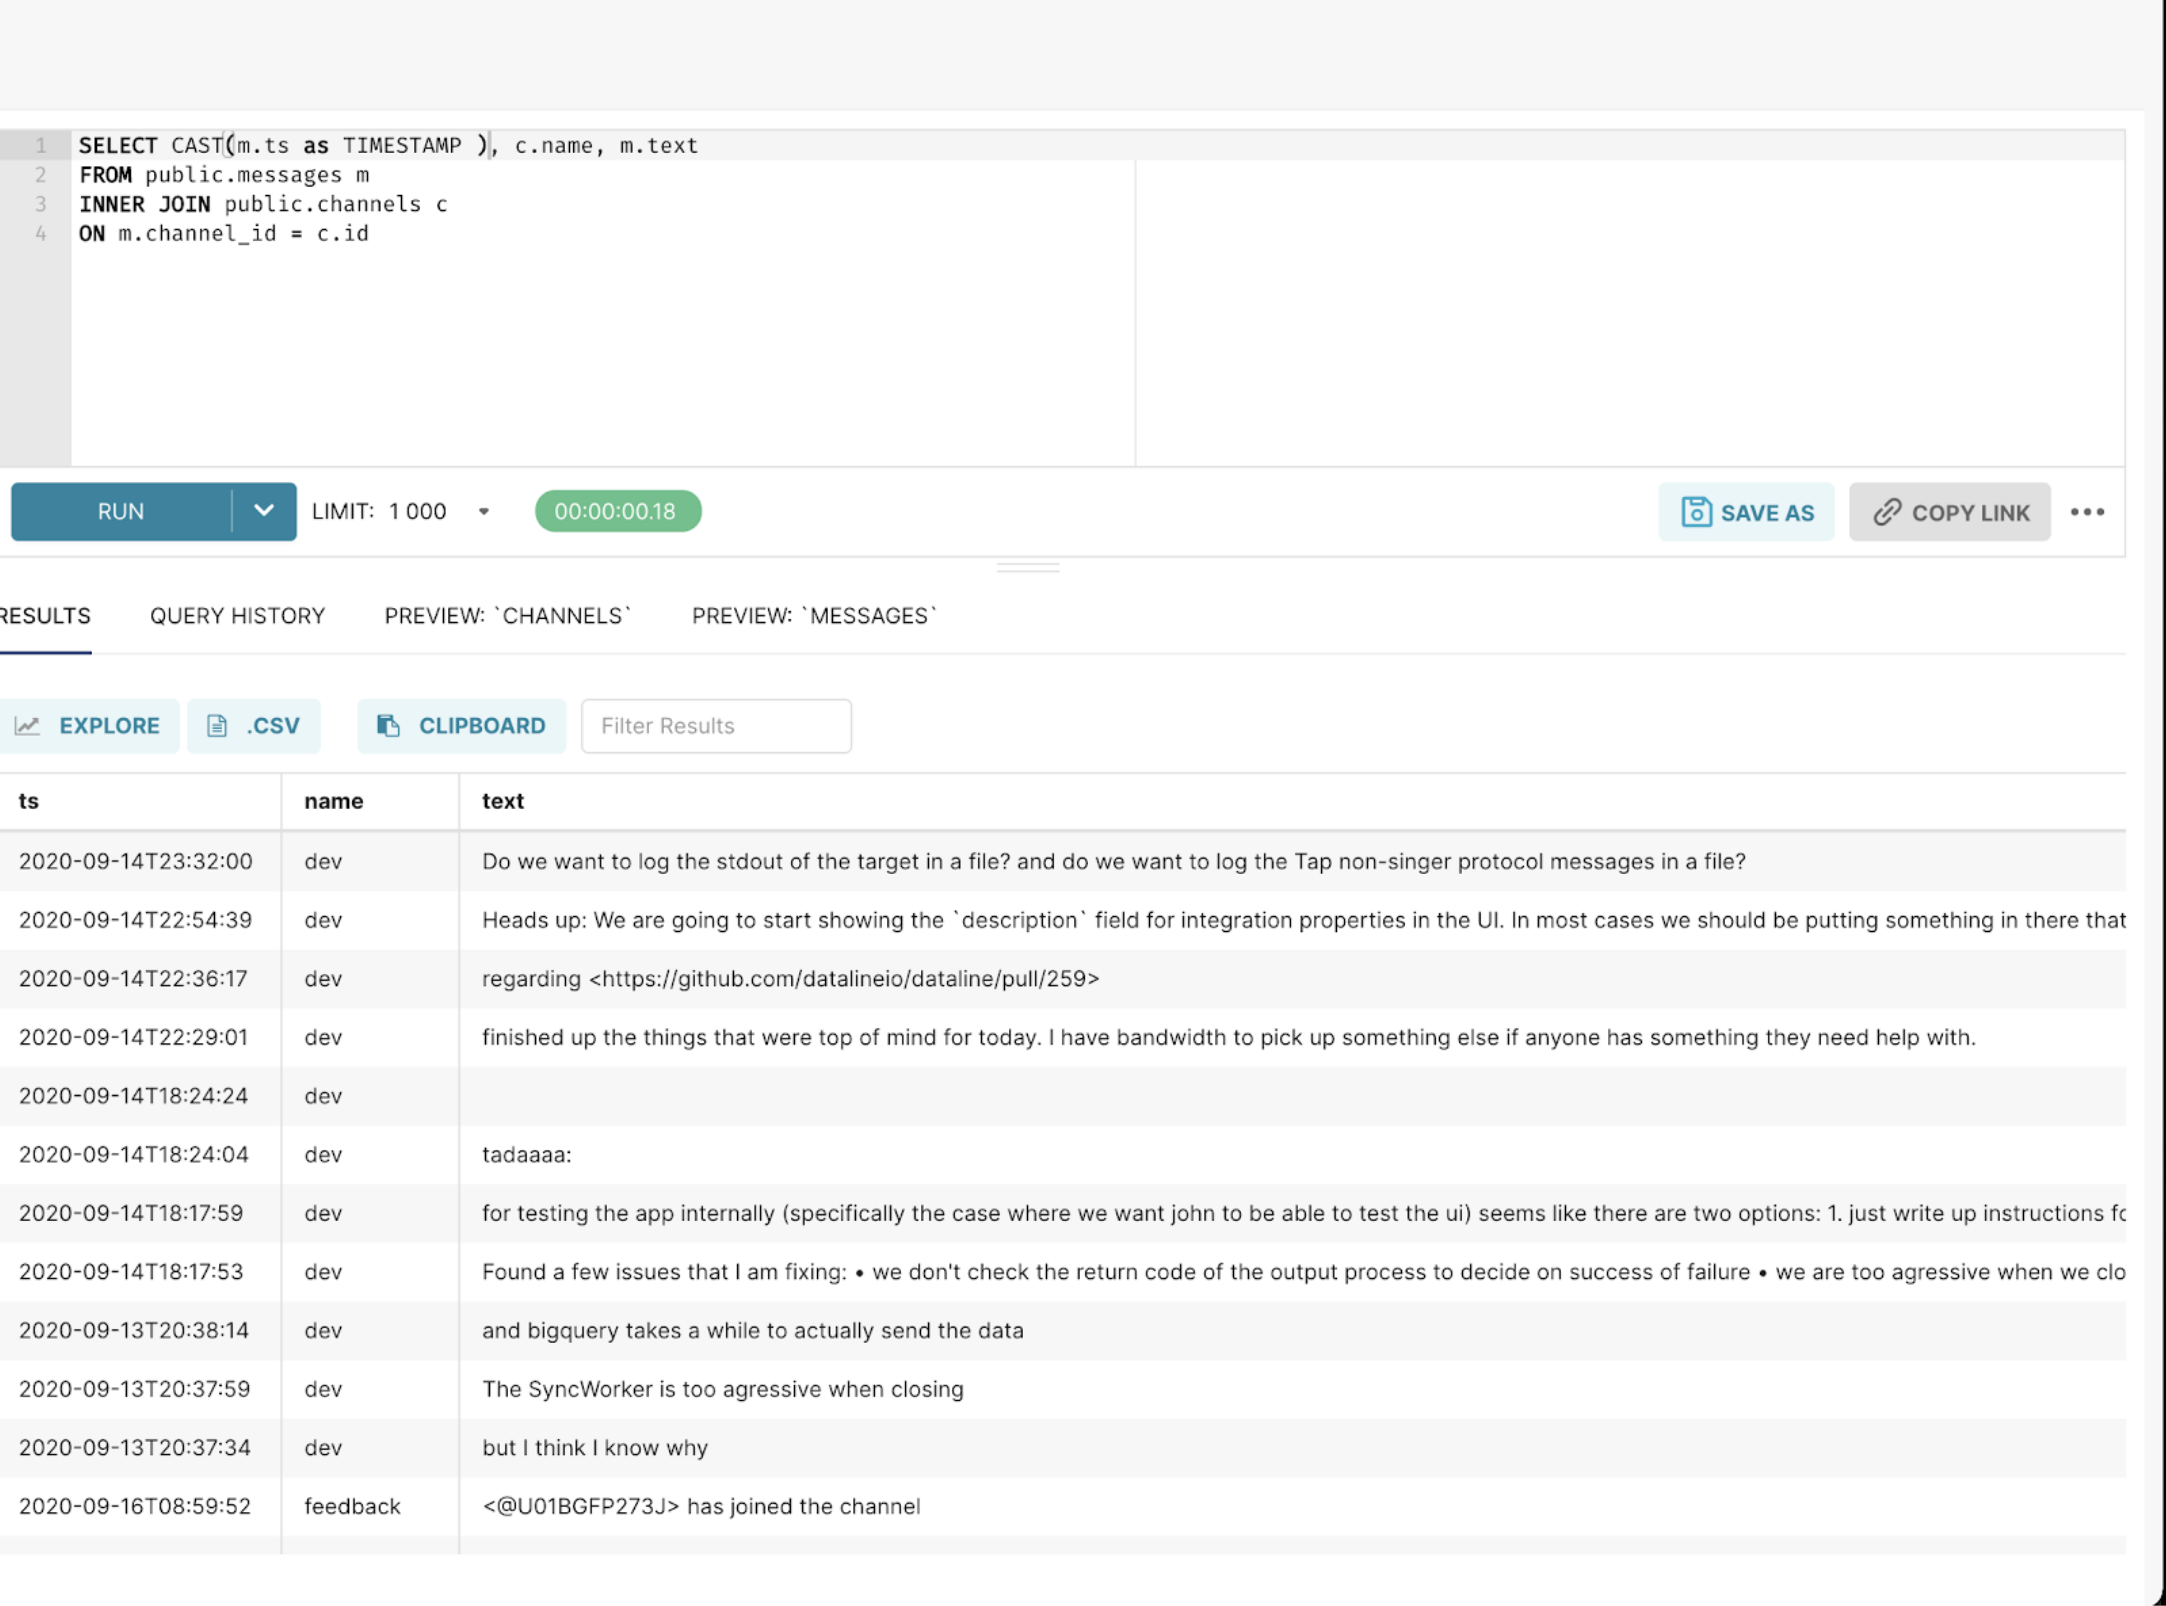
Next, click on EXPLORE to be taken to the exploration page; make it match the screenshot below:
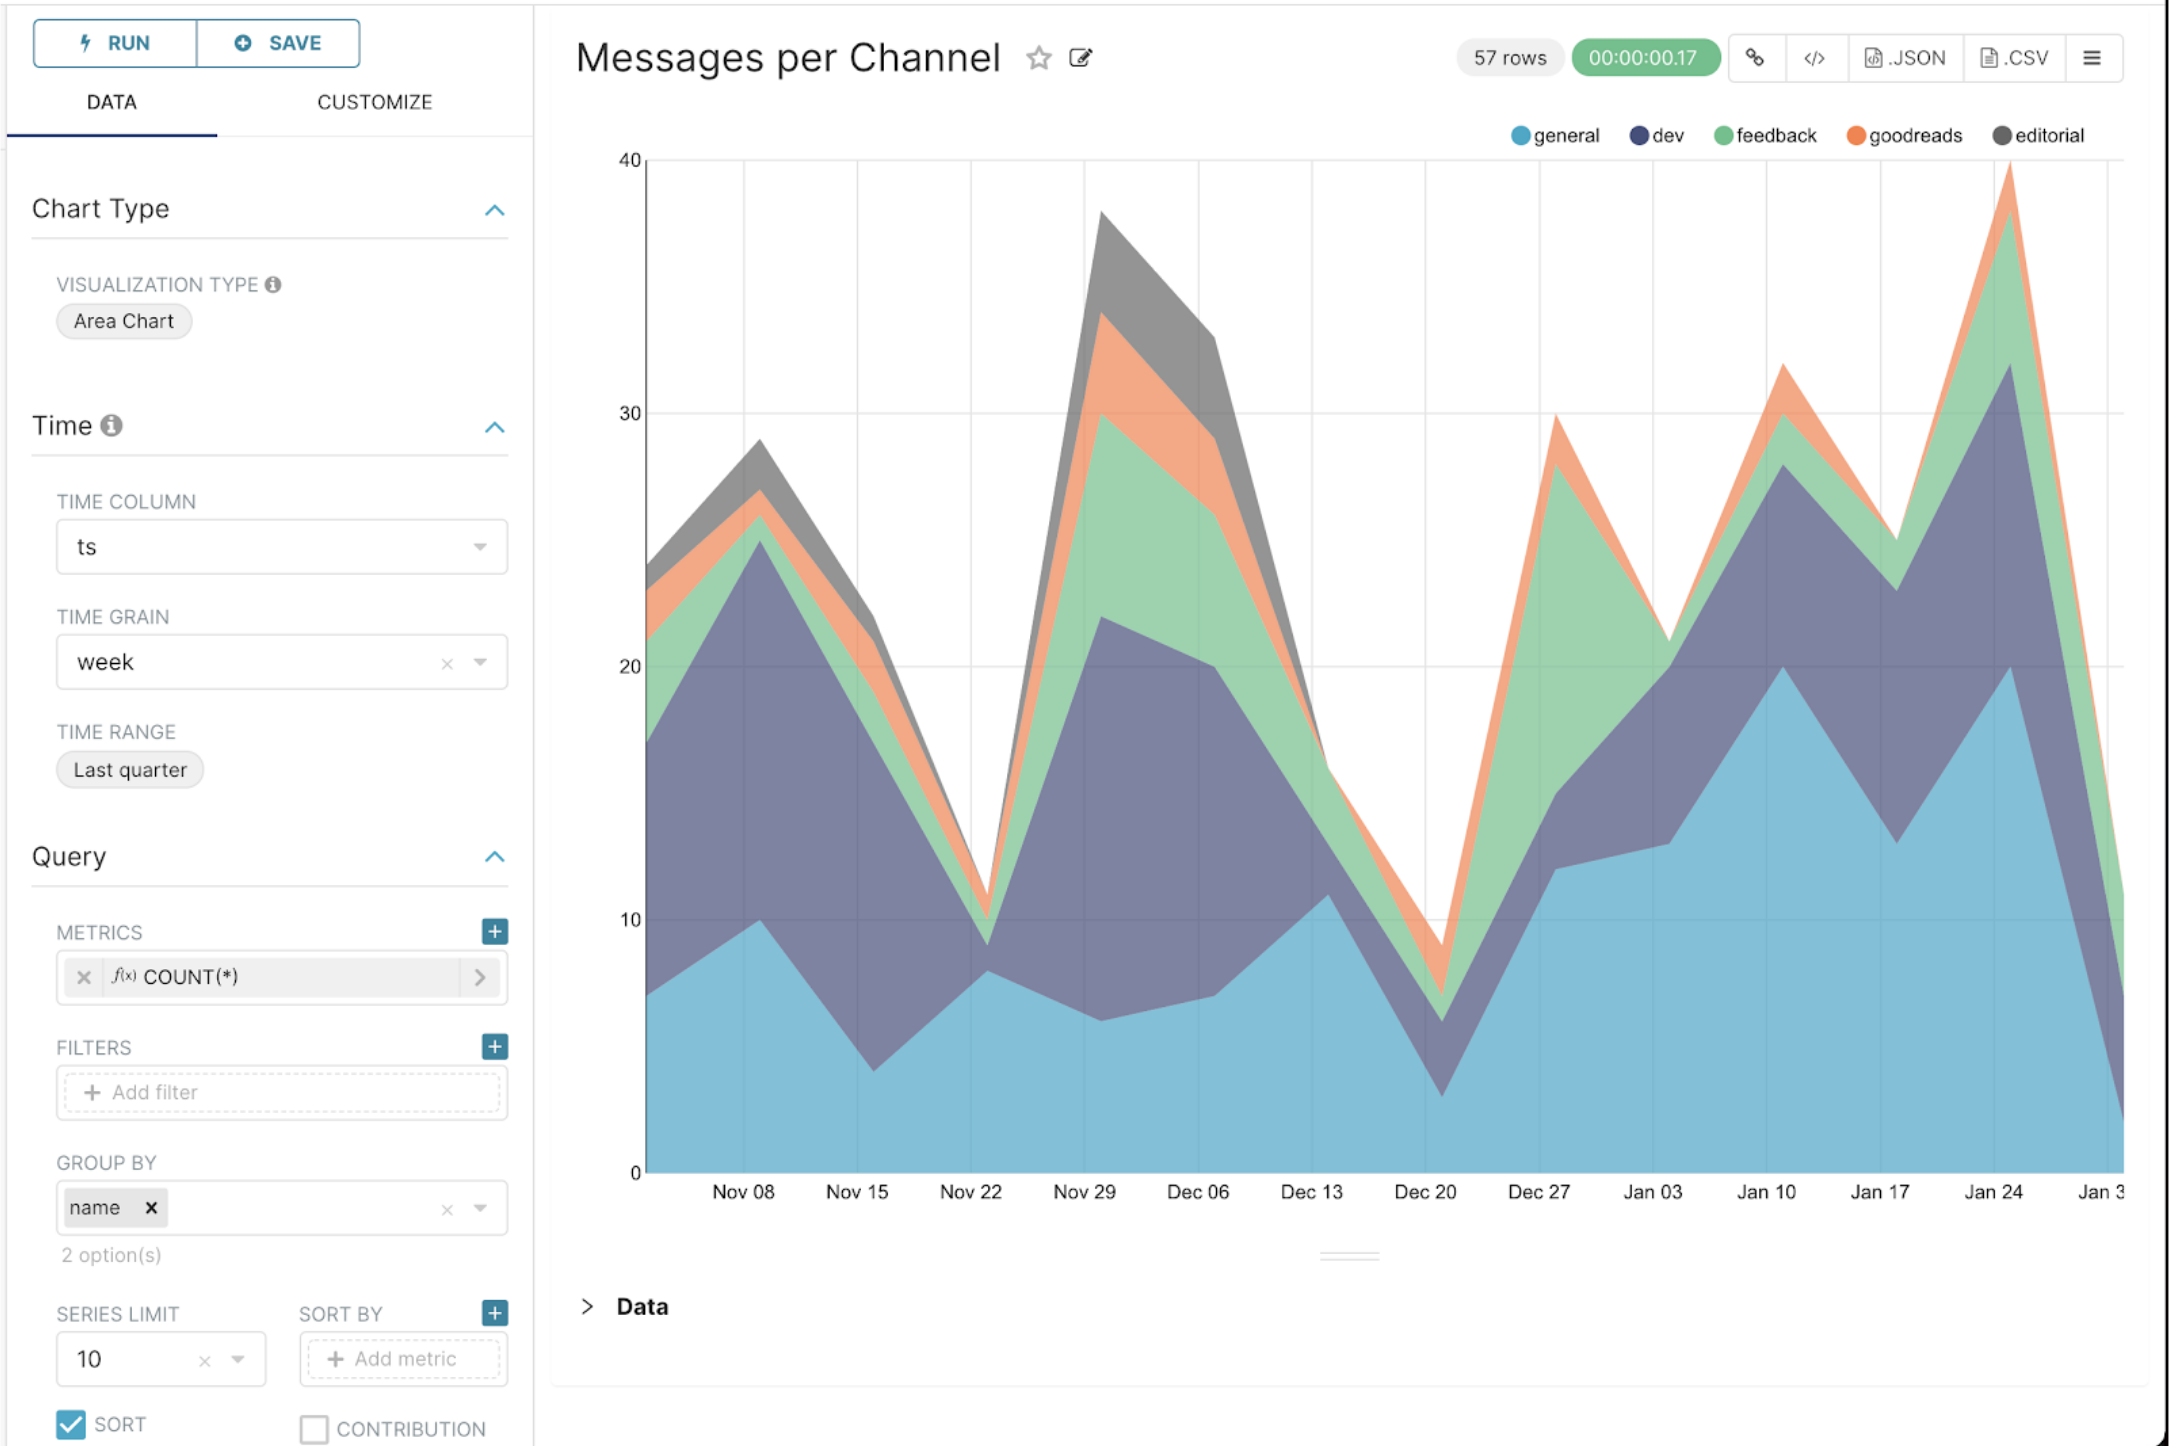
Save this chart to the dashboard.
Members per time zone
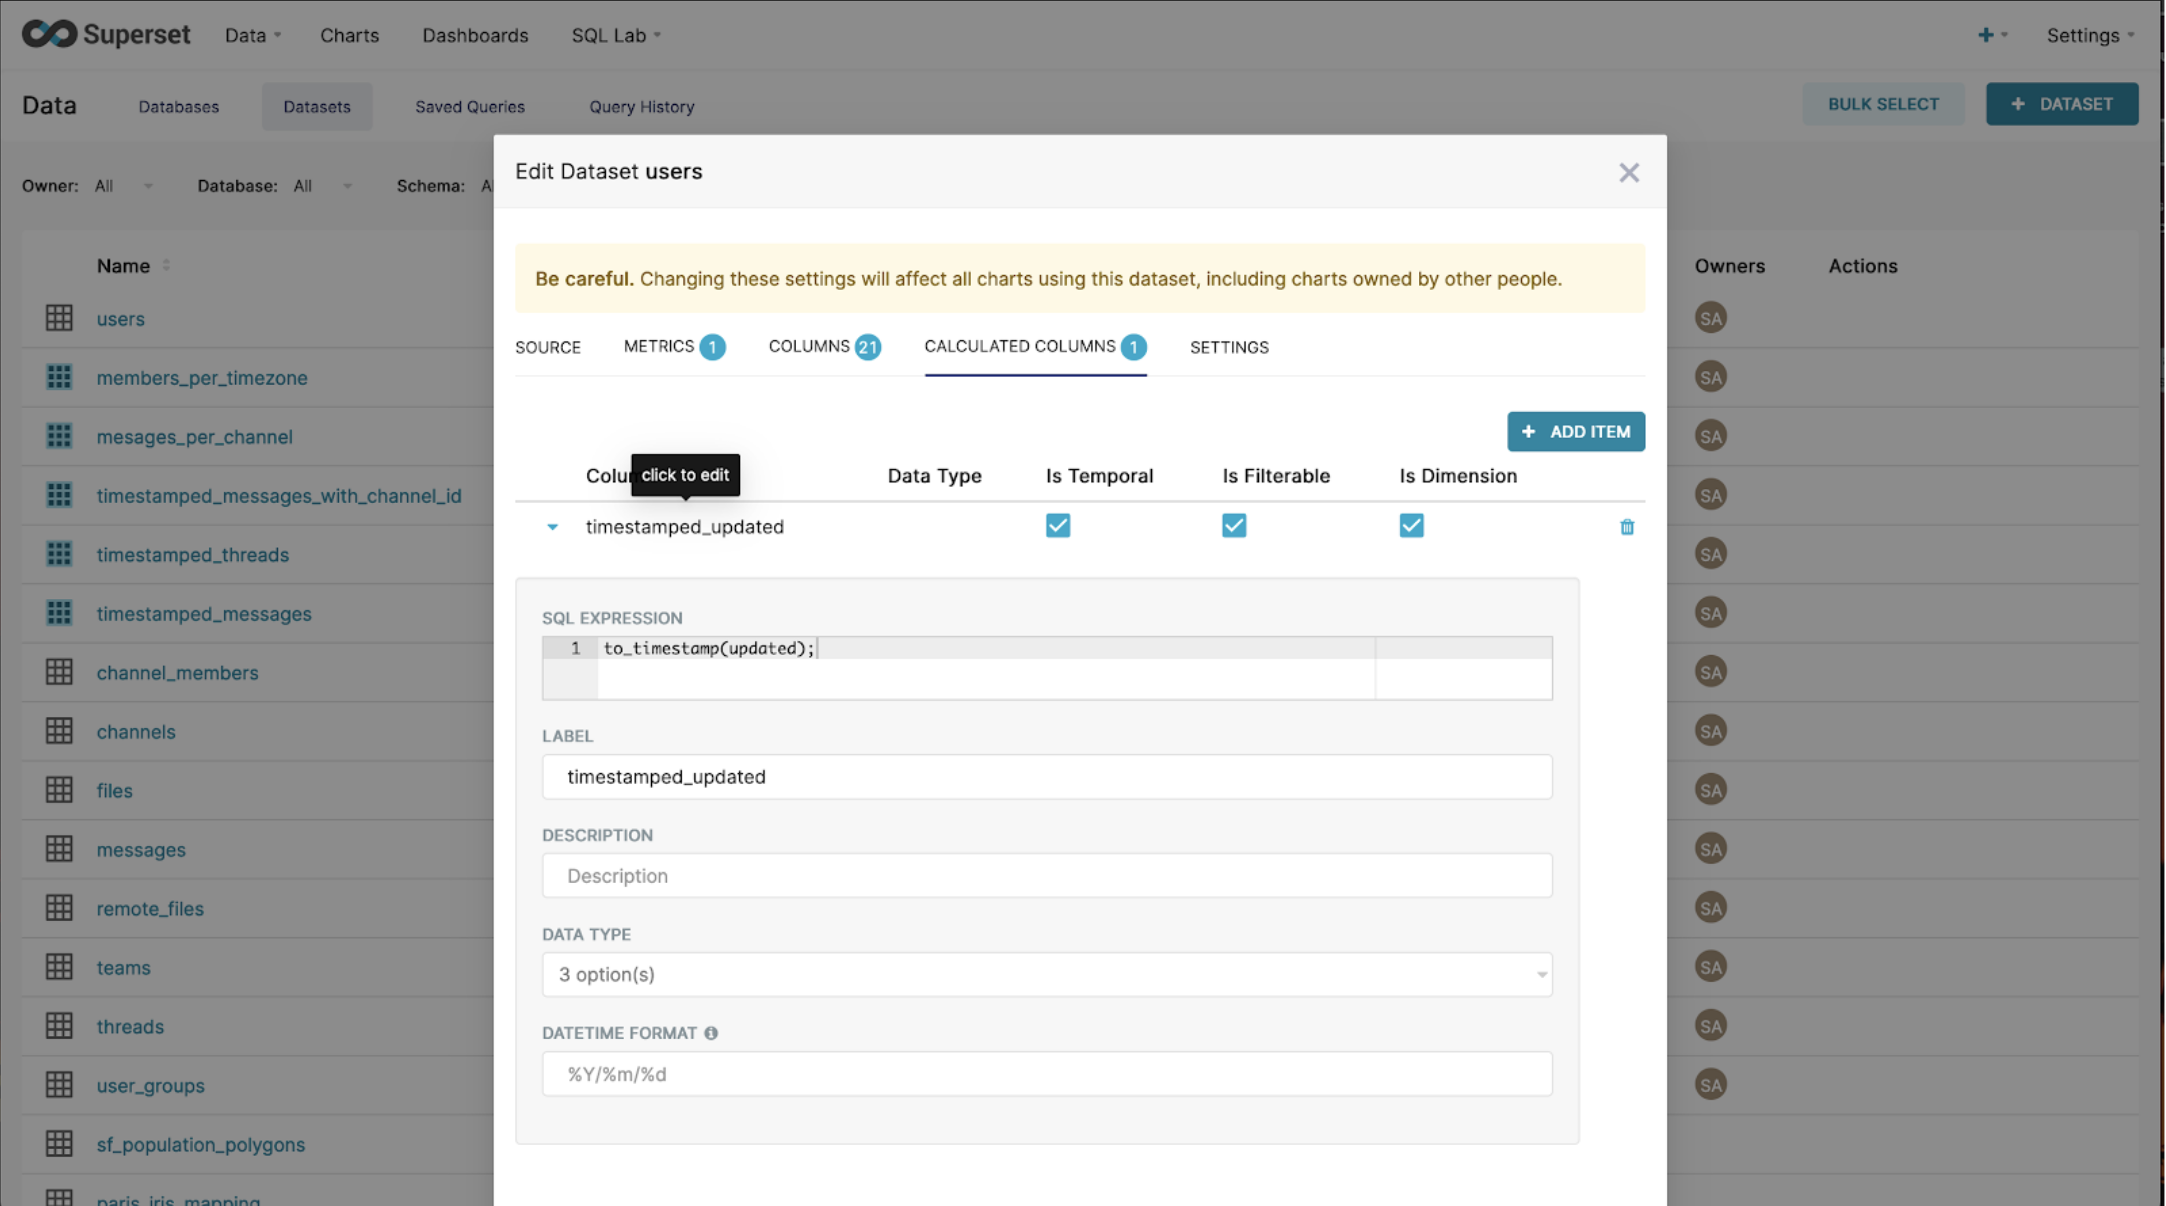
Finally, we will be visualizing members per time zone. To do this, instead of casting in the SQL lab as we’ve previously done, we will explore another method to achieve casting by using Superset’s Virtual calculated column feature. This feature allows us to write SQL queries that customize the appearance and behavior of a specific column.
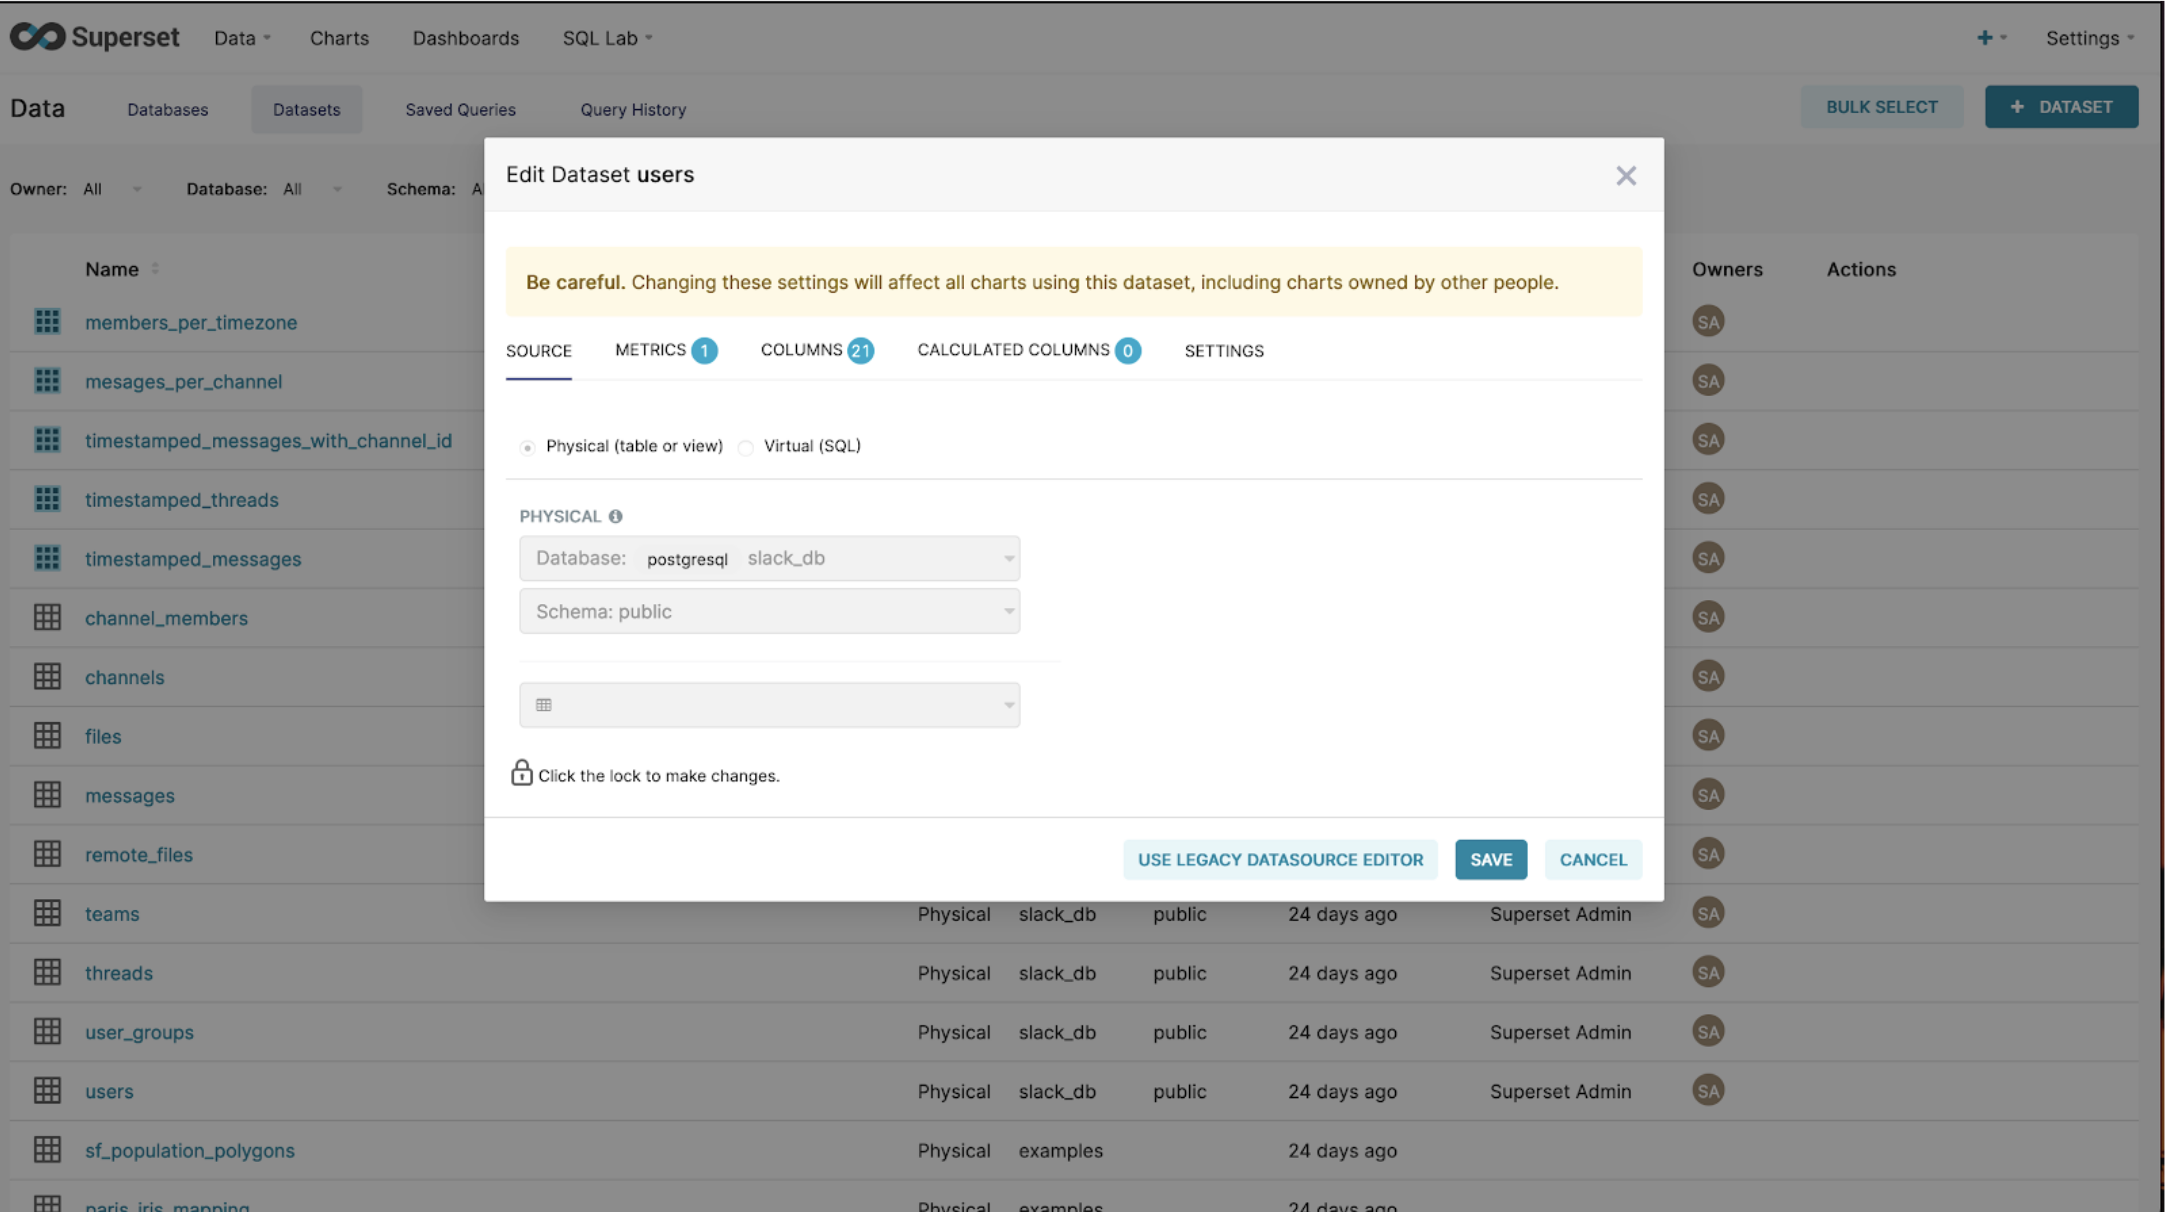
For our use case, we will need the updated column of the users table to be a TIMESTAMP, in order to perform the visualization we need for Members per time zone. Let’s start on clicking the edit icon on the users table in Superset.

You will be presented with a modal like so:
Click on the CALCULATED COLUMNS tab:
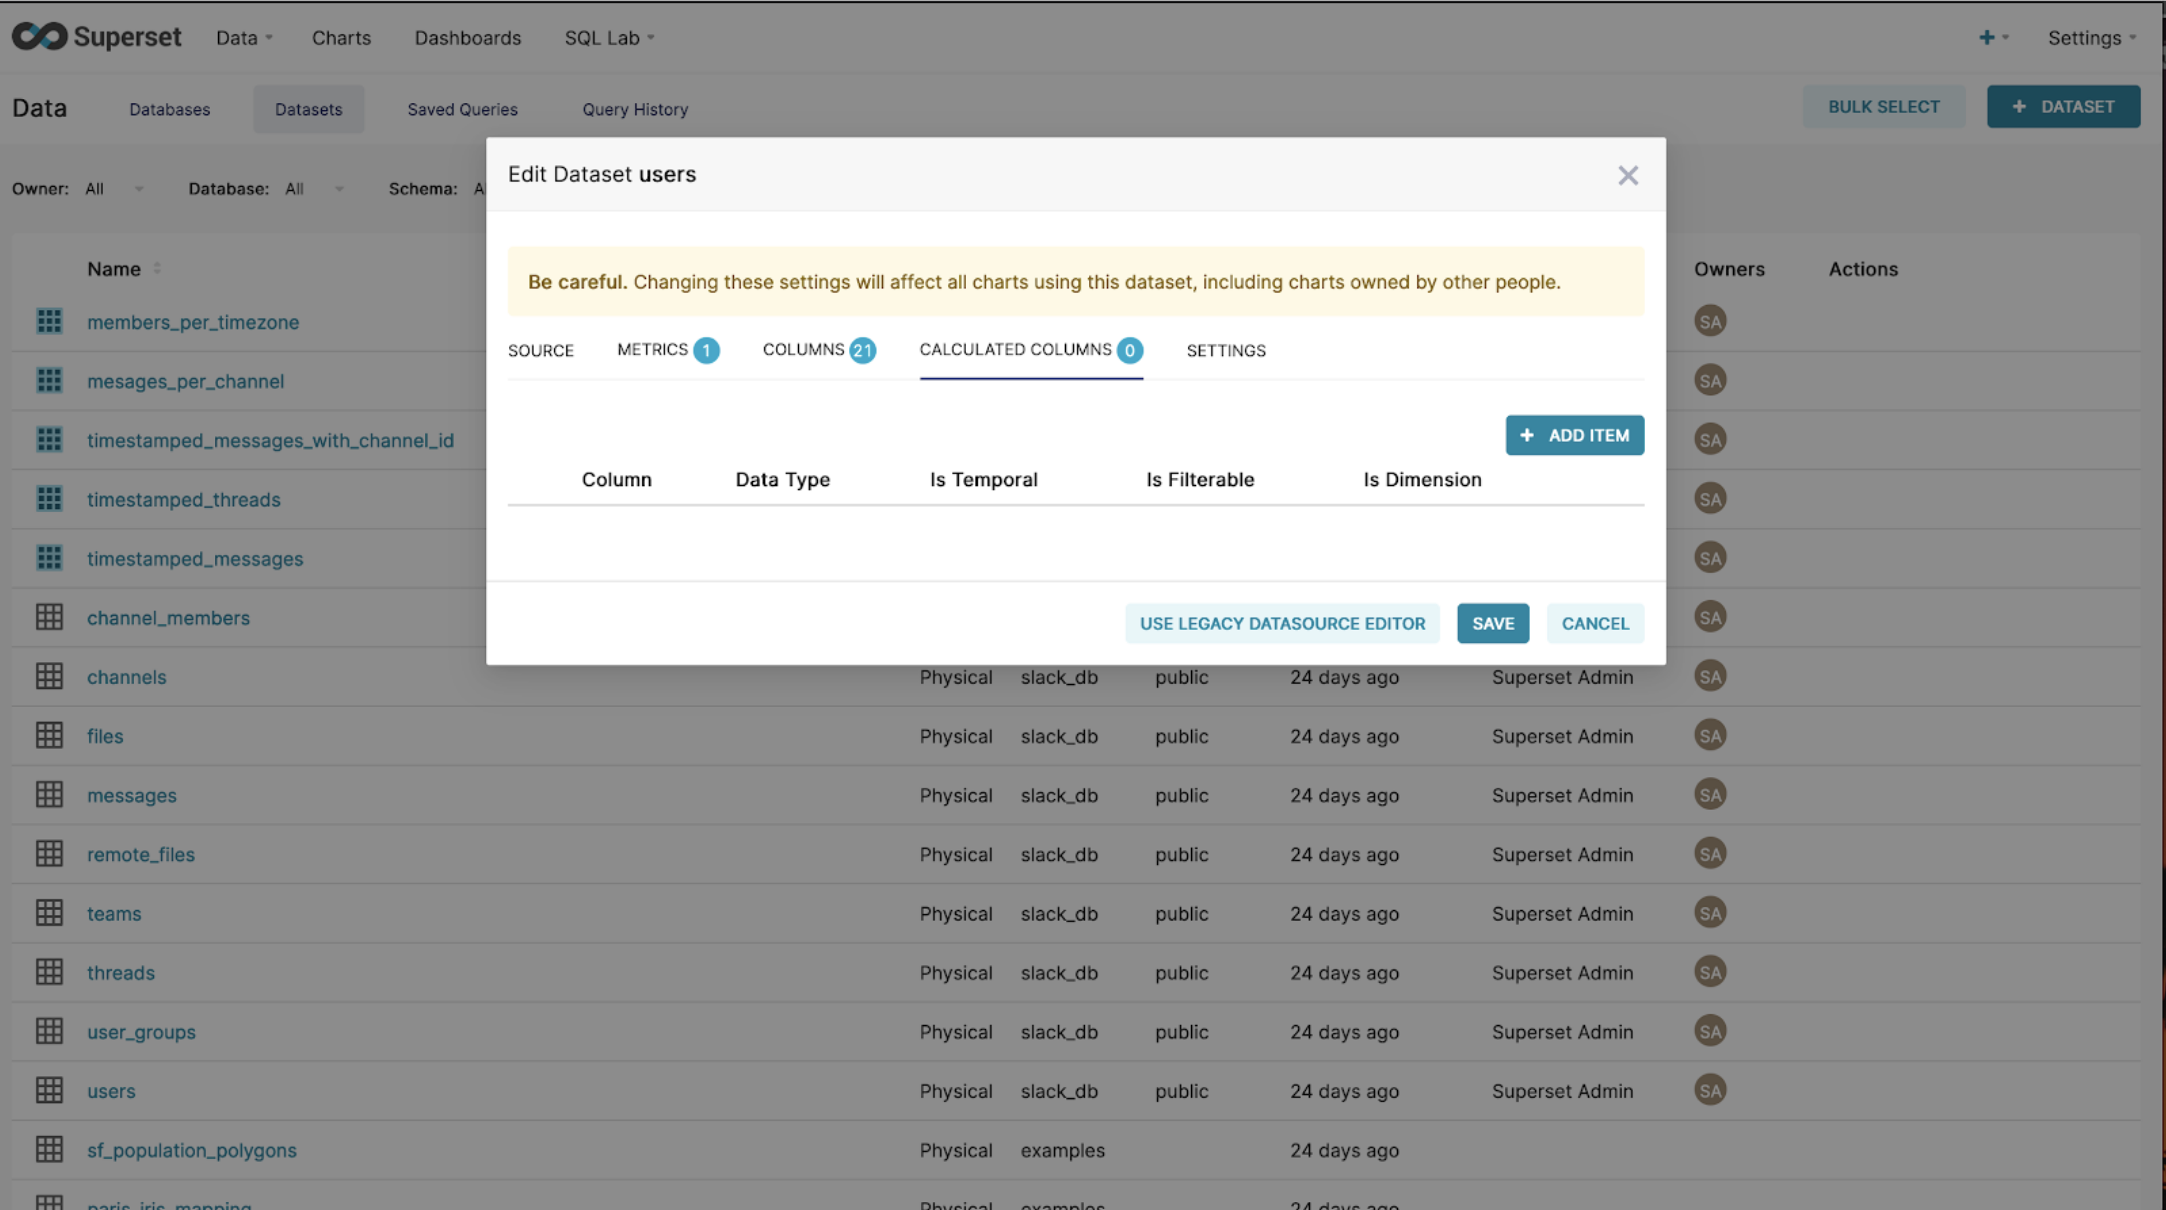
Then, click on the + ADD ITEM button, and make your settings match the screenshot below.
Then, go to the exploration page and make it match the settings below:
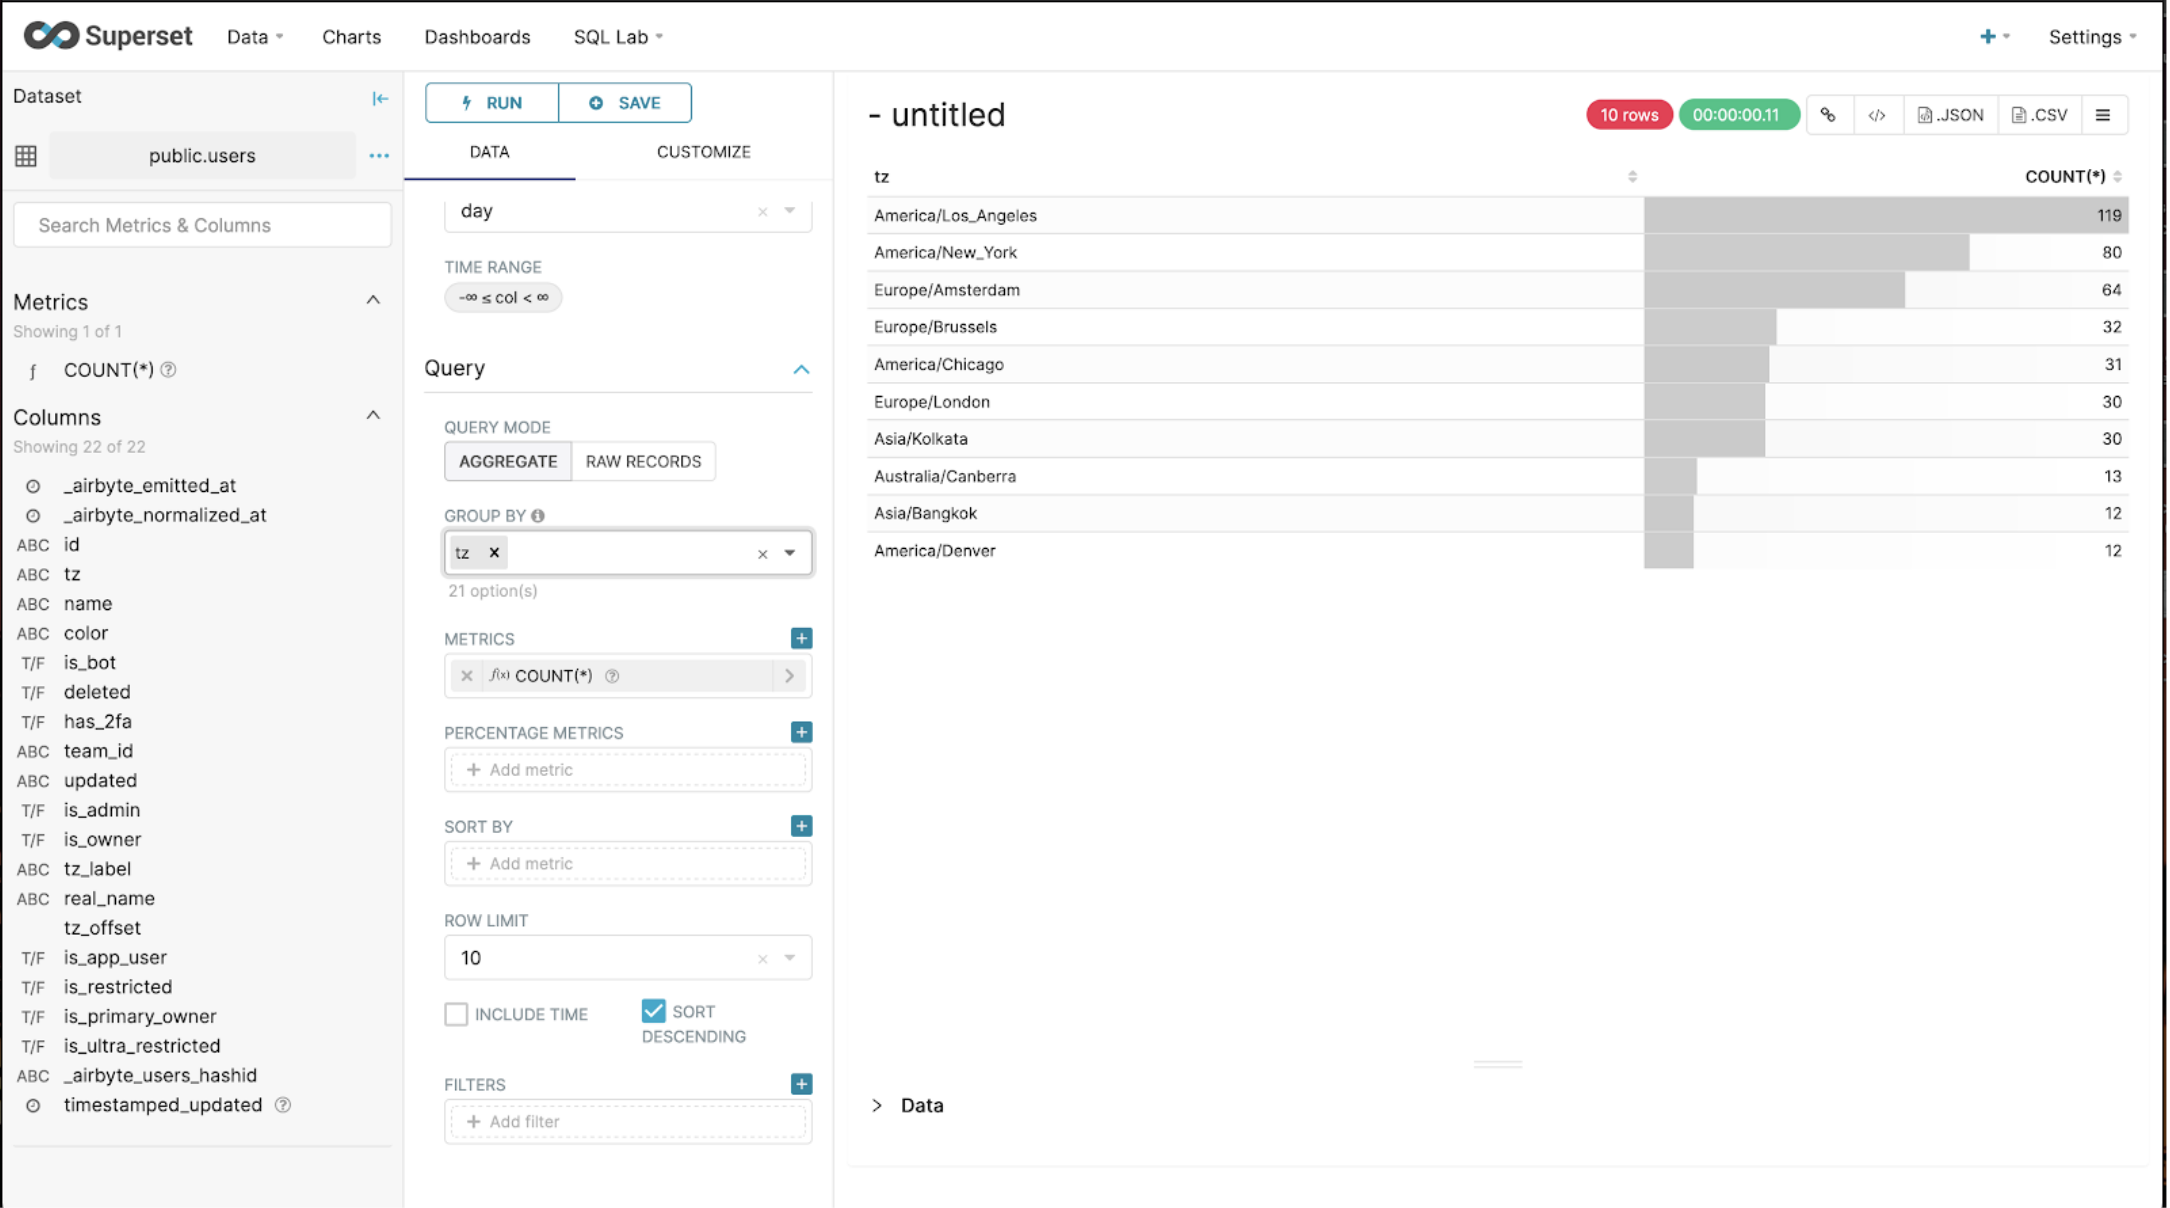
Now save this last chart, and head over to your Slack Dashboard. It should look like this:

Of course, you can edit how the dashboard looks to fit what you want on it.
Conclusion
In this article, we looked at using Airbyte’s Slack connector to get the data from a Slack workspace into a Postgres database, and then used Apache Superset to craft a dashboard of visualizations.If you have any questions about Airbyte, don’t hesitate to ask questions on our Slack! If you have questions about Superset, you can join the Superset Community Slack!
