


Time-series Analysis With Druid Superset and Prophet


Time-series analysis is a rich subfield of statistics with many applications to real-world problems. Changing weather, stock-prices, consumer demand, the human body's homeostatic rhythm, and the activities of the 3.5 billion people connected to the internet all produce complex time-series with many interesting features. Because of their importance, database technologies optimized for capturing and analyzing vast amounts of time-series data have emerged. Apache Druid is one such database; ideal for fast, scaleable ingestion and retrieval of this very special type of data.
Druid has a distributed architecture that is great for modern cloud-computing use-cases.
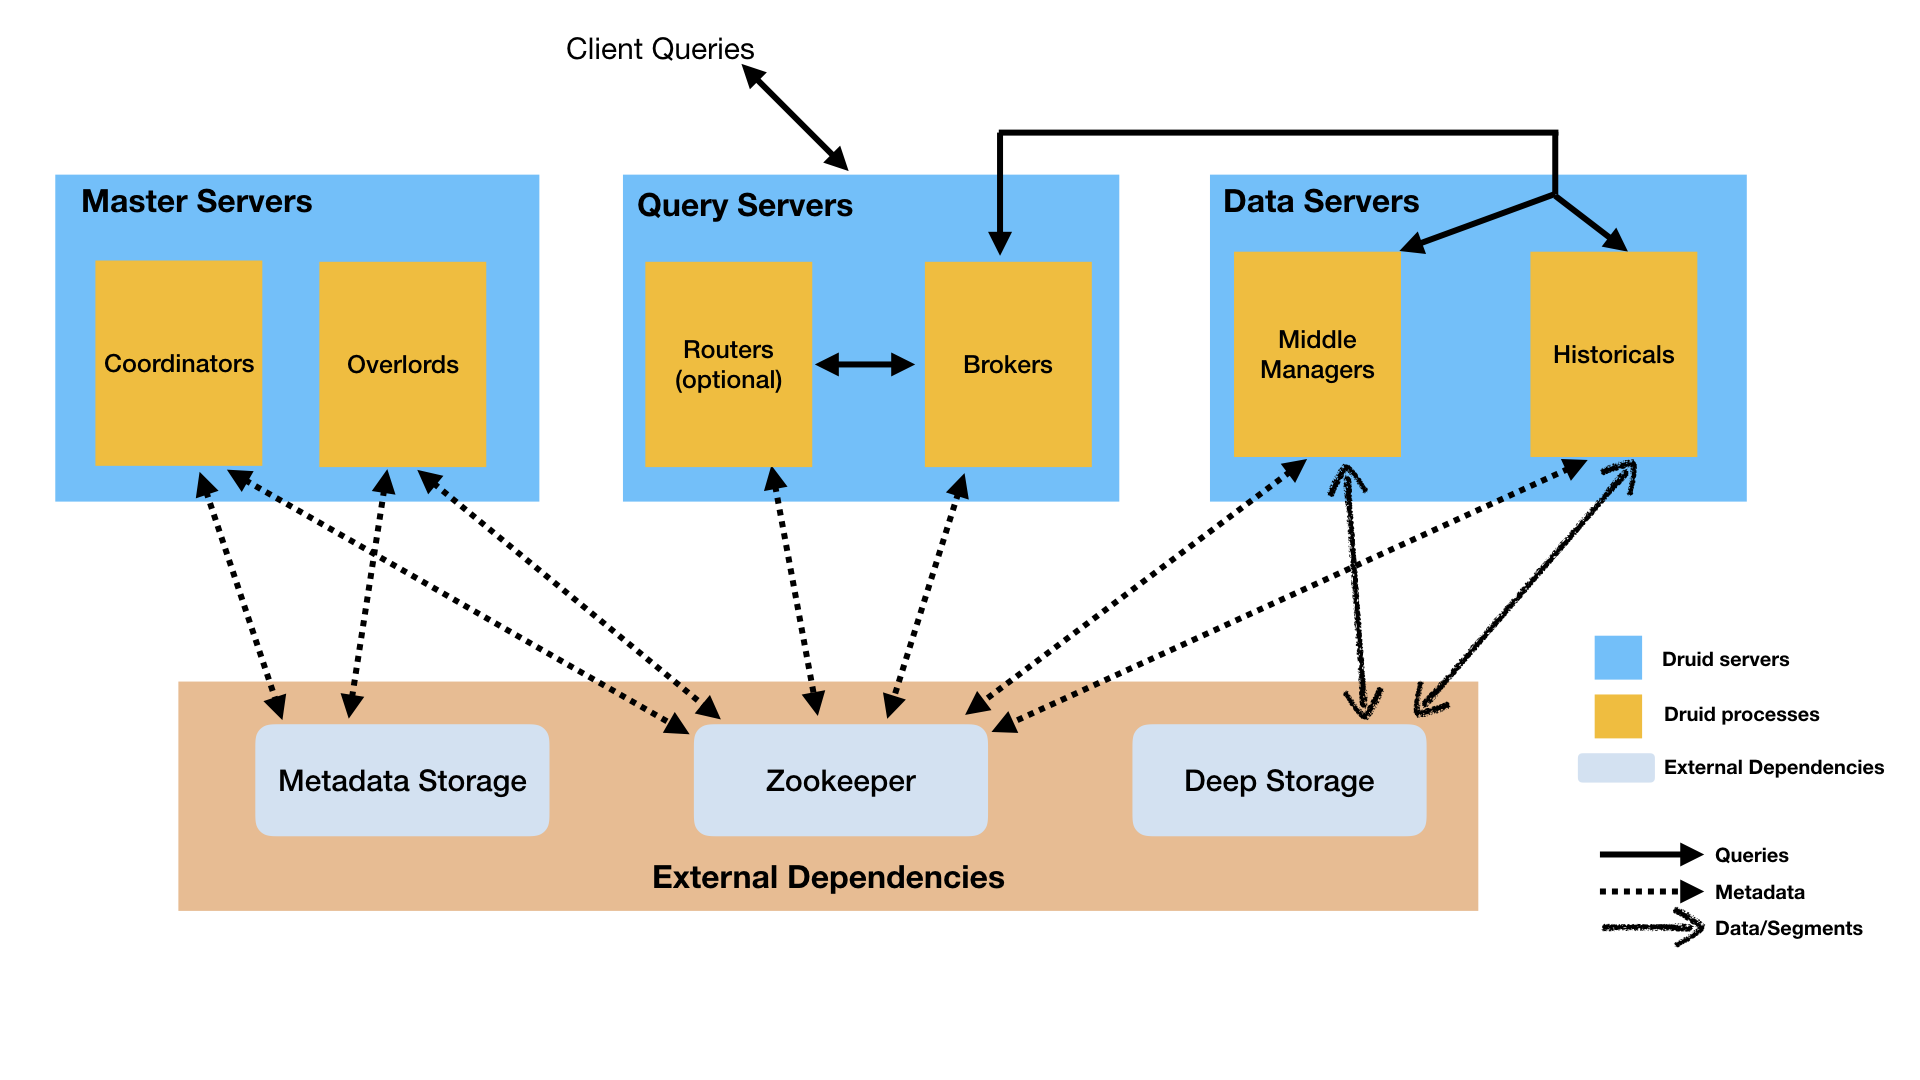
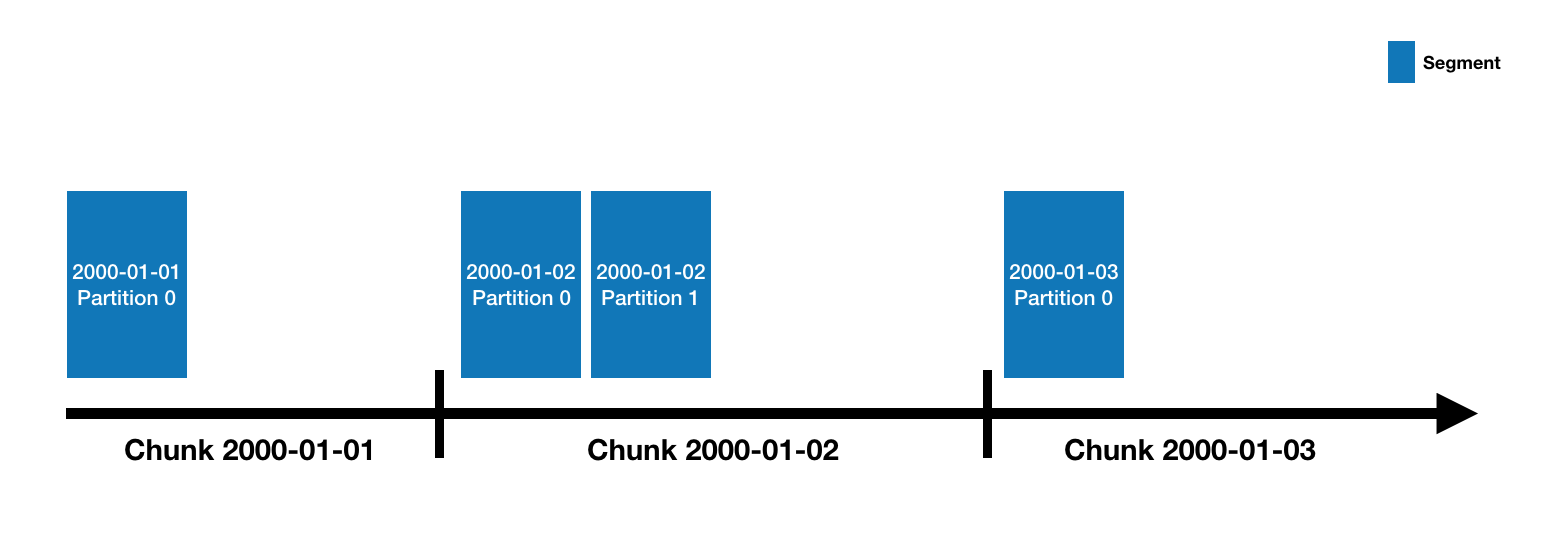
Druid's combination of lightning-fast in-memory cache and flexible historical data storage are a powerful combo that enable fast, high volume reads and writes. It stores data in a segmented, column oriented format using a special indexing column derived from the data (in this case time) to enable fast retrieval.
Druid and Superset are two Apache projects with a special history, as Superset was originally created to be a visualization layer for Druid and still carries deep integration.
On the analysis side, existing software packages in Python and R provide deep functionality for analyzing and predicting time-series. While there are many great articles on the web that go into depth on the powerful features of these packages and the models they implement, they are all only really accessible to analysts and data-scientists with the right background. As many organizations look to democratize their data, it would be nice to also democratize the analysis of that data in an intuitive and accessible way.
We are taking a crack at this problem in the Apache Superset project by providing an ever-increasing number of analytic options at the chart level. Facebook's Prophet package (and the newer Neural Prophet) are designed to be highly approachable, meaning messy data, outliers, and seasonality can be handled with minimal tuning. Analyst assumptions can be easily imposed on the forecasting model without a deep knowledge of time-series analysis.
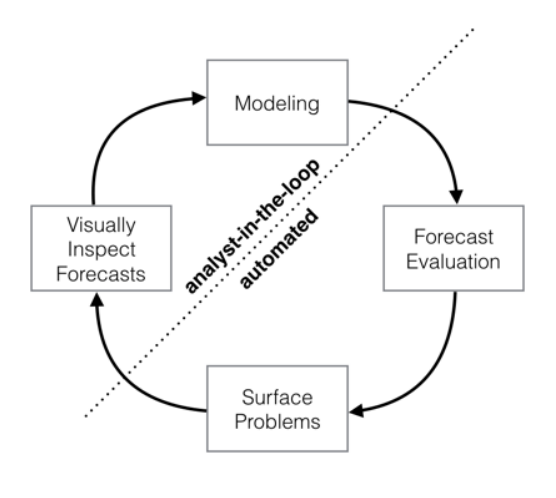
This so-called 'analyst-in-the-loop' approach makes Prophet ideal for time-series forecasting in a data visualization environment like Superset where only so much functionality can be surfaced in the GUI without weakening the visual design.
In the 0.38 release, Superset added experimental support for basic in-viz analysis and time-series data forecasting using Prophet.
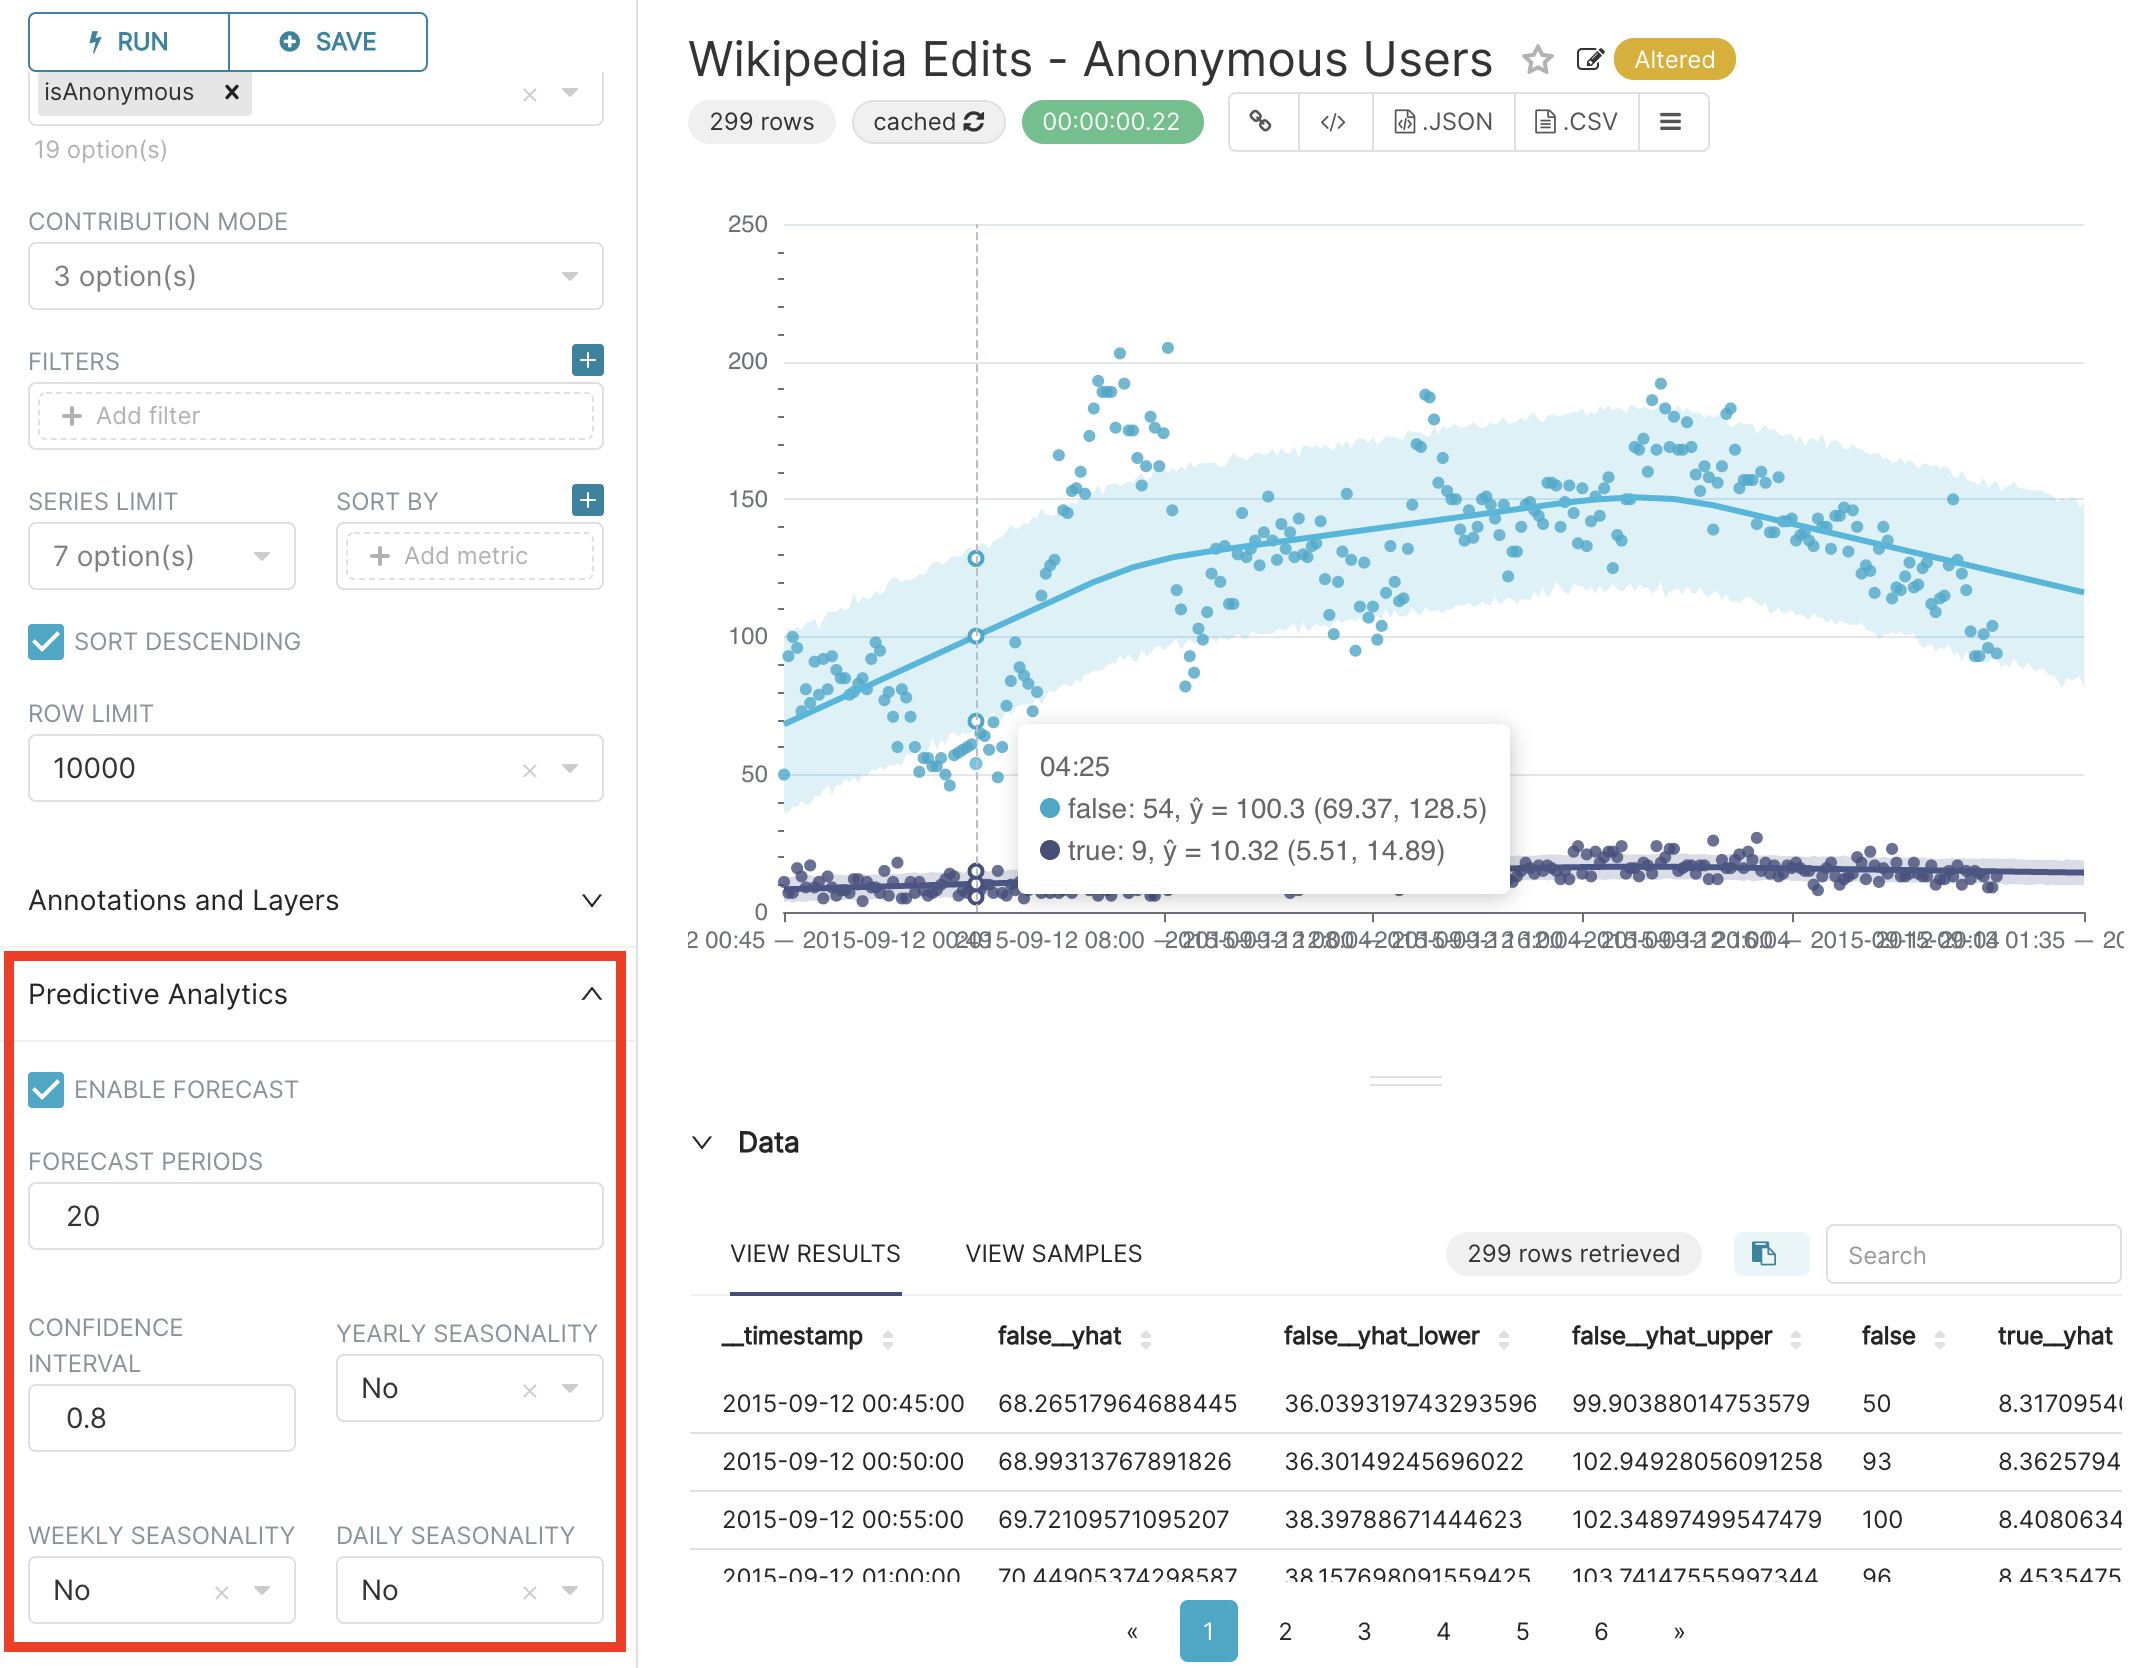
I recently had the pleasure of doing a live demo focused on introducing beginner and experienced user alike to this functionality and want to share some of what I learned along the way.
Here in part 1, we will walk through:
- Druid set up with basic metadata authentication
- Getting Prophet running Superset's python environment
- Connecting Druid and Superset
Next time, we will cover ingesting time-series data into druid and building great time-series visualizations in Superset. Finally, we will close out this series by covering in-depth what analytic options can be applied to time-series data in Superset and talk about the future of in-chart analytics with one of Superset's distinguished contributors, Ville Broteldt.
Let's dive in.
Step 1: Druid configuration
First we will need an EC2 instance (or equivalent) to host Druid's services. The minimal instance type I have found to work well with Druid's micro-quickstart configuration (a single-node configuration designed for experimentation with low resource consumption) is r5.large. I also recommend the Ubuntu18 image if working in AWS.
Druid also requires the Java runtime environment 8, so make sure you have that installed.
java -version
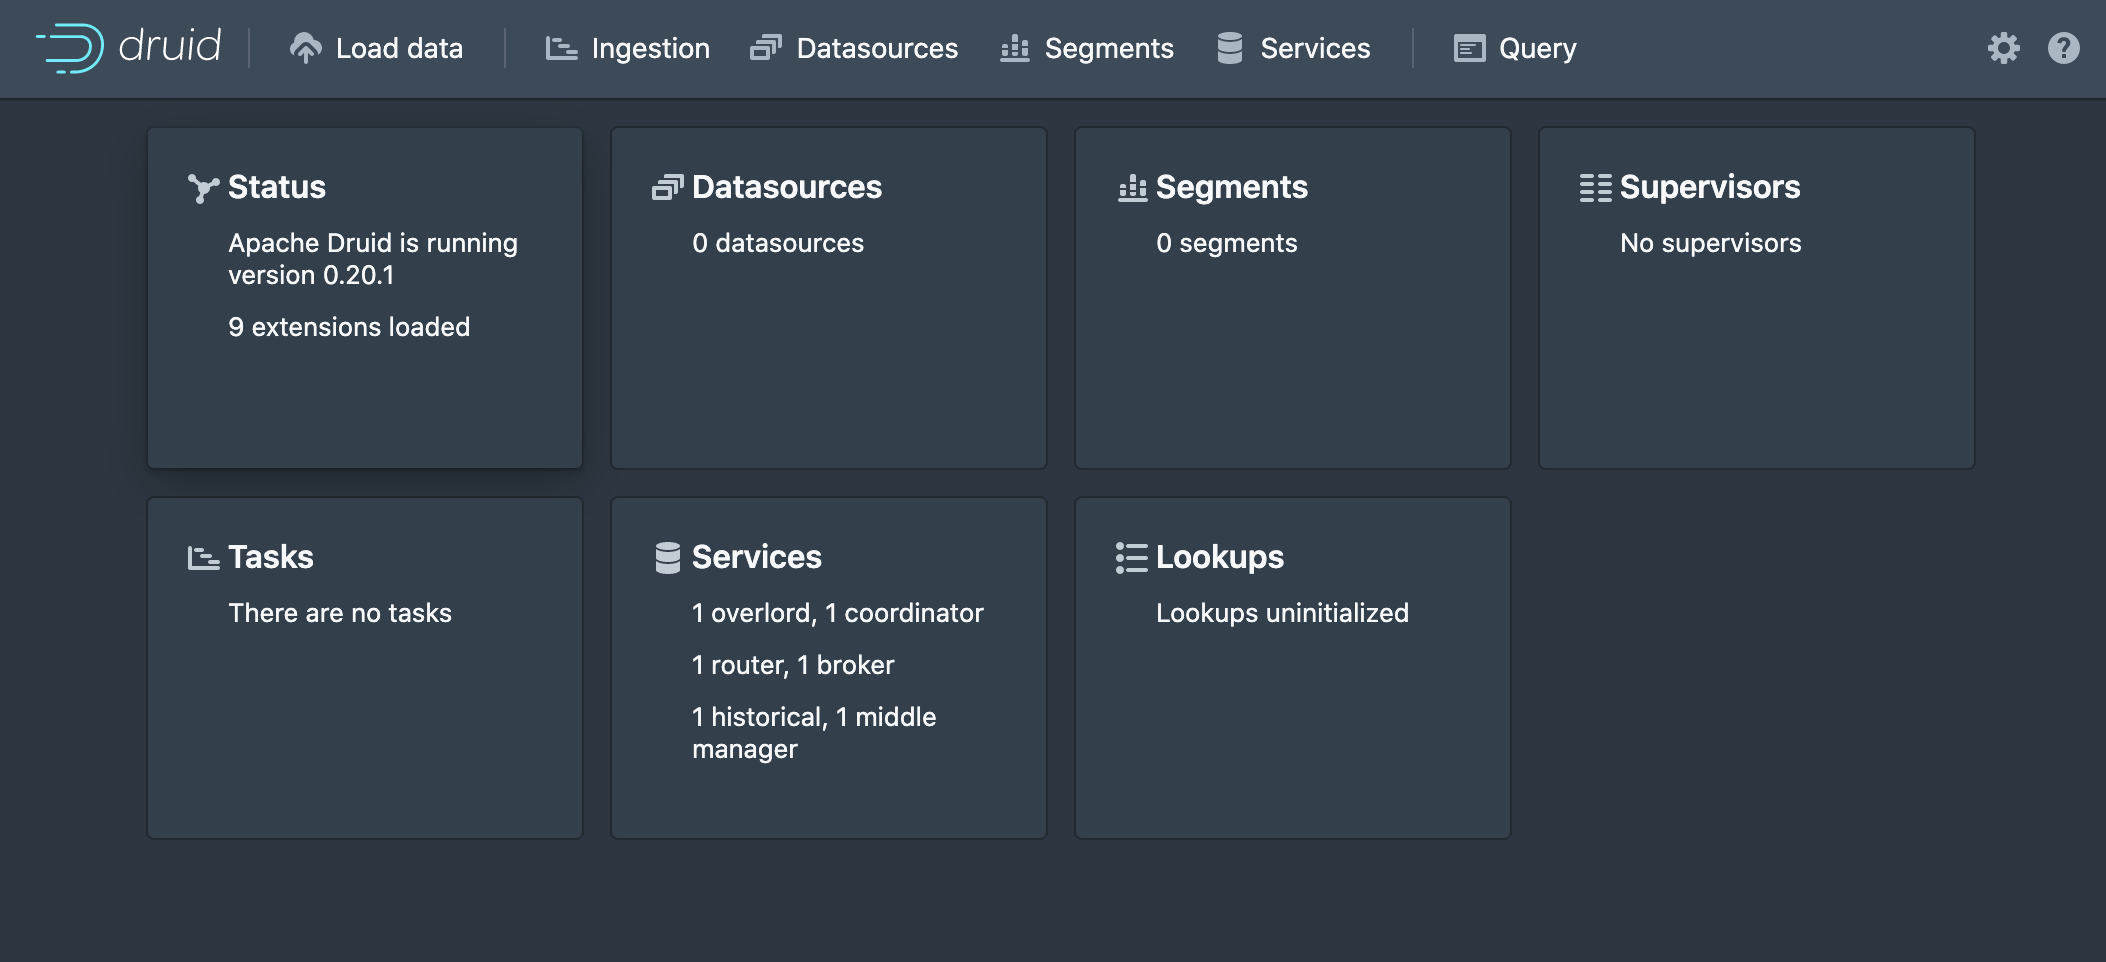
sudo apt install openjdk-8-jre-headlessDownload and unpack the latest version of Druid, which at the time of writing, is Druid 0.20.1.
wget https://apache.claz.org/druid/0.20.1/apache-druid-0.20.1-bin.tar.gz
tar -xzf apache-druid-0.20.1-bin.tar.gz
Now we will add some stuff to enable basic metadata authentication in Druid's configuration files. Navigate into the newly created druid directory, then open the common.runtime.properties configuration file in a text editor.
cd apache-druid-0.20.1
nano /conf/druid/single-server/micro-quickstart/_common/common.runtime.properties
First, add the druid-basic-security extension to the list of extensions loaded when Druid starts.
druid.extensions.loadList=[...,"druid-basic-security"]When using Druid's basic-security extension with Superset, we need to configure a user with a password that has permissions to perform SQL queries against our data. The simplest way to do this is define an admin user and specify a password, in this case password1.
#
# Authentication
#
druid.auth.authenticatorChain=["MyBasicMetadataAuthenticator"]
druid.auth.authenticator.MyBasicMetadataAuthenticator.type=basic
druid.auth.authenticator.MyBasicMetadataAuthenticator.initialAdminPassword=password1
druid.auth.authenticator.MyBasicMetadataAuthenticator.initialInternalClientPassword=password2
druid.auth.authenticator.MyBasicMetadataAuthenticator.credentialsValidator.type=metadata
druid.auth.authenticator.MyBasicMetadataAuthenticator.skipOnFailure=false
druid.auth.authenticator.MyBasicMetadataAuthenticator.authorizerName=MyBasicMetadataAuthorizer
Here we are also defining a password for the internal client and giving our authenticator a name that can be referred to in other places. If interested, I would advise checking out the relevant part of the Druid documentation for more detailed information.
We also need to add an escalator and an authorizer like so.
# Escalator
druid.escalator.type=basic
druid.escalator.internalClientUsername=druid_system
druid.escalator.internalClientPassword=password2
druid.escalator.authorizerName=MyBasicMetadataAuthorizer

# Authorizer
druid.auth.authorizers=["MyBasicMetadataAuthorizer"]
druid.auth.authorizer.MyBasicMetadataAuthorizer.type=basic
All done! Open a new screen and start druid.
screen
./bin/start-micro-quickstart
We can now detach from the screen (CTRL+A, CTRL+D) and log in to the druid web interface by navigating to the IP of our instance on port 8888.
Step 2: Configure Superset to load Prophet
Now we have to get the prophet package into Superset's python environment. There are a number of different ways to run Superset. The simplest (and what I recommend to beginners) is to use the docker-compose stack. If setting up Superset for the first time, follow those instructions and ensure you are able to log in to Superset with no issues before continuing. Note: Superset can take a while to docker-compose up, especially the first time. I recommend monitoring the process in the terminal and giving it up to thirty minutes to do its thing.
Note: When running the latest version Superset from the docker-compose stack without extra packages like prophet, try docker-compose -f docker-compose-non-dev.yml up from the base directory of the repo to get going a lot faster.
To add prophet to the docker-compose stack:
- Add
fbprophetto./docker/requirements-local.txt. docker-compose down -vdocker-compose up- After Superset starts, if fbprophet's dependencies failed to build the first time, CTRL+C to terminate.
- Repeat steps 2-4 as needed (it took me two times for prophet to have no build dependency errors)
The process for the manual install is very similar, but fbprophet should be instead added to Superset's ./requirements.txt file. Be prepared to troubleshoot issues with fbrophet's dependencies if they arise.
Step 3: Connect Druid to Superset
This is the easy part. In Superset, mouse over the Data tab and select Databases. Click the + Database button in the top right corner.

Give the database a name and input the connection string, which should look like this:
druid://admin:password1@10.0.0.1:8082/druid/v2/sql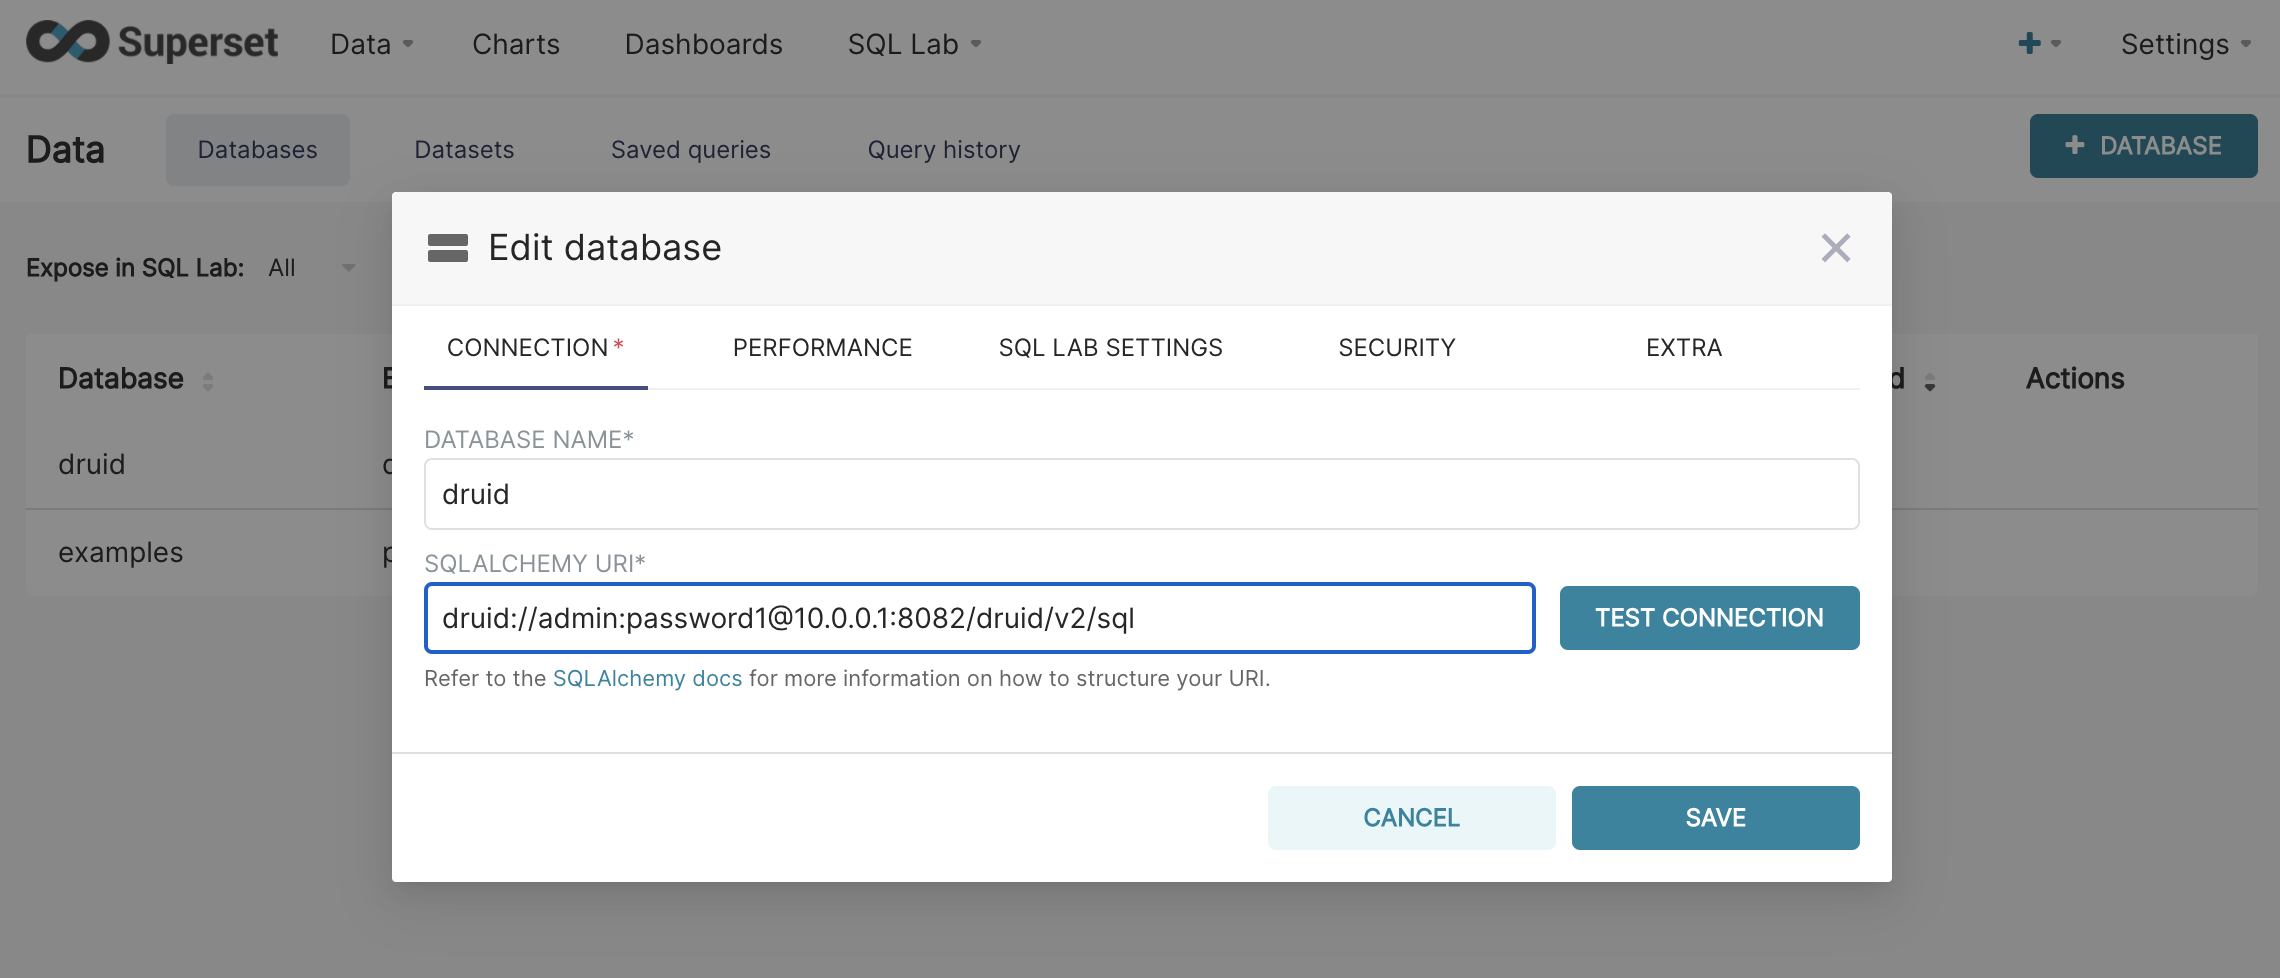
Where 10.0.0.1 has been replaced with the address of Druid, and password1 is the password you configured for the admin user in Step 1. Click the test connection button to make sure there are no problems, then save the connection.
Congratulations! You now have Druid running and connected to Superset with Prophet installed!
In part 2 of this series, we will explore ingestion of time-series data into Druid, then create our first visualization with Superset's time-series charts.
Join our community slack, visit Superset on Github, and get involved!
Related Reading
- Real-Time vs Time-Series Databases — Understanding different database types for analytics
- ECharts Time-Series Visualizations — Explore time-series charting capabilities
- Time-Series Forecasting: A Complete Guide — Deep dive into forecasting techniques
- Real-Time Analytics in Apache Superset — Building real-time dashboards
