


Managing Apache Superset Assets as Code with Preset


Apache Superset offers a rich UI from which you can manage your databases, datasets, charts, dashboards, and more, allowing technical and non-technical users to build assets and find the answers they need. There are times, though, when you need more control over these assets, and you want to manage them as code, benefiting from version control systems, code review, continuous deployments, and more.
Luckily, Superset offers a rich API for resource management, which can be leveraged to simplify this task. With the API we can build tools that integrate with metrics repositories and semantic layers,
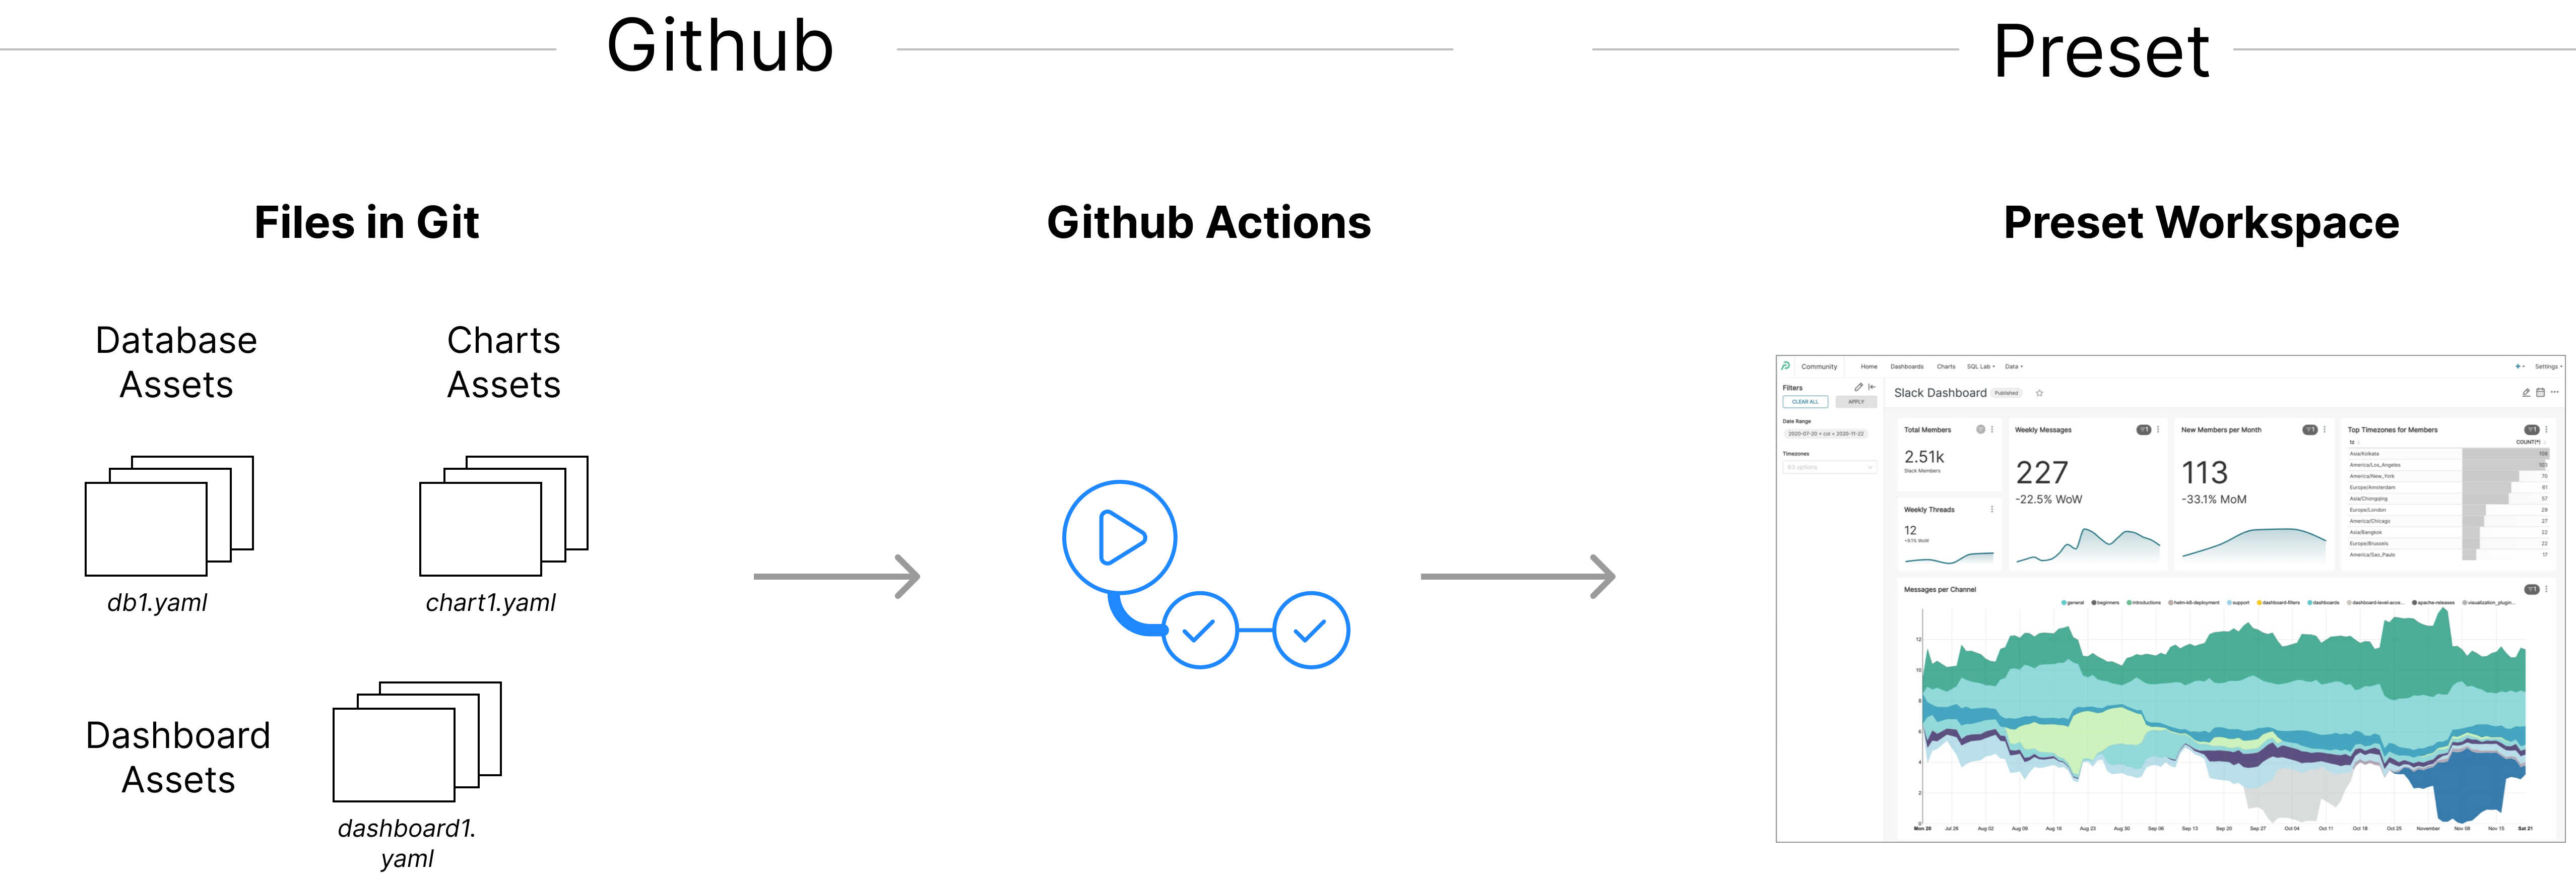
In this blog post we’re going to walk through a use case where information about a database, a dataset, a chart, and a database are all managed in a GitHub repository, stored as easy-to-read YAML files native to Superset. A GitHub Action will publish these assets to a Superset instance running in a Preset workspace every time new changes are merged.
As a bonus step we’ll also show how to use templating in the YAML definitions, in order to customize the assets generated depending on a series of factors.
In a future post we’ll show how to use the same tools described here to integrate Superset with DBT, as well as doing a deeper dive in how the assets can be customized across multiple workspaces.
If you prefer a live demo, we're showing the workflow outlined in this post on July 19th. You can signup for that event or watch the recording afterwards at this link.
The Preset CLI
Superset and Preset already offer powerful APIs that allow you to create and manage resources programmatically. With the Superset API you can connect to databases, create datasets, run queries, build charts and dashboards, and more.
Preset Manager is our multi-tenant platform that lets you spin up and manage multiple Superset workspaces. Preset also exposes a rich GUI for managing role-based access control and assigning members to teams.
We expose all of this added functionality through the Preset API. To further improve the developer experience, we went one step further and created a command-line interface (CLI for short) that hides most of the complexity that arises from this added functionality. The Preset CLI knows how to talk to Superset, and wraps that functionality in order to talk to the multiple workspaces capability that Preset offers, allowing you to run the same operations on multiple workspaces.
We put a lot of effort into making using the CLI effortless!
Pre-requisites
Install the Preset CLI
The first step is installing a Preset command-line-interface (CLI) utility, written in Python. Make sure you have a Python version 3.8 or later. It’s also recommended to install the CLI in a virtual environment (using something like pyenv). Then run:
% pip install "git+https://github.com/preset-io/backend-sdk.git"This will install the latest version of the CLI, adding a new command called preset-cli to the $PATH of the virtual environment. You can test if everything was installed correctly by running preset-cli --help:
% preset-cli --help
Usage: preset-cli [OPTIONS] COMMAND [ARGS]...

  A CLI for Preset.

Options:
  --baseurl TEXT
  --api-token TEXT
  --api-secret TEXT
  --jwt-token TEXT
  --workspaces TEXT
  --help             Show this message and exit.

Commands:
  auth      Store credentials for auth.
  superset  Send commands to one or more Superset instances.
[Optional] Clone the repository
If you want to follow along this blog post you can clone the repository https://github.com/preset-io/headless-bi-blog-post-examples (or download the files if you don’t have a GitHub account). The repository also has a custom GitHub Action that runs the CLI every time new changes are merged into the main branch, so you can use it as a starting point to automatically manage your Superset assets.
💡 Note that the CLI requires API access to Preset, which is available in our Enterprise plan.
To clone the repository:
% git clone "https://github.com/preset-io/headless-bi-blog-post-examples.git"The directory has the following files:
./databases/Google_Sheets.yaml
./datasets/Google_Sheets/country_cnt.yaml
./charts/Count_per_country_79.yaml
./dashboards/Demo_dashboard.yaml
Together, they represent a very simple dashboard with a single chart:
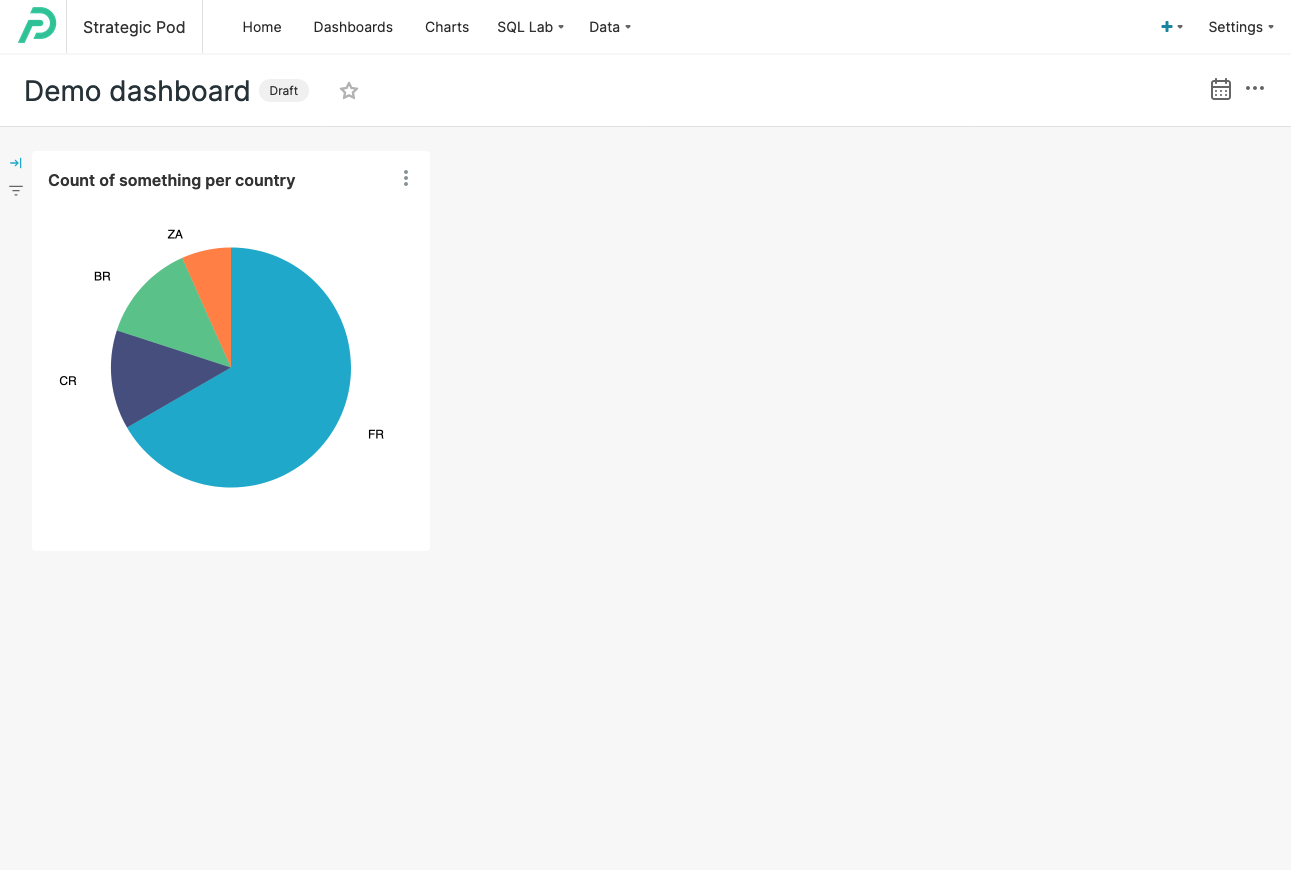
Note that the dashboard uses a public Google Spreadsheet as its database, so if you follow the instructions on this blog post you should be able to see the same data without having to set up a proper database.
Authenticate
In order to publish the assets to our Preset workspace we will need to provide a token/secret pair. This can be easily accomplished by running the preset-cli auth command:
% preset-cli auth
Please generate a new token at https://manage.app.preset.io/app/user if you don't have one already
API token: 35dac901-c775-43ff-8eb4-816edc061487
API secret: [will not echo]
Credentials stored in /Users/beto/Library/Application Support/preset-cli/credentials.yaml
The credentials will be stored in your $HOME directory, in a file that’s readable only by you. Note that you will also need a token/secret pair in order to use the GitHub Action for Continuous Deployment — we’ll cover that later.
Publishing the assets
Now that we have all the prerequisites in place, we can publish our assets to a given Preset workspace:
% preset-cli superset sync native headless-bi-blog-post-examples/If you have more than one workspace available the CLI will print the list of workspaces grouped by team, and prompt you to make a selection.
Choose one or more workspaces (eg: 1-3,5,8-):

# Team 1 #
✅ (1) The Data Lab
🚧 (2) New workspace

# Dev #
⤴️ (3) Test workspace
Alternatively, you can specify the workspaces on the command line as comma-separated list:
% preset-cli --workspaces=https://abcdef12.region.app.preset.io/,https://... \
> superset sync native headless-bi-blog-post-examples/
There are two optional flags that deserve some attention. First, if you try to run the sync command for the second time you’ll notice that it fails. This is because the assets being published already exist. To overwrite them we need to pass the --overwrite flag.
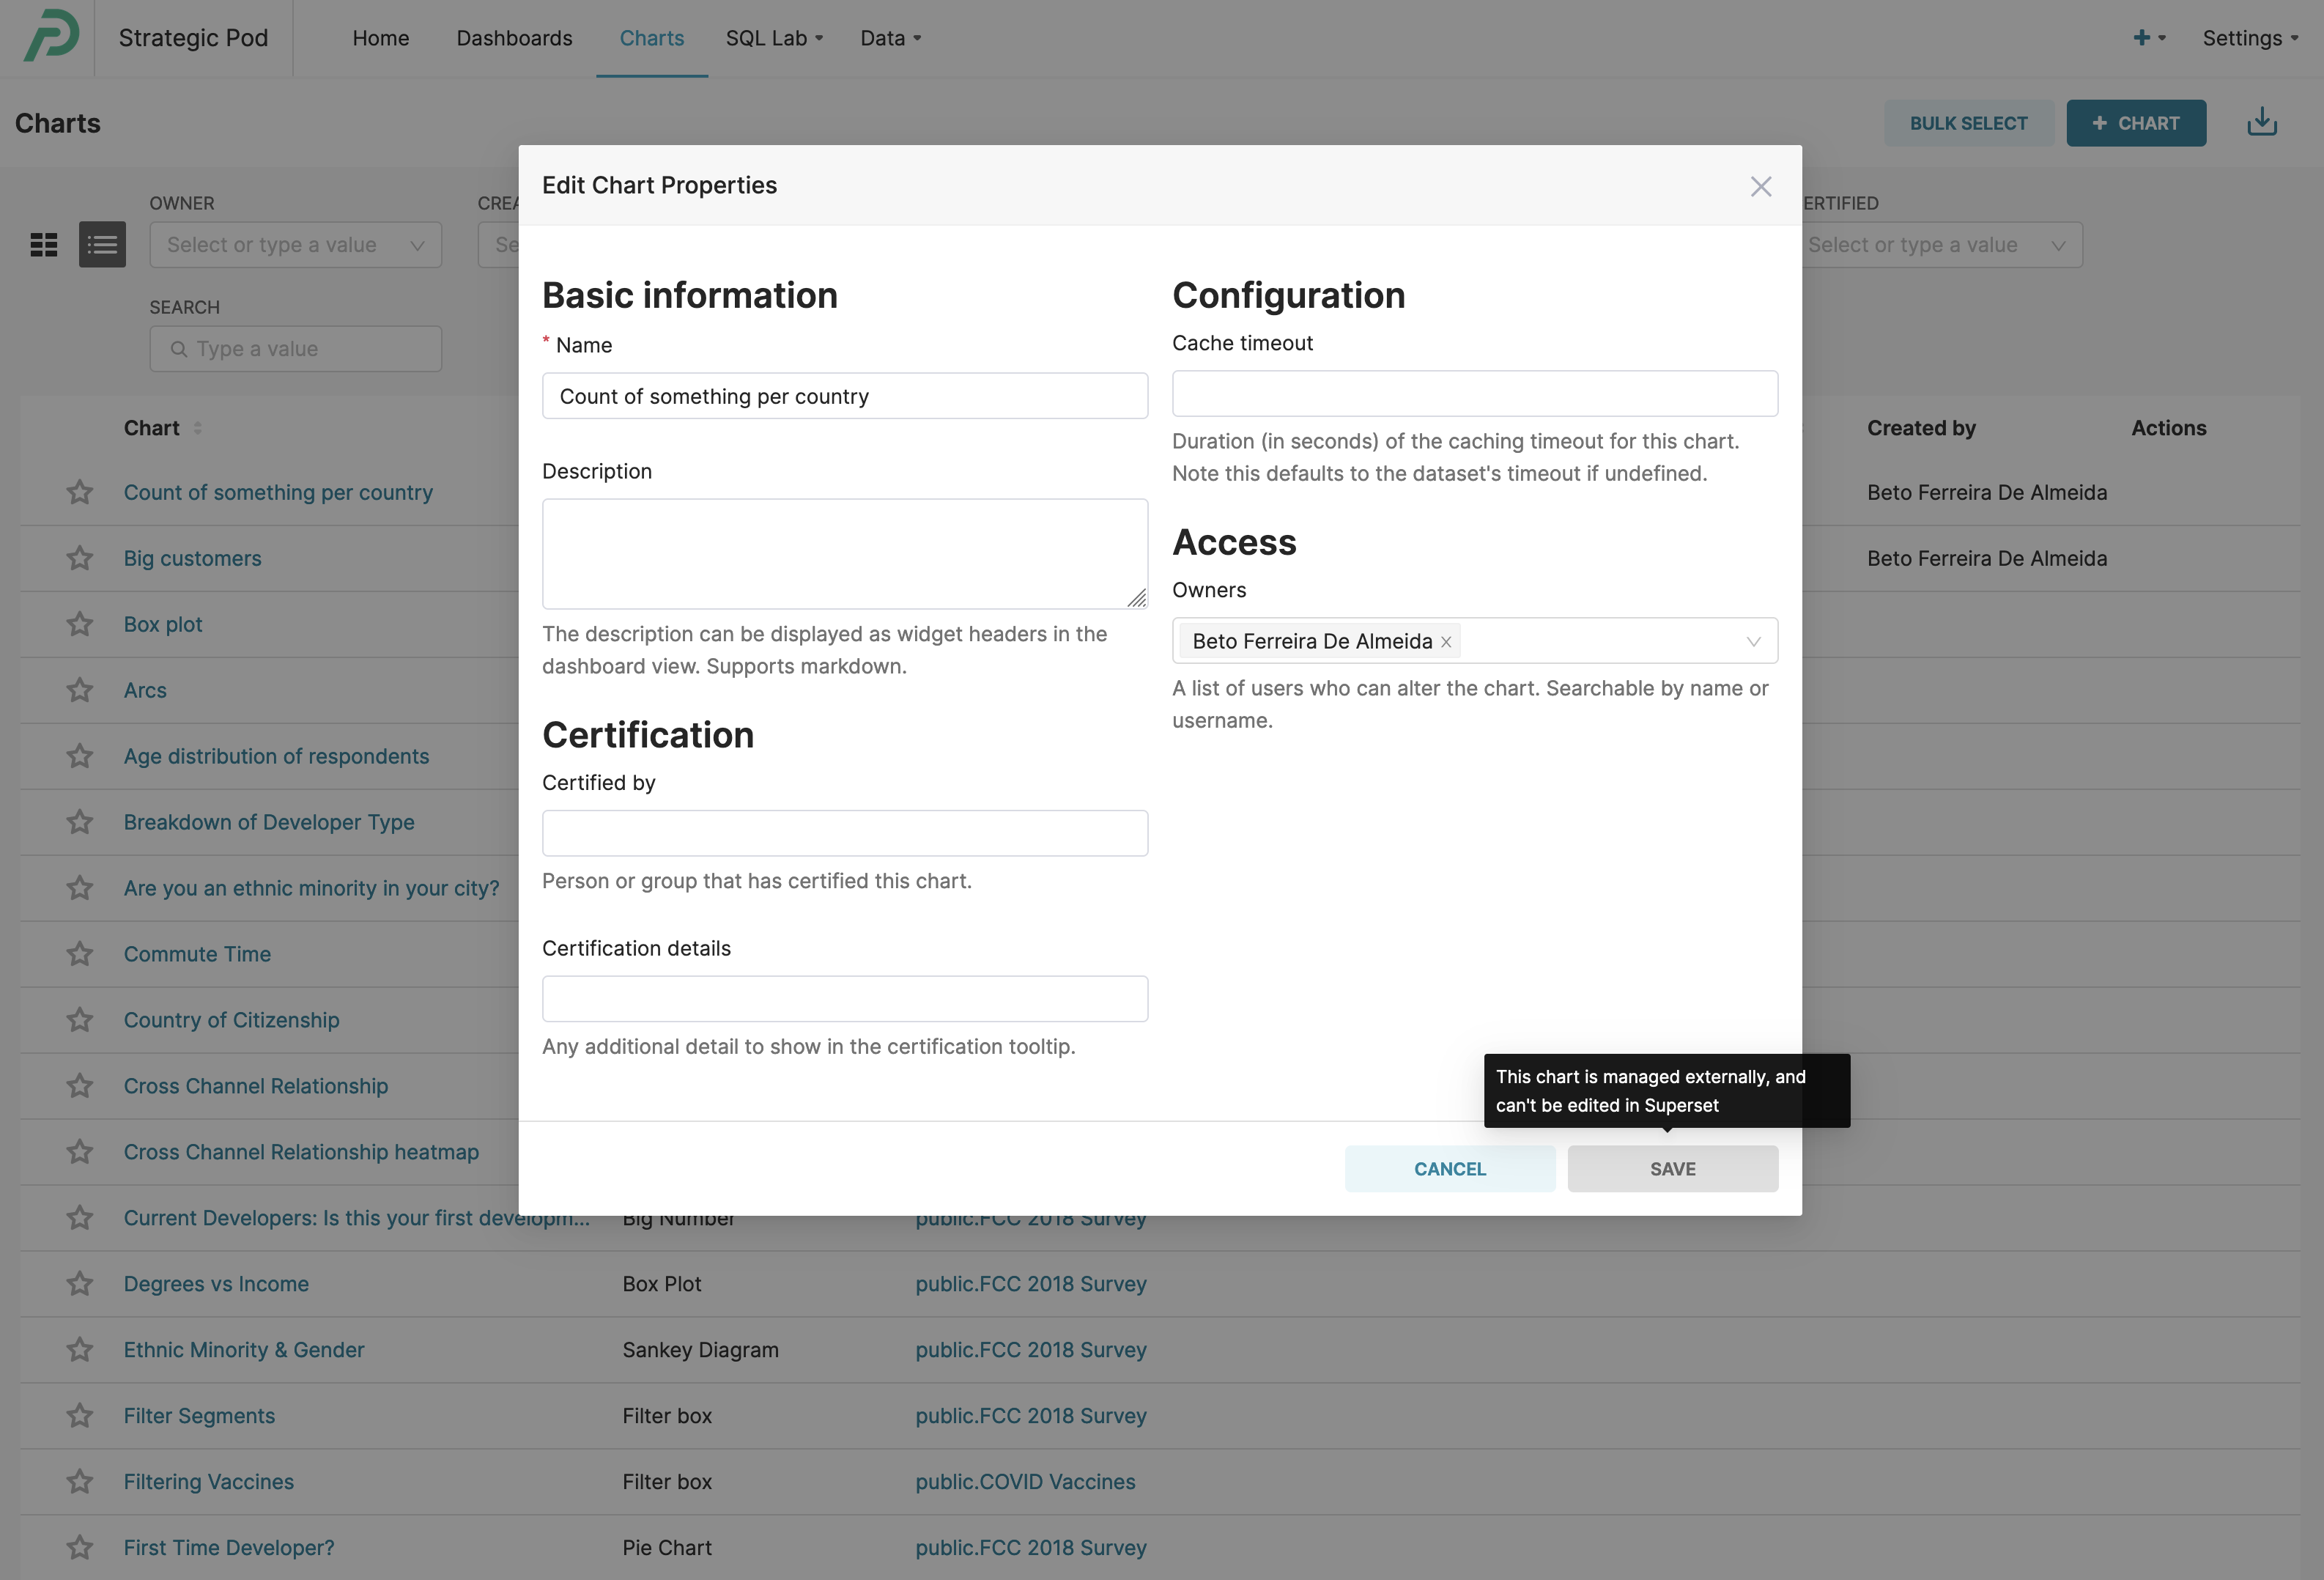
Second, depending on your use case you might or might not want your users to be able to edit the published assets. Allowing users to edit them might be confusing if their changes are later undone, since the source of truth now lives in source control. To prevent users from editing the assets you can pass the ---disallow-edits flag.
Finally, you can also specify a base URL prefix for each of the assets. Currently this information is not displayed anywhere in Superset, but in the future it should be used to inform the users where they can edit the assets. For our example we would use the prefix https://github.com/preset-io/headless-bi-blog-post-examples/blob/main/, so that each assets get an external_url attribute that points to it in the repository:
% preset-cli superset sync native headless-bi-blog-post-examples/ \
> --disallow-edits \
> --external-url-prefix=https://github.com/preset-io/headless-bi-blog-post-examples/blob/main/databases/Google_Sheets.yaml
With this prefix the Google Sheets database, defined by the file databases/Google_Sheets.yaml, would have an external_url value of https://github.com/preset-io/headless-bi-blog-post-examples/blob/main/databases/Google_Sheets.yaml, pointing to the file in the repository. In a near future this will be displayed when a user tries to edit the asset, so they know where the source of truth for it lives.
Continuous deployment
Another advantage of this approach to managing assets is that we can use GitHub Actions to implement continuous deployment to one or more workspaces. This can be done with a simple file (see the example in our repository):
name: 'Publish resources to Preset workspace'

env:
  WORKSPACE: ${{ secrets.WORKSPACE }}

on:
  push:
    branches:
    - main
  pull_request:

jobs:
  publish:
    name: 'Publish resources'
    runs-on: ubuntu-latest

    defaults:
      run:
        shell: bash

    steps:
    - name: 'Checkout CLI'
      uses: actions/checkout@v3
      with:
        repository: preset-io/backend-sdk
        path: preset-cli

    - name: 'Install CLI'
      run: |
        cd preset-cli
        pip install .
        cd ..

    - name: 'Checkout'
      uses: actions/checkout@v3

    - name: 'Publish resources'
      env:
        PRESET_API_TOKEN: ${{ secrets.PRESET_API_TOKEN }}
        PRESET_API_SECRET: ${{ secrets.PRESET_API_SECRET }}
      run: preset-cli --workspaces=${WORKSPACE} superset sync native . --disallow-edits --overwrite
With the action above every time a change is pushed to the main branch (directly, or merging a PR) the following steps occur:
- The CLI repository (https://github.com/preset-io/backend-sdk) is cloned in the worker to a directory called
preset-cli. - The CLI is installed.
- The repository with the assets is cloned (https://github.com/preset-io/headless-bi-blog-post-examples, in this case).
- The
preset-cliis called to publish the assets to a given workspace (defined byWORKSPACE), with the--disallow-editsand the--overwriteflags.
One important thing about the action is that we need to provide the a PRESET_API_TOKEN and a PRESET_API_SECRET via GitHub secrets. These correspond to token/secret pair that we generated when first authenticating with the CLI. You can reuse the credentials that were stored or, even better, create a new pair just for CD at https://manage.app.preset.io/app/user. In addition, we need to create a secret with the URL of the WORKSPACE.
Using templates
Another benefit of the Preset CLI is that it allows the use of templating logic inside the YAML files. The CLI uses Jinja2 as its template engine, the same one used by Superset, dbt, Ansible, and one of the most used template engines for Python.
You can use Jinja2 with any of the YAML files in your repository — databases, datasets, charts, dashboards. This makes it easy to customize your assets depending on certain conditions. For example, you might have 2 different Preset workspaces, and want to connect each one to a different database. In order to do this you could write a file databases/db.yaml that contains a section like this:
# use "db1" for a specific hostname, "db2" otherwise
{% if instance.host == '12345678.region.app.preset.io' %}
sqlalchemy_uri: postgresql://db.example.org:5432/db1
{% else %}
sqlalchemy_uri: postgresql://db.example.org:5432/db2
{% endif %}
The example above leverages the instance variable that is available for templates (an instance of yarl.URL) to define the SQLAlchemy URI of the database. This way a single YAML file can be used to populate different workspaces, so that different groups of users see different data.
In the third blog post of this series we’ll address in details how to customize databases, datasets, charts, and dashboards, in order to create bespoke dashboards in each one of your workspaces.
Passing parameters
In addition to the instance variable, there are other ways of passing parameters to your templated configuration files. The easiest one is using the -o flag in the CLI, which can be called multiple times. Here’s how it works: imagine we want to create a chart that shows data for different countries in different workspaces — one workspace might show data for Brazil, while another would show for France. We could add a section like this to our chart definition:
{% if country %}
slice_name: Count in {{ country }}
{% else %}
slice_name: Total count
{% endif %}

viz_type: big_number_total

params:
  {% if country %}
  adhoc_filters:
  - clause: WHERE
    comparator: null
    expressionType: SQL
    filterOptionName: filter_osfx5u3a5ks_qu7tlefn04j
    isExtra: false
    isNew: false
    operator: null
    sqlExpression: country = '{{ country }}'
    subject: null
  {% else %}
  adhoc_filters: []
  {% endif %}
With this configuration file, if country is not defined the name of the chart (”slice”, in old jargon) would be “Total count”, and it would have no adhoc filters. But once country is defined (eg, “BR”) then the title changes to “Count in BR”, and an adhoc filter of country = 'BR' is added to the chart definition. To pass a filter we just need to invoke the CLI this way:
% preset-cli superset sync native -o country=BR headless-bi-blog-post-examples/Multiple flags can be passed by simply repeating the -o flag:
% preset-cli superset sync native -o country=US -o state=CA -o ...Custom functions
While the previous example is useful, sometimes more complex logic is necessary. To cater to power users the CLI also allows the definition of custom Python functions that can be called inside the templates. In order to do this, simply create a directory called functions alongside the assets. In our examples repository we have a simple example file called demo.py with a single function:
# functions/demo.py
def hello_world() -> str:
    return "Hello, world!"
This function can be called inside templates by simply called functions.demo.hello_world(). For example, if we want to have a chart with the title “Hello, world!” we could add this to its definition:
slice_name: {{ functions.demo.hello_world() }}These functions can do anything you want. Imagine you want to create a new chart every time the assets are published, instead of overwriting the same chart. One way to do that would be changing the chart’s UUID to a new value, so that a new one is created. This can be done by exposing the uuid4 function:
# functions/chart.py
from uuid import uuid4
And then in the chart definition:
uuid: {{ str(functions.chart.uuid4()) }}Creating your own assets
In all of the examples above we used a simple synthetic example as our source of truth. And while the examples repository may be a great starting point for managing assets in source control, how do we go to creating useful datasets, charts, and dashboards for the real world?
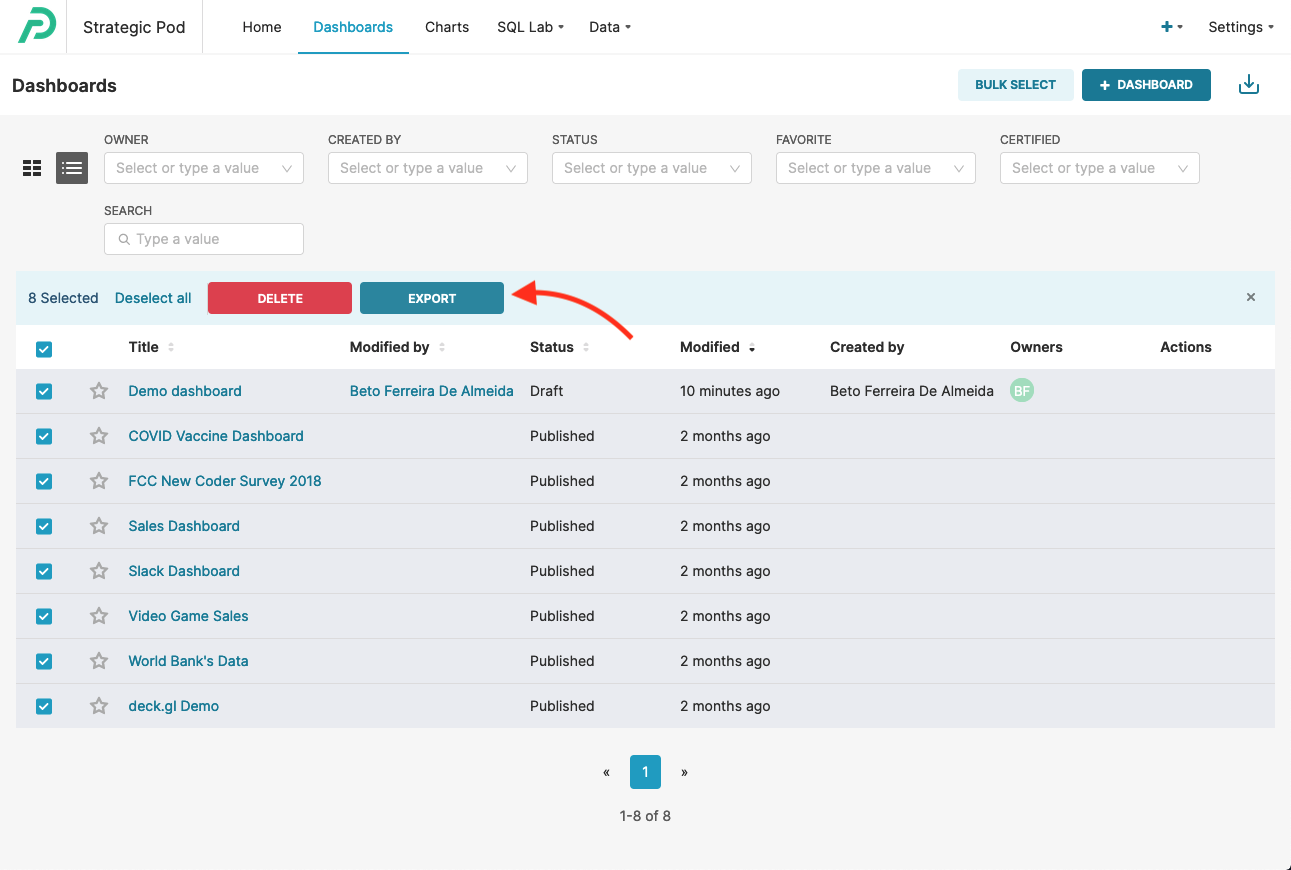
We certainly don’t expect you to write YAML files for each asset by hand — there’s an easier way! The YAML schema used in these examples is the same used by the import/export functionality of Superset. The easiest way to start managing assets with code is to create them in Superset itself. You can build your dashboards in Superset and export them with a single click:
The download will be a ZIP file containing YAML files for all the dashboards, charts, datasets, and databases. Simply unpack the ZIP file into a directory and you’re ready to use it as the source of truth for your assets.
Note that this workflow will only export assets that are attached to dashboards. This happens because the exported dashboards include YAML files for all their charts; the charts do the same for datasets; and datasets for databases. But if you have an orphan chart (one that doesn’t belong to any dashboard), an orphan dataset, or an orphan database, they will not be exported with the dashboards.
One way to workaround this is simply going to the chart/dataset/database tabs and repeating the procedure. Since the assets are identified by a UUID imports are idempotent, and it’s OK if an asset is imported more than once in this workflow.
There is also another way: using the CLI itself. If you want to export all the databases, datasets, charts, dashboards, and even saved queries from a Preset workspace you can simply run the following command:
% preset-cli superset export output-directory/Alternatively, if you want to export assets from a standalone Superset installation there is also a special command called superset-cli that comes with the Preset CLI. You can run it with:
% superset-cli https://superset.example.org/ export output-directory/All of the preset-cli superset commands used in the blog post can be replaced by a superset-cli command in the same way, meaning it’s easy to move data from Superset to Preset or vice-versa. You can run superset-cli --help for instructions on how to authenticate against a self-hosted Superset installation.
Final words
We're showing the workflow outlined in this post on July 19th. You can signup for that event or watch the recording afterwards at this link.
In this blog post we explored how the Preset CLI can be used together with the Superset API to manage assets as code and to help version control your dashboards. Databases, datasets, charts, and dashboards can be stored as readable YAML files, made even more powerful via Jinja2 templates. These assets can be deployed continuously and to multiple workspaces, customized to each one.
We hope that the examples in this post, even if simple, will inspire you to come up with new ways to manage your assets and leverage all the functionality that we’ve built into the CLI and the Superset API. Let us know how you’re using the Preset CLI, how you’re using custom Python functions inside your templates, and all the exciting things you’re building!
