


The Preset API for Absolute Beginners


1. What is Preset.io?

Preset is a tool that makes working with data more accessible and enjoyable. Think of it like a friendly guide for your data. It allows you to create beautiful, interactive charts and dashboards from your data, without needing to be a coding expert.
Preset uses a popular open-source tool called Apache Superset, enhancing it with additional features and a more user-friendly interface. It’s great for exploring your data, discovering insights, and sharing your findings with others in a visually appealing way. So, if you’ve got data and you want to make sense of it, Preset helps you ‘visualize’ your data journey in an easy and fun way! Let’s chart this out!
2. What is an API?
Imagine you're at a restaurant. You sit at a table with a menu of choices to order from, and the kitchen is the part of the system that will prepare your order. What's missing is the critical link to communicate your order to the kitchen and deliver your food back to your table. That's where a waiter, or in our case, an API, comes in.
An API, or Application Programming Interface, is similar to that waiter. It's a messenger that takes requests, tells the system what you want to do, and then returns the response back to you. In technical terms, it's a set of rules and protocols for building and interacting with software applications. APIs allow different programs to communicate with each other, enabling them to share data and functionality safely and efficiently.
3. What is the Preset API?
The Preset API is a powerful feature that allows you to interact with the Preset tool programmatically. It lets you:
- Automate tasks (e.g. create, modify, or delete Charts, Dashboards, Workspaces, User Accounts, Filters, Permissions (used to manage DAR and RLS), Reports, and manage Teams, etc.)
- Integrate Preset with other tools or systems
- Customize your data visualization experience
For instance, you can use the API to automatically update or create new dashboards, extract data visualizations for use in other applications, or even manage user accounts and permissions if you’re administering Preset for a team. This means you don’t have to do everything manually within the Preset interface; you can write scripts or use other software to communicate with Preset, telling it what to do with your data.
It’s like giving Preset a set of instructions through code, which can save time, enhance functionality, and allow for more complex and tailored data management and visualization strategies. If you’re comfortable with programming, or willing to learn, the Preset API opens up a whole new world of possibilities for how you work with your data.
4. What is needed to use the Preset API?
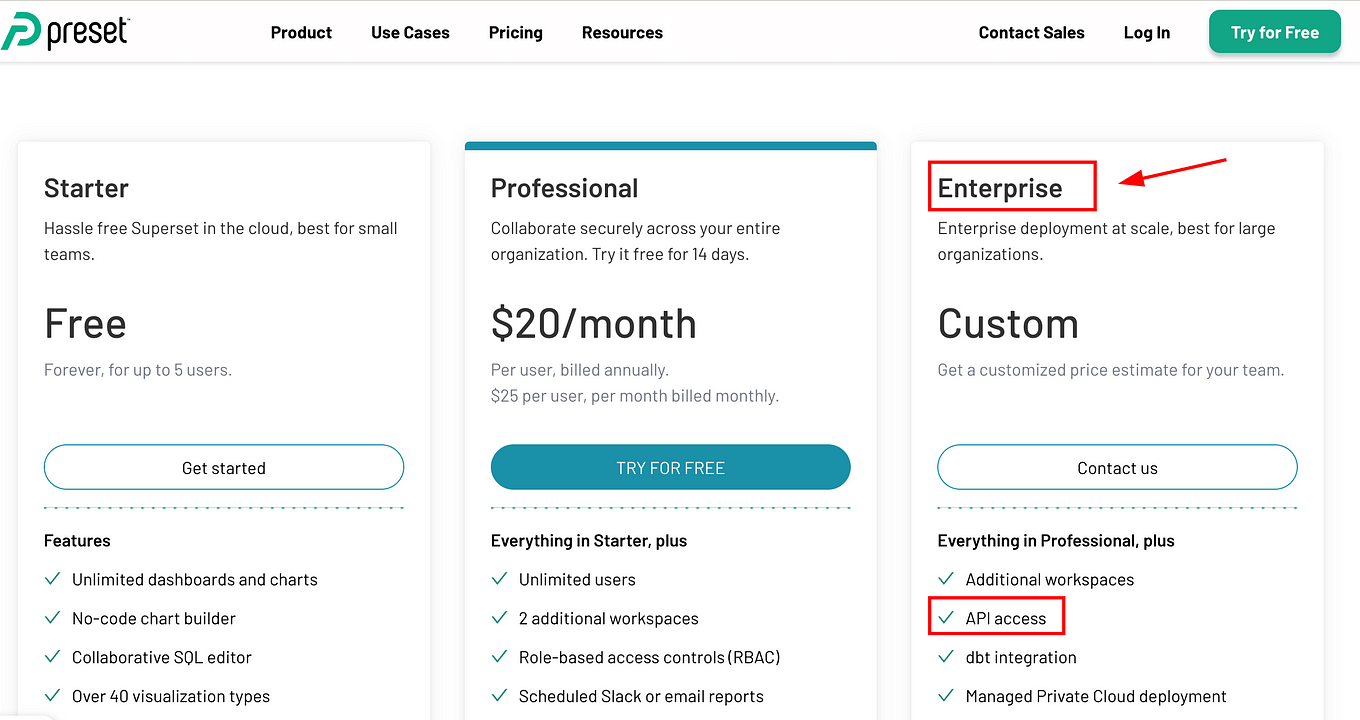
4.1 Preset Enterprise account
First of all, Preset API access is only available in Enterprise, but not available to all Enterprise customers. If you’re on the Enterprise tier, feel free to reach out to their Support team or your Account Executive to confirm if the API is included in your subscription. Enterprise plan.
Now, if you already have an Enterprise account with the Preset API Access, you need to decide whether you want to use it by:
- Writing scripts or
- Using other software (tools) to communicate with APIs.
The easiest and fastest way to interact with the Preset API is through the second option, that we can achieve using Postman.
4.2 Postman

Postman is a popular tool used by software developers, especially for working with APIs (Application Programming Interfaces). It’s designed to make the process of developing, testing, and using APIs simpler and more efficient.
So to continue with this tutorial, proceed to create a free Postman account and then decide whether you want to install Postman on your laptop or use the online tool (both options work).
In the following steps, we will be using Postman installed locally on Mac.
4.3 Preset API documentation
Finally, the last tool needed to get used to the Preset API neither more nor less than the Preset API documentation. This will help you a lot to understand how to trigger and use each functionality you are looking for.
5. Understanding the Preset API
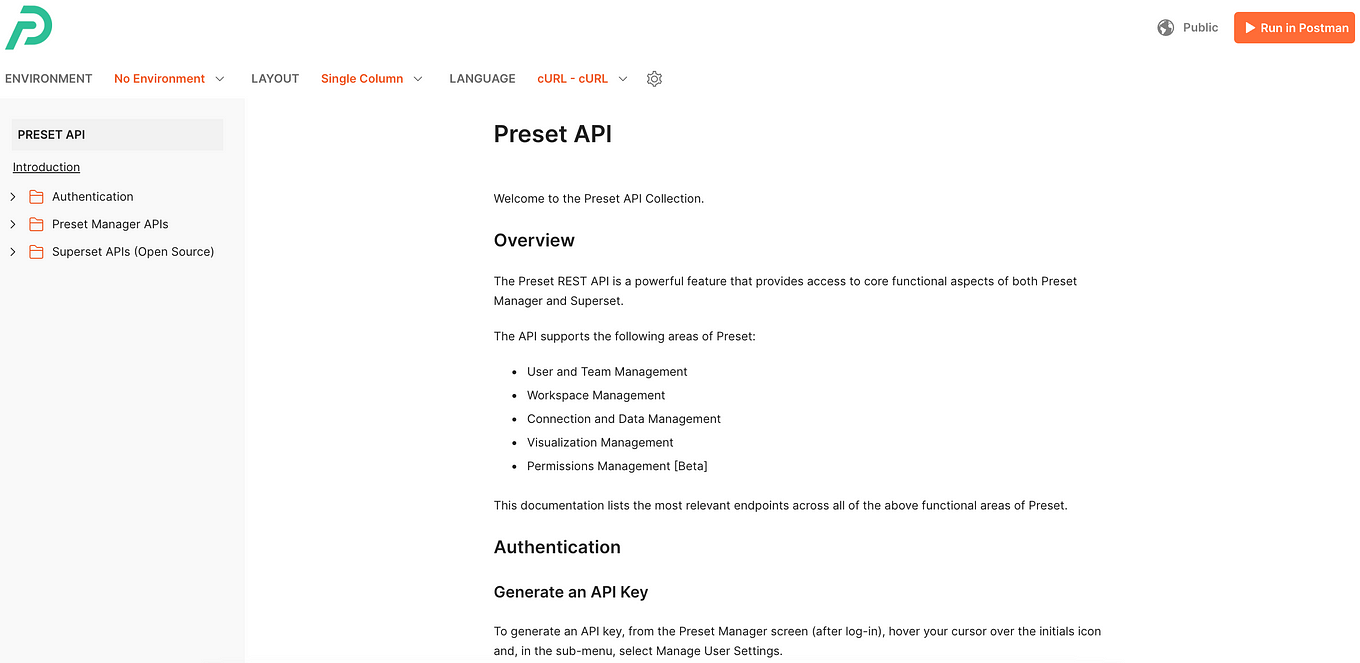
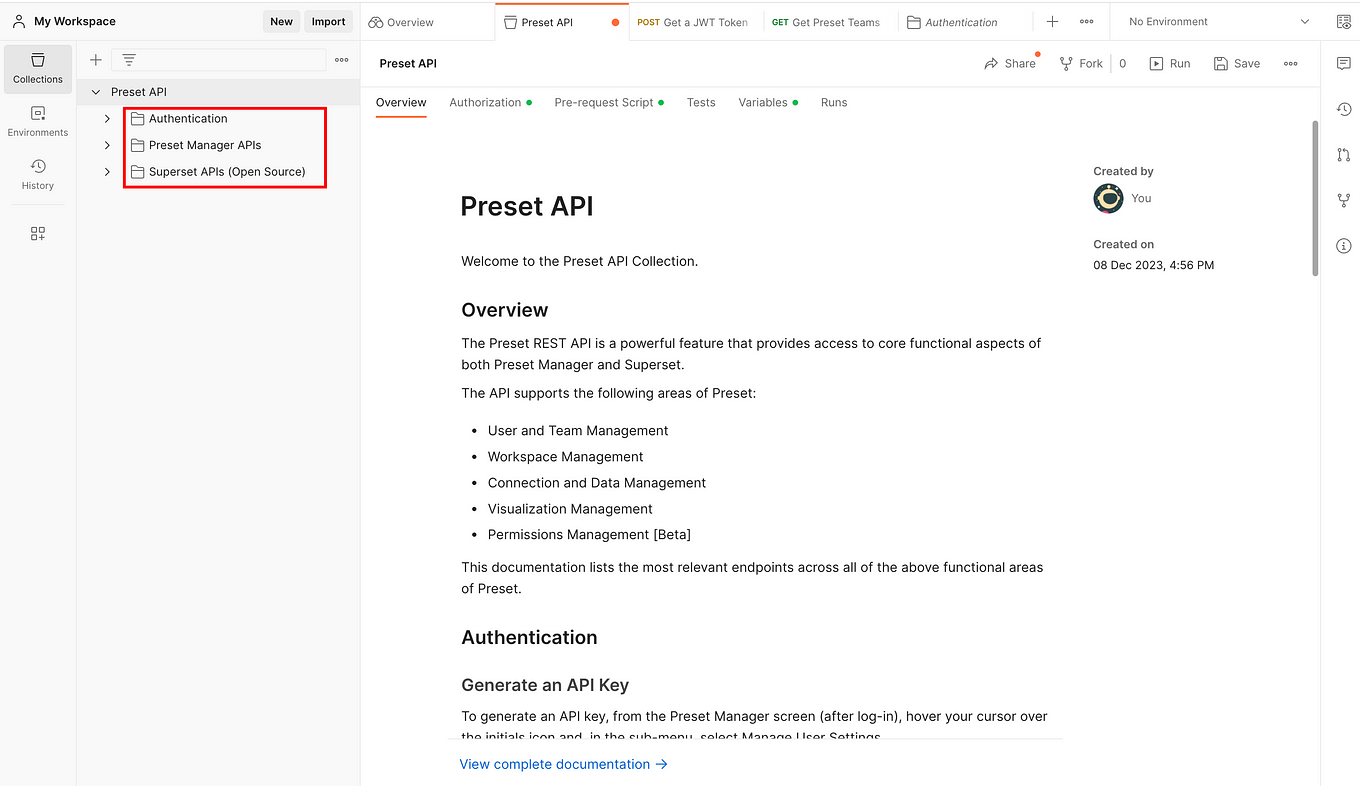
As we mentioned, the fundamental tool to understand how to use the Preset API will be its documentation. When you look at it, you will see three main folders on the left panel:
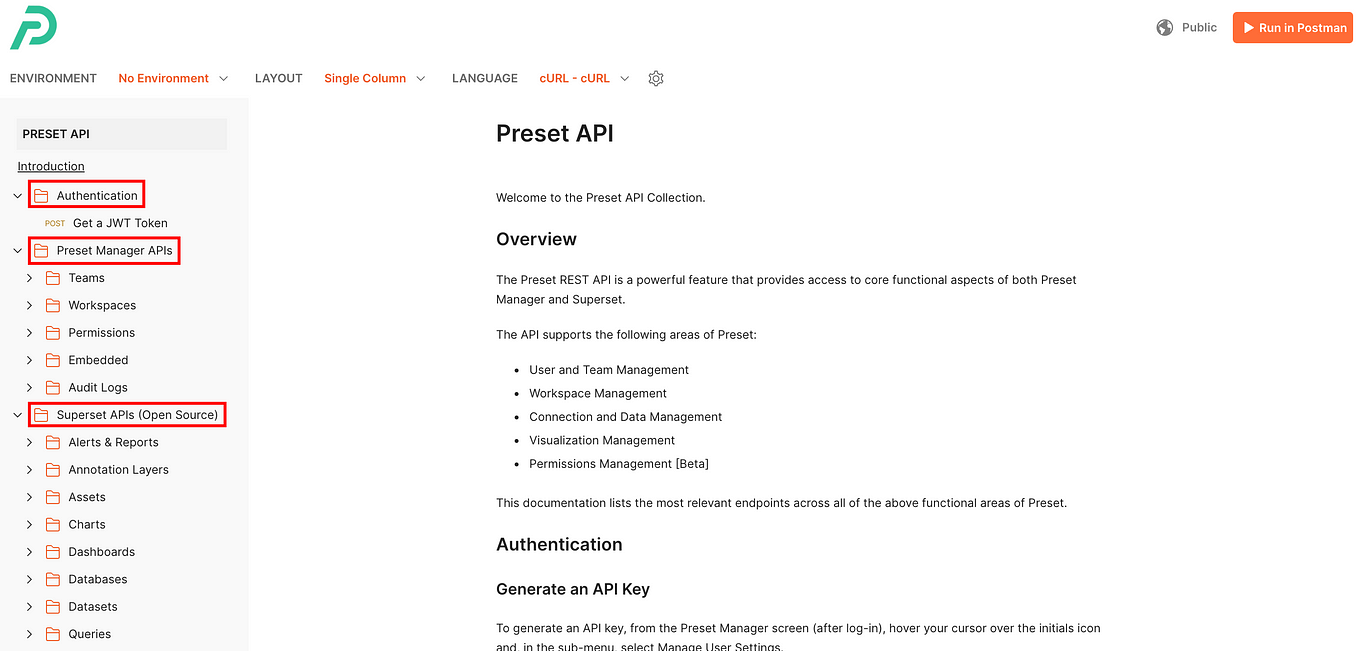
Each of these folders has different subfolders that contain API endpoints, which are specific addresses (URLs) where an API can access the resources it needs to perform a function. Before progressing, let's get a general idea of what these three main folders have to offer:
- Authentication: This folder contains information on how to verify your identity to the Preset API. Just like you need a key to unlock a door, you need an API key or token to access Preset’s features through the API.
- It explains how to obtain a JWT (JSON Web Token), which is a secure way to get a token that confirms your identity. Each time you make a request to the API, you’ll include this token to let Preset know it’s really you.
After explaining the folders you will realize in the next section that in order to use all the different API endpoints in the other two main folders (Preset Manager APIs and Superset APIs (Open Source)) you need to use the content of this Authentication folder, which means using the “Get a JWT Token” endpoint .
Important: your JWT token has the same permissions as your account, so you can’t perform actions via the API if you also don’t have permission via the UI.
- Preset Manager APIs: This section is focused on managing the different parts of Preset, like teams, workspaces, and permissions. Here’s what you might find inside:
- Teams: Instructions on how to create, modify, or delete teams within Preset.
- Workspaces: Similar to teams, but for managing workspaces, which are like separate areas in Preset for different projects or groups.
- Permissions: Details on how to control who can do what within Preset, like who can create dashboards or view certain data.
- Embedded: Information on how to embed Preset visualizations into other web applications.
- Audit Logs: Guidelines on how to access records of who did what in Preset, which is important for security and compliance.
- Superset APIs (Open Source): Since Preset is built on top of Apache Superset, this folder contains APIs that interact directly with Superset’s features. These are more technical and include:
- Alerts & Reports: How to set up or manage alerts and automated reports.
- Annotation Layers: Managing layers of annotations, which are notes or labels that can be added to your data visualizations for extra context.
- Assets: The Assets APIs allows you to import a collection of assets (dashboards, charts, datasets, etc) or create an export of all your Workspace
- Charts: API calls for creating, updating, and managing charts.
- Dashboards: Similar to charts, but for entire collections of visualizations that make up a dashboard.
- Databases: How to connect and manage the databases that store your data.
- Datasets: Instructions for managing datasets, which compose your semantic layer.
- Queries: Running and managing data queries, which are questions you ask your database to retrieve specific data.
- SQL Lab: SQL Lab is a tool within Superset that allows users to write and run SQL queries directly against their databases. The folder contains one endpoint to execute queries.
- Tags: Tags are used to organize and categorize different elements within Superset, such as dashboards, charts, or databases. These endpoints allow you to create, assign, update, or delete tags.
6. How to use the Preset API?
All right! If you get to this point you are ready to put your hands on the Preset API.
6.1 Importing Preset API Collection into Postman
To start with this, you can import the Preset API collection into Postman using this button:
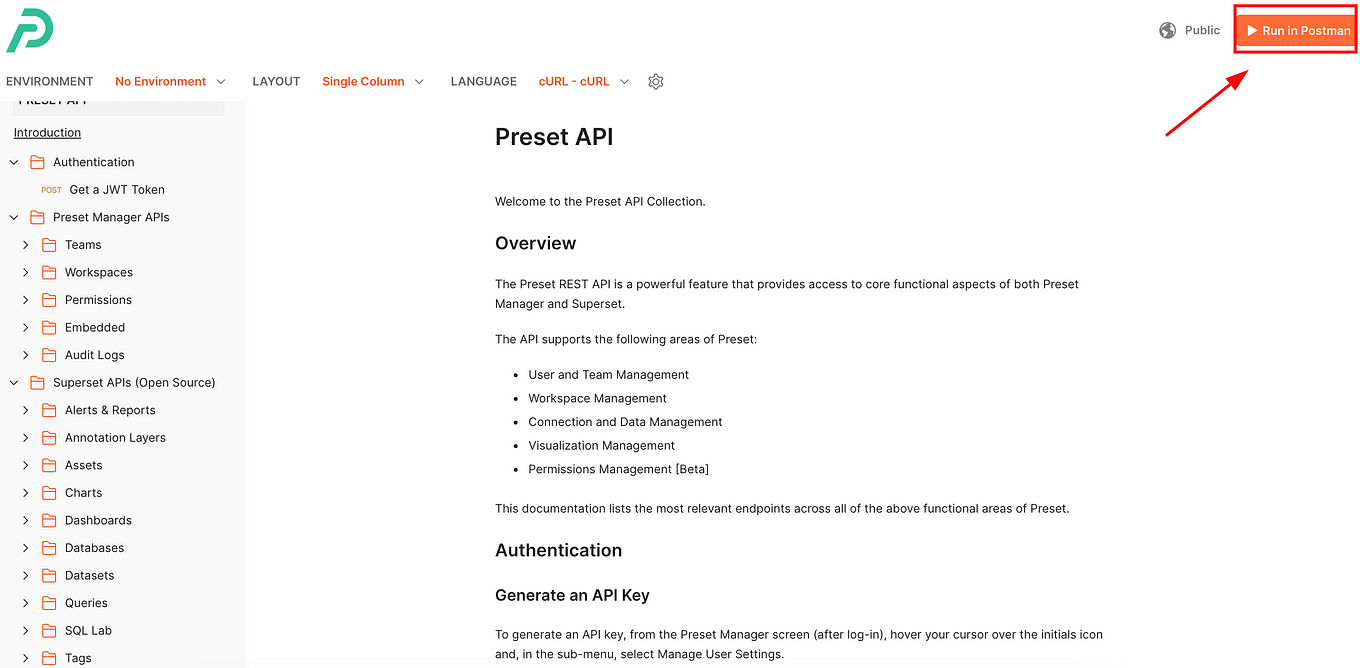
Once you click on it, all the content of the three main folders that we discussed will be imported into your Postman instance:
6.2 Getting your token to use all the endpoints
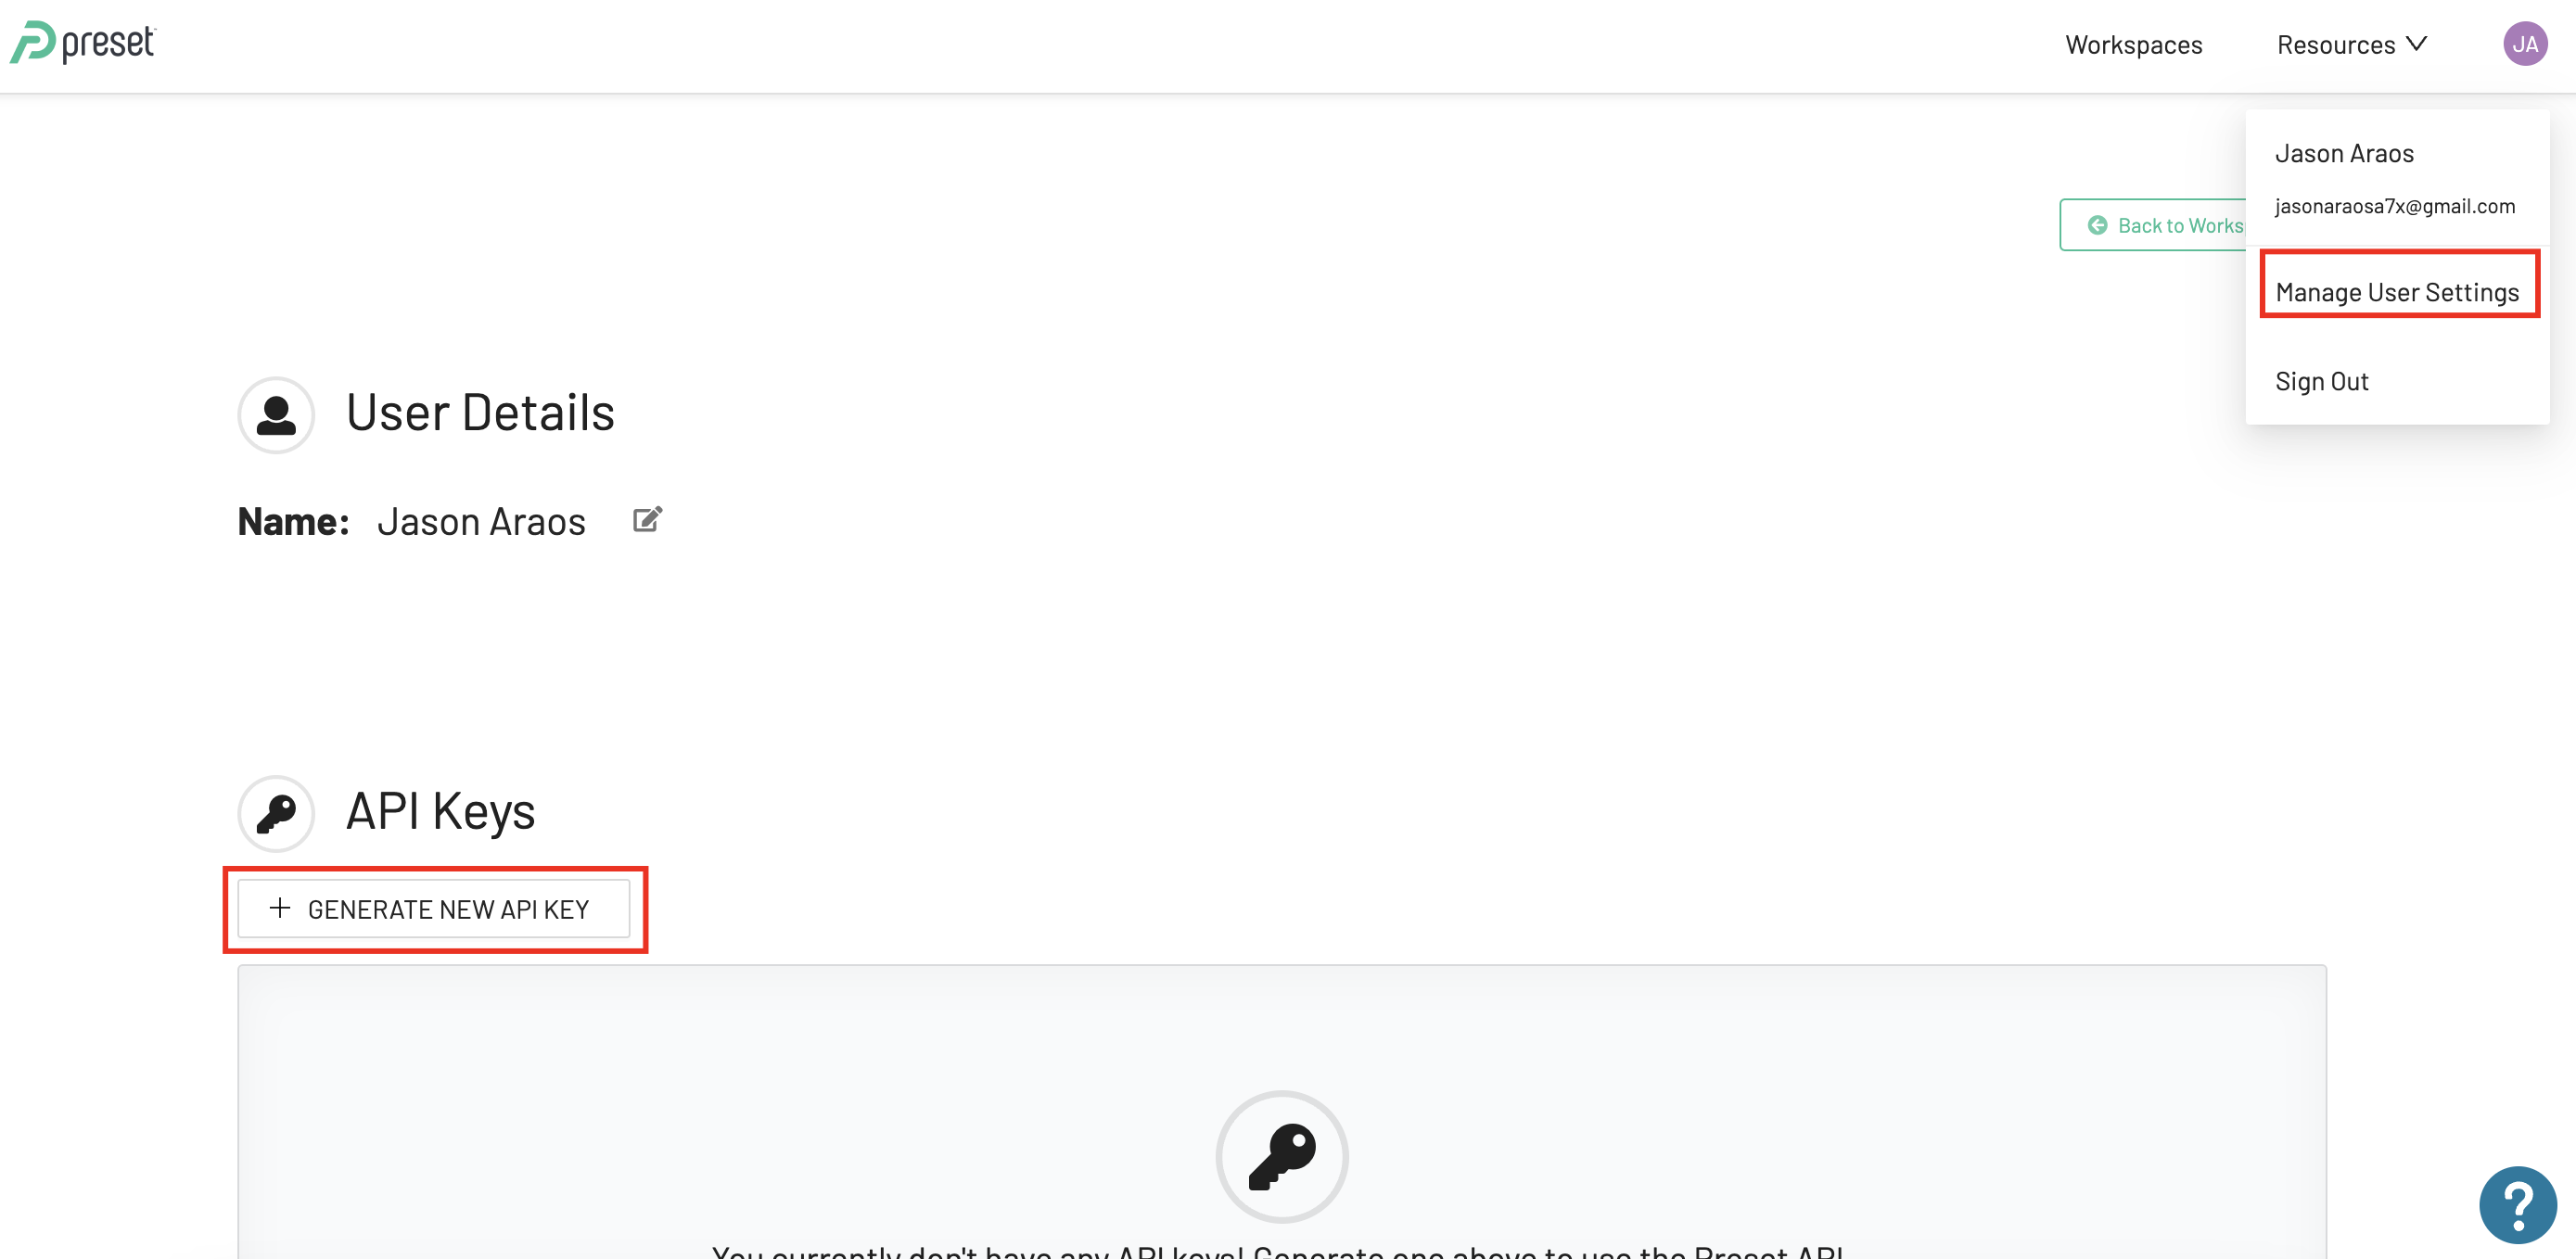
As we mentioned, we need a Preset Enterprise account to use their API. If you have it, you need to log into your account in your browser a look for this option:
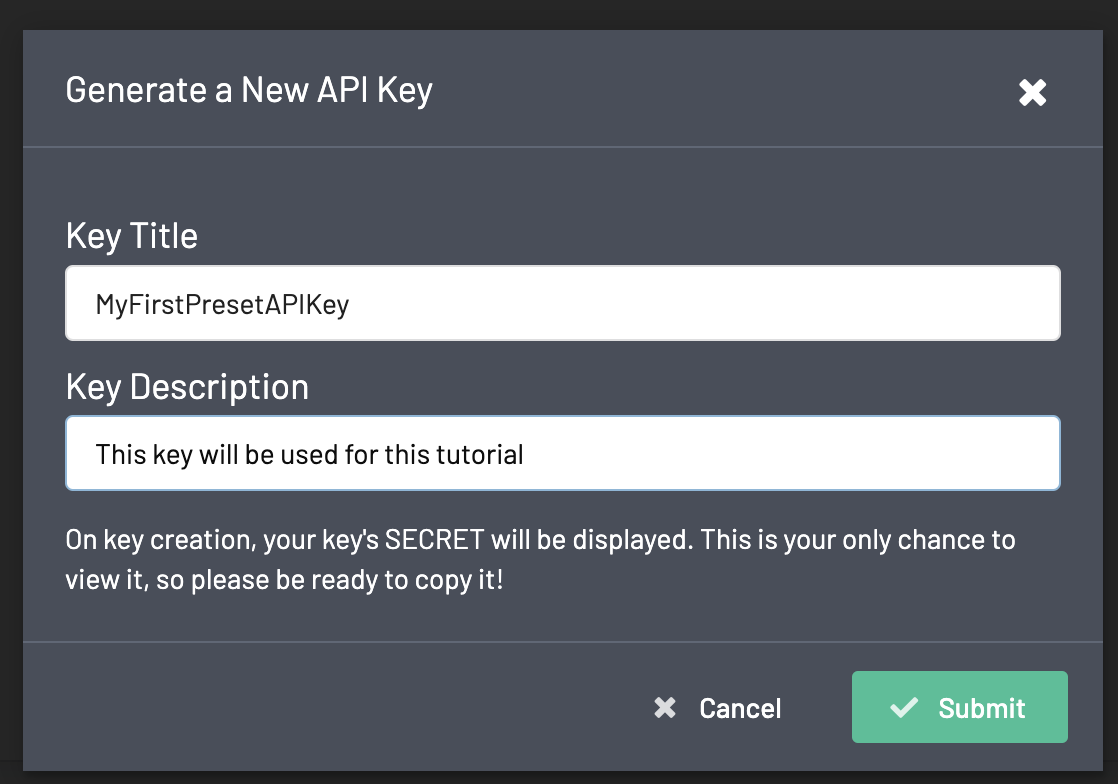
When you click on "+ Generate New API Key" button, you will see a popup window asking you to assign a name and description for your new Preset API key:
Once you click on "Submit", you will see your key credentials:
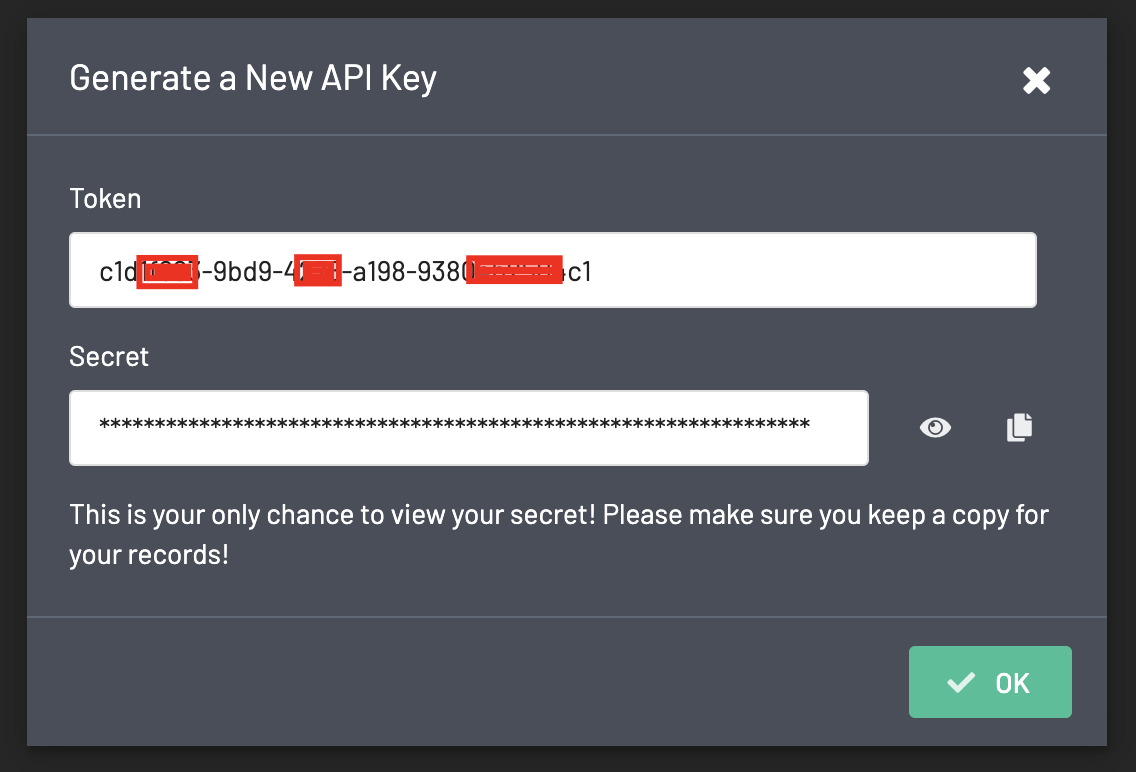
Important: You need to copy your token and especially your secret in a secure place because this will be the last moment you will see the secret of your API key. Moreover, any person who gets your token and secret will be able to do things with your Preset account on your behalf.
6.3 Using your token to use all the endpoints
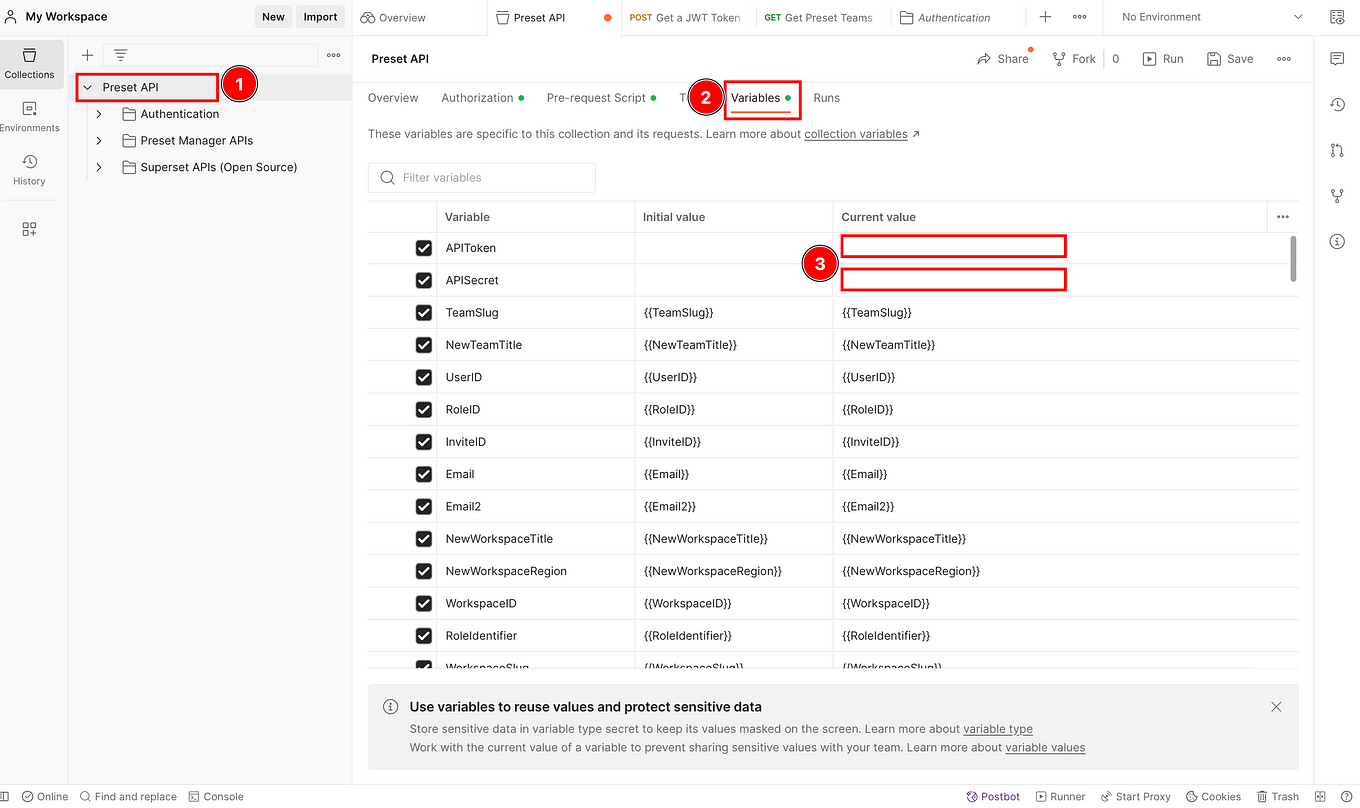
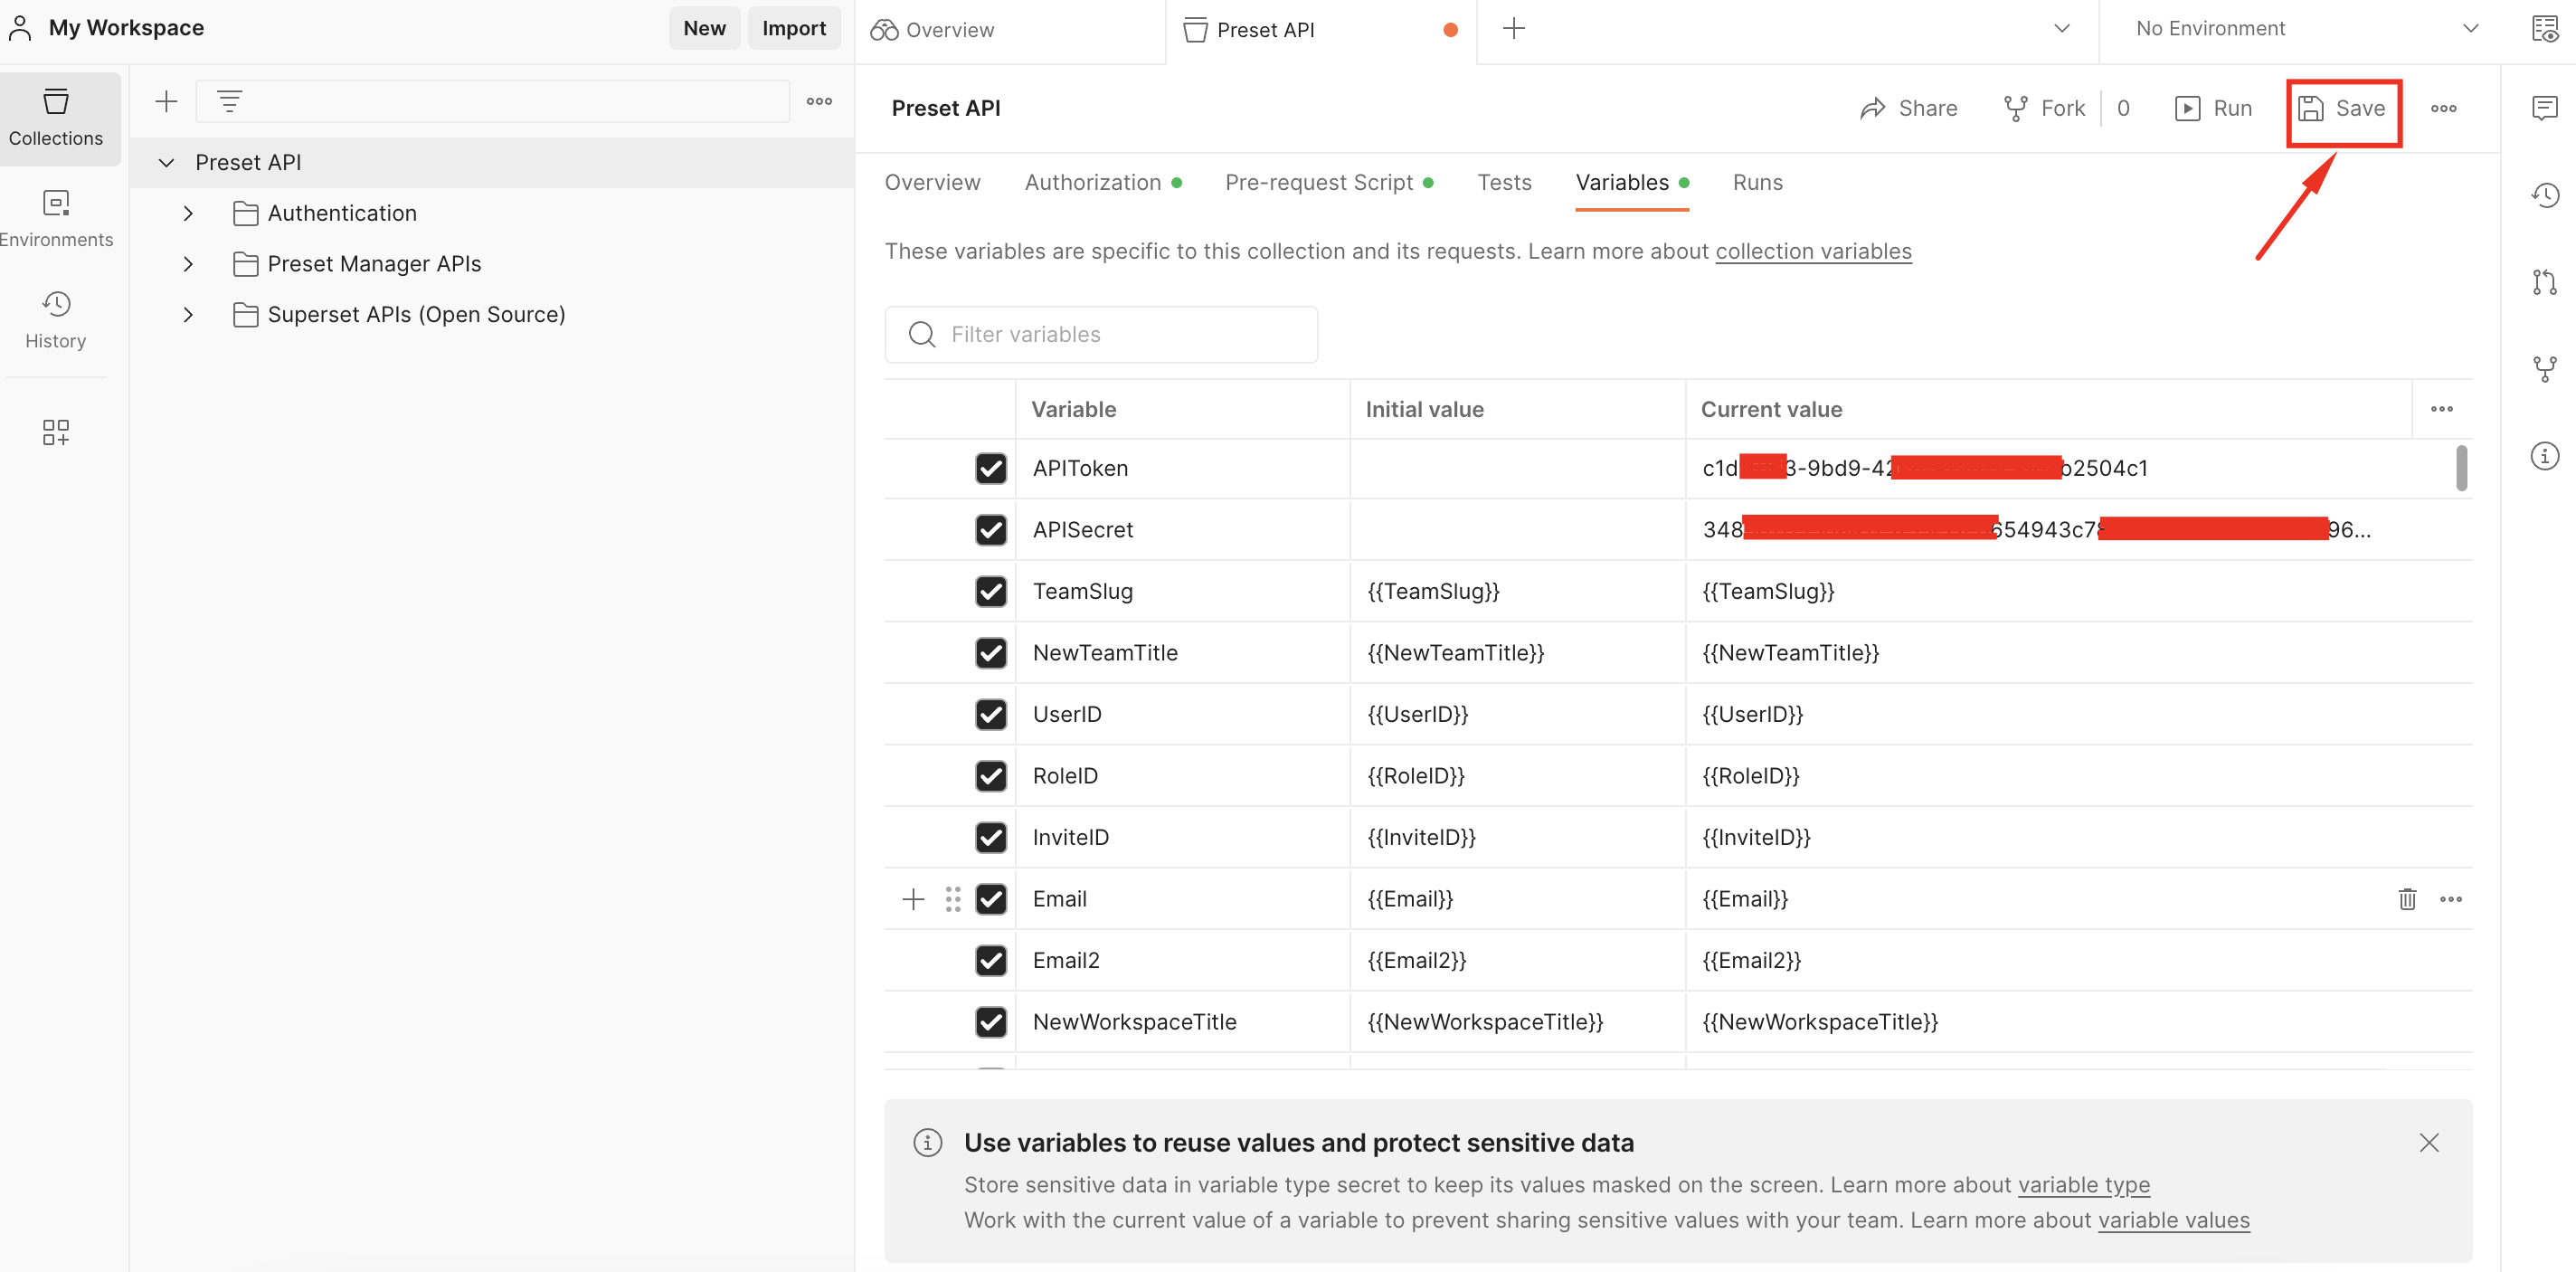
To set your credentials and let your Postman instance connect to Preset, you can save your Preset credentials (the previous token and secret) as Postman variables. So just copy and paste both in their respective section here:
Then click on Save:
Now you will be able to use the endpoint inside the Authentication folder named "Get a JWT Token". This endpoint will open the door to your Postman instance to use all the different endpoints available in the "Preset Manager APIs" and "Superset APIs (Open Source)" folders.
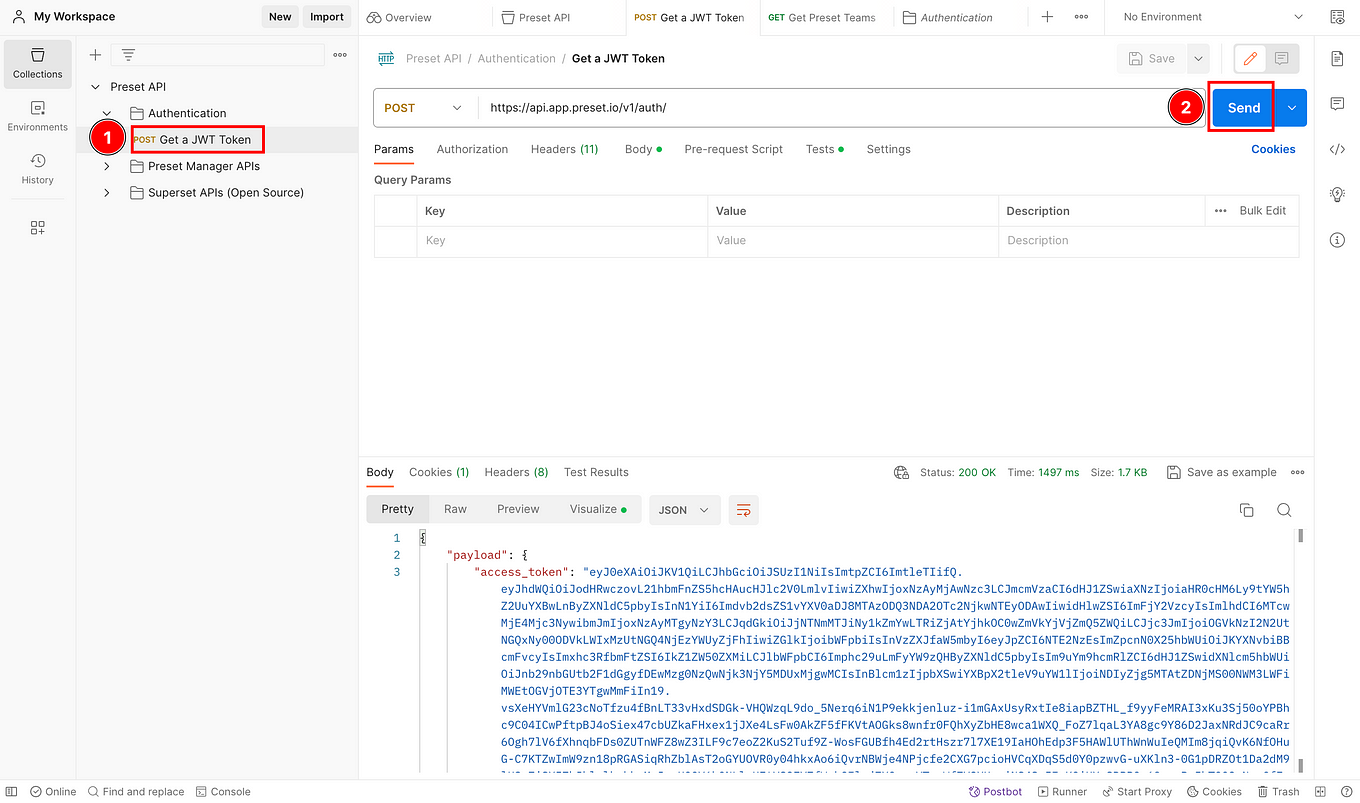
If you see a payload and access_token output similar to the one shown above, you are ready to use all the Preset API endpoints in the other two folders.
6.4 Understanding the API methods
In APIs, the most commonly used methods are:
- GET: Retrieve data from the server. It’s like asking a question and getting an answer back.
- POST: Send data to the server, often used to create a new record, like a new user.
- PUT: Update existing data on the server, like changing your email in your profile.
- DELETE: Remove existing data from the server, like deleting a photo from your account.
These methods correspond to the basic CRUD (Create, Read, Update, Delete) operations in database management.
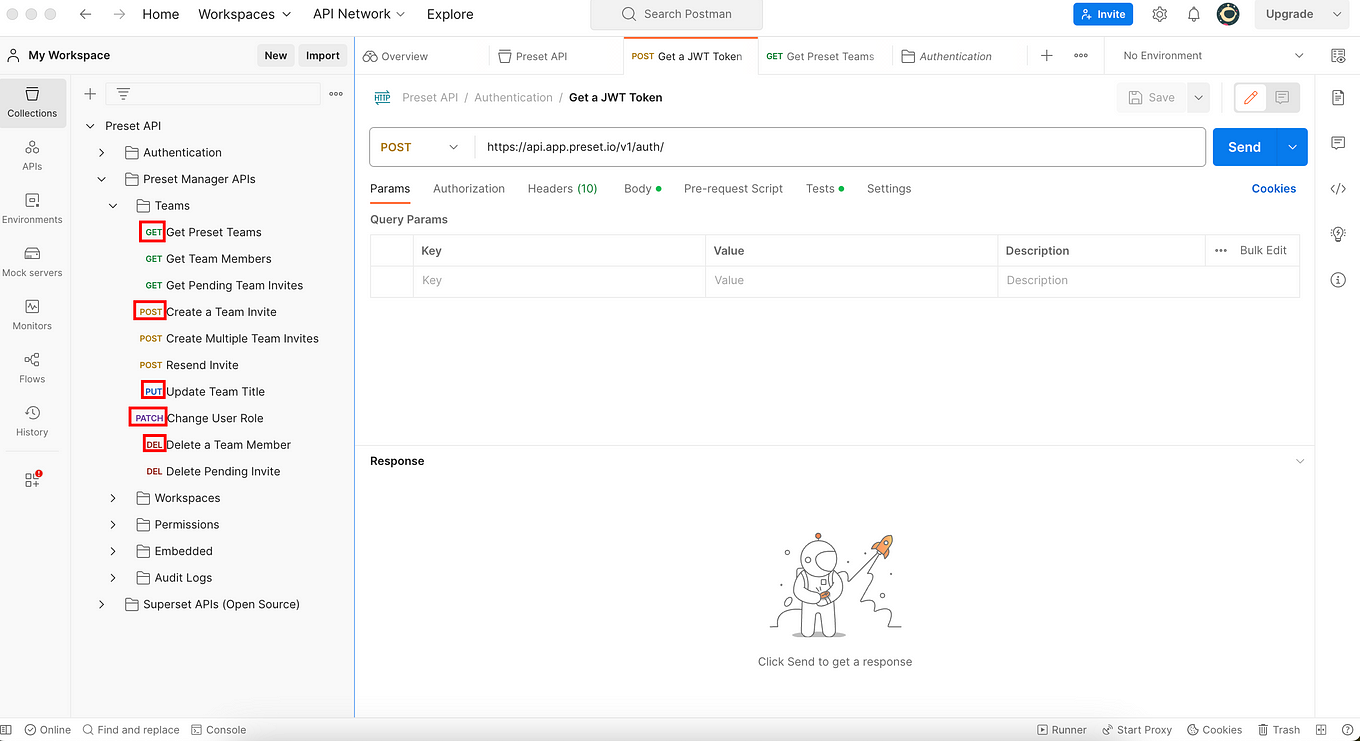
There are other methods like
PATCHthat is used in APIs to apply partial updates to a resource. WherePUTis typically used to update a resource entirely,PATCHis used when you want to make a small change to the resource.
So each time you interact with a Preset API endpoint, depending on what method it has at the beginning of its name, you will know what to expect from its execution.
6.5 Using Preset API endpoints (examples)
To understand how to interact with Preset using its API, you need to know what your Preset account has and how it works. For example, you know your Preset instance is composed of:
- One or more Teams
- Each Team has one or more Workspaces
- Each Workspace has one or more Dashboards and Datasets
- Each Dashboard has one or more Charts
- and a long etc.
Example 1: Getting Teams
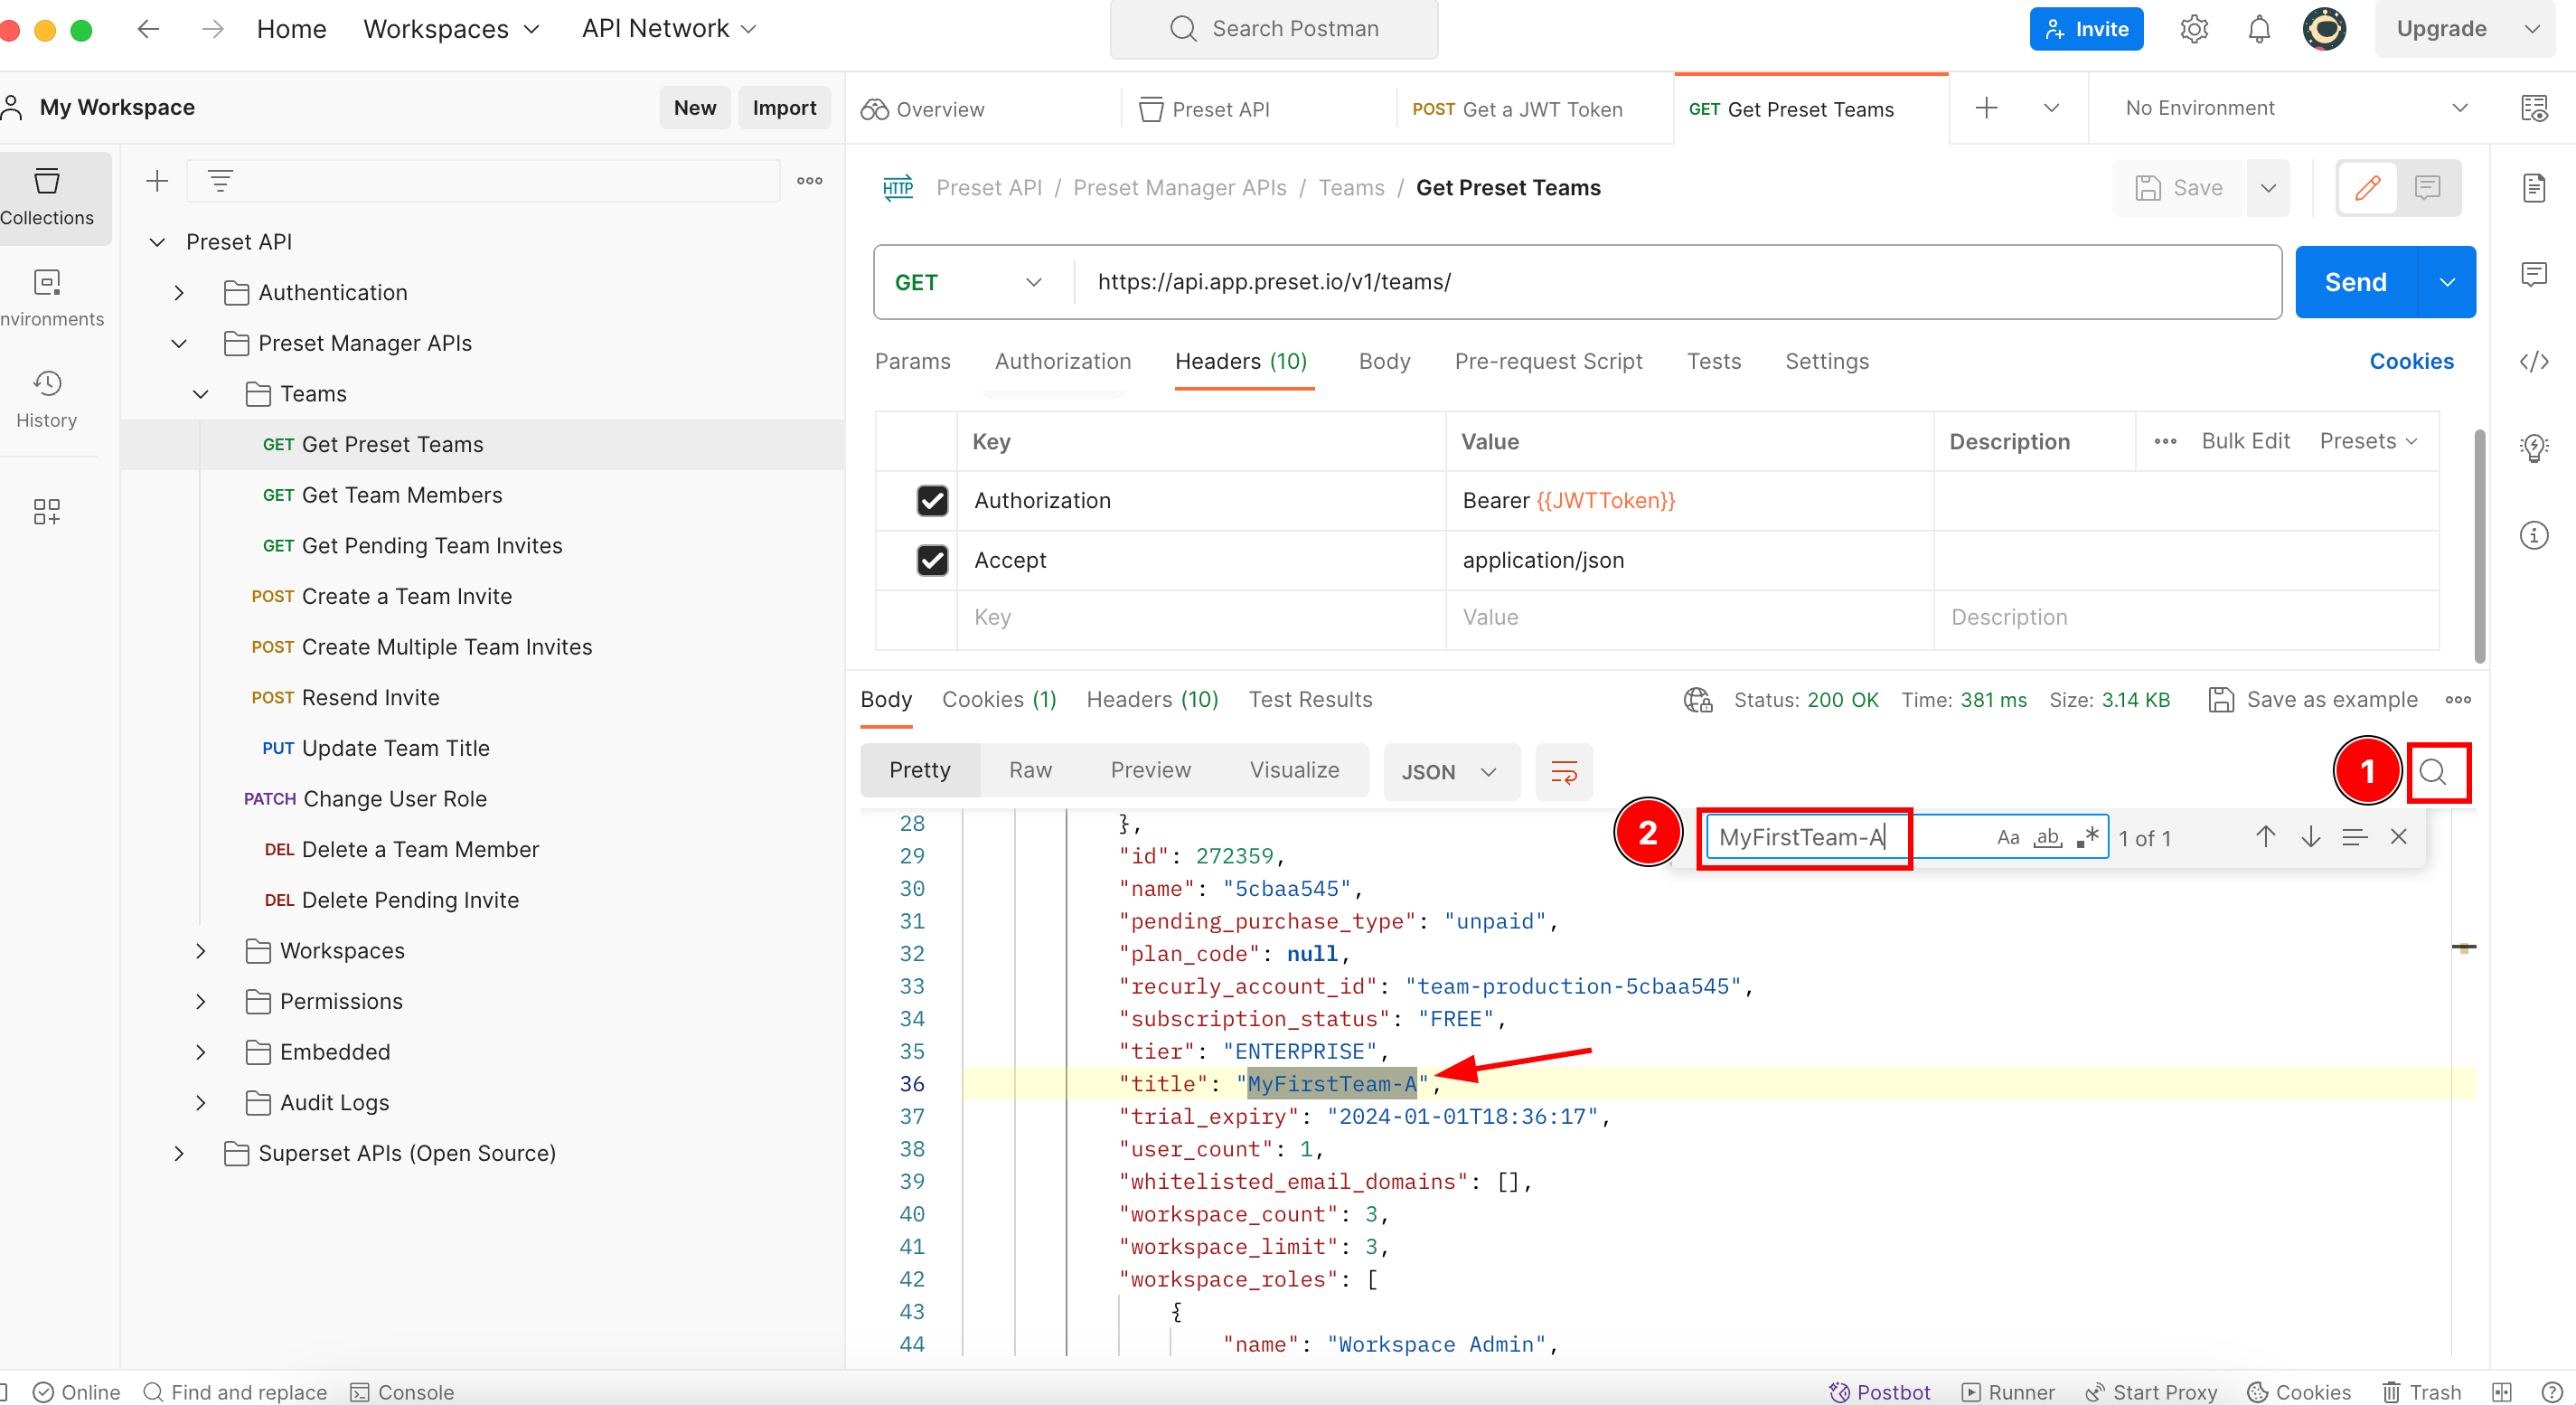
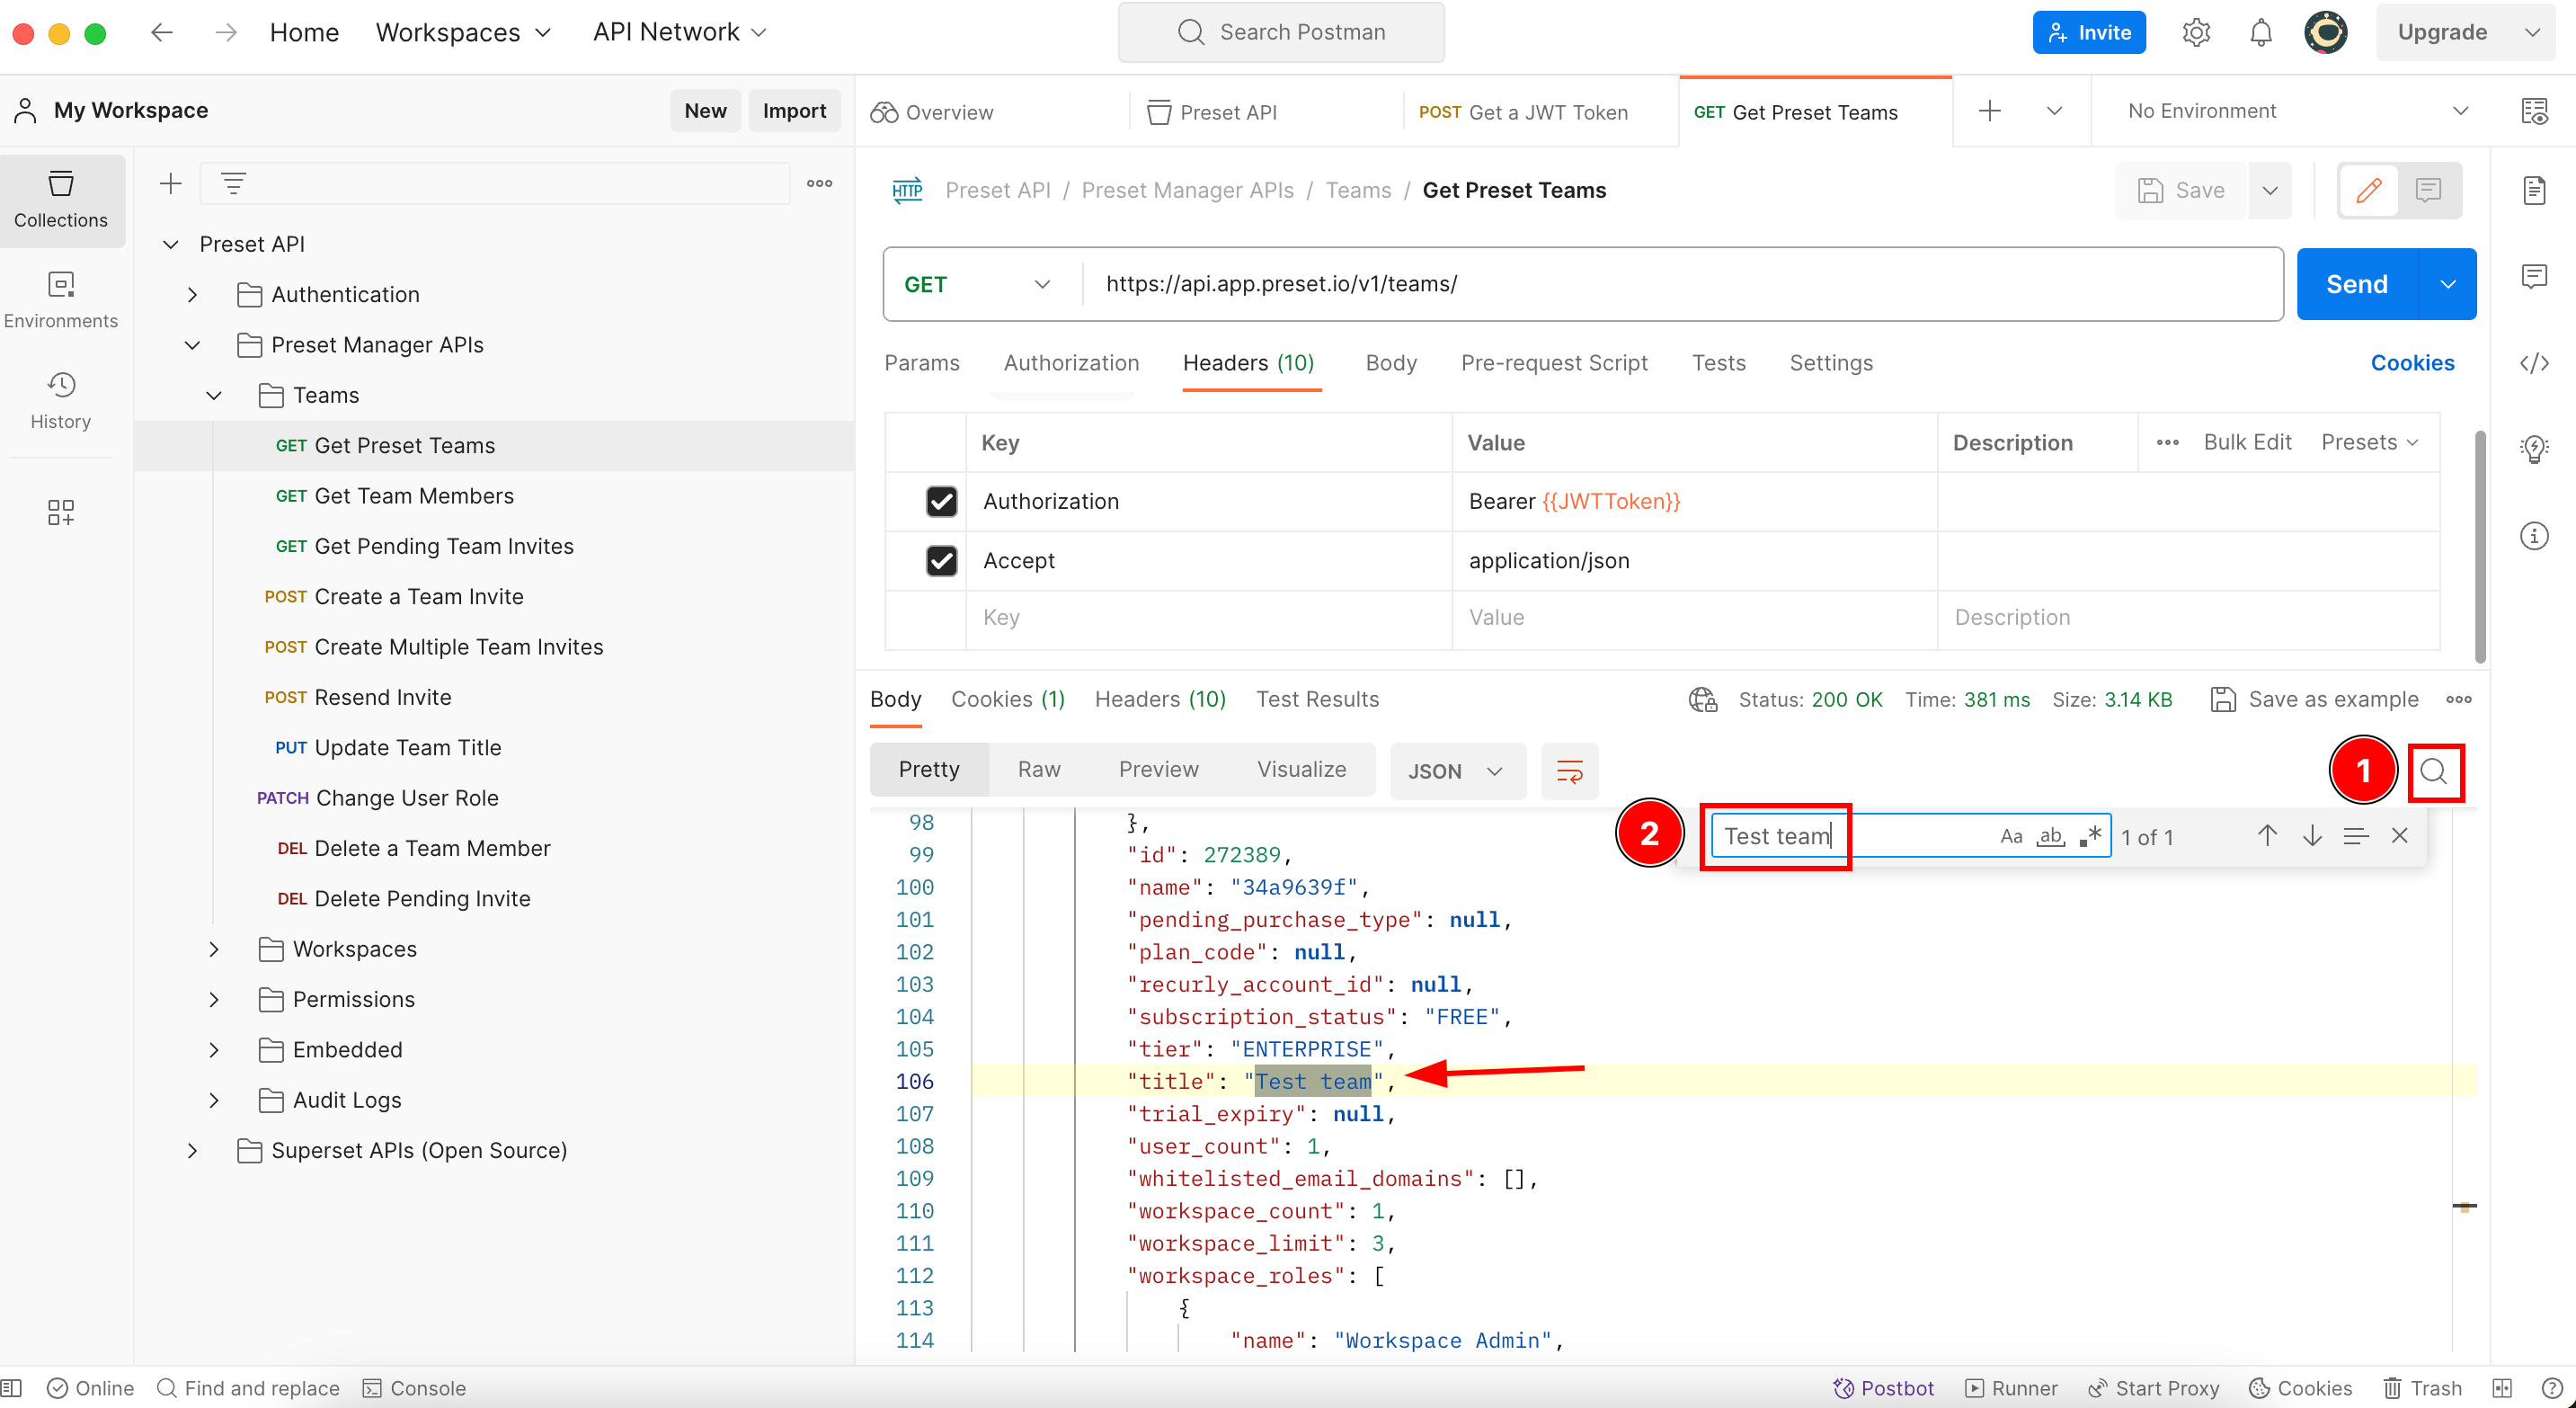
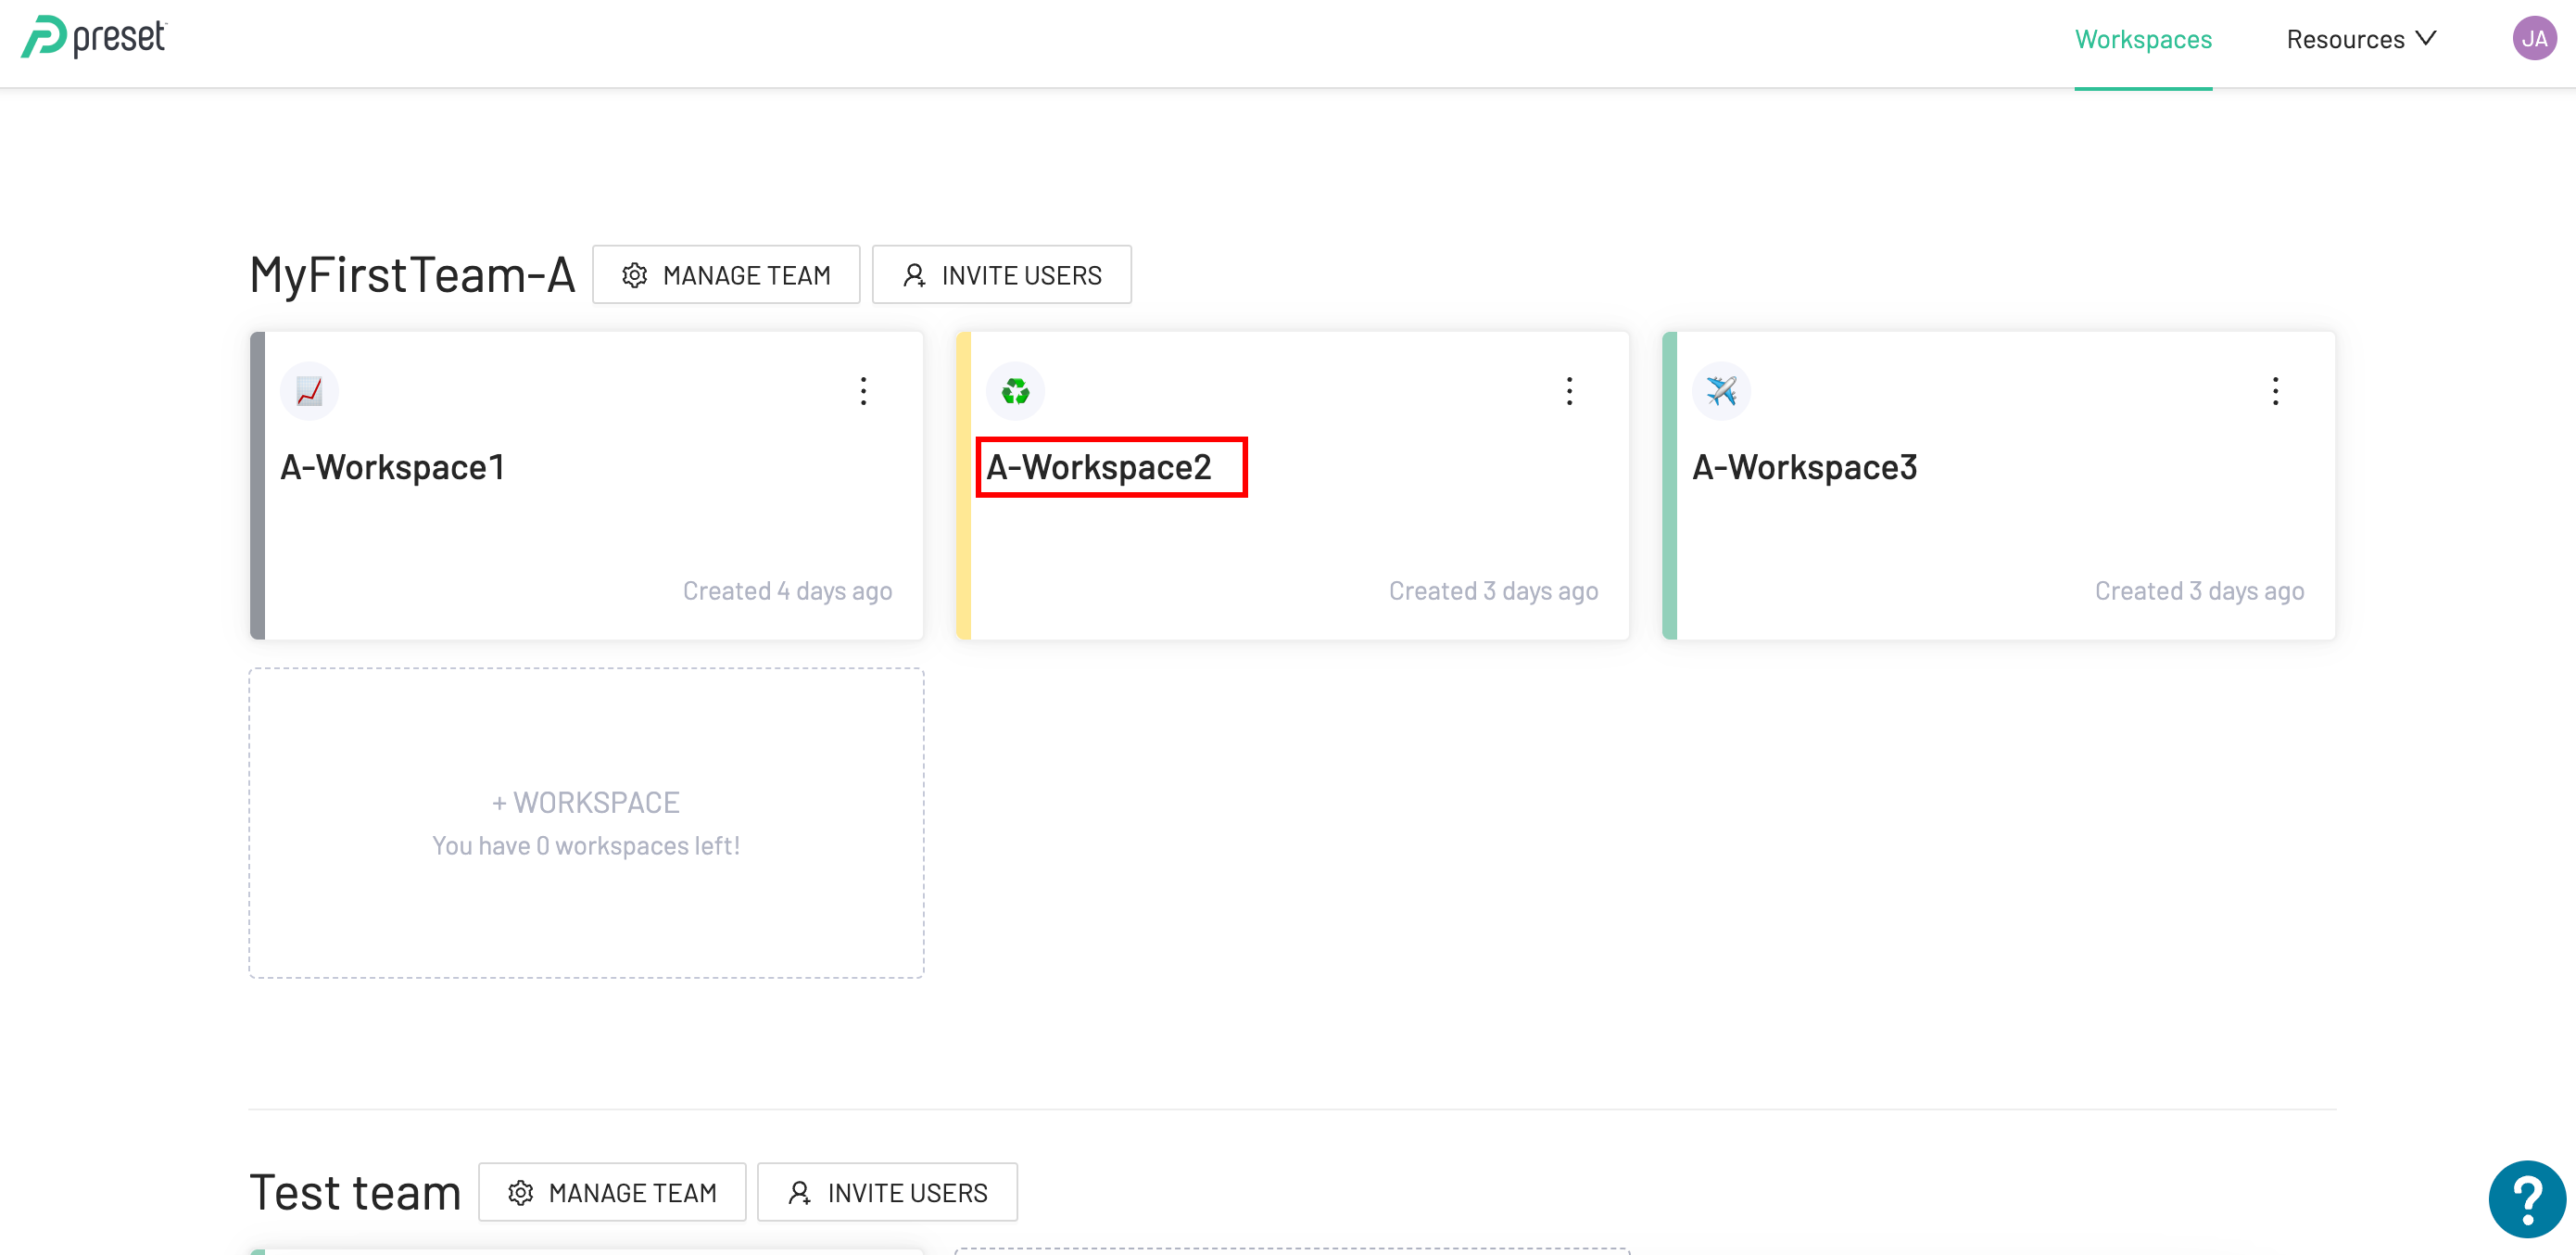
Let´s take this Preset account as an example:
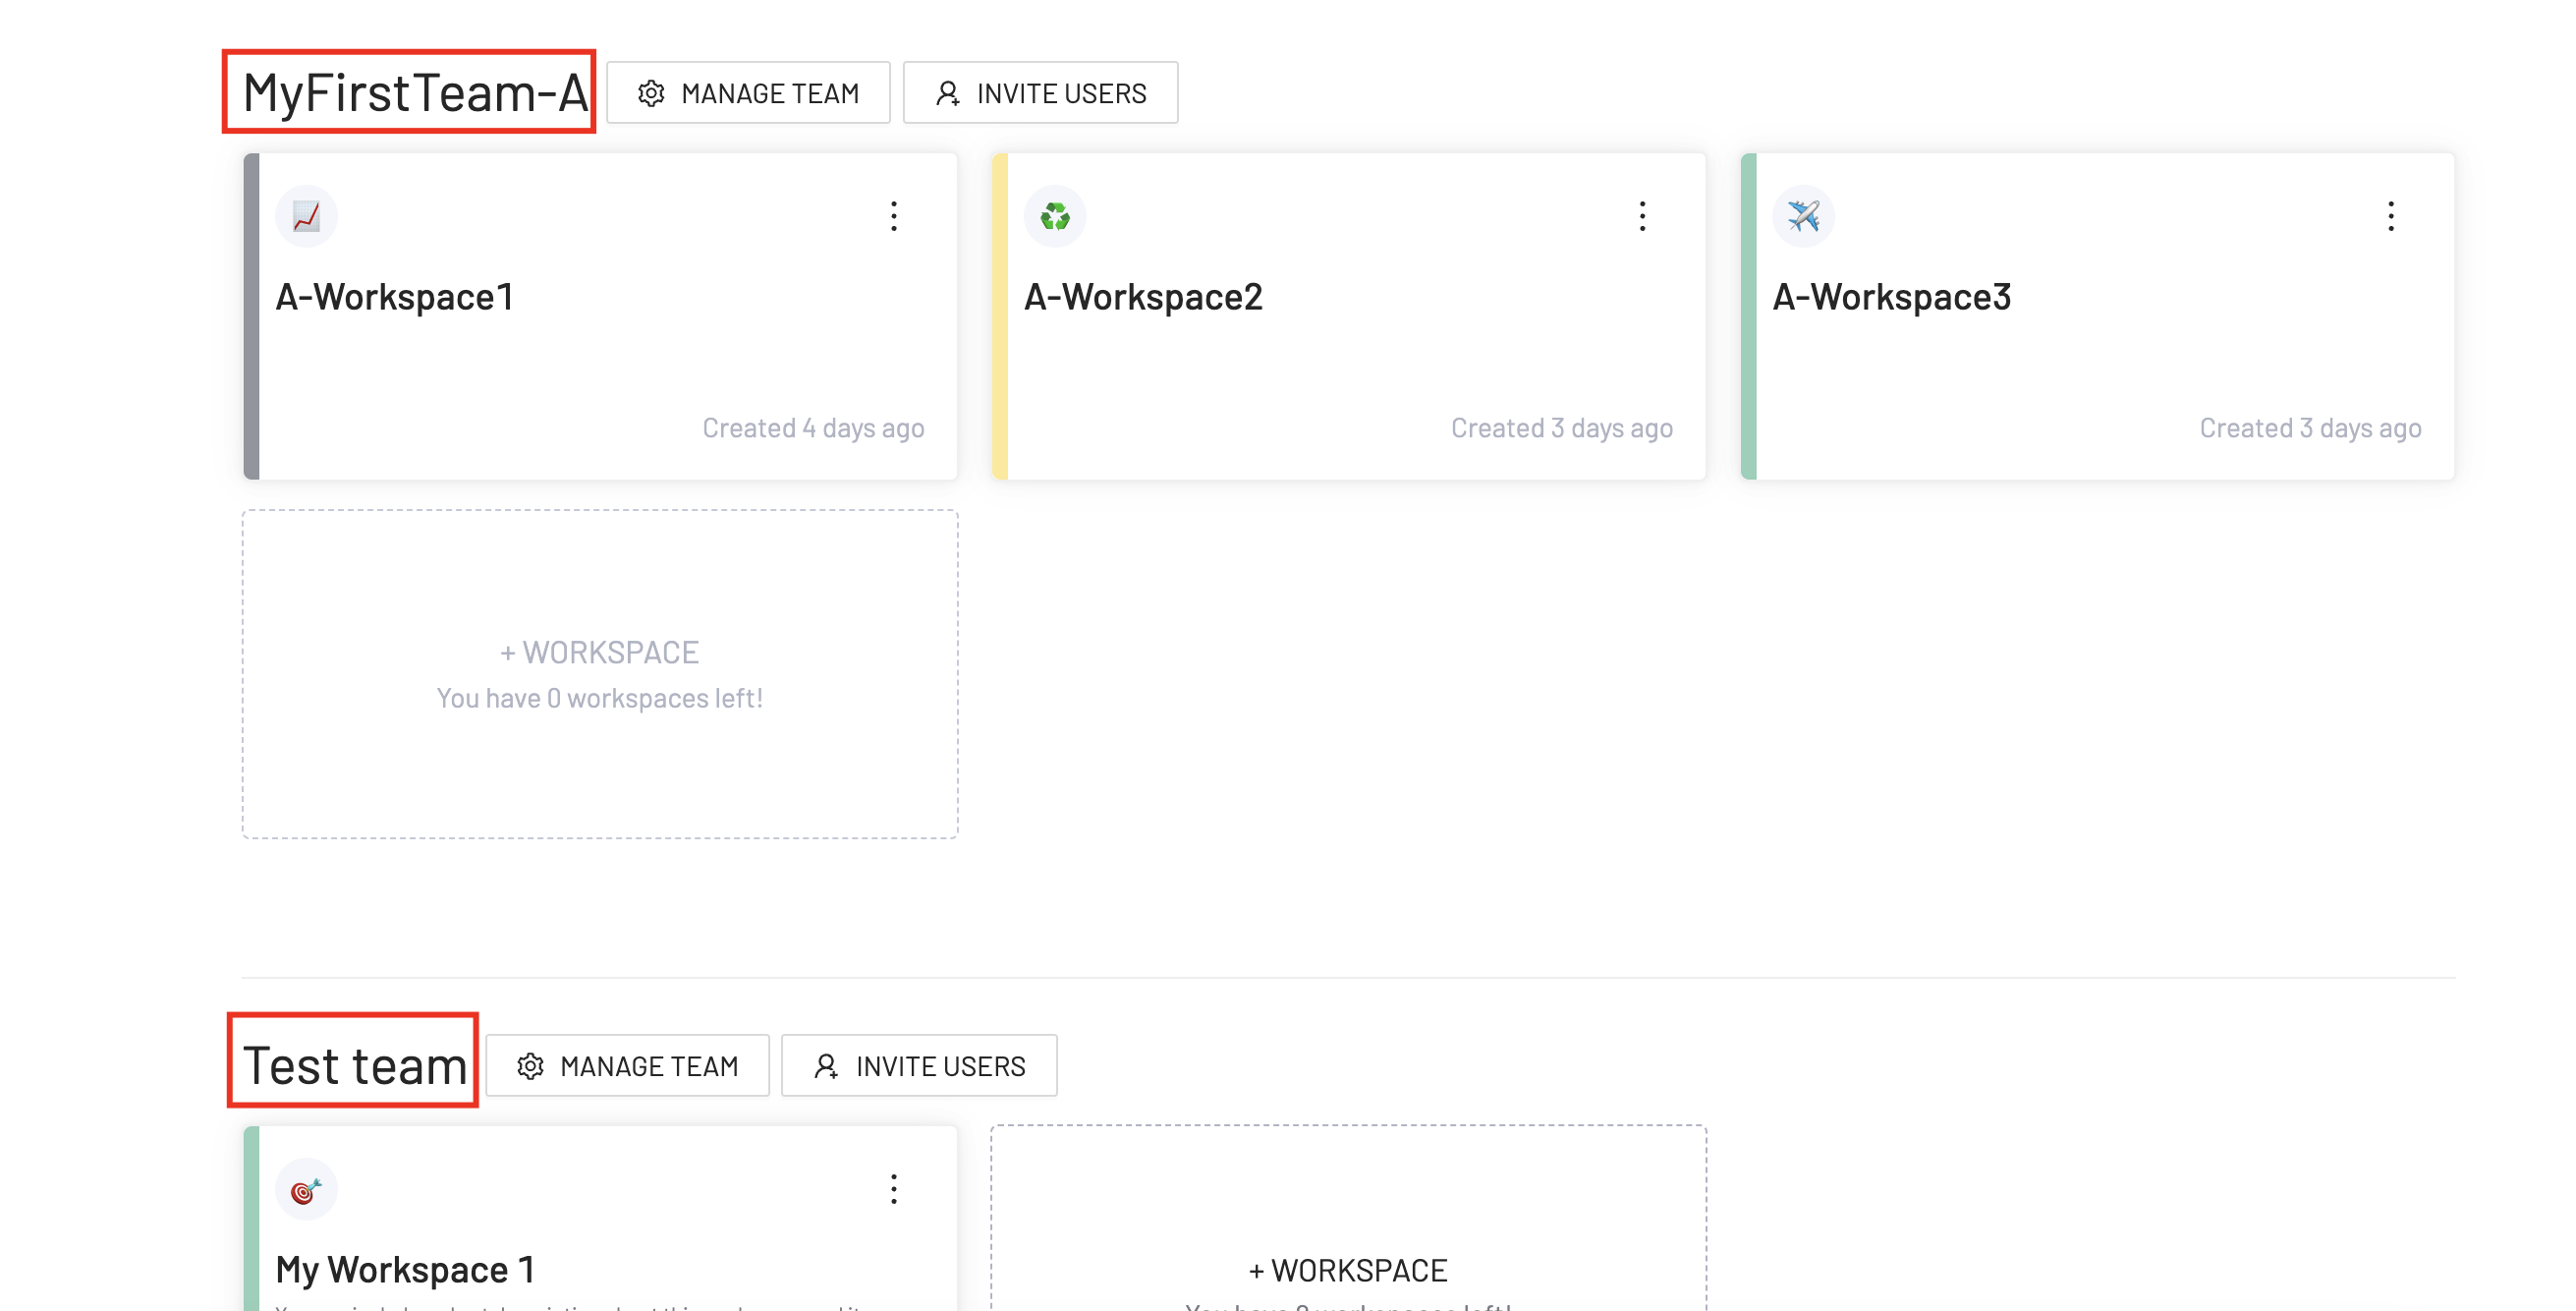
This image shows two different Teams named MyFirstTeam-A and Test team, and each of them is composed of three and one workspace respectively.
So if your goal is to get all the different teams associated with this Preset account, you will need to go to the Preset API documentation and look for the resource folder that lets you achieve this. In this case:
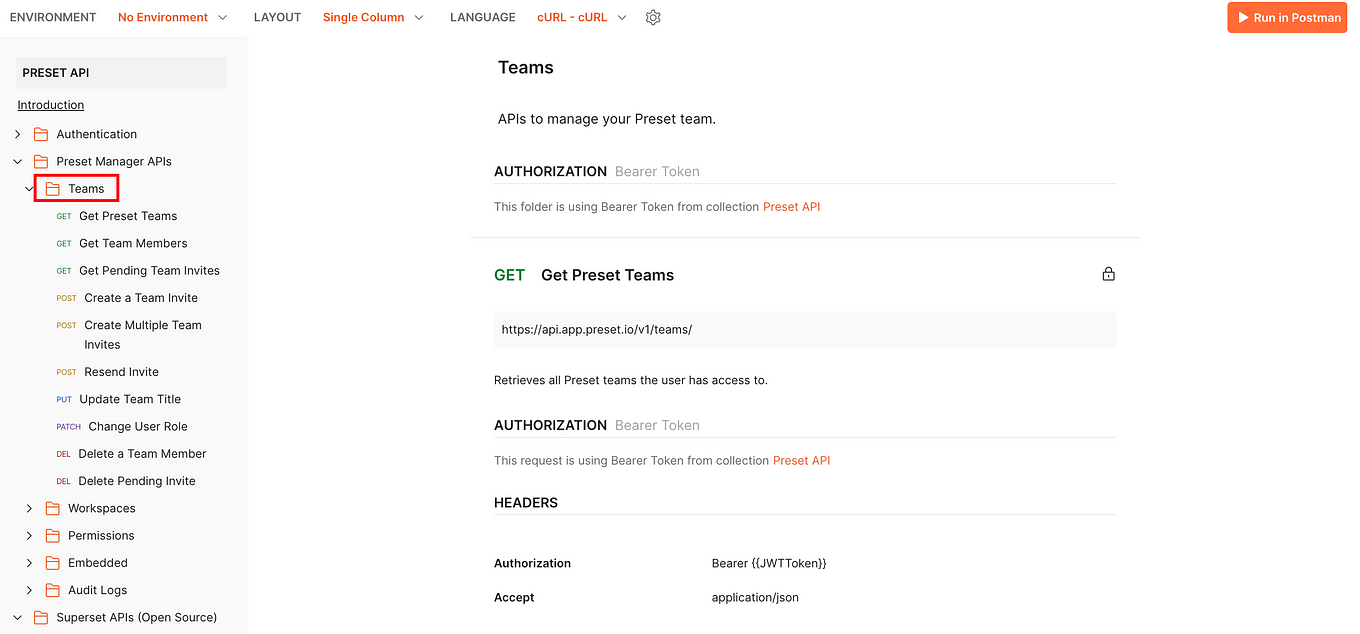
Inside this folder, you will see all the endpoints related to handling your Preset Teams associated with your account. So, as we learned before, the GET endpoints will retrieve information, so to retrieve all the Preset Teams associated with your account, you need to use the “(GET) Get Preset Teams” endpoint:
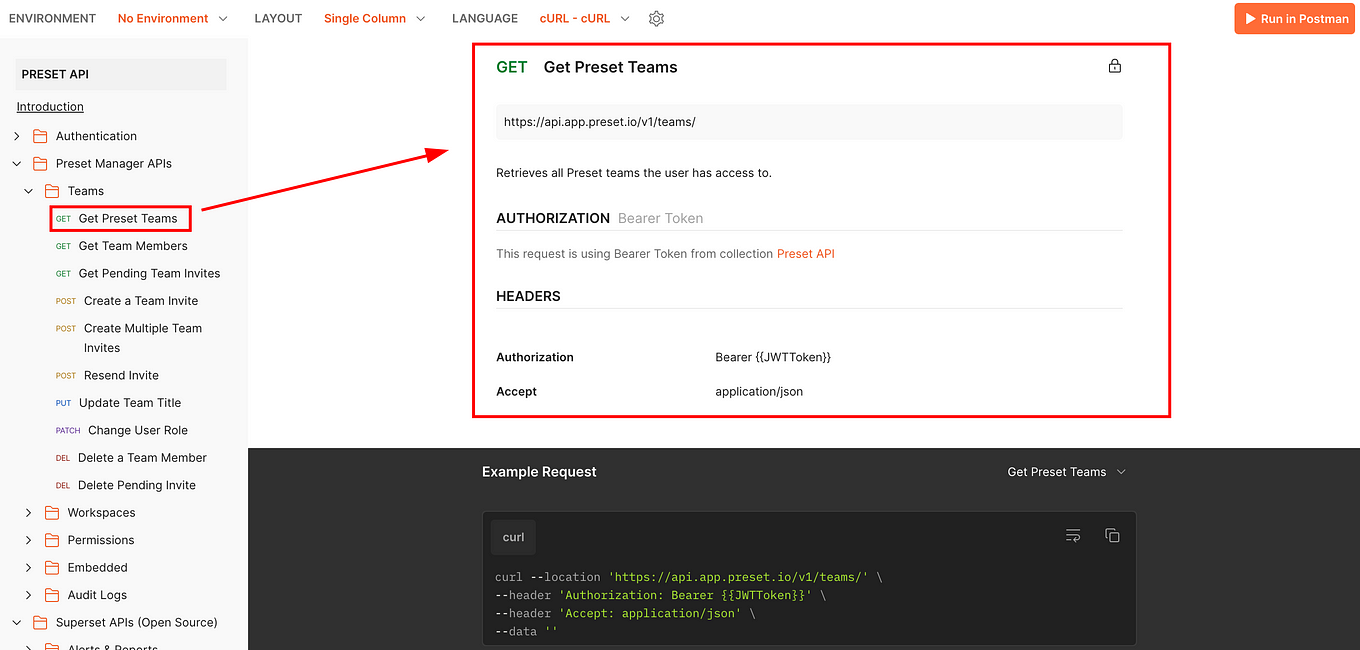
The above documentation says, in simple words, that to get all the Preset Teams associated with your Preset account you need to send a request to that URL (endpoint), and that to create a successful request to this endpoint you need to be previously authorized using a Bearer Token.
A bear token uses the access token created for you when you previously executed the “(POST) Get a JWT Token” endpoint.
Because we are interacting with the Preset API using Postman, all these previous steps we did were stored in Postman variables, meaning that Postman will take care of the bear token on our behalf each time you execute those endpoints. So to use the “(GET) Get Preset Teams” you only need to go to your Postman, click on the endpoint, and then click on “Send”:
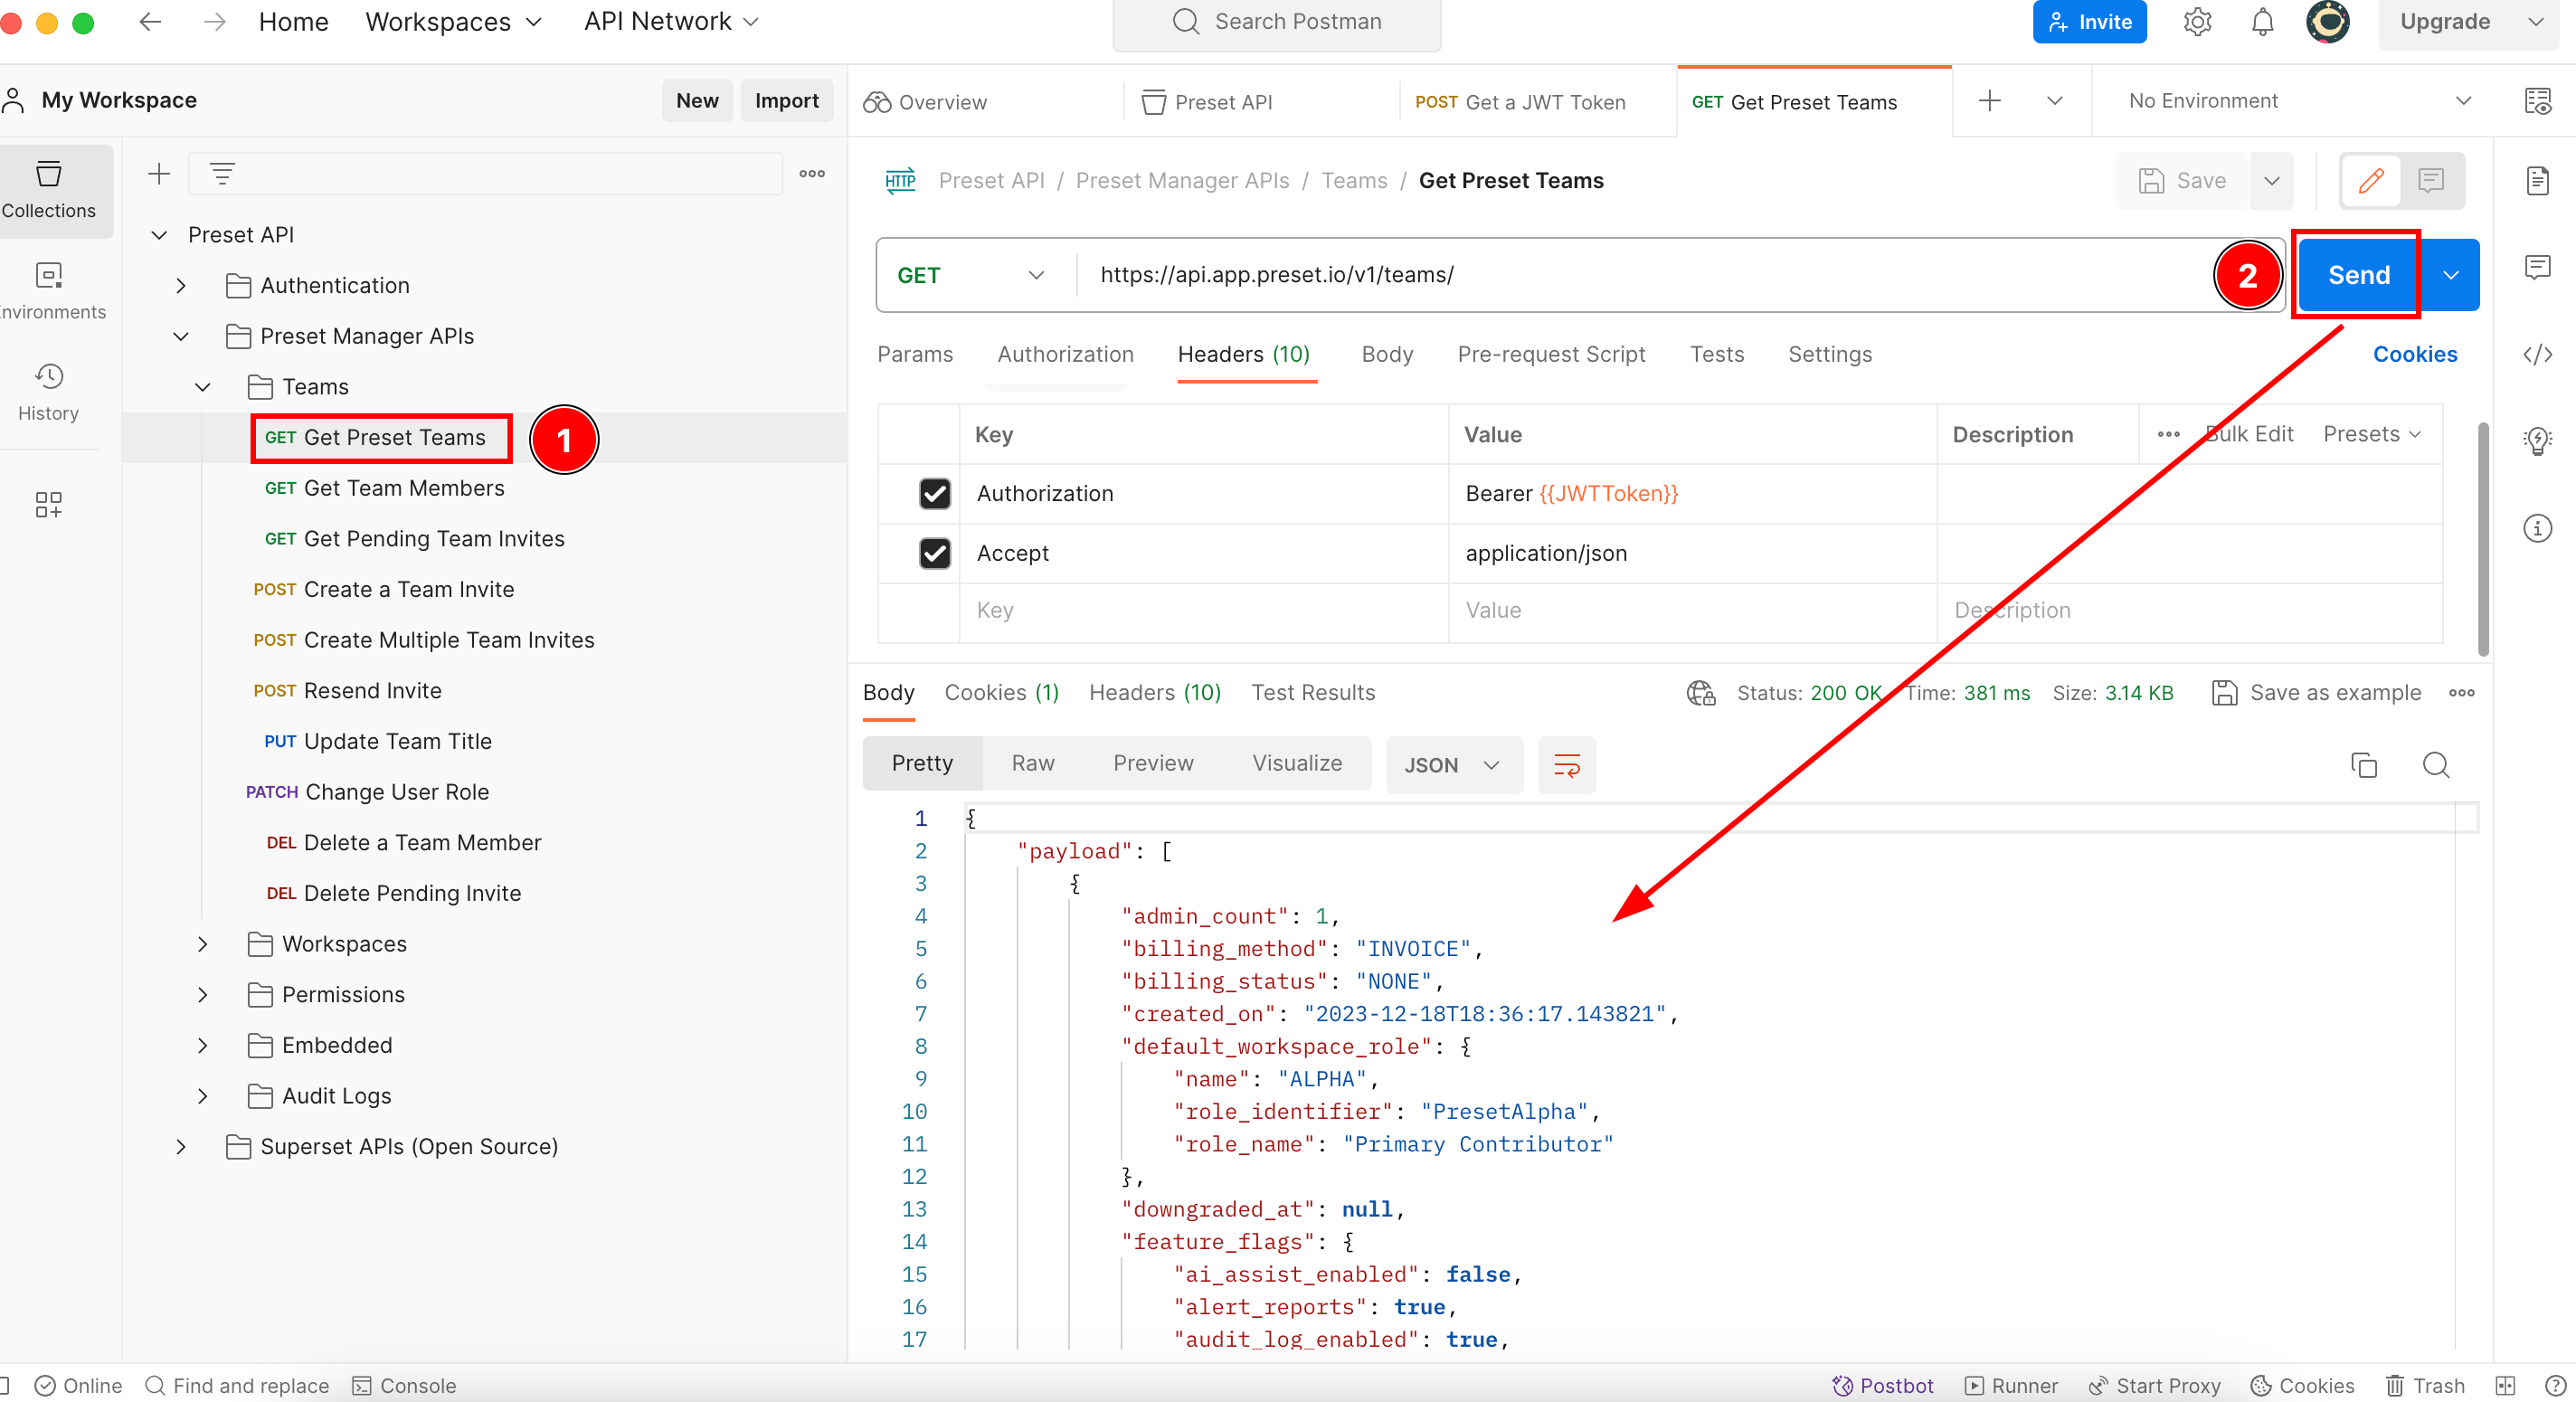
The Payload code you see above is the output given by the endpoint in a JSON format, which means that if you scroll down you can check all teams associated with your Preset account.
As you see, this endpoint retrieves not just the name of the Teams associated with your Preset account, but many other info associated with each of them. If you are asking yourself what type of info retrieves each endpoint of the Preset API, you can use Postman this way to know what info you can get from the API and how to prepare your code to receive and take advantage of all this information.
Example 2: Exporting Dashboards
Now let’s test other interesting endpoints.
Important: Remember, each time you want to test an endpoint you need to go to the Preset API documentation to learn how it can be used.
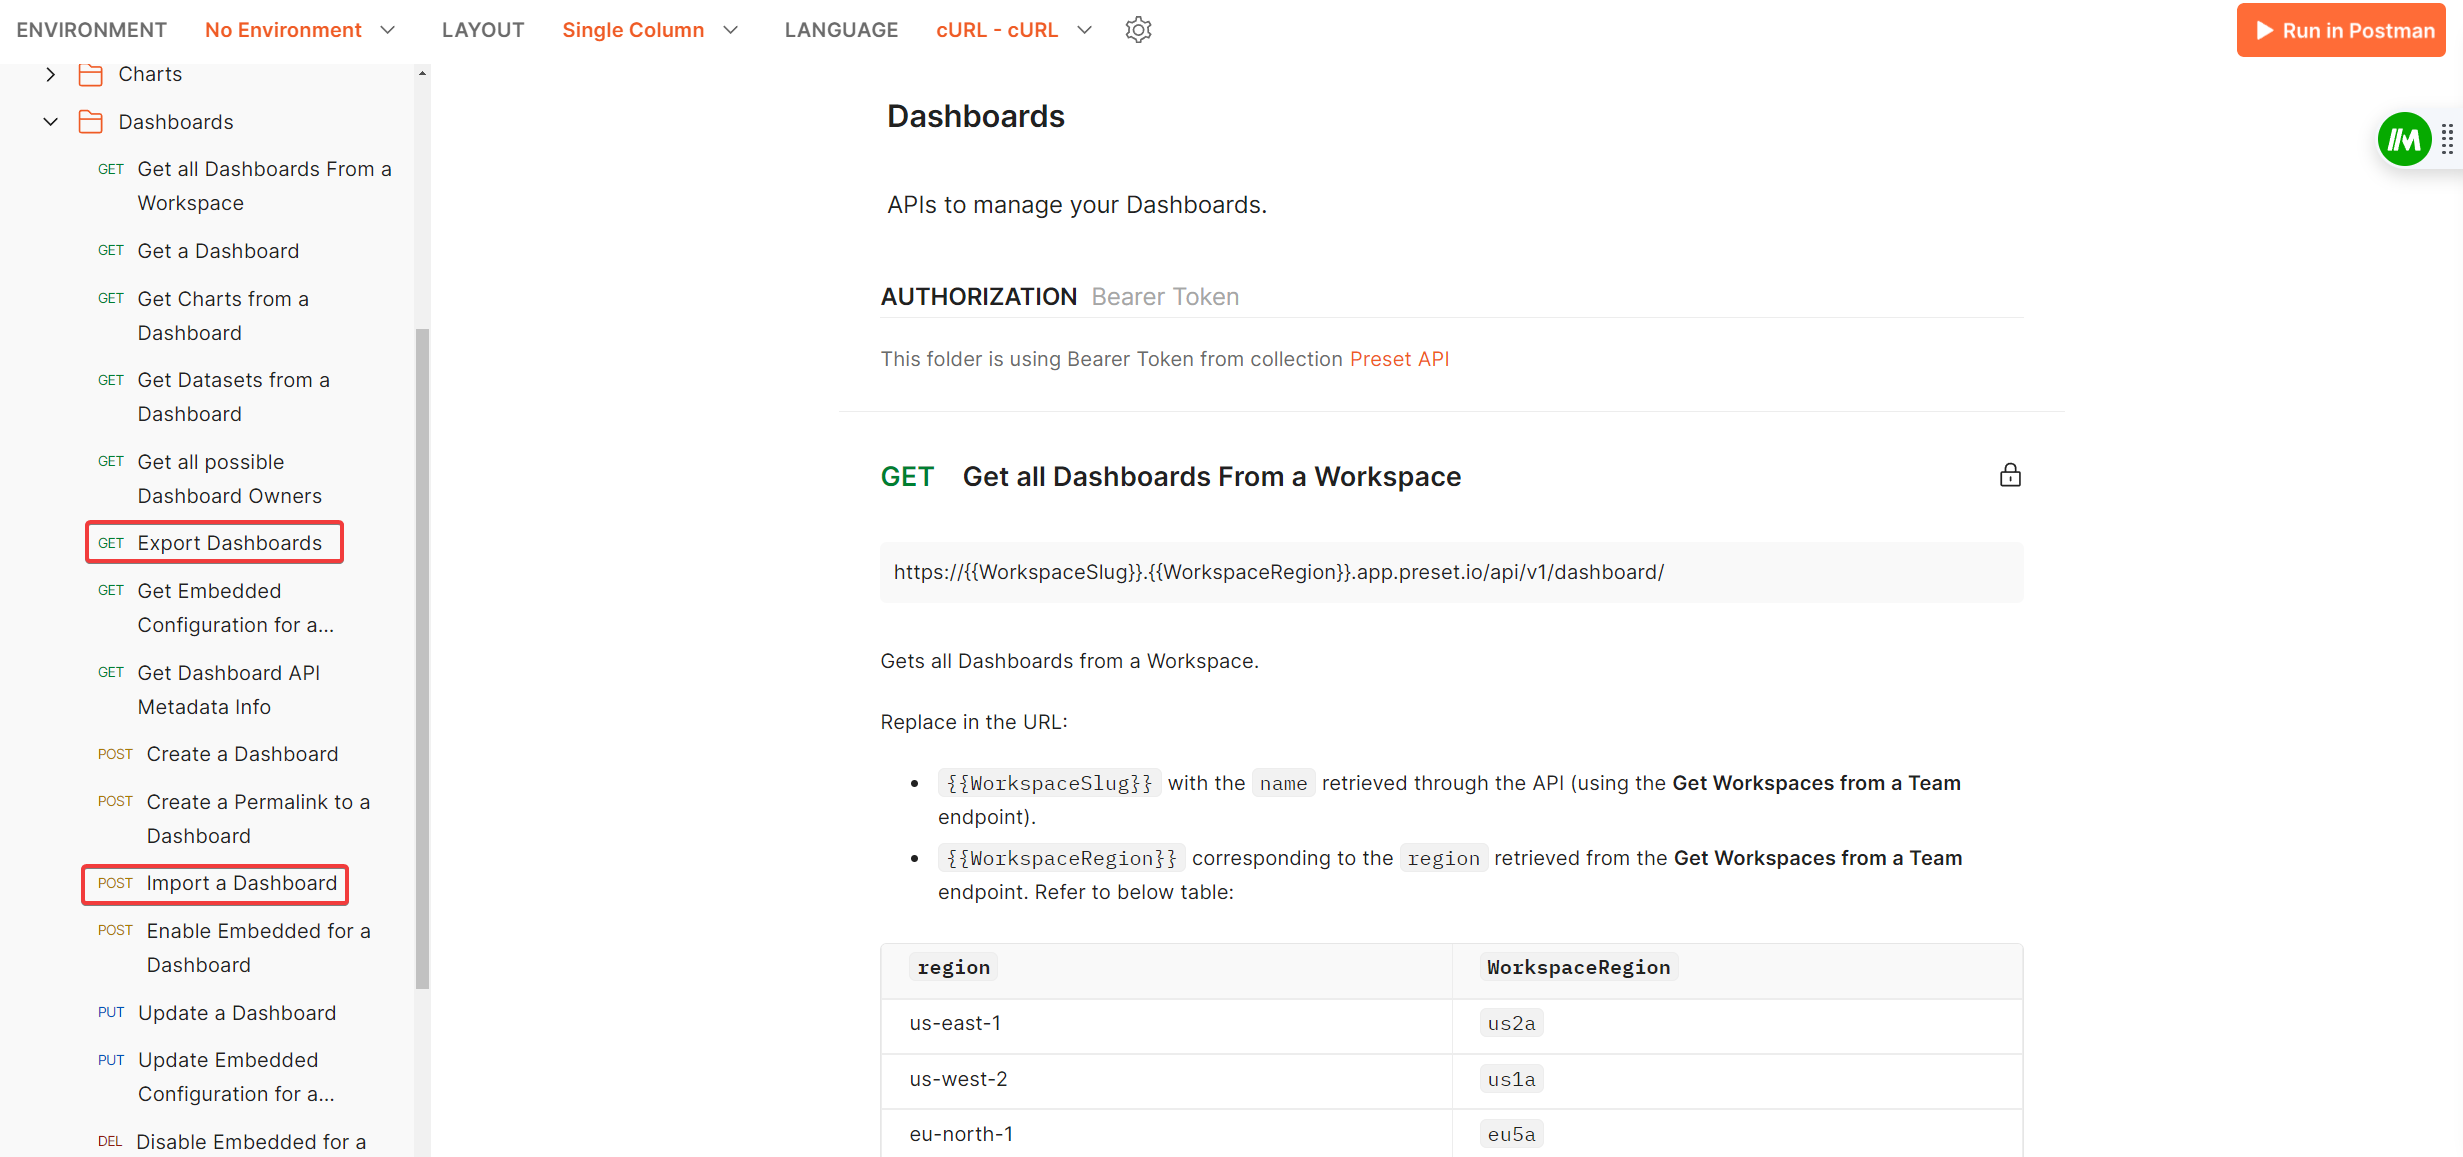
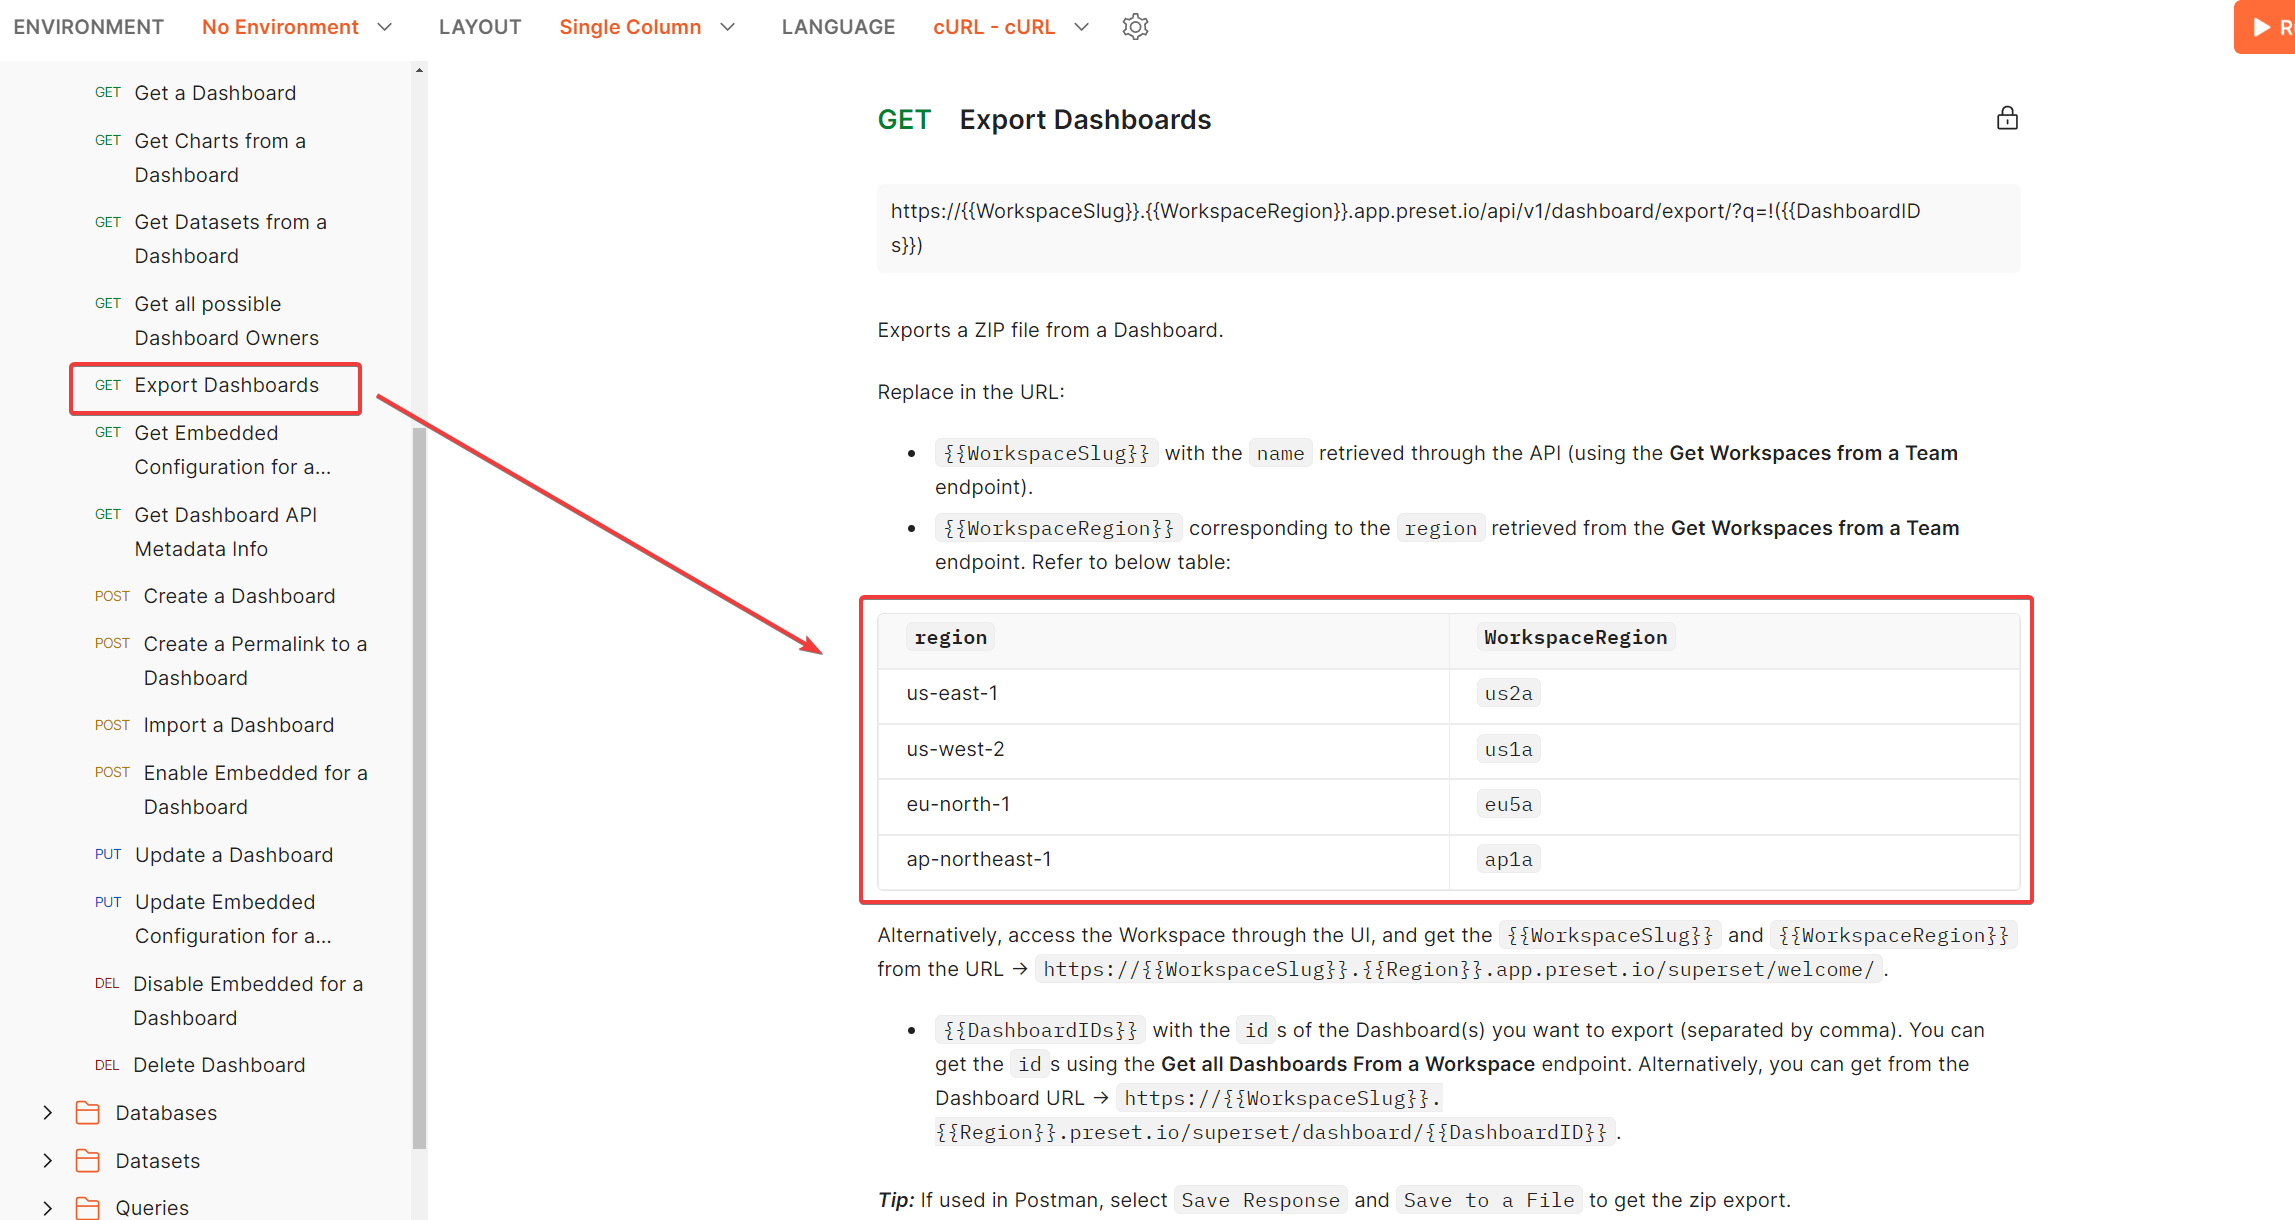
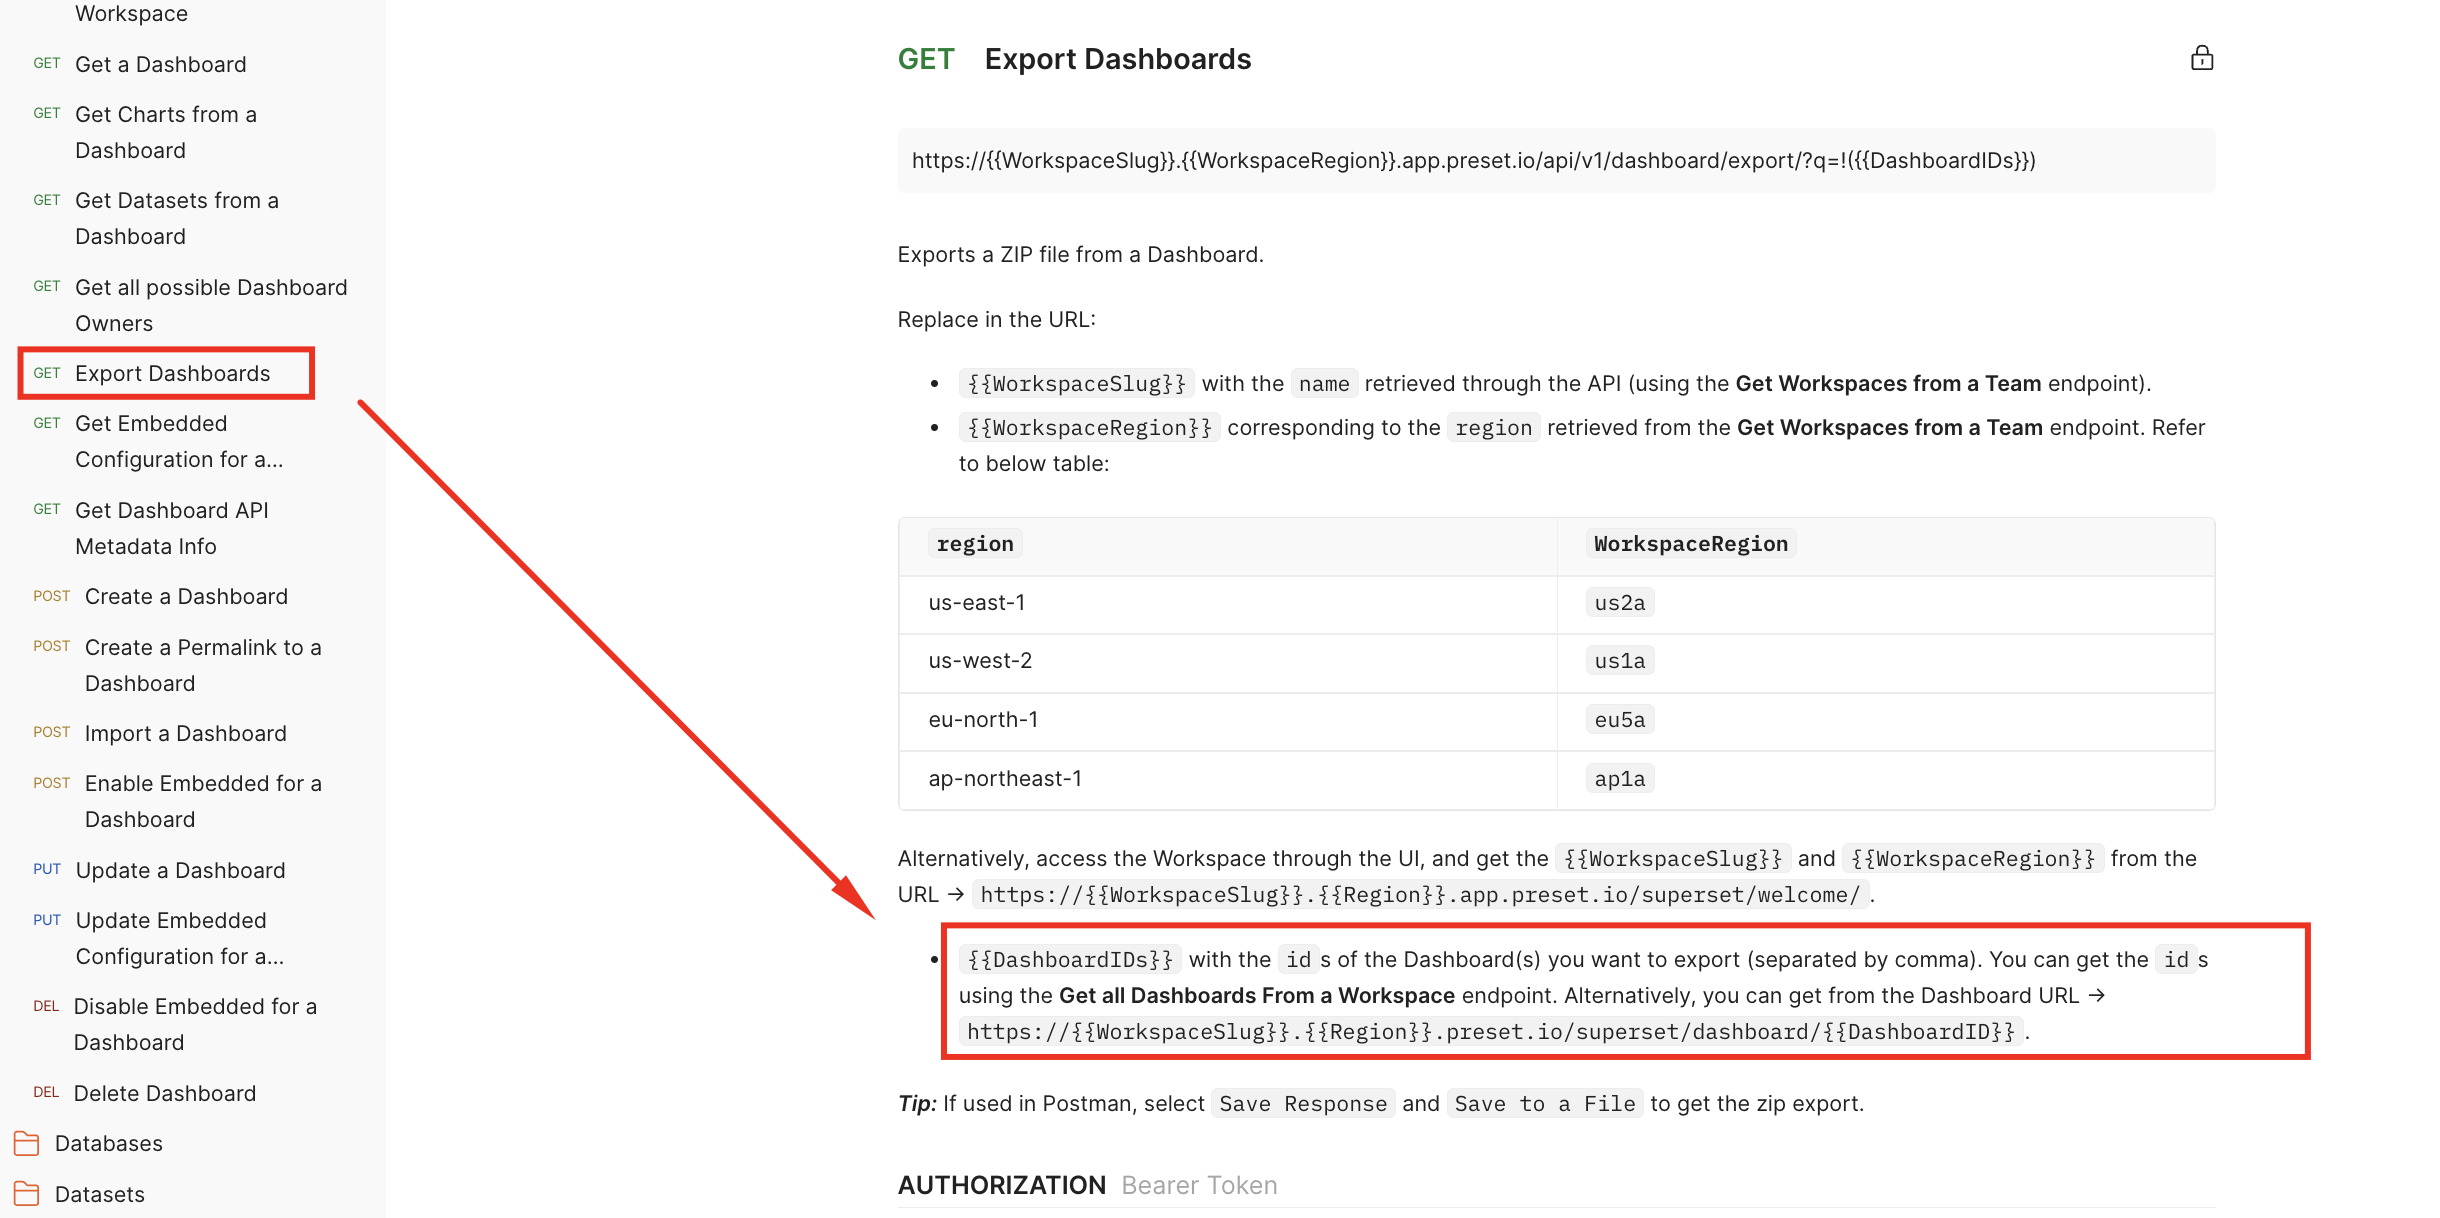
So to learn how to use the “Export Dashboard” endpoint, let’s check what its documentation says:
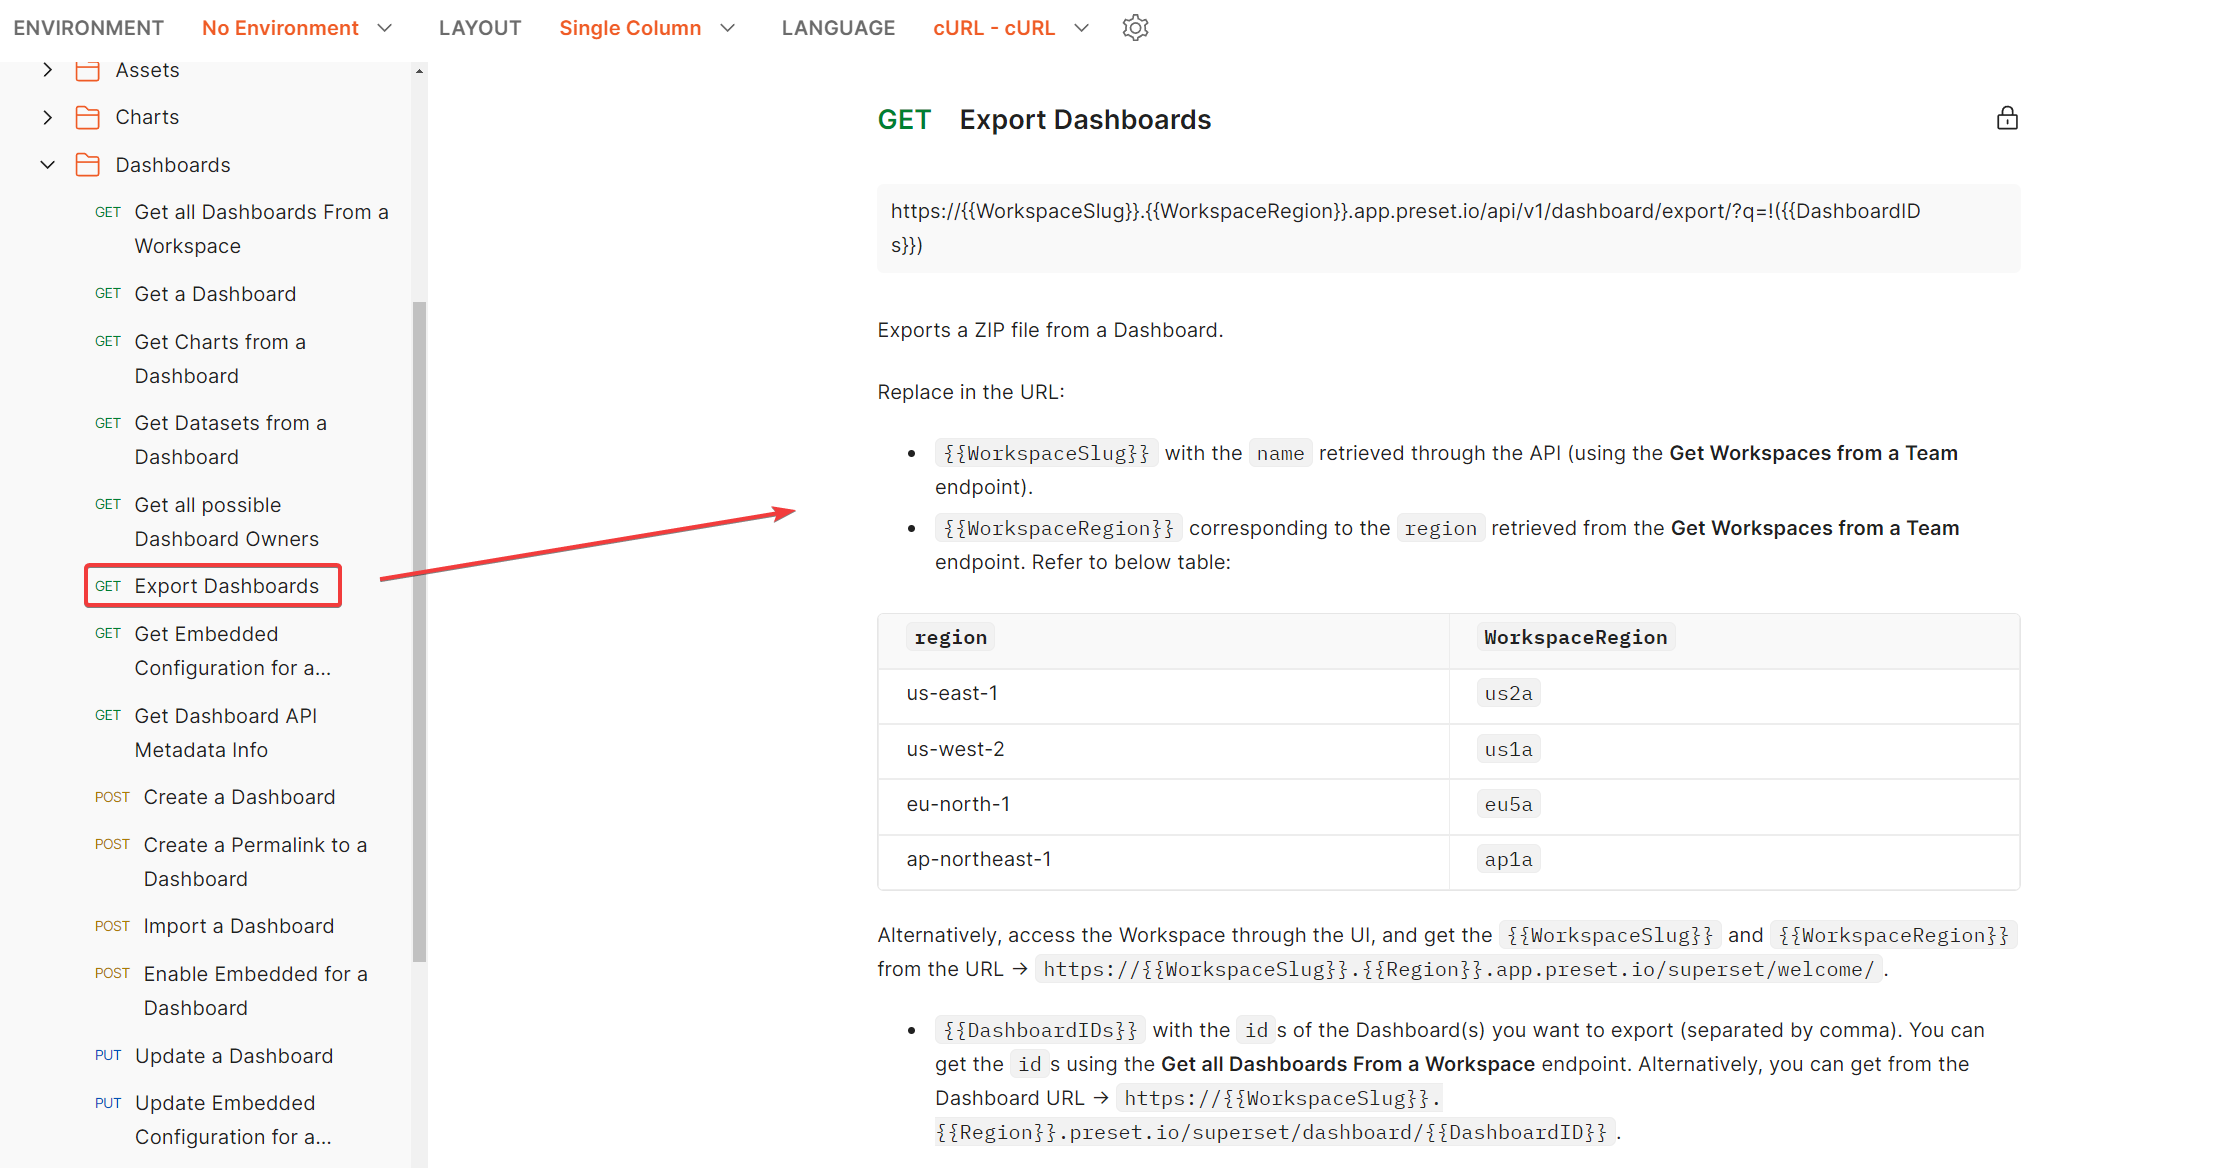
It mentions that when we execute the (GET) Export Dashboard endpoint, it will download a zip file. However, we need to give the value of the variables {{WorkspaceSlug}} and {{WorkspaceRegion}} to execute it. To know how to assign those values to them we need to follow what the documentation says:
{{WorkspaceSlug}} with the name retrieved through the API (using the Get Workspaces from a Team endpoint).
So here we need to go to the “Get Workspaces From a Team” endpoint and execute it:
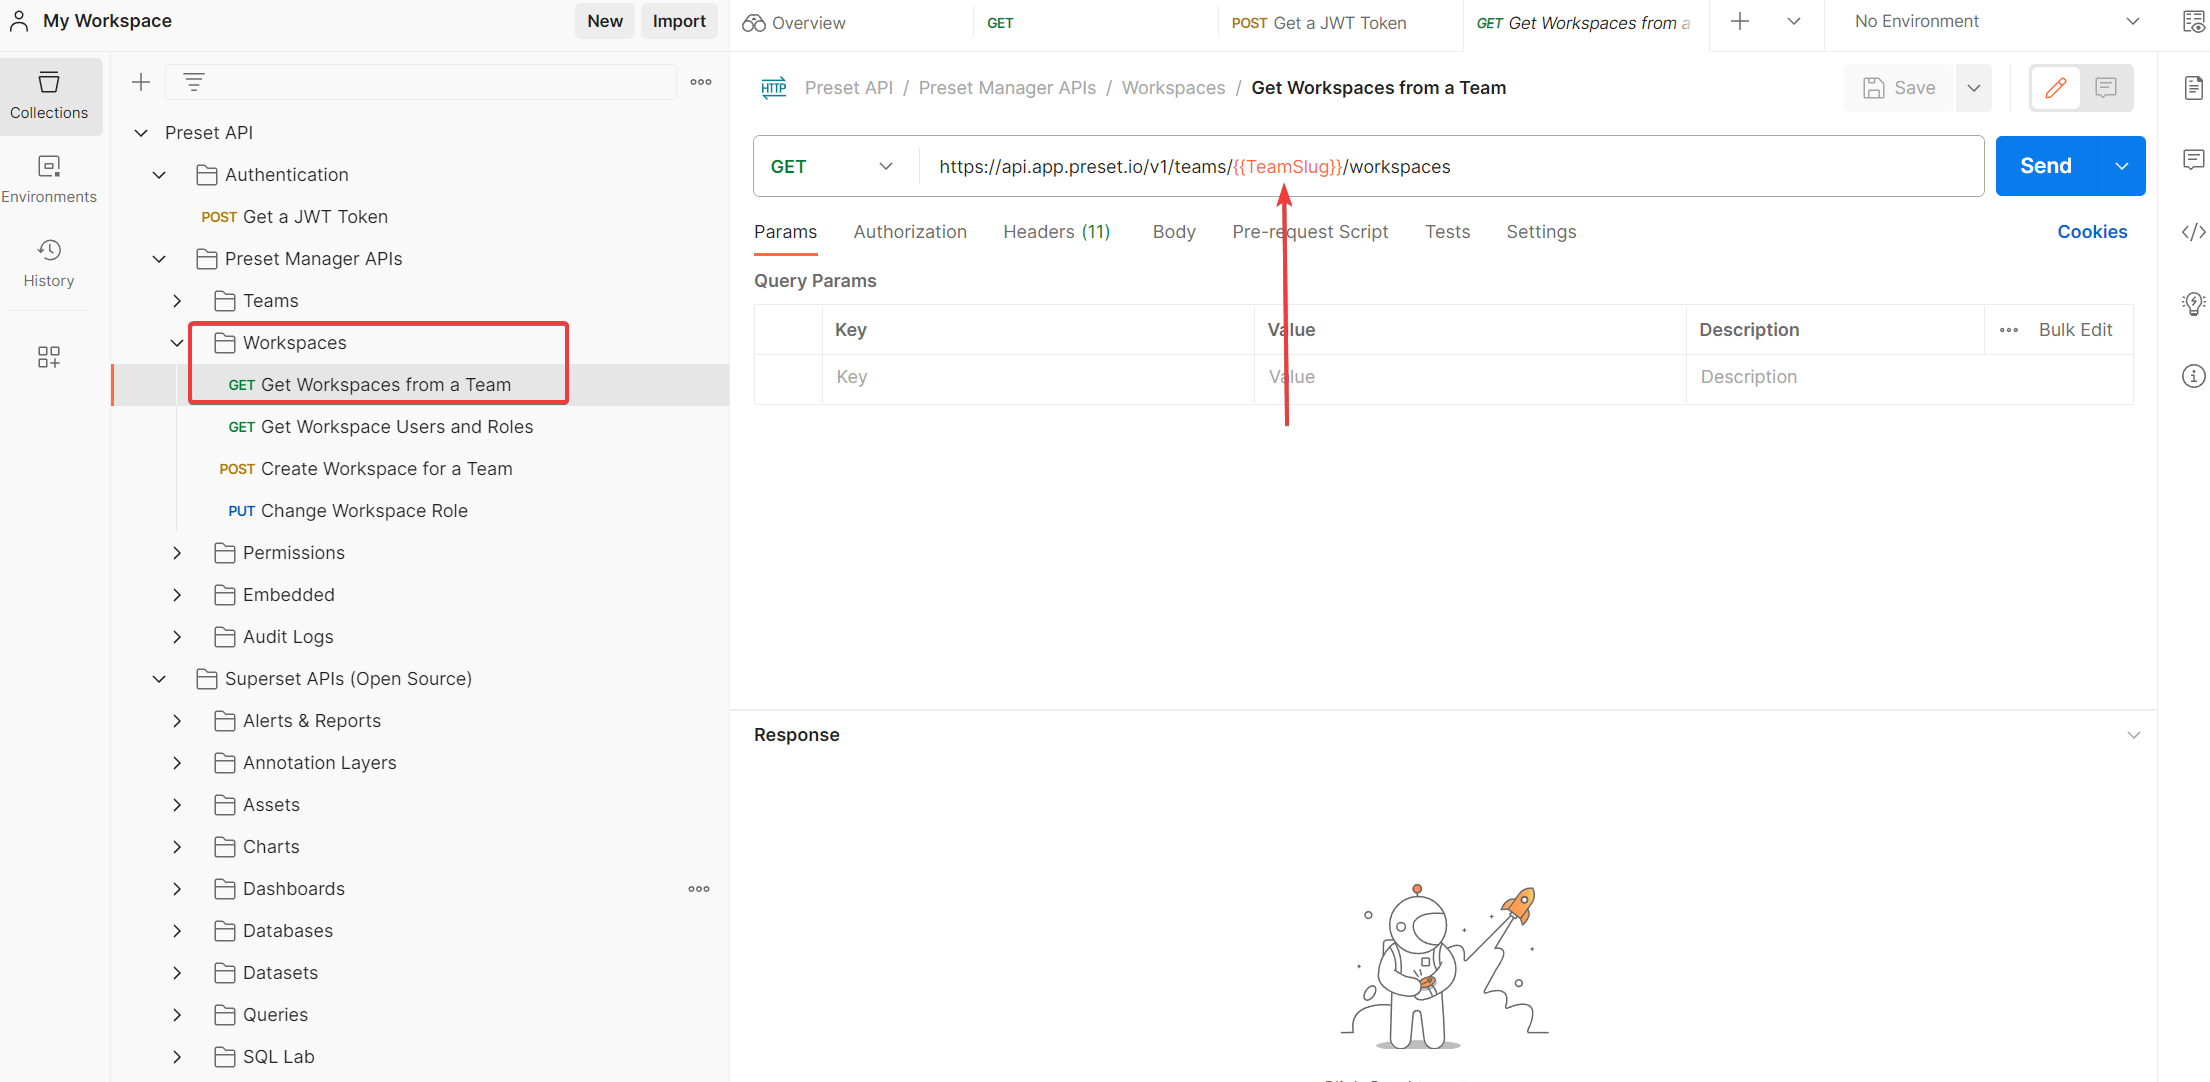
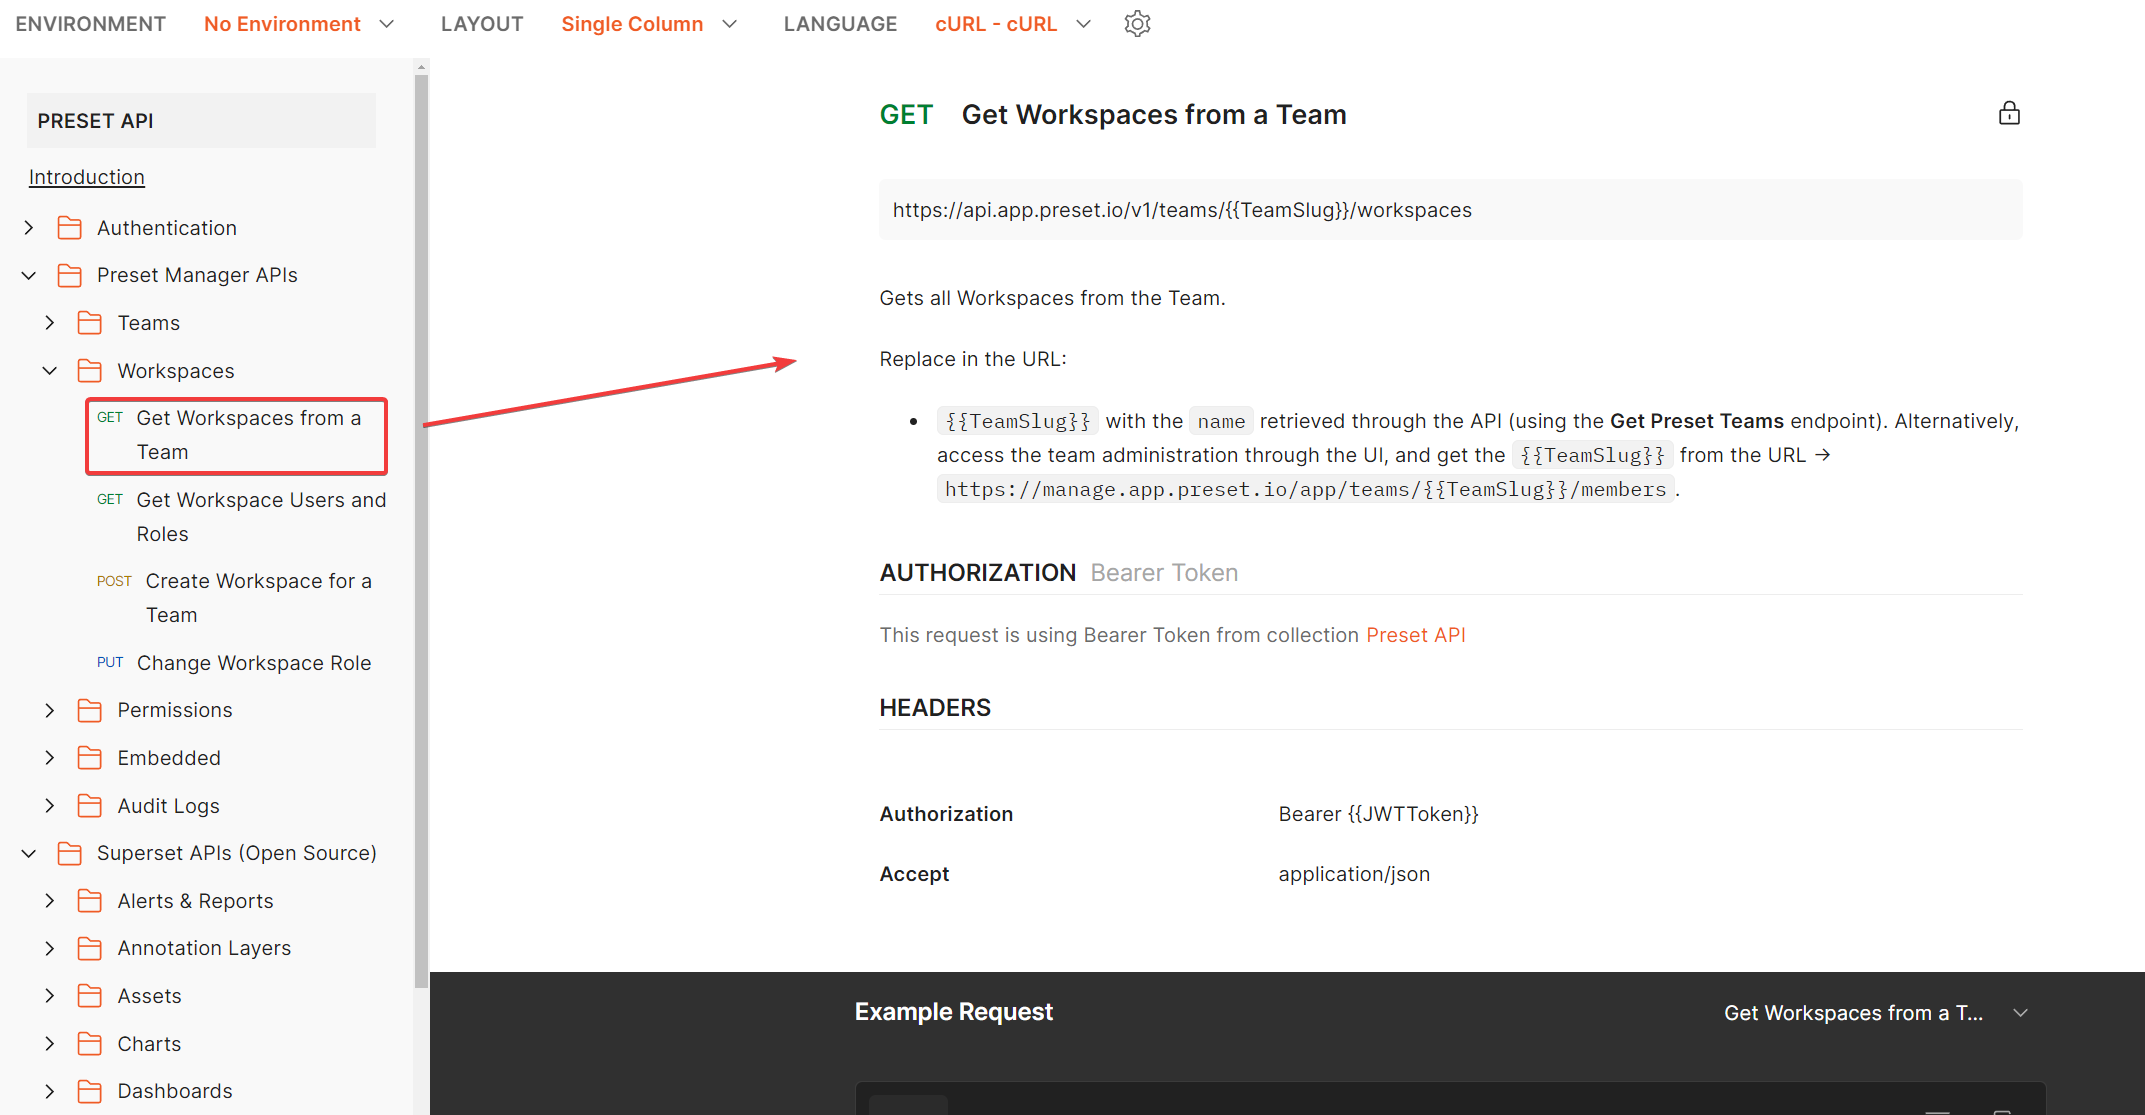
It asks for the TeamSlug value which has the workspace we are looking for. How do we get it? Let’s see what the documentation says:
It says we need to use the “(GET) Get Preset Teams” endpoint, so let’s go to that folder:

This endpoint doesn’t require anything so we can execute it directly. Now we go to the payload and look for the team slug of the team (in this case the Team is named MyFirstTeam-A) we are looking for:
If you look carefully, there is no attribute named team slug, but if we remember, the documentation above says the team slug is what has the attribute “name”, so in this case it is 5cbaa545.
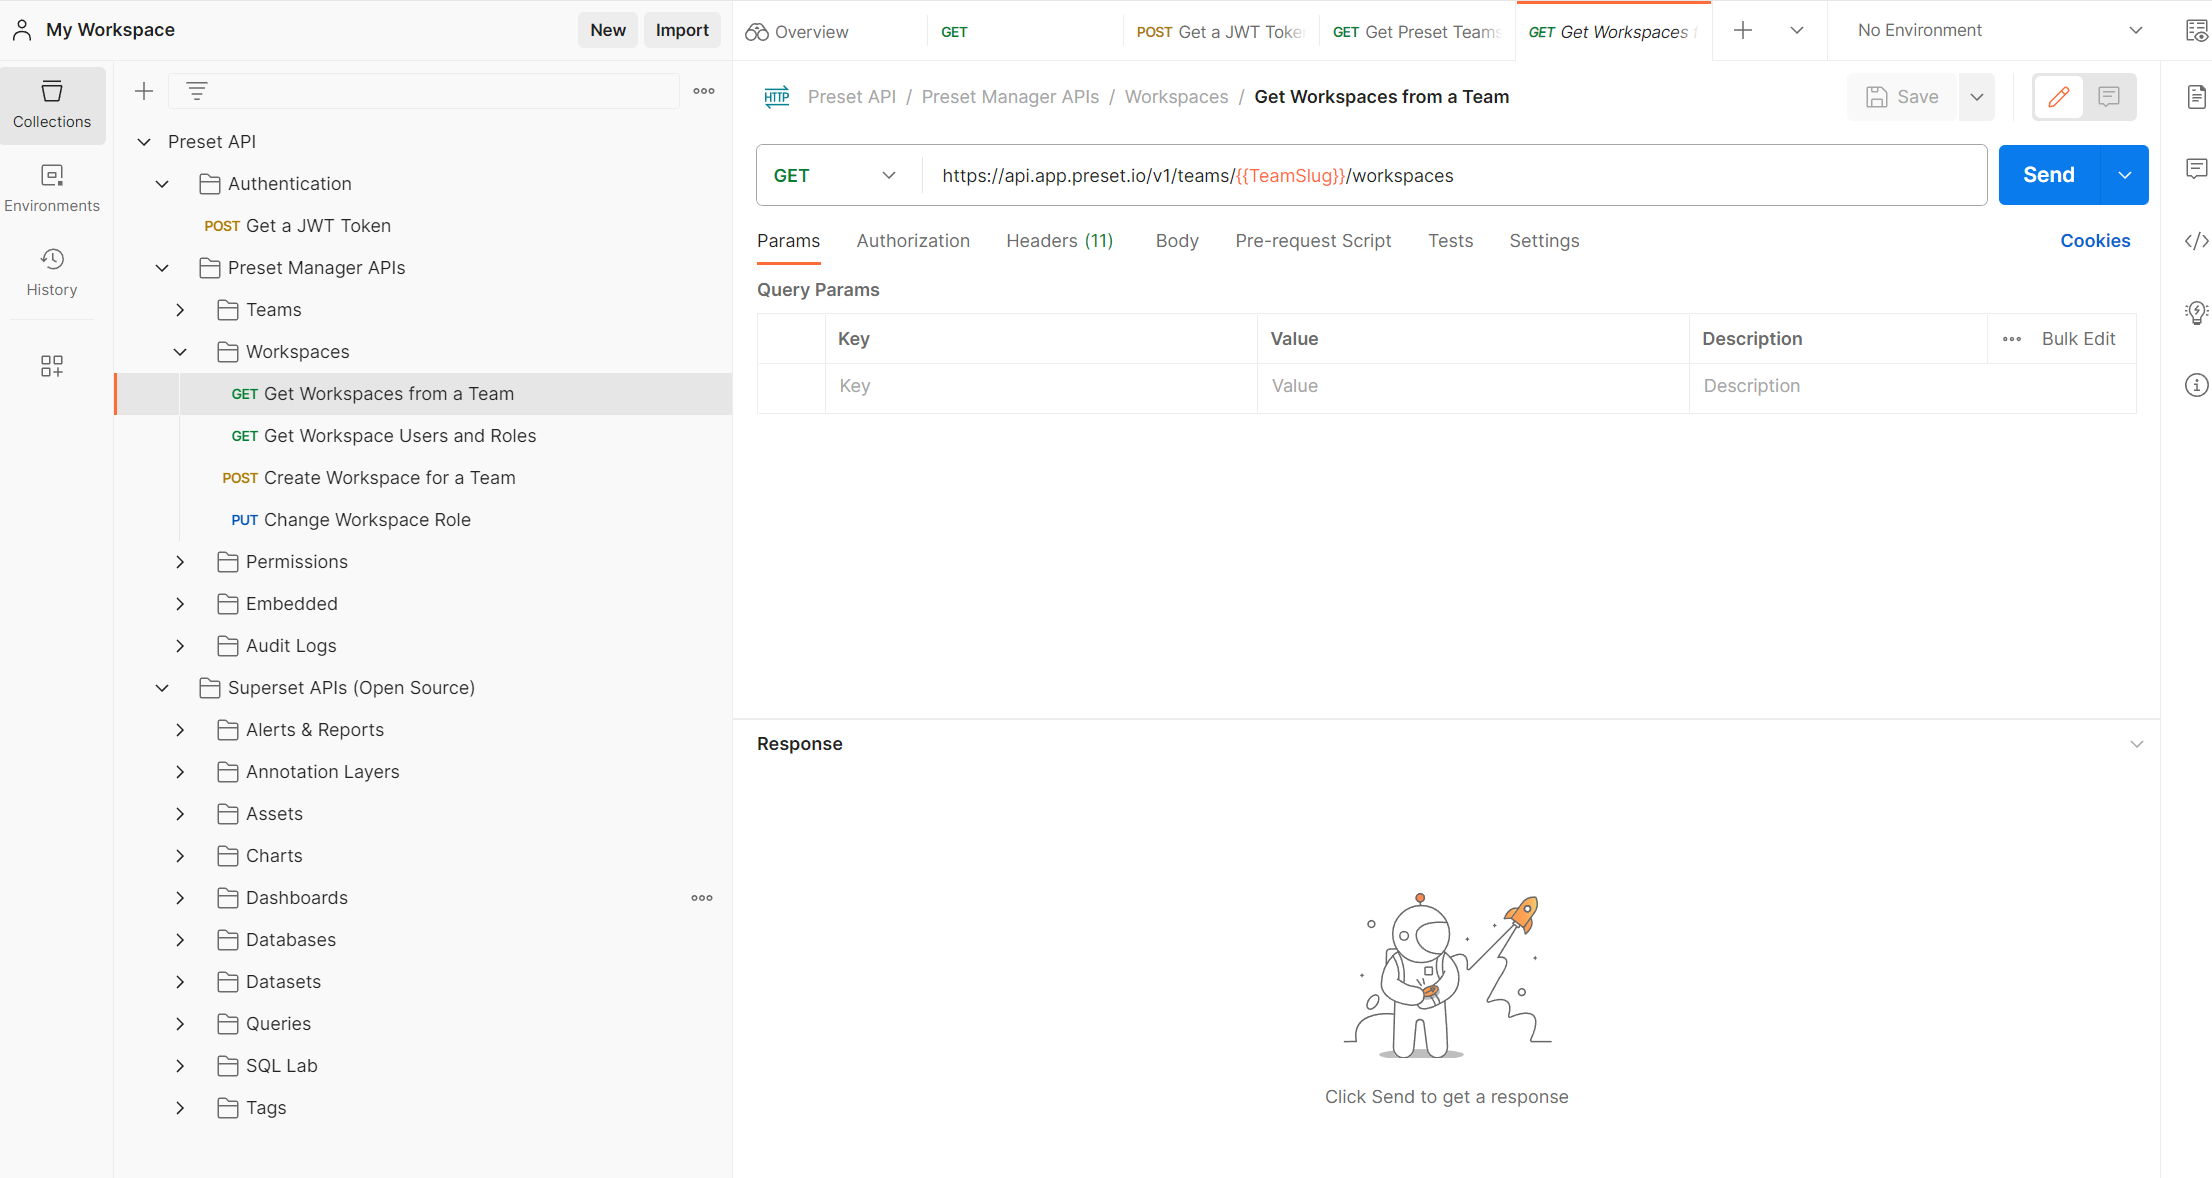
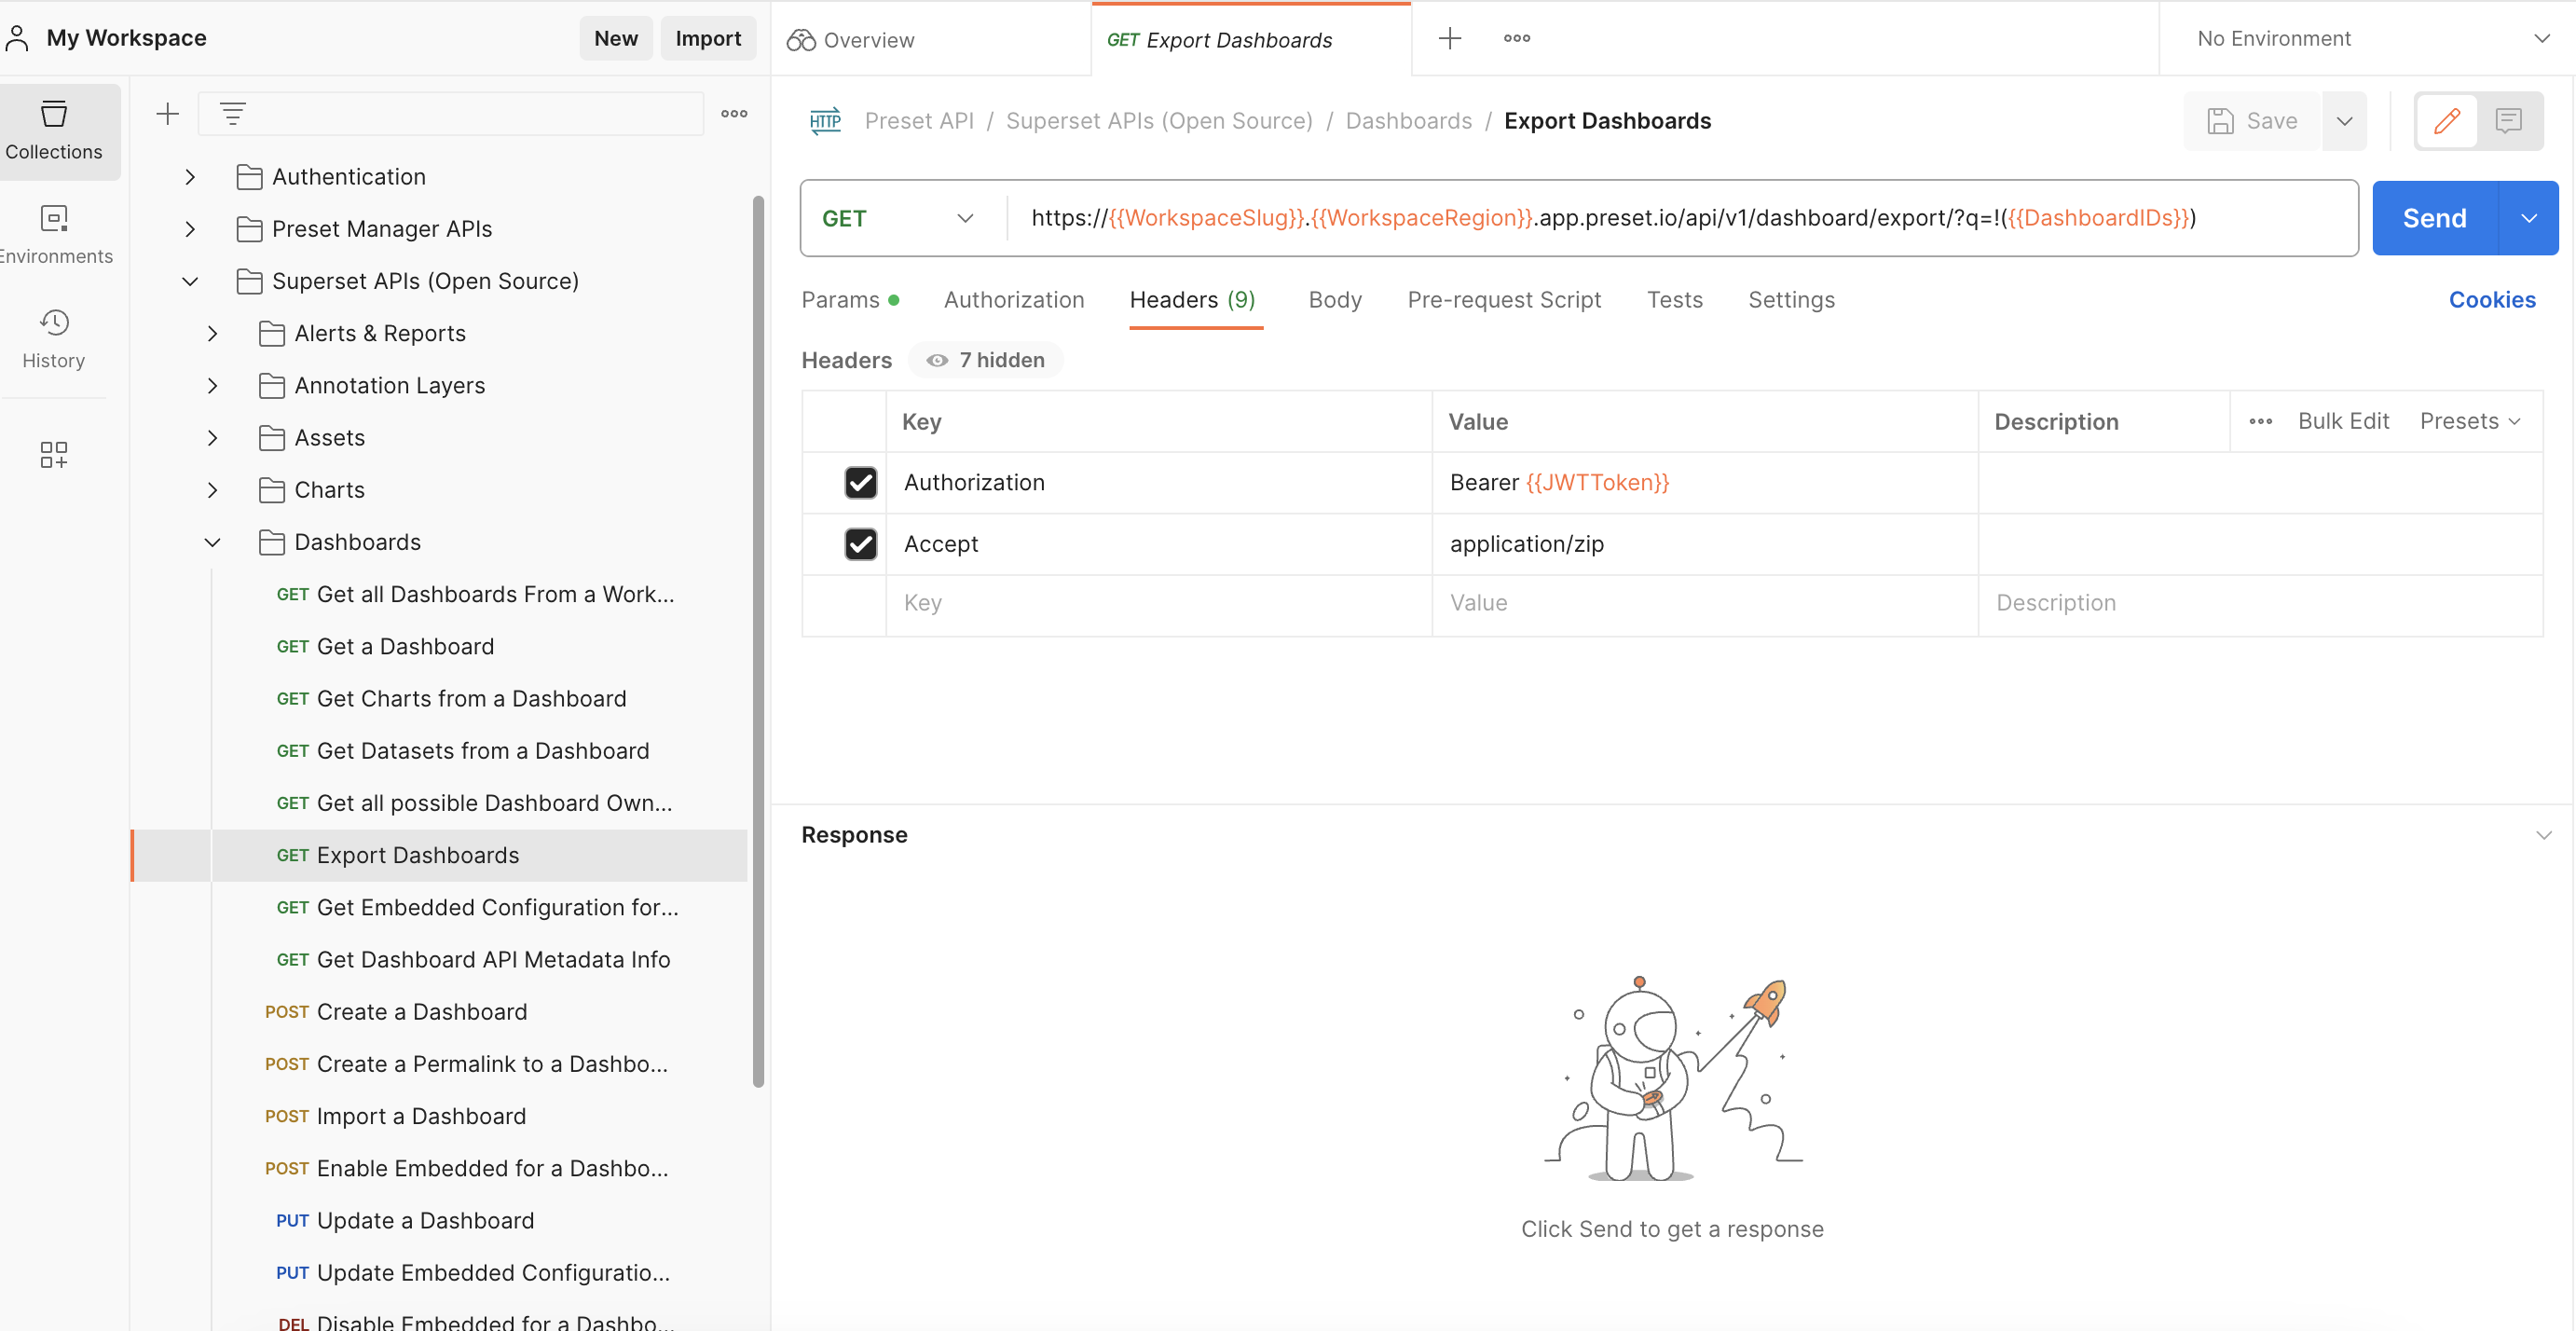
So now we can come back to the previous endpoint Get Workspaces from a Team endpoint:
Here we have two options:
- Replace the teamslug directly on that URL
- Save the teamslug value as a Postman variable
Just to save time on this tutorial, we will use the first method.
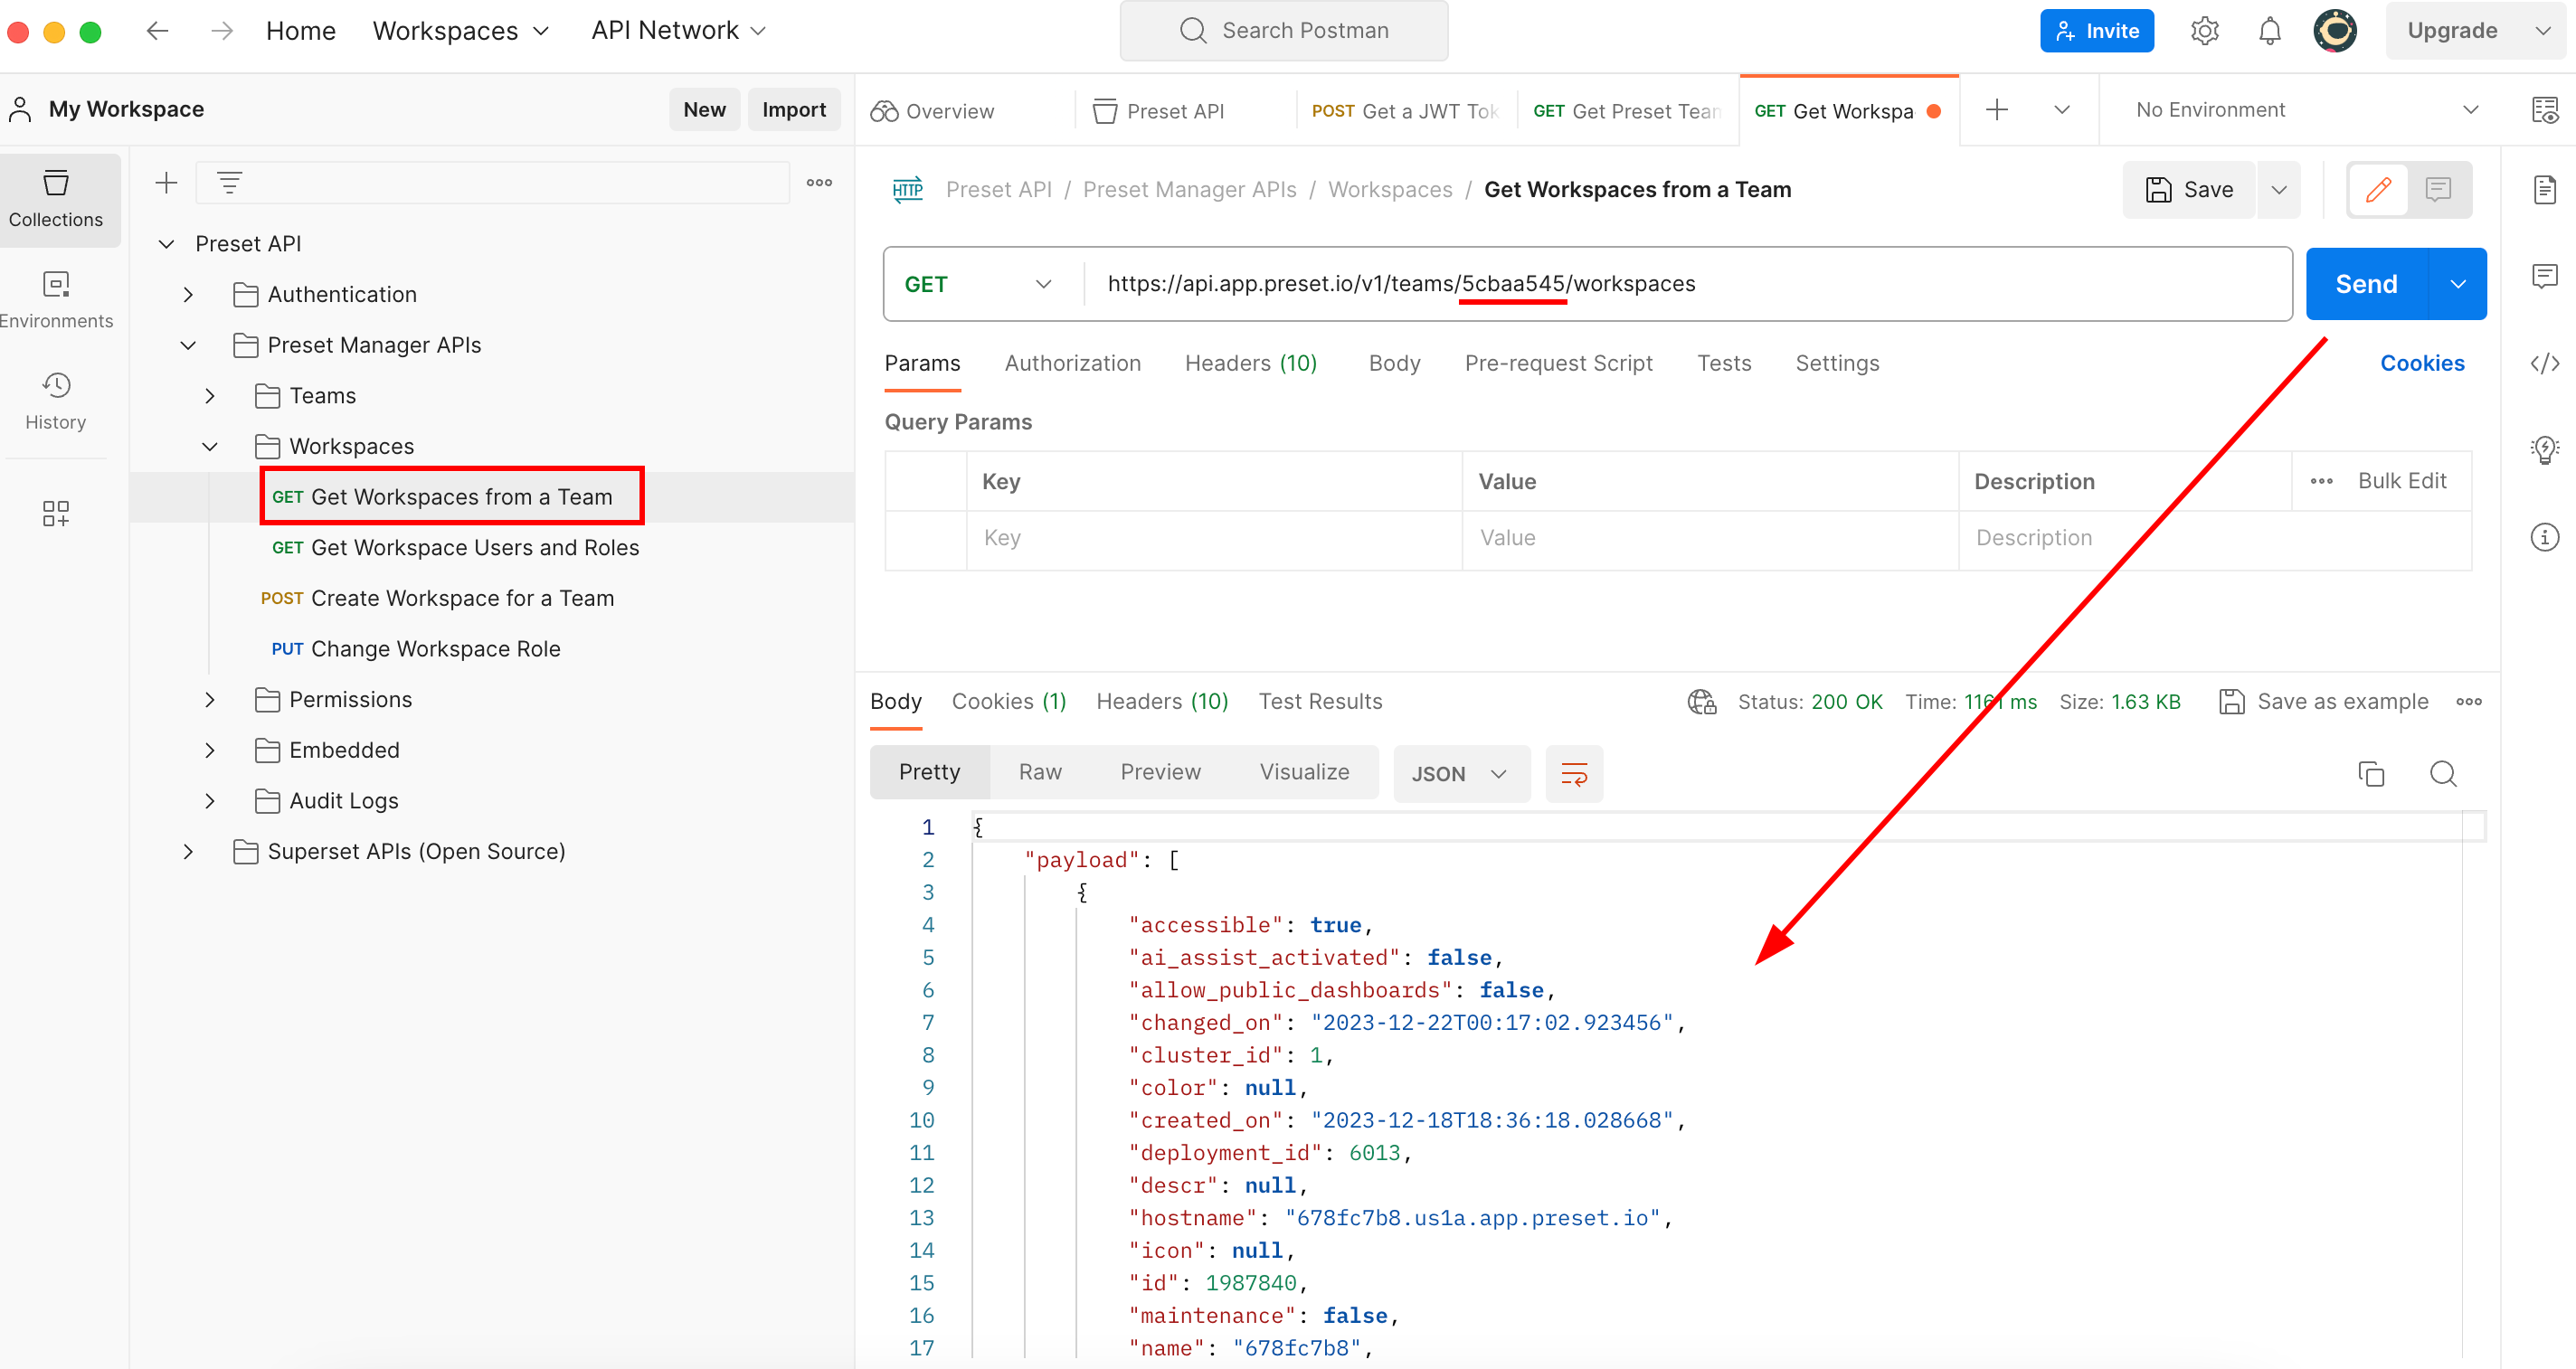
If we scroll down on that payload you can see all the workspaces info associated with a team. Remember we are looking to use the (GET) Export Dashboards endpoint which asks for two things:
- the
{{WorkspaceSlug}}with thenameretrieved through the API. - the
{{WorkspaceRegion}}with theregionretrieved through the API.
So let’s say we want to get that info from a workspace named A-Workspace2:
So let’s use the search box to look for it:
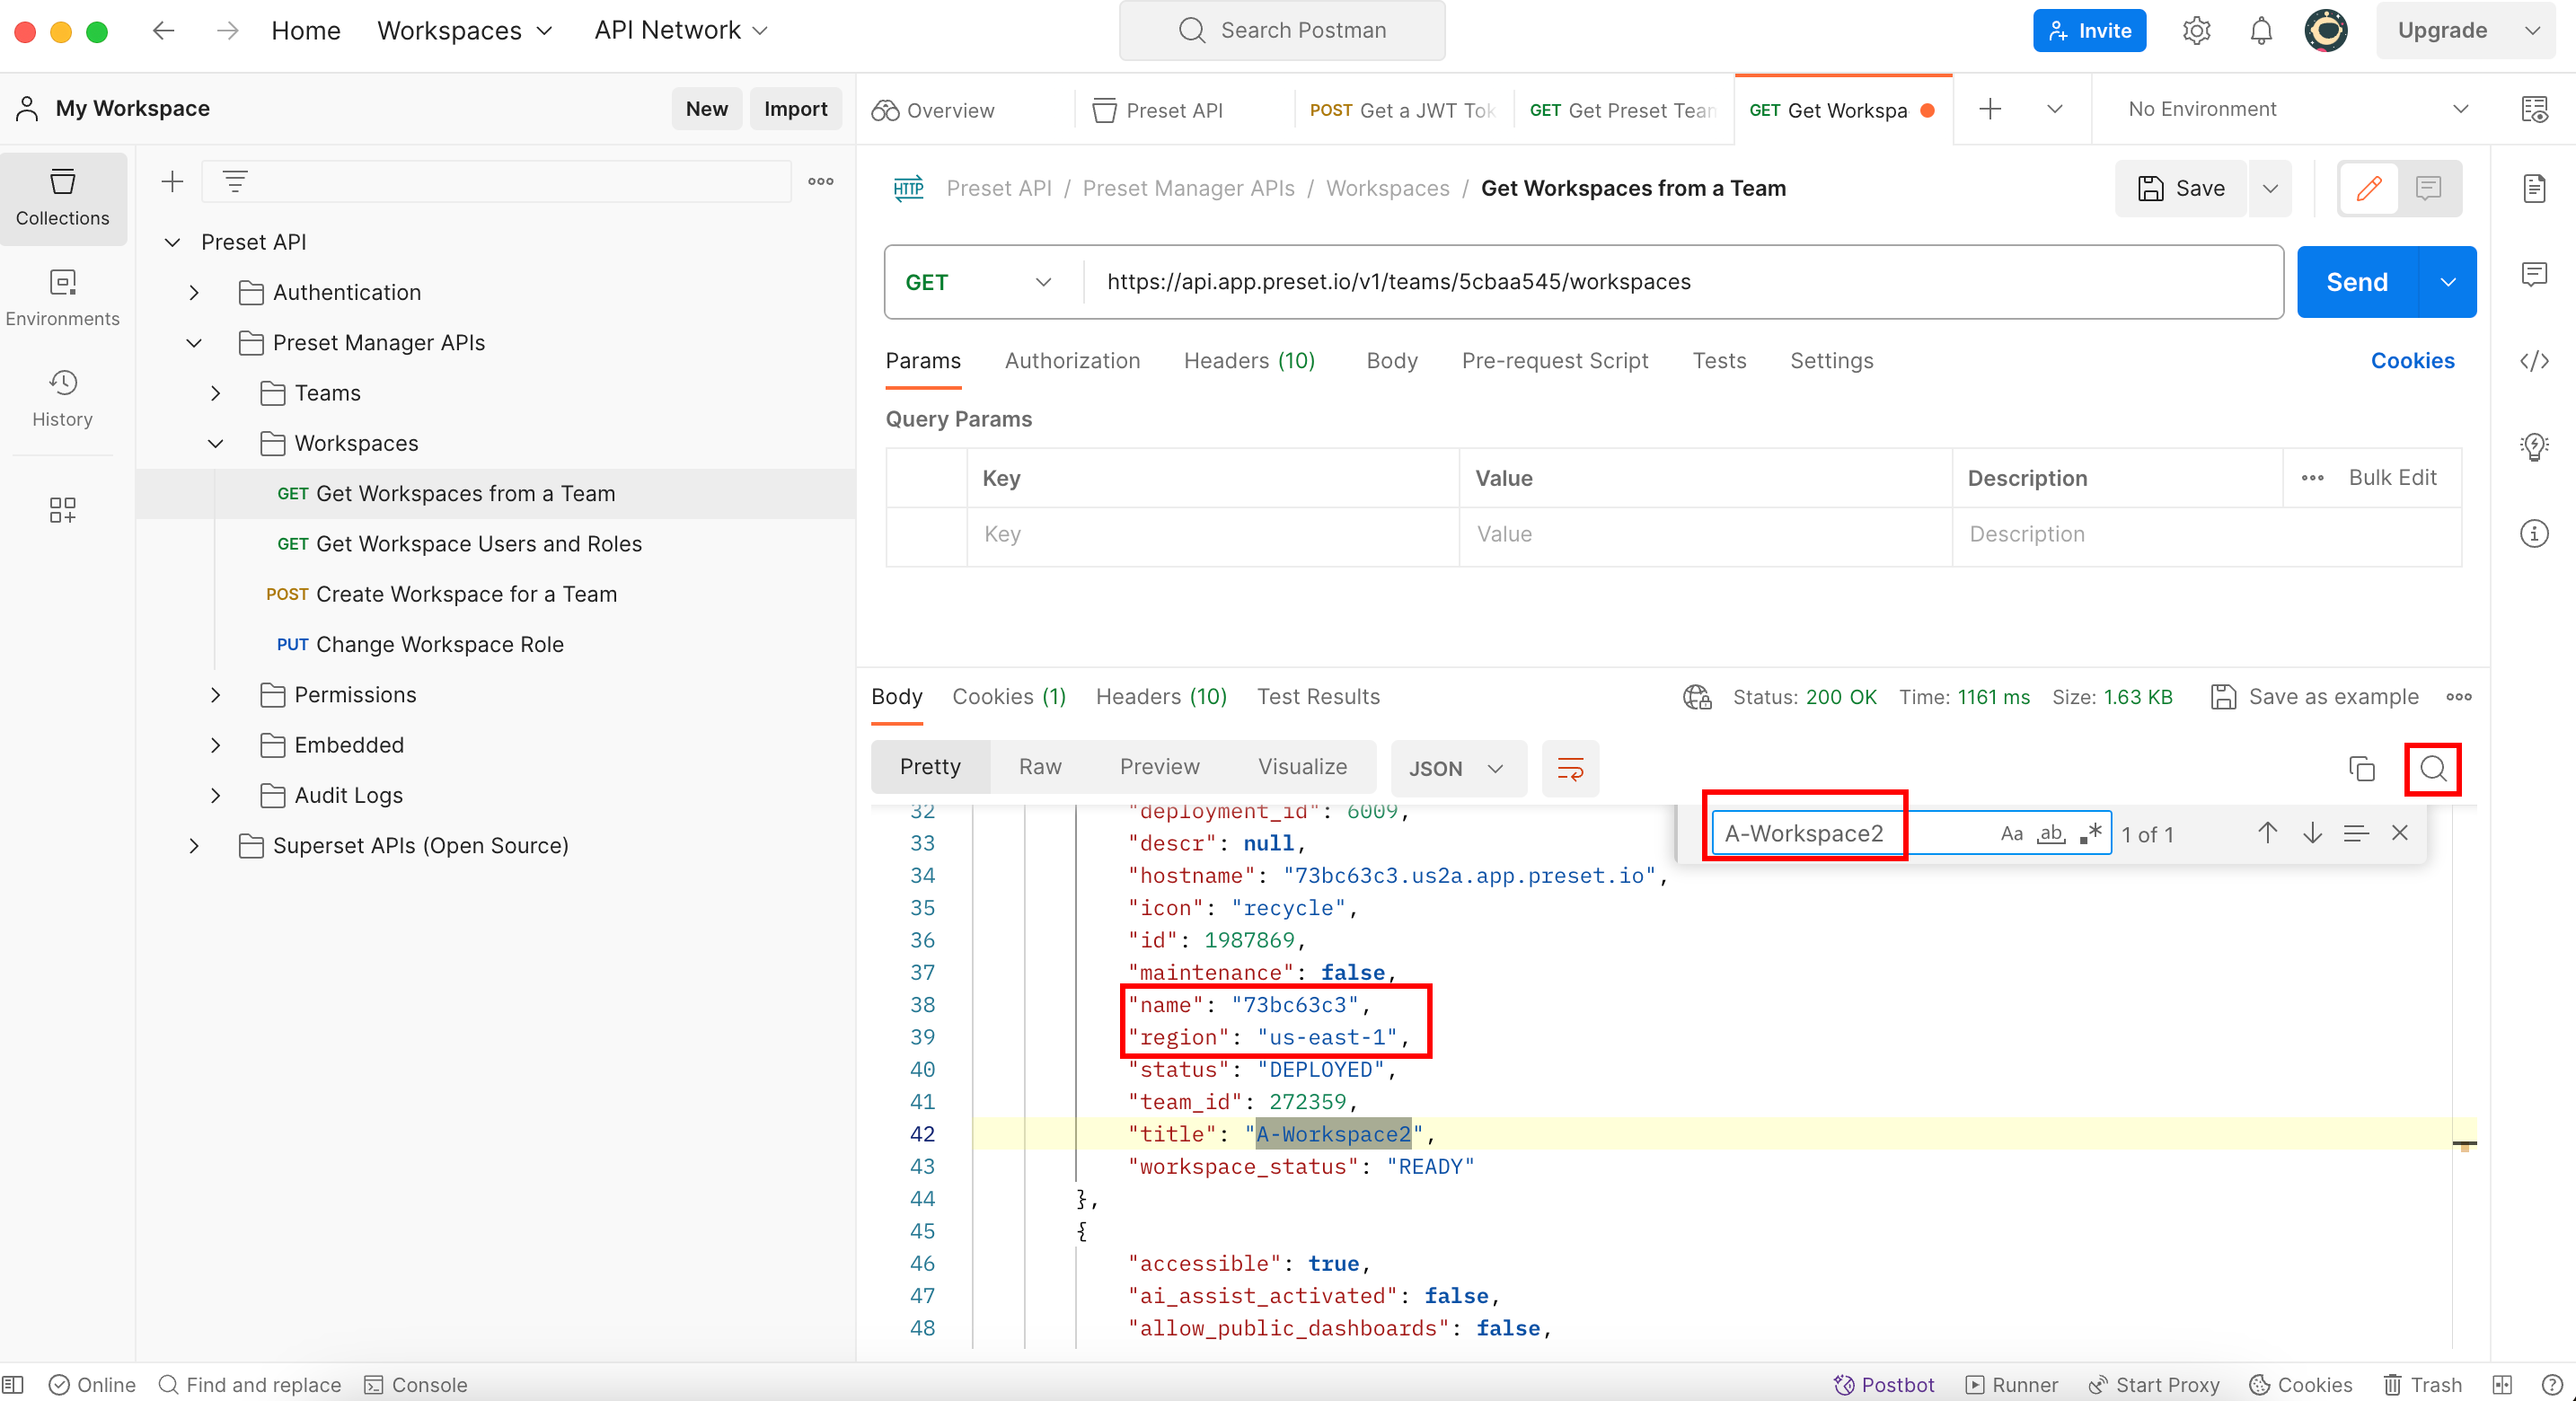
As you can see there, you have the two attributes you were looking for. But be careful, according to the (GET) Export Dashboards documentation you need to transform the region you see there to the format asked by the endpoint:
So the attributes you need to use in the (GET) Export Dashboards endpoint are:
- WorkspaceSlug:
73bc63c3 - WorkspaceRegion:
us2a - DashboardIDs: (we will look for this now)
Finally, let’s look for the last attribute we need: DashboardIDs. According to the Preset API Documentation:
So let’s use the (GET) Get all Dashboards From a Workspace endpoint. We can assume intuitively this endpoint is inside the Dashboard folder:
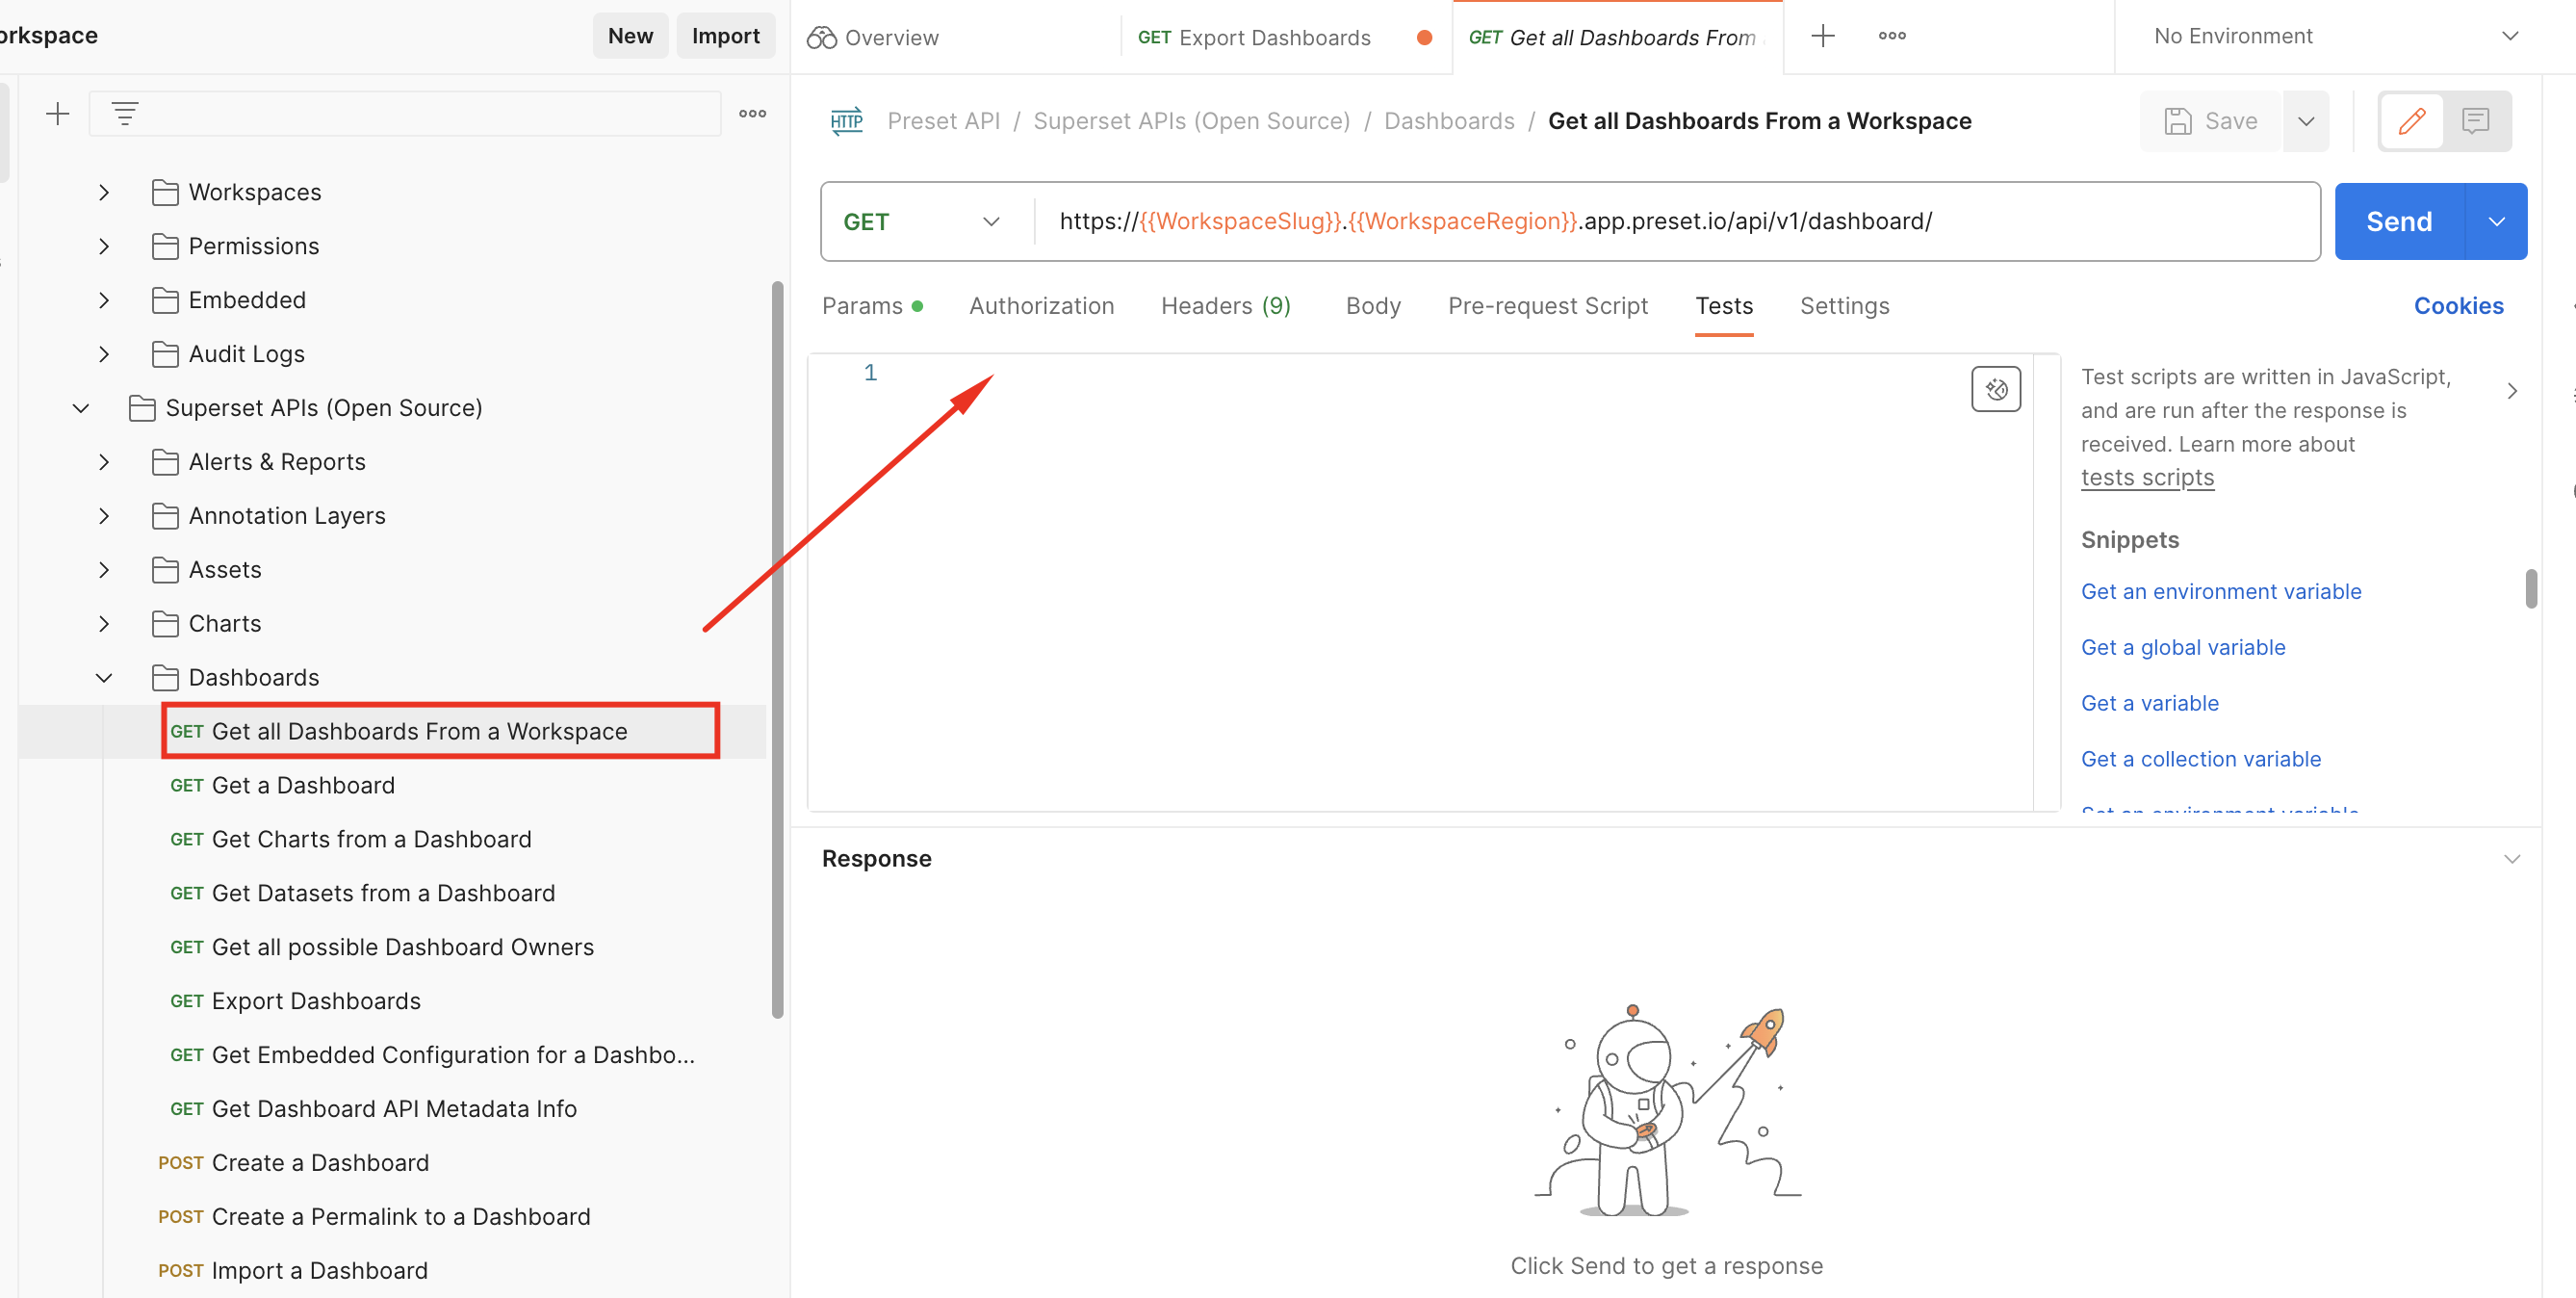
It asks for the WorkspaceSlug and WorkspaceRegion attributes. We have both, so let’s replace those values and execute (send) this endpoint:

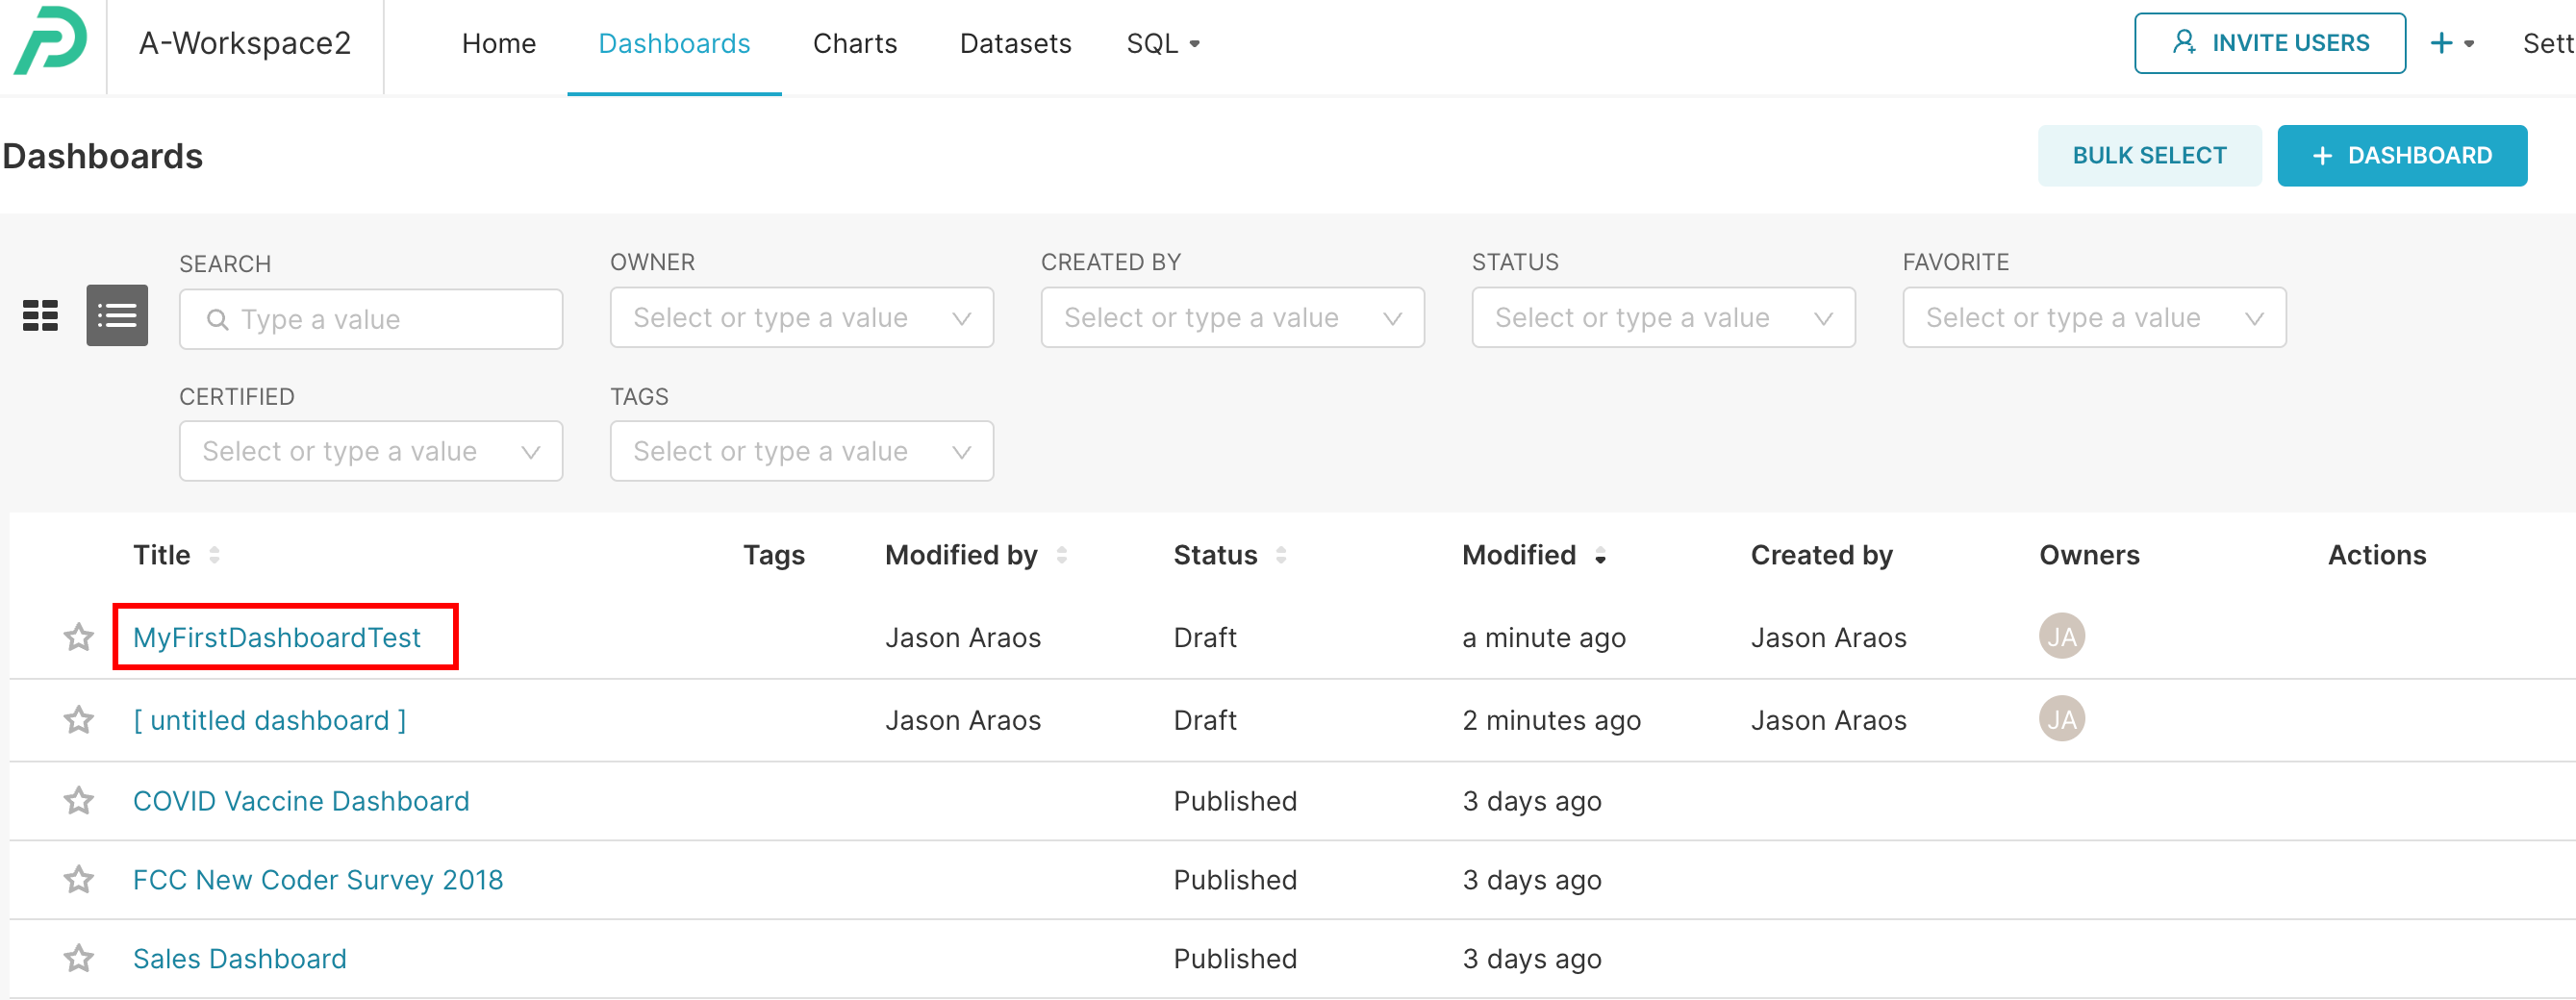
We know inside this workspace there is a dashboard named “MyFirstDashboardTest”, so this is the one we will look for:
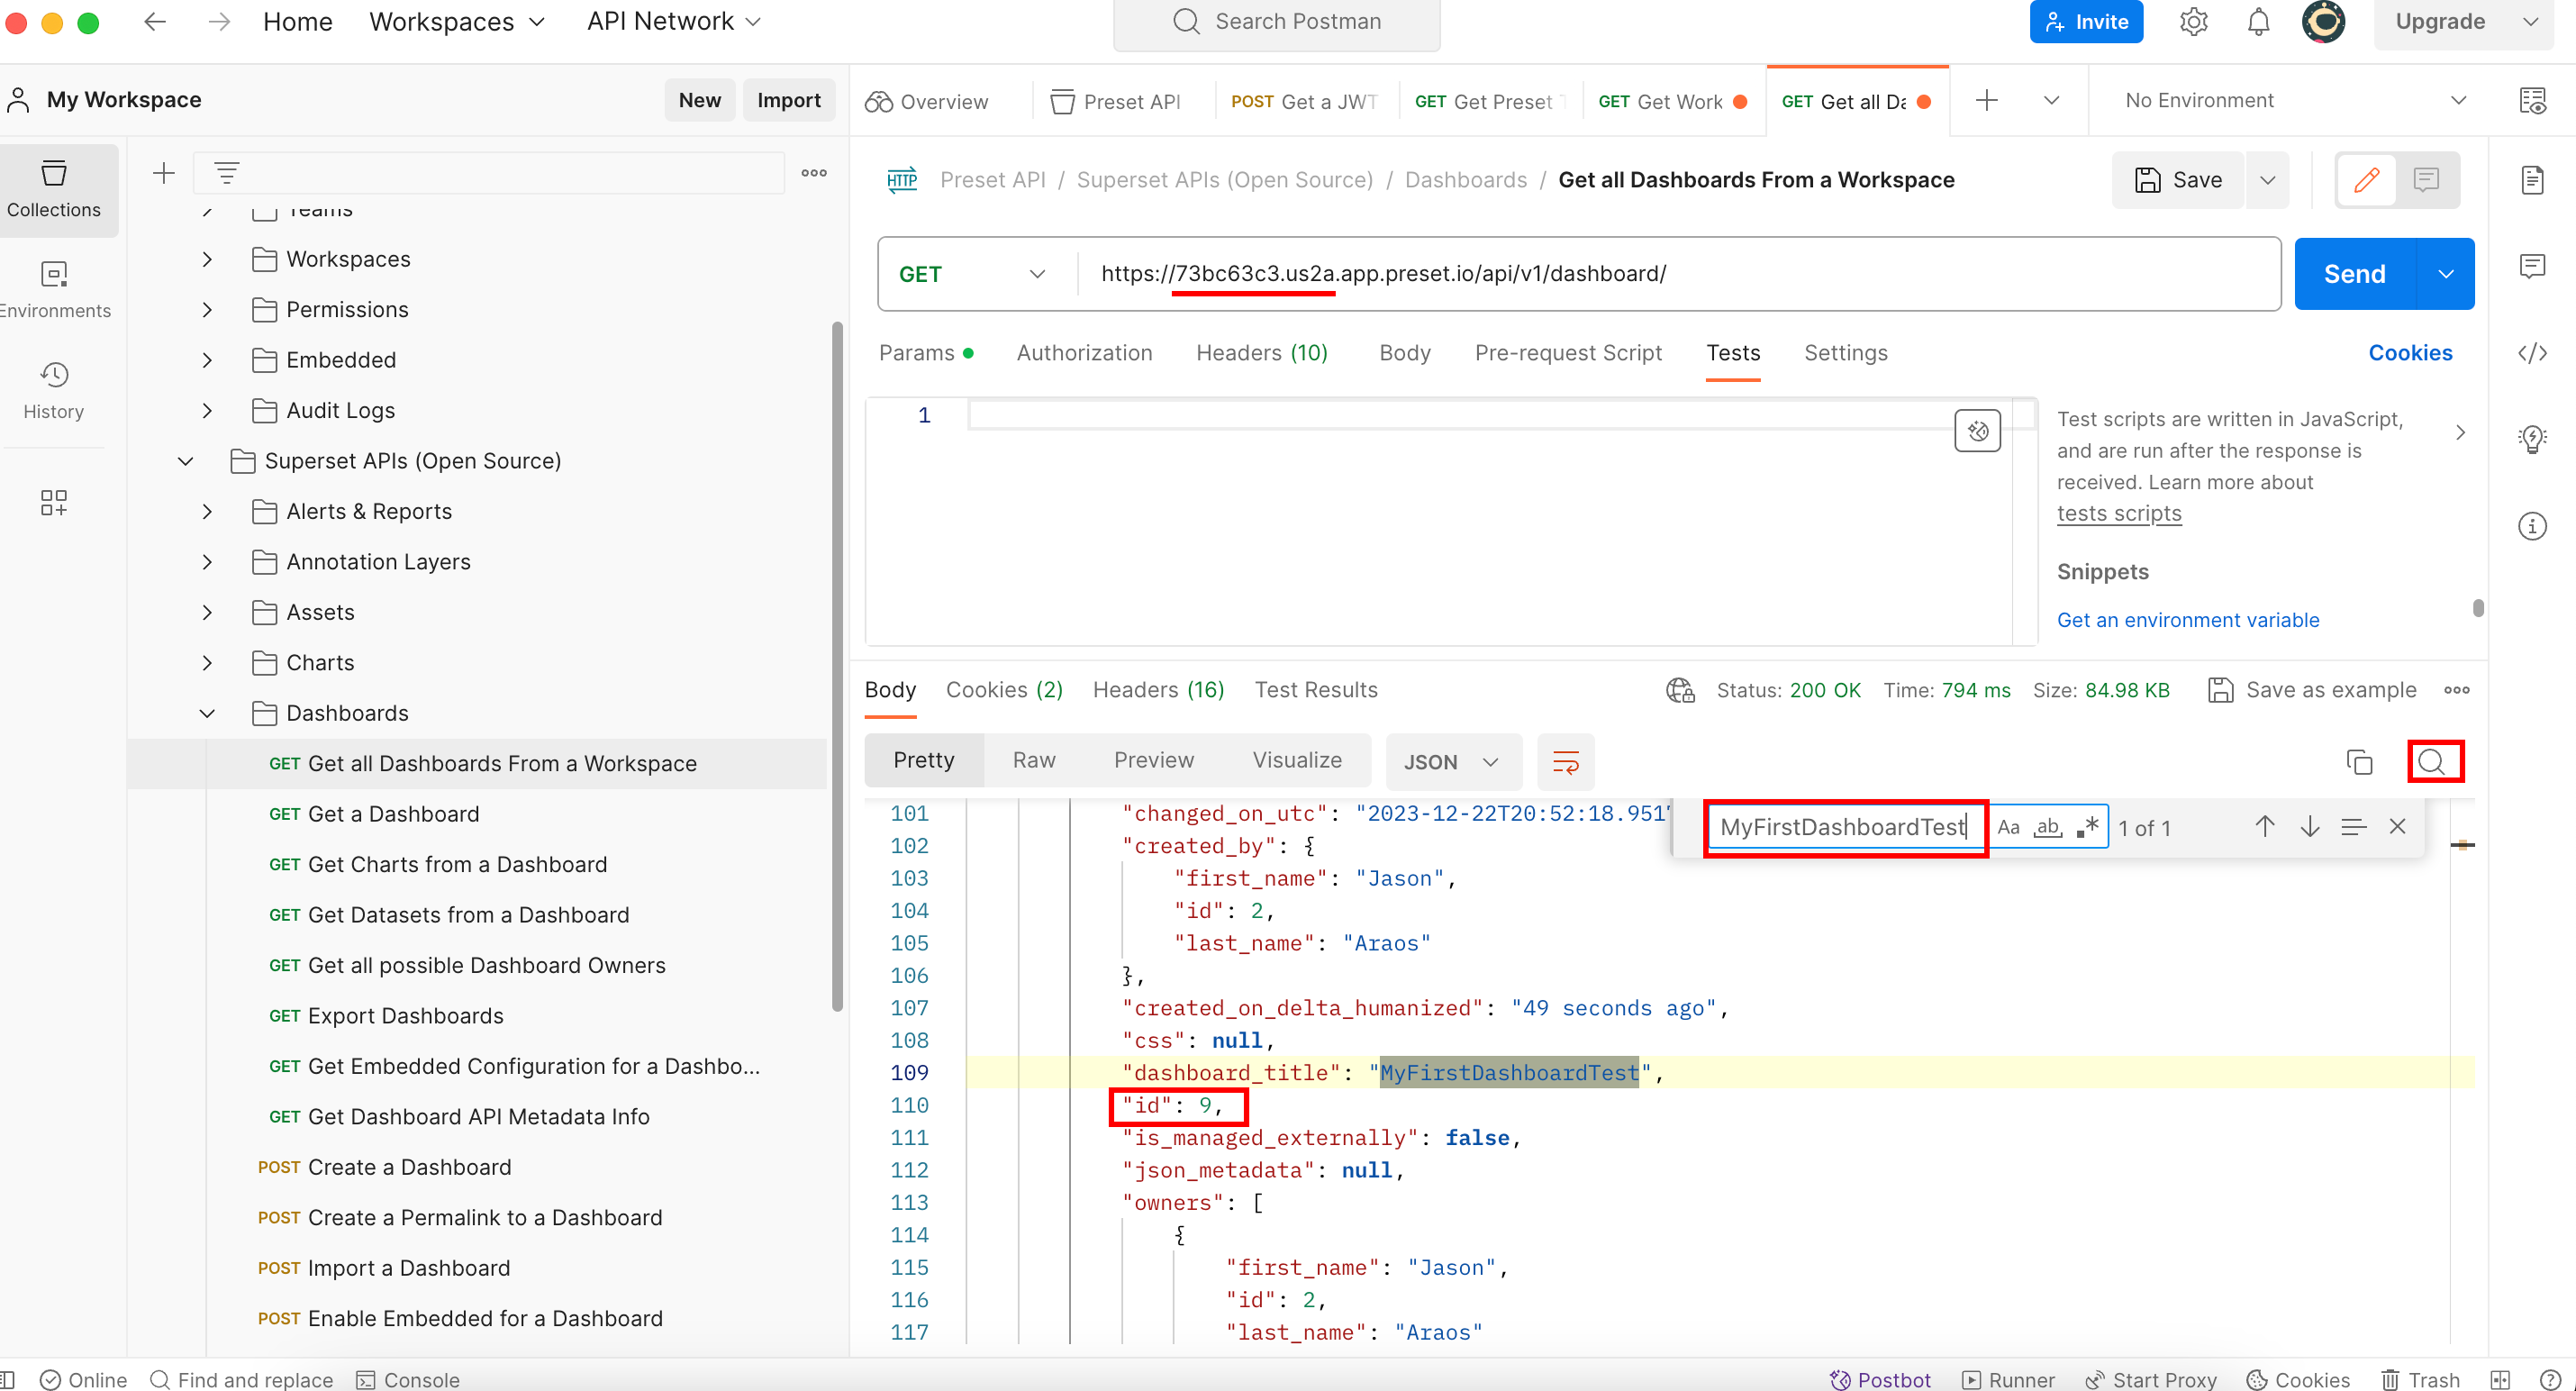
So in order to export this dashboard with need to use its id which is 9.
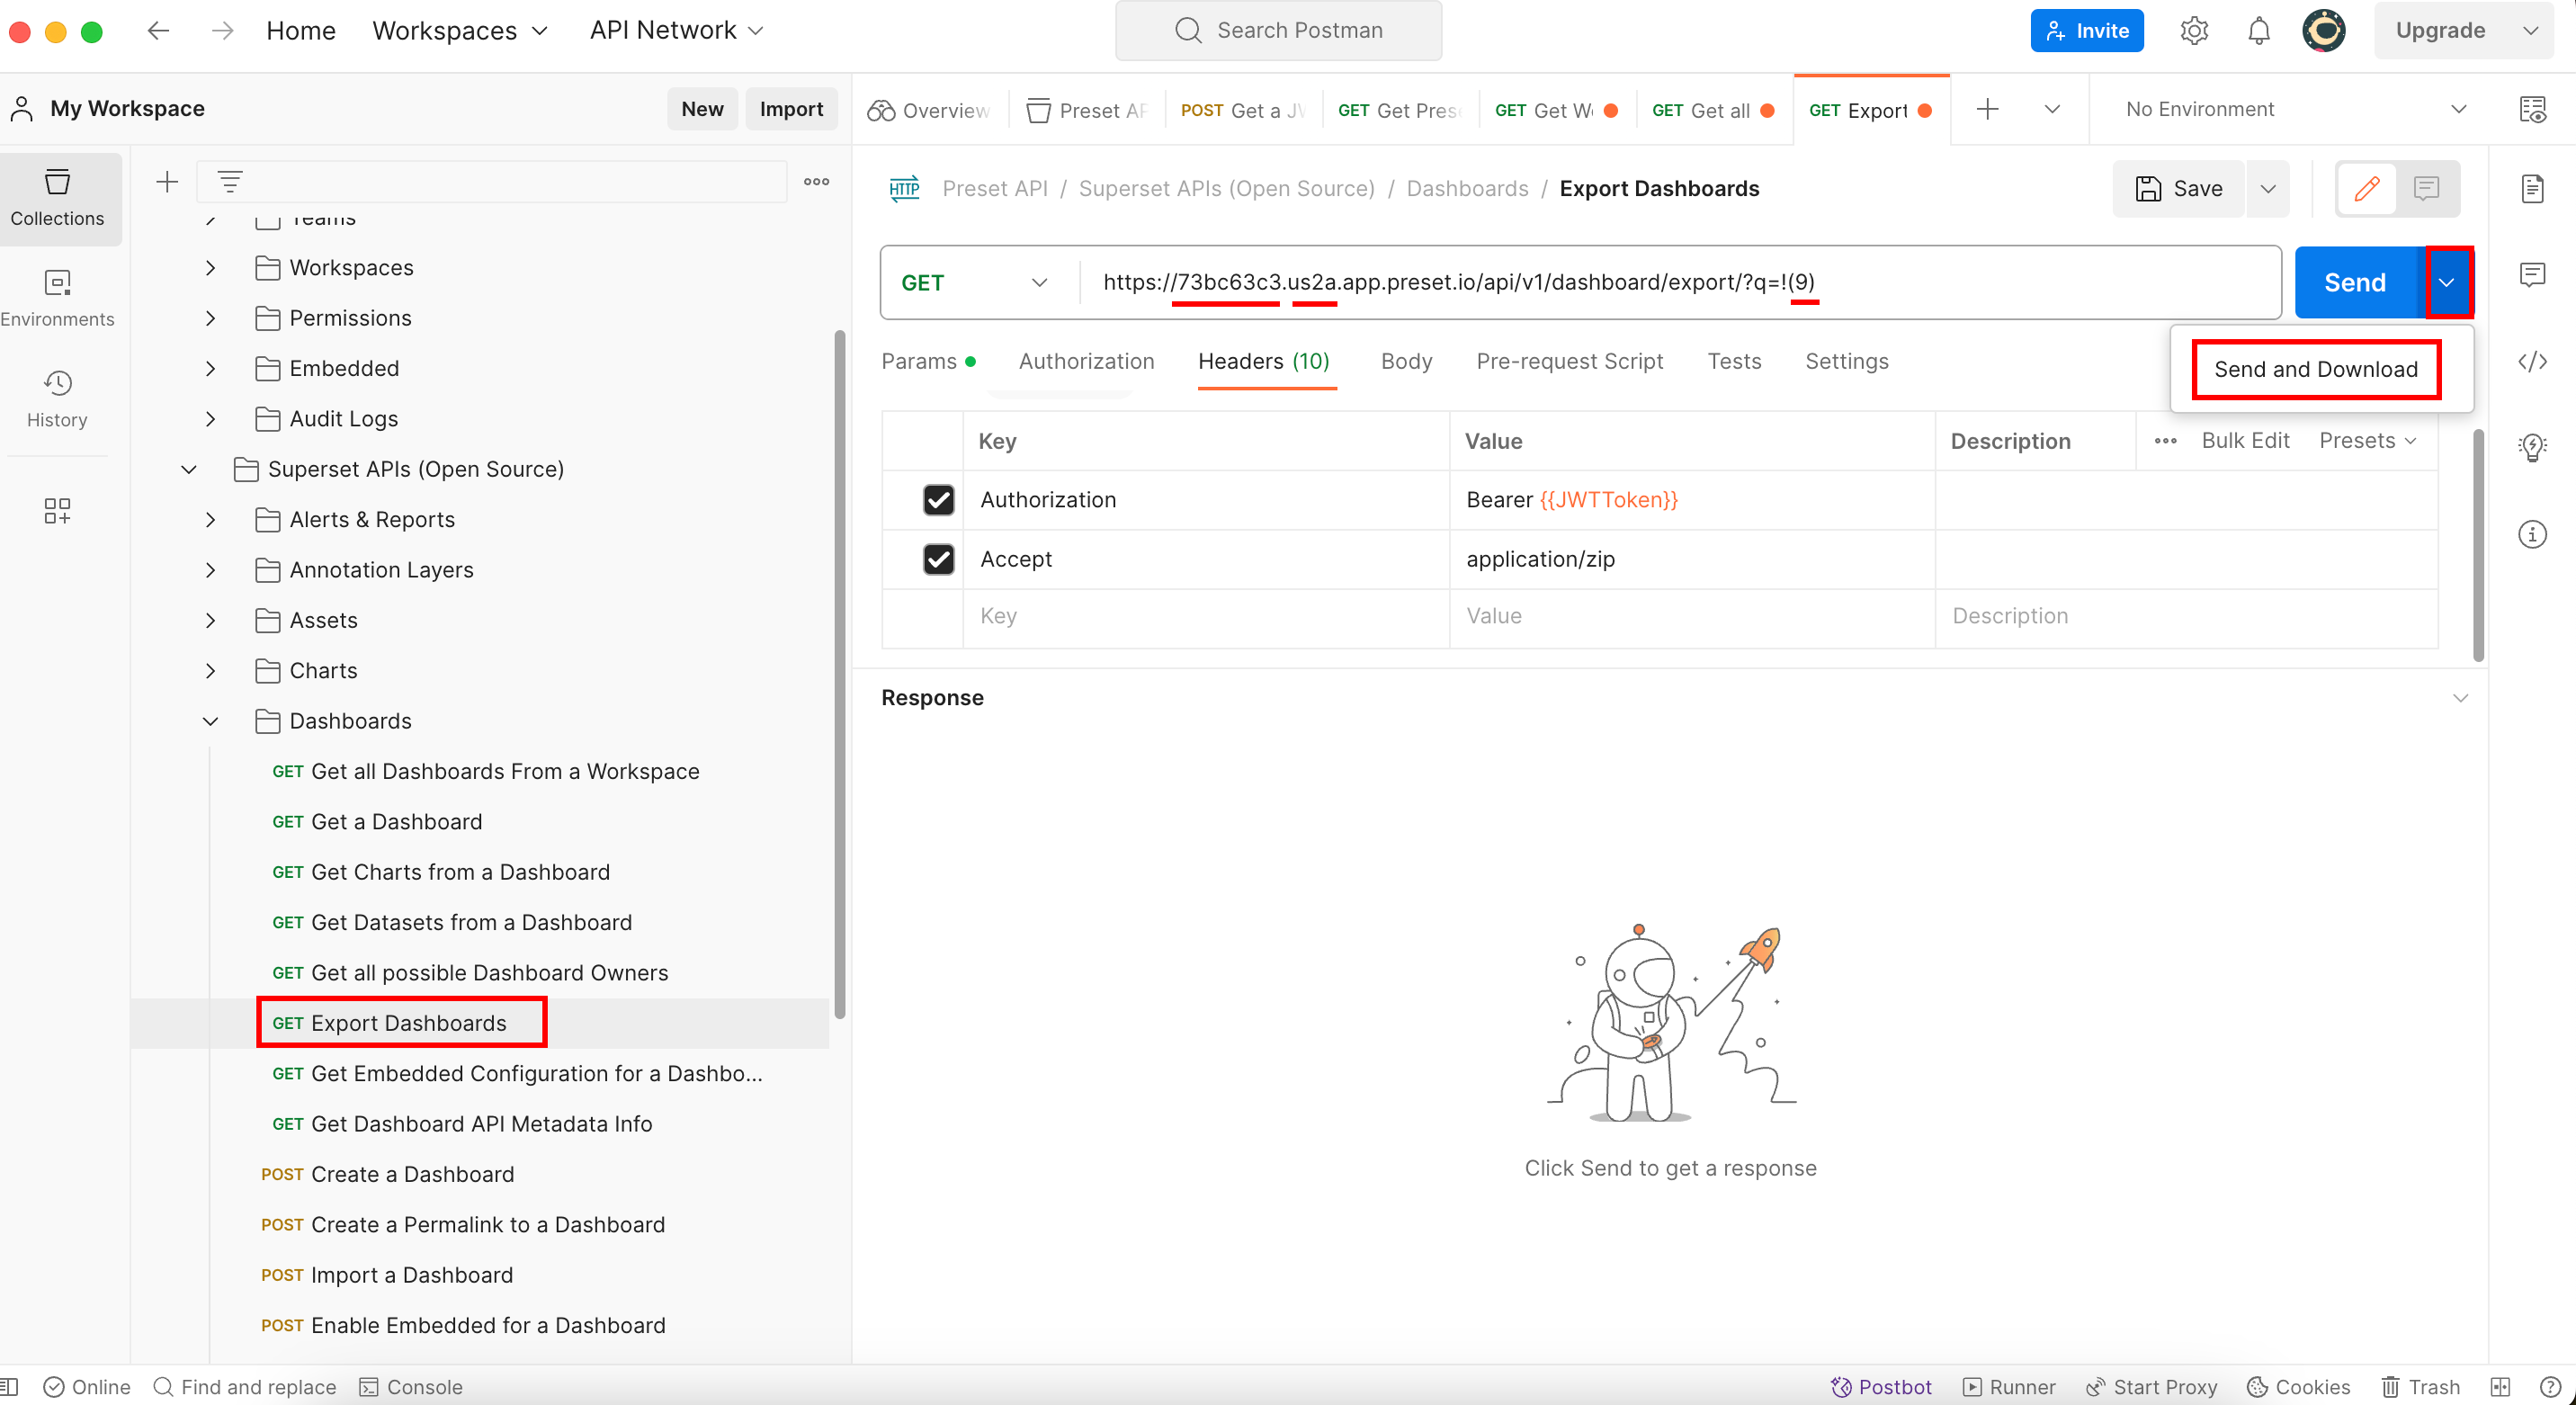
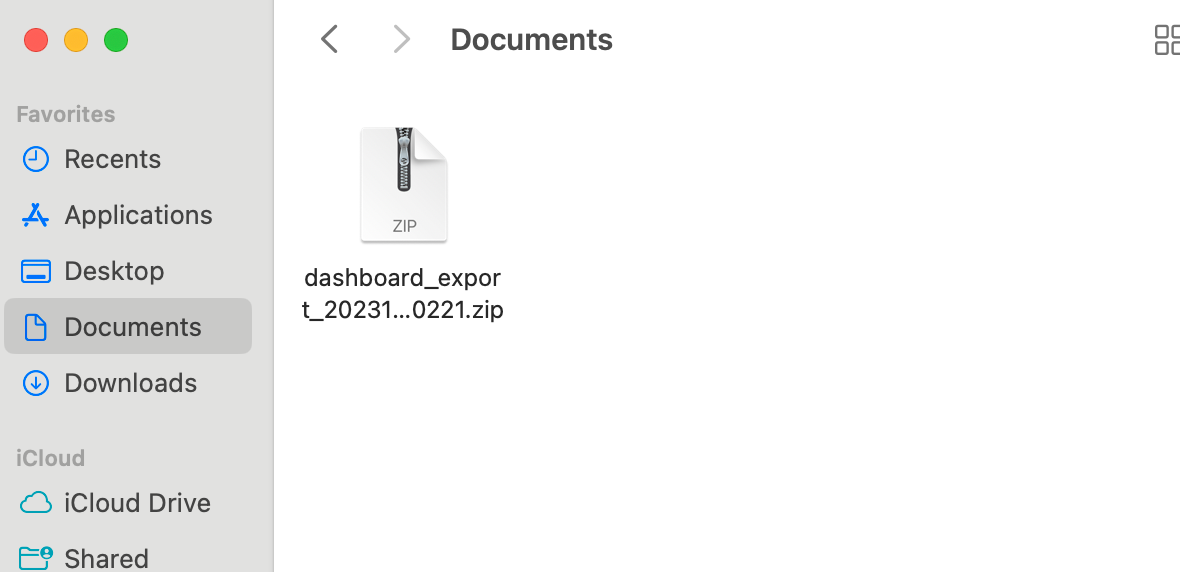
This will download a zip file where all your dashboards (or in this case the dashboard with id=9) are stored:
7 Conclusion
The Preset API allows users to interact with Preset's features, such as teams, workspaces, dashboards, and datasets. The API is divided into three main folders: Authentication, Preset Manager APIs, and Superset APIs (Open Source). Users must first authenticate to access Preset’s features. The Preset Manager APIs allow for managing teams, workspaces, permissions, and more. The Superset APIs interact directly with Apache Superset’s features. To use the API, users can import the Preset API collection into Postman, get a token, and use various API methods. During this article, we saw some quick examples like getting teams and exporting dashboards.
Preset has incredible and useful features for any person who wants to tell a story with their data. With the Preset API you can take an extra step to automate any of these features into a personalized environment.
Give the extra mile and take advantage of it, you will not regret it.
