


Embed Your First Preset Dashboard in Minutes Using Flask | Tutorial


In early August this year, we announced our Preset Embedded SDK. Using this SDK, you can push Preset dashboards into external web applications to craft data application experiences for your users. Learn more about Preset's embedded analytics capabilities and how they can power your customer-facing applications.
This blog post is a companion post to the Building Embedded Dashboards in Preset live demo we ran on August 16th that will help you build your first embedded dashboard.
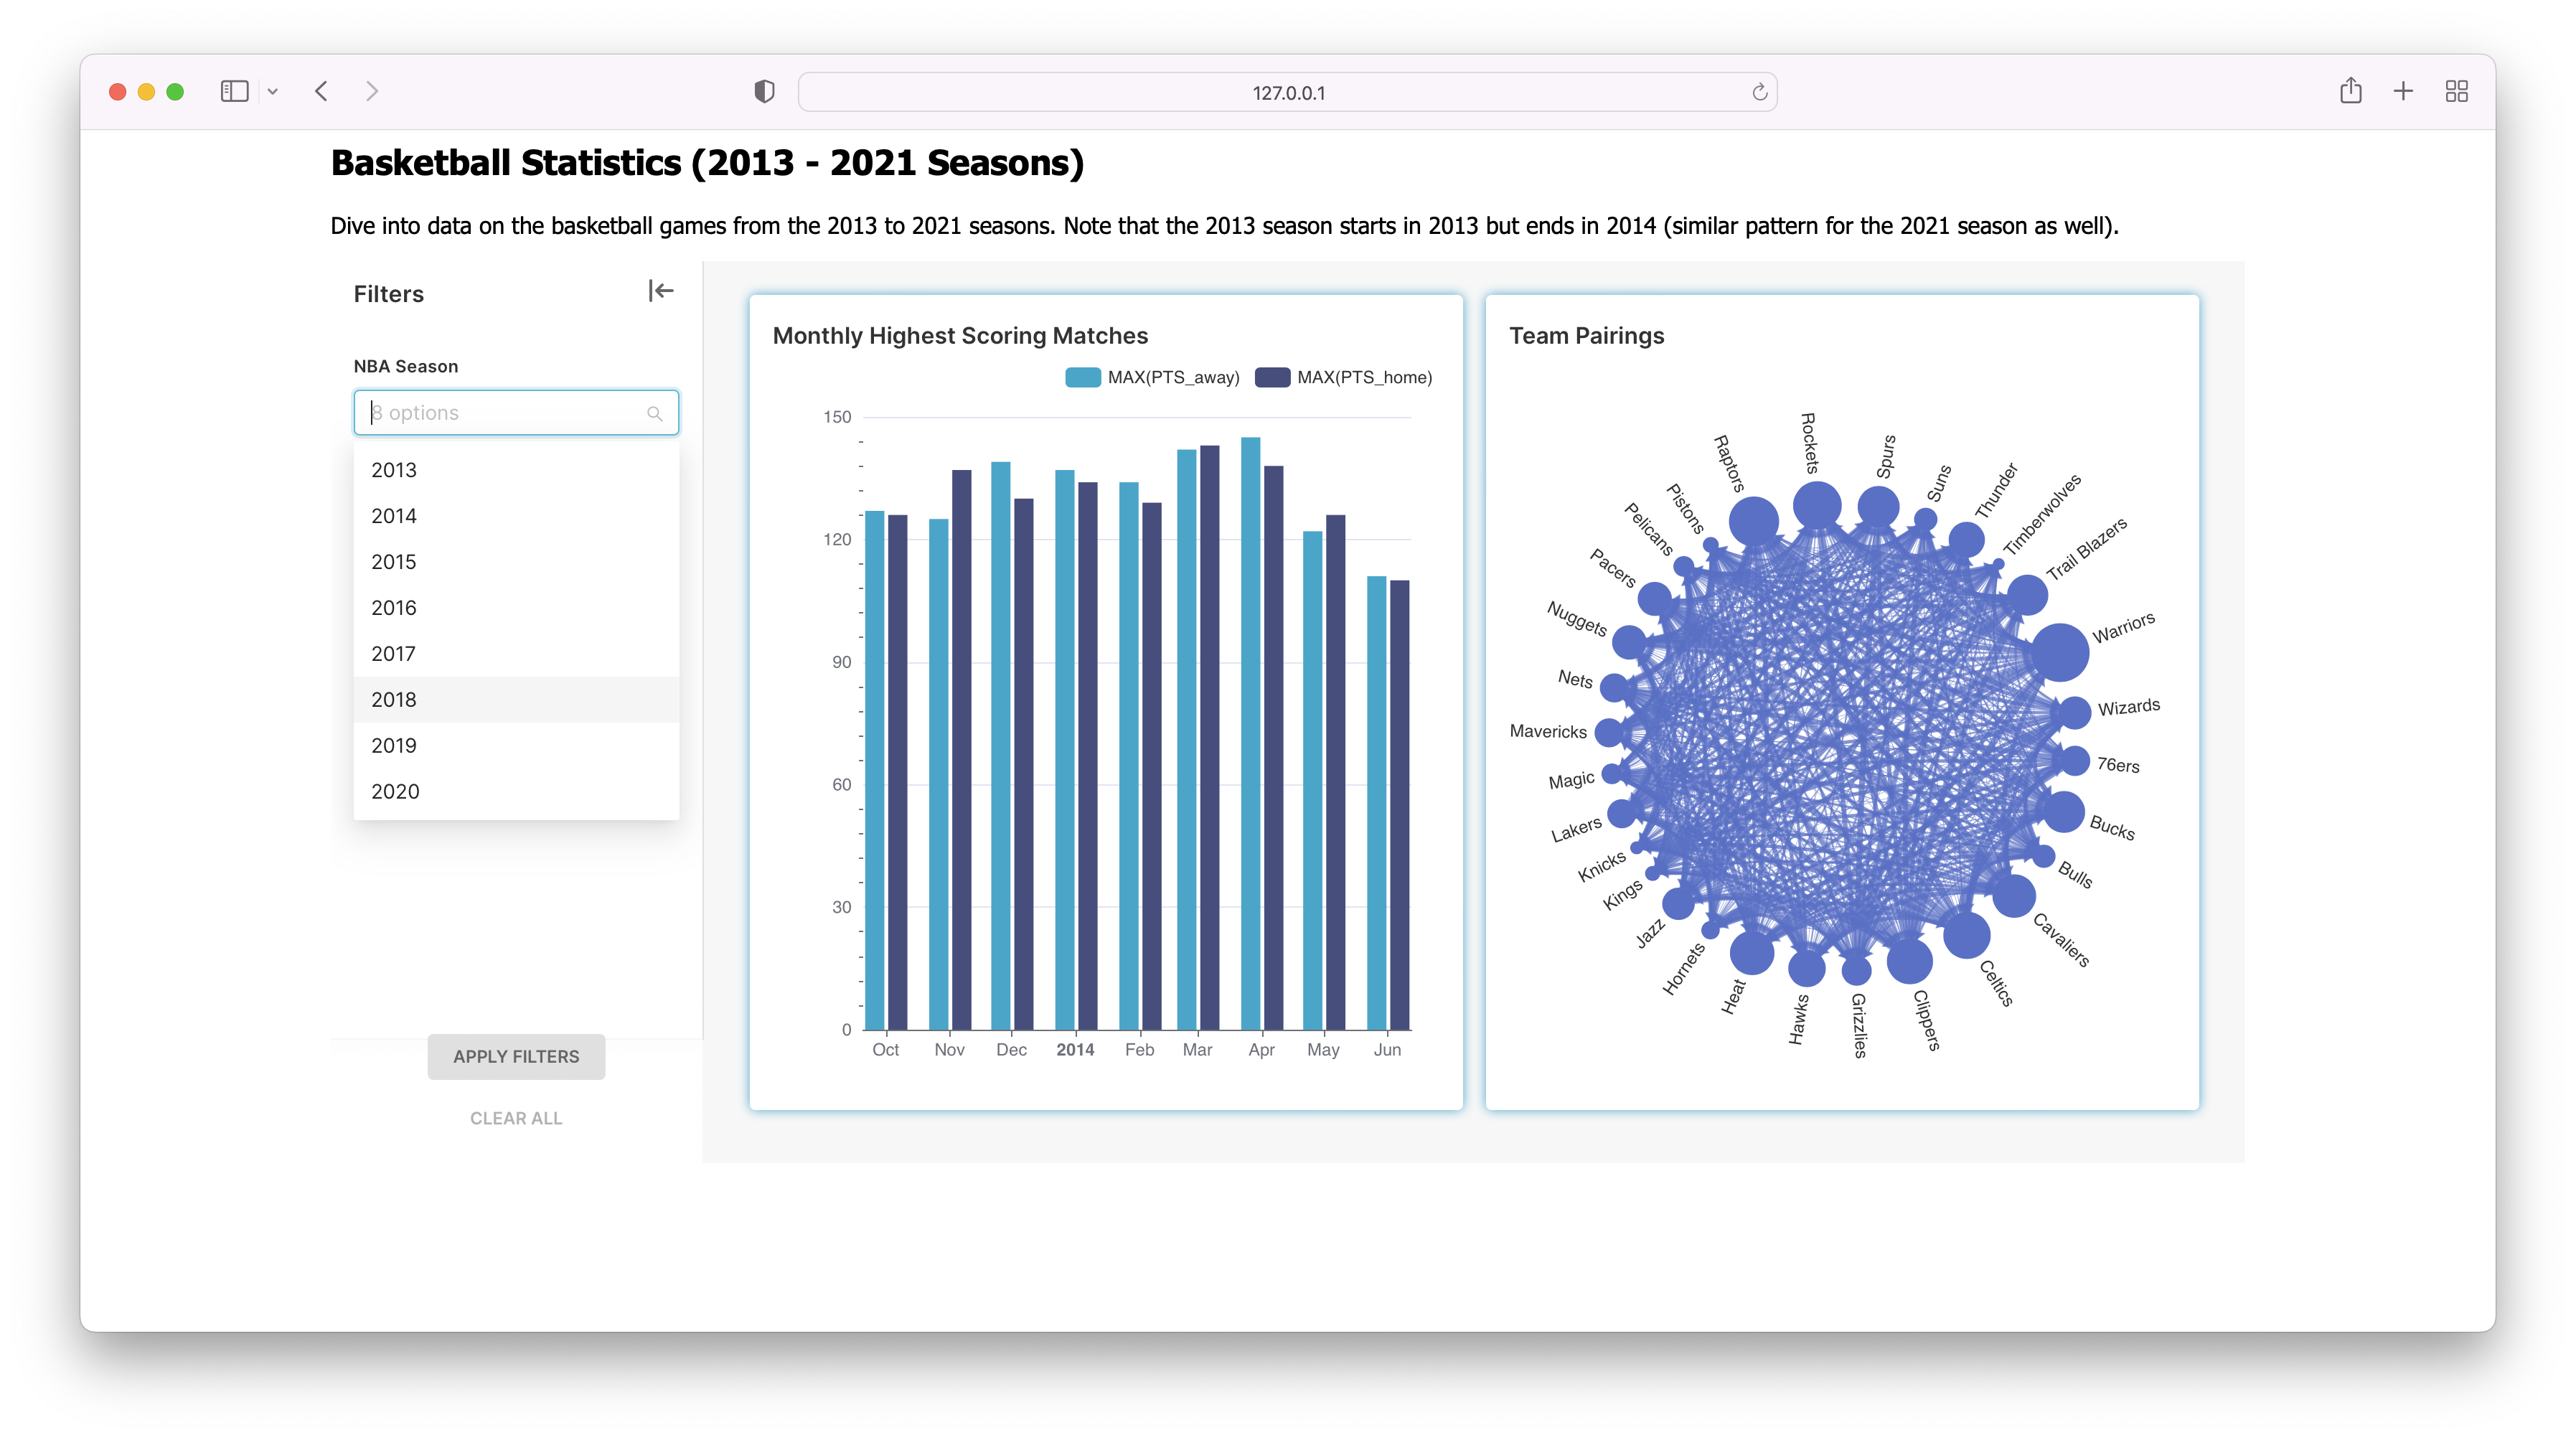
Using this tutorial, you'll be able to replicate the following web application with an embedded dashboard:

Understanding the Architecture
Here's a diagram that conveys all of the components you need and the relevant data that's exchanged between them:
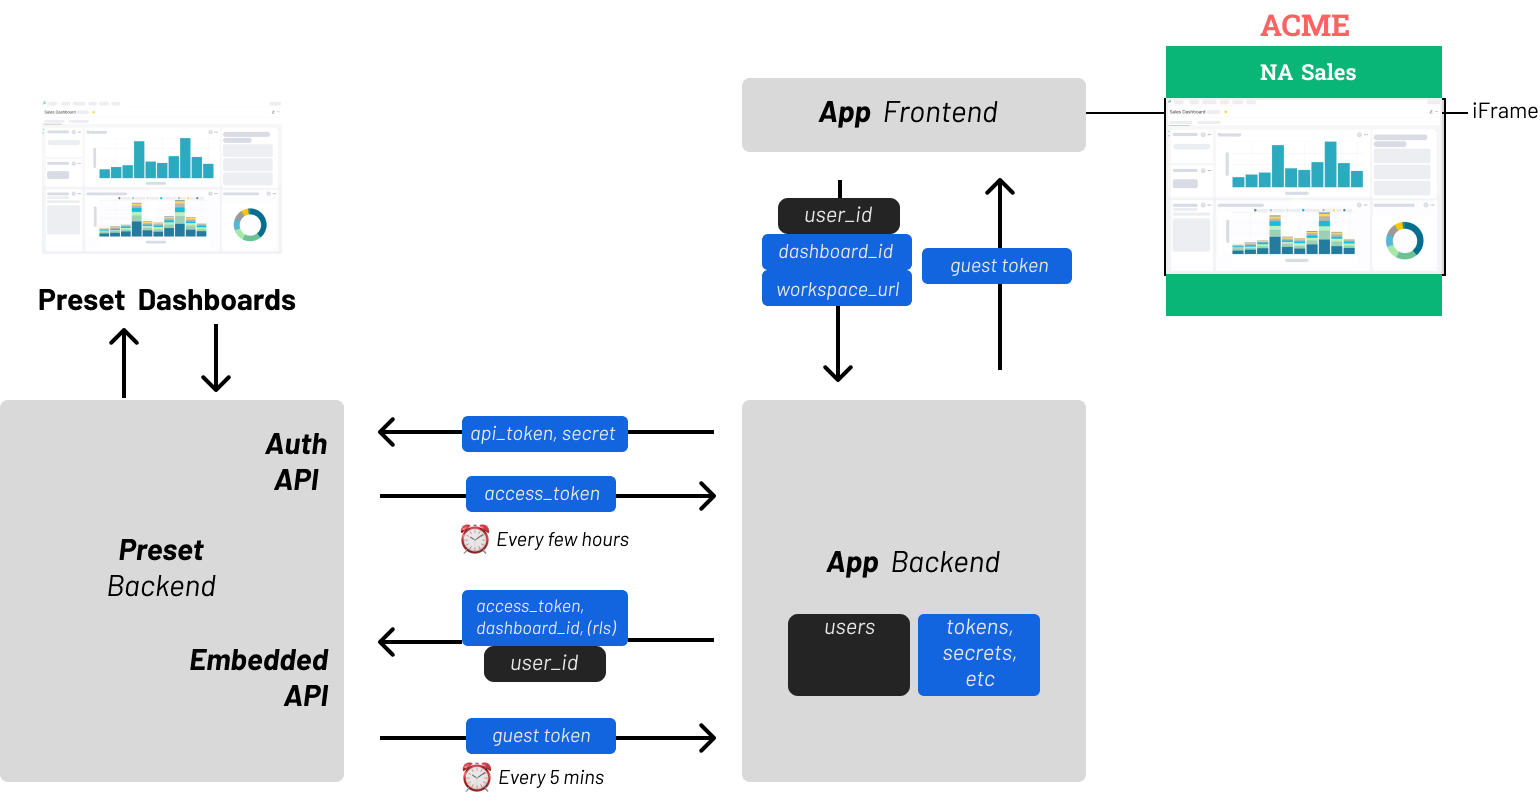
Here are the core steps needed for your web app to render a Preset dashboard into an iFrame component:
- Your app frontend sends information about the user, a unique identifier for the dashboard, and the URL of the Preset workspace to your backend
- Your app backend then requests a
guest_tokenfrom the Preset API and sends it to your app frontend - Your app frontend uses the
guest_tokento authenticate with your Preset workspace into the iFrame container / mount point you specified
Embedded a Preset dashboard currently requires both a web application frontend and backend.
Pre-requisites
-
Access to Embedded. Currently, our embedded offering is available by request only. We recommend requesting access and circling back once embedded functionality has been turned on for your account.
-
Basic familiarity with web application development. To build your first embedded dashboards, you'll need to have familiarity with coding a simple, full-stack web application (including both the backend and frontend). We will be using the Python flask framework in this tutorial
-
A dashboard you want to embed. Lastly, you'll need a dashboard you want to embed. You're welcome to use one of the example dashboards if you'd like that are availabie in every Preset workspace by default.
Preparing dashboard for Embedding
Once you've requested and received access to Preset Embedded, you're ready to prepare your first Preset dashboard for embedding.
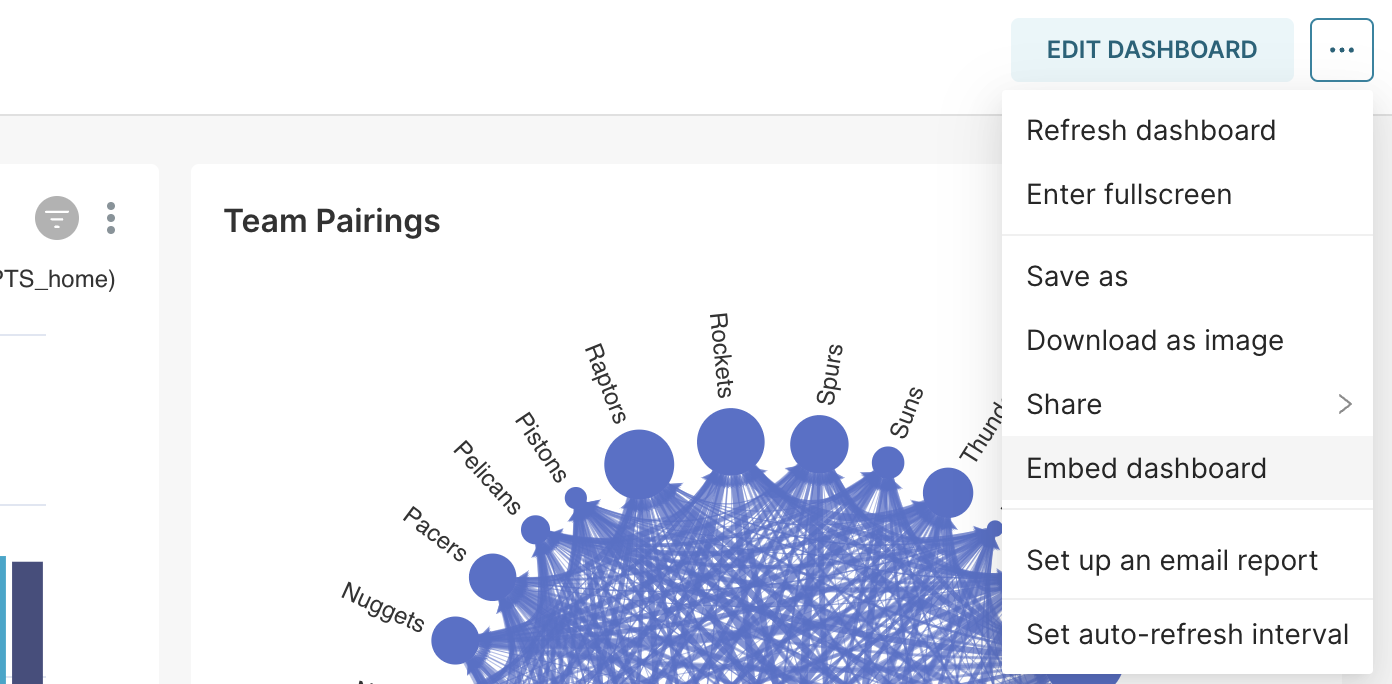
- Open your Preset dashboard, click the
...button in the top right corner to show more options, and then click Embed dashboard.
- A modal window will pop up and display:
- Embedded Dashboard ID: the unique identifier / ID for this dashboard
- Superset Domain: the URL to the workspace the dashboard lives in
- Workspace ID: workspace identifier component of the domain
- Team ID: team identifier component of the domain
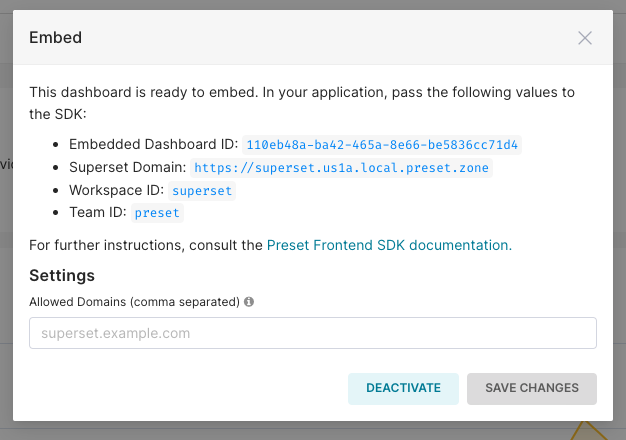
Copy all of the above information, as you'll need it in your web application that's hosting the embedded dashboard.
- Allowed Domains: you can also define a comma-separated list of domains and Preset will only allow calls to the embedded APIs made from those domains
Generating a Preset API Key
Next, you'll need to obtain an API key from the Preset API so your web application can securely interact with the Preset API.
The Preset API builds on the Superset API by adding Preset-only API routes (e.g. for Preset workspaces). You can find the interactive documentation for the Preset API here.
Note that access to the Preset API is only available to paying customers that have paid for the API add-on or potential customers trialing the API or Preset Embedded features.
Now we'll walkthrough how to generate an API key.
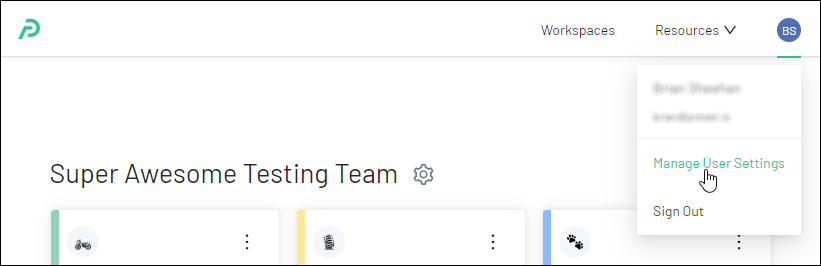
- While you're logged in, hover over your user icon (by default they're you're initials, like "SK") and then click Manage User Settings.
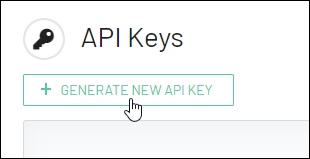
- Under the API Keys section, click Generate new API key:
- Fill out the fields for Key Title and Key Description, and then click Submit.
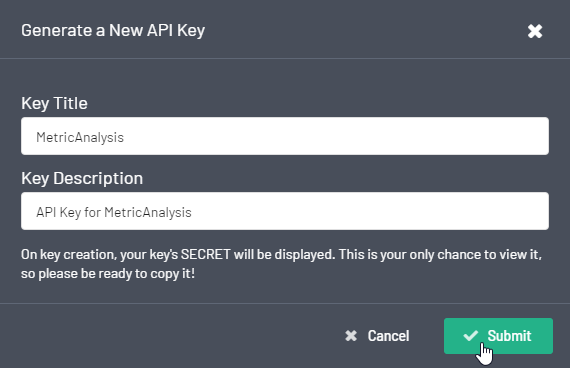
- Copy the values in the Token and Secret fields for safekeeping.
Note that while the token will be shown again for you, the secret value won't be. So please store this in a safe place.
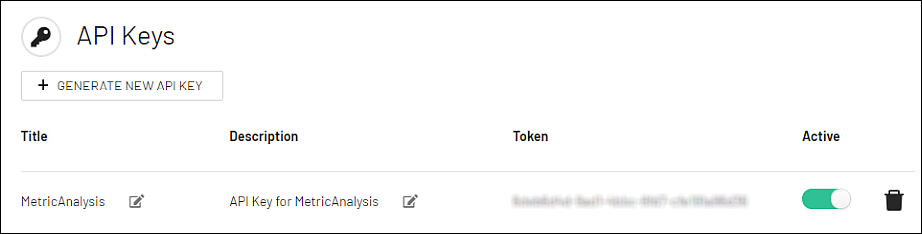
- Click the OK button to finalize. You'll notice your API token listed now:
Building the Backend for your Web Application
Flask is a very minimal framework for quickly building web applications in Python. You can write a backend just using a single app.py file!
- Create a Python 3 virtual environment and install flask.
python3 -m venv .venv/
source .venv/bin/activate
pip install requests
pip install flask-
Create a new folder for your web app (
example_app) and then create a new empty file (example_app/app.py). -
Copy and paste the following code into
app.pyand then we'll walkthrough each chunk.:
from flask import Flask, render_template, jsonify
import requests
import json
import os

app = Flask(__name__)

@app.route('/')
def hello():
	return render_template('index.html')

@app.route("/guest-token", methods=["GET"])
# @login_required
def guest_token():
	## 1. Authenticate with Preset API
	url = "https://manage.app.preset.io/api/v1/auth/"
	payload = json.dumps({
		"name": "<API_TOKEN>",
		"secret": "<YOUR_SECRET>"
	})

	headers = {
		'Content-Type': 'application/json',
		'Accept': 'application/json'
	}

	response1 = requests.request("POST", url, headers=headers, data=payload)
	preset_access_token = json.loads(response1.text)['payload']['access_token']

	## 2. Fetch Guest Token for Embedded Dashboard
	payload = json.dumps({
		"user": {
			"username": "<USER_NAME>",
			"first_name": "<FIRST_NAME>",
			"last_name": "<LAST_NAME>"
		},
		"resources": [{
			"type": "dashboard",
			"id": "<DASHBOARD_ID>"
		}],
		"rls": []
	})

	bearer_token = "Bearer " + preset_access_token
	response2 = requests.post(
		"https://manage.app.preset.io/api/v1/teams/<TEAM_ID>/workspaces/<WORKSPACE_ID>/guest-token/",
		data=payload,
		headers={ "Authorization": bearer_token, 'Accept': 'application/json', 'Content-Type': 'application/json' })
	# Return guest_token as valid JSON to frontend
	return jsonify(response2.json()['payload']['token'])
Now let's breakdown each section of the code.
The first section uses your API Token and Secret that we asked Preset to generate to authenticate with the Preset API. Preset returns a preset_access_token for us.
## 1. Authenticate with Preset API
		url = "https://manage.app.preset.io/api/v1/auth/"
		payload = json.dumps({
			"name": "<API_TOKEN>",
			"secret": "<YOUR_SECRET>"
		})

		headers = {
			'Content-Type': 'application/json',
			'Accept': 'application/json'
		}

		response1 = requests.request("POST", url, headers=headers, data=payload)
		preset_access_token = json.loads(response1.text)['payload']['access_token']
This preset_access_token is only valid for a few hours, so this implementation currently requests a new token upon every request (a bit naive, but provides us a good guarantee for our starter app).
The second section of the function builds a payload containing information on:
- user context (username, first_name, last_name, etc) from your web app. Preset can help you manage the mapping from your users to your RLS (row-level security) rules.
- requested resources and their unique identifiers (currently only dashboards are supported)
- any optional RLS rules
This payload is sent to the relevant Preset API route and Preset responds back with a guest_token.
## 2. Fetch Guest Token for Embedded Dashboard
payload = json.dumps({
  "user": {
    "username": "<USER_NAME>",
    "first_name": "<FIRST_NAME>",
    "last_name": "<LAST_NAME>"
  },
  "resources": [{
    "type": "dashboard",
    "id": "<DASHBOARD_ID>"
  }],
  "rls": []
})

bearer_token = "Bearer " + preset_access_token
response2 = requests.post("https://manage.app.preset.io/api/v1/teams/<TEAM_ID>/workspaces/<WORKSPACE_ID>/guest-token/",
  data=payload,
  headers={ "Authorization": bearer_token, 'Accept': 'application/json', 'Content-Type': 'application/json' })
# Return guest_token as valid JSON to frontend
return jsonify(response2.json()['payload']['token'])
We now have a backend that fetches guest_token values on behalf of our users from the Preset API.
Building the Frontend for your Web Application
Let's now build a simple frontend that:
- fetches the
guest_tokenfrom our backend - passes the
guest_tokento the Preset Embedded SDK, which then can attach an iFrame to the webpage with the embedded dashboard we requested
In this tutorial, we'll just use vanilla HTML, CSS, and JavaScript to keep things as accessible as possible.
As before, here's the code we need to accomplish these steps first and then we'll walkthrough it:
<head>
	<script src="https://unpkg.com/@preset-sdk/embedded"></script>
</head>
<body>
	<p id="dashboard-container"> </p>
	<script>
		// 1. Request guest_token from our backend, which runs at localhost:5000 by default
			async function fetchGuestTokenFromBackend() {
				let response = await fetch('http://127.0.0.1:5000/guest-token');
				let data = await response.json()
				return data
		}

		// 2. Uses Preset Embedded SDK to embed the dashboard as iFrame
		const myDashboard = presetSdk.embedDashboard({
		  id: "<DASHBOARD_ID>",
		  supersetDomain: "<PRESET_WORKSPACE_DOMAIN>",
		  mountPoint: document.getElementById("dashboard-container"), // any html element that can contain an iframe
		  fetchGuestToken: () => fetchGuestTokenFromBackend(),
		  dashboardUiConfig: { hideTitle: true, hideChartControls: true}, // dashboard UI config: hideTitle, hideTab, hideChartControls (optional)
		});
	</script>
</body>
First things first, we need to load the Preset Embedded SDK script:
<script src="https://unpkg.com/@preset-sdk/embedded"></script>The first big chunk of code requests a guest_token from the backend we built. This is all done asynchronously, so you can ask the browser to do other tasks while it's waiting on a response if you'd like.
// 1. Request guest_token from our backend, which runs at localhost:5000 by default
			async function fetchGuestTokenFromBackend() {
				let response = await fetch('http://127.0.0.1:5000/guest-token');
				let data = await response.json()
			return data
}
The second section uses the Preset Embedded SDK to generate the iFrame and attach it to the part of the webpage that you defined using mountPoint. We highly recommend reading the Preset Embedded SDK documentation here to learn more.
const myDashboard = presetSdk.embedDashboard({
		  id: "<DASHBOARD_ID>",
		  supersetDomain: "<PRESET_WORKSPACE_DOMAIN>",
		  mountPoint: document.getElementById("dashboard-container"), // any html element that can contain an iframe
		  fetchGuestToken: () => fetchGuestTokenFromBackend(),
		  dashboardUiConfig: { hideTitle: true, hideChartControls: true}, // dashboard UI config: hideTitle, hideTab, hideChartControls (optional)
});
Because we defined the mount point as follows:
mountPoint: document.getElementById("dashboard-container")the iFrame component that will fetch the Preset dashboard will be appended to the <p> element we created that has an id value of "dashboard_container".
After adding some more HTML and CSS, it's easy to modify this template and get the result looking closer to the following screenshot:
Learn More
The Preset Embedded SDK is a huge leap forwards for our platform. We're really excited to see the rich data applications and interactive analytics experiences that our users and customers create using this functionality.
Here's a summary of resources mentioned in this post to continue your learning:
- Preset Embedded SDK documentation
- Preset API documentation
- Original Preset Embedded Launch Blog
- Talk to one of our experts here
- For organizations requiring dedicated infrastructure, explore Preset Managed Private Cloud
Related Reading
- Build Customer Facing Data Applications Using the Preset Embedded SDK — SDK launch announcement
- Managing Filter State for Embedded Dashboards — Set filters programmatically
- Retrieving Filter State in Embedded Dashboards — Get current filter configuration
- Embedded Analytics: Unlock Data-Driven Decision-Making — Benefits and use cases
